User Manager for Sites: Manage Groups
Selecting a group under the Groups node of a site shows group profile information and a list of members of the selected group in the right pane. Right-clicking the group allows you to delete the group, e-mail all the users in the selected group, or add users to the group. You can also delete or e-mail the selected group by clicking the Actions button and selecting the appropriate menu option, or add users to the selected group by clicking the New button.
Add Users to Selected Group
Type in the users names separated by a semi-colon, use the Check Names icon to verify the user names, or click the Address Book icon to search for users.
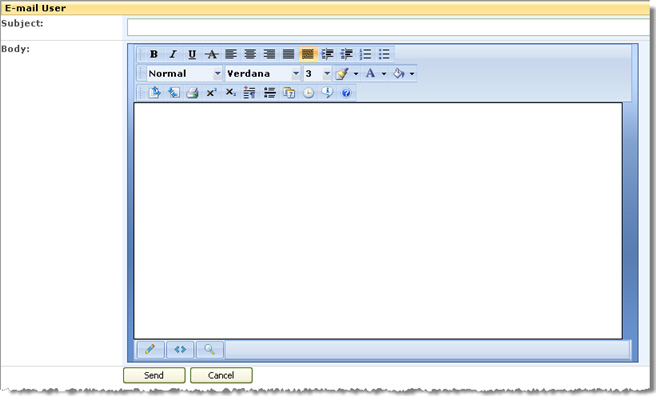
E-mail all users in the selected group
Just type the Subject line and body message and click Send to send an e-mail to all the users in the selected group directly from the Web Part.

Delete the selected group
Select this option to delete the selected group.
Group Users
Selecting a user under a group node shows their profile and group membership in the right pane. On the Profile tab, click the Edit button to edit user profile information or click Sort to sort the user properties in ascending or descending alphabetical order. On the Groups tab, select a group(s) and click Remove from Group to remove the selected user from the selected group(s). From the tree, right-clicking the user allows you to remove the user from the group or e-mail the user.
- E-mail the selected user. Select this option to send an e-mail directly from the User Manager for Sites to the selected user. Same as e-mailing a user from the Alphabetical view pane.
- Remove the user from the group. Select this option to remove the user; it does not delete the user from the site or the Site Collection.
See also:
User Manager for Sites: Sites View Pane
| Step |
Action |
Result |
| 1. |
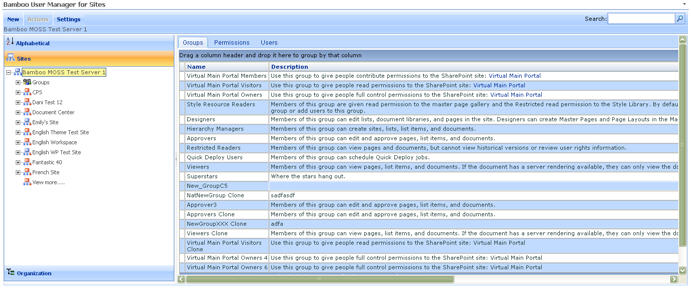
Site icons |
The red site icon  in the tree indicates that the site inherits user permissions from the parent site. The blue site icon in the tree indicates that the site inherits user permissions from the parent site. The blue site icon  indicates that the site has unique permissions. indicates that the site has unique permissions. |
| 2. |
Site Information |
Click on a site node (including the top level site) to see tabbed information in the right pane containing Group, Permission and User information for the selected site. You can drag and drop column headings in each of these tabs to the bar directly above the information grid to group information by that column heading. |
| 3. |
Export site information |
You can export the list of Groups, Permissions, or Users in the right pane to Microsoft Word or Excel by clicking one of the buttons at the bottom right of the information grid. |
| 4. |
Create groups and users |
The Sites view pane is the only view where you can create groups and users. |
| 5. |
Right-clicking Sites, Groups or the Groups node |
Right-click a site, group or the Groups node to view a context menu of available actions.
- Right-clicking any site name allows you to create a user or a group for that site.
- Right-clicking the Groups node under any site allows you to create a new group for that site.
- Right-clicking a group name allows you to delete the group, add users to the selected group, or e-mail all the users in the selected group.
|
|
These topics provide more detailed information about user and group actions within the web part:
User Manager for Sites: Alphabetical View Pane
Select a user name in the Alphabetical View in the left pane to view their profile and their group membership displays in the right pane.
| Step |
Action |
Result |
| 1. |
Edit |
Click the Edit button in the right pane to edit user properties. |
| 2. |
Sort |
Click the Sort button to sort the properties A to Z (ascending). Click the Sort button again to sort Z to A (descending). |
| 3. |
Actions |
From the Actions button on the tool bar, you can delete the selected user from the entire site collection, reset the user’s password, or email the user directly. |
| 4. |
Groups Tab |
From the Groups tab in the right pane, you can view the user’s group membership and remove the user from one or more groups. |
| 5. |
Delete, Reset User Password or E-mail the User |
Right-click the user name in the tree to delete the user from the entire Site Collection, reset the user’s password, or e-mail the user.
Reset User Password
Select this option to reset the selected user’s password.
Email the user
Just type the Subject line and body message and click Send to send an e-mail to all the users in the selected group directly from the Web Part.
|
| 7. |
Delete the user from the Site Collection |
Select this option to delete the user from all sites and groups within the Site Collection.
NOTE: This action does not delete the user from the SharePoint User Profile database in order to retain the user’s history throughout SharePoint.
|
|
See also:
User Manager for Sites: Create Group
You can also create groups from the New button on the tool bar depending on what node you have selected in the Sites view pane. Creating a group is very similar to creating a group in SharePoint Out-of-the-Box.
| Step |
Action |
Result |
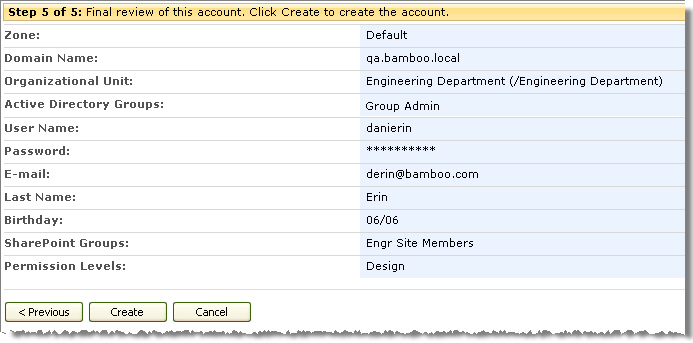
| 1. |
Name and Description |
|
| 2. |
Owner |
Use the phonebook icon ( ) to look up the person who is the owner of this group. (It does not have to be you, but it needs to be a user with elevated permission.) ) to look up the person who is the owner of this group. (It does not have to be you, but it needs to be a user with elevated permission.) |
| 3. |
Group Settings |
Specify who can view and edit the membership of this group. |
| 4. |
Membership Requests |
Select the settings that you want for requests to join or leave the group. You can specify the email address to which requests should be sent. |
| 5. |
Give Group Permission in this Site |
Choose a permission level for this group. |
|
See also:
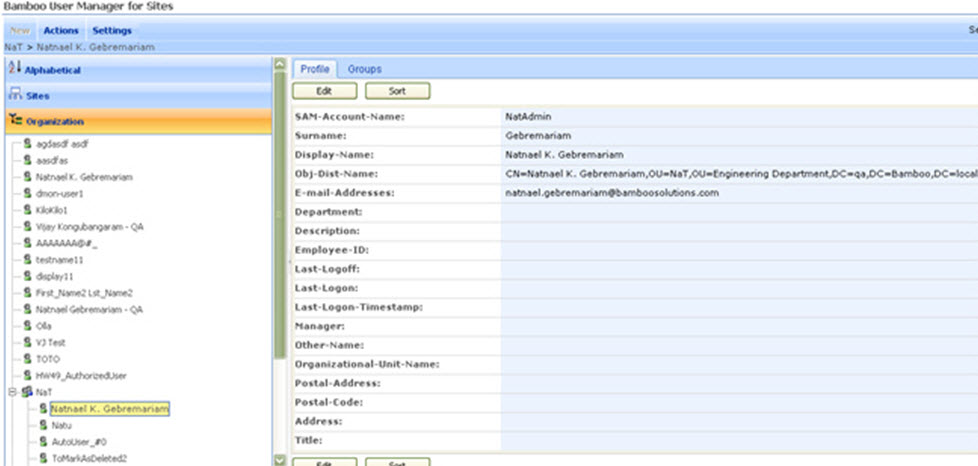
User Manager for Sites: Organization View Pane
This view shows the organizational unit structure under the LDAP path configured in the tool pane for the Active Directory Services Settings.
-
When you right-click a user name, you can:
- Delete the user from the site collection
NOTE: The delete action does not delete the user from the SharePoint User Profile database in order to retain the user’s history throughout SharePoint.
- Reset the user’s password
- E-mail the user
-
View the selected user’s profile and group membership in the right pane
- Edit the user’s profile data
- Sort the user’s profile data
- See the groups in which this user is a member when you click the Groups tab
See also: