About Time Tracking Modes
Time Tracking and Management site can be configured several ways. All modes provide the same basic functionality:
- The TTM site allows timesheet users (resources) to track their time, including time spent on individual tasks.
- Timesheet managers approve timesheets.
- The Report Center reports resource use, cost information (when available), and timesheet status.
Time Tracking Mode
For basic TTM configuration, configure timesheet reporting periods, select the data sources for timesheet tasks, and add resources. After you add tasks, resources can start to enter time in timesheets and Timesheet Managers can approve time.
For a list of required and optional steps for configuring time tracking, see the Time Tracking Configuration Checklist
Cost Tracking Mode
When cost tracking is enabled, costs can be calculated for work entered for timesheet tasks. Cost tracking is an additional feature that can be added after time tracking is configured.
For a list of steps required to configure cost tracking, see the Cost Tracking Configuration Checklist
.
Project Management Central (PMC) Integration Mode
If you have Bamboo Project Management Central, your TTM site can use resources from the PM Central Enterprise Resource Pool (ERP) and timesheets can automatically include tasks assigned to a resource in PM Central projects. PM Central integration is available with both time tracking and cost tracking modes.
About PMC Webinars
Register for a 1-hour Webinar today!

At the individual project level, we’ll show Project Managers:
- How to create and configure a project workspace with our built in project site template
- Efficient and consistent management of project tasks
- How to effectively communicate with your project resources/team
- Effective issue management within your project
- How to easily collaborate on project documents with your entire team
- An easy way to manage ideas, thoughts, or concerns surrounding your project through threaded discussions
At the individual project level, we’ll show Project Team Members:
- How to easily identify and update all tasks, issues, and risks that have been assigned to you
- How to stay on top of upcoming meetings and events for a project
At the top level project management site, we’ll show Project Managers
- How to view aggregated summary portfolio information for all project sites centrally
- How to update Gantt View Data to properly see project schedules
- Best practices and tips for managing project groups and users
Get started right away! Download a 30-day free trial from our online store. It’s quick, easy, and absolutely risk-free.
Want to set up a private demonstration?
Contact Bamboo Sales
About our documentation
 Here at Bamboo, we think documentation is useful as a reference tool and we don’t expect you will read everything we write about our products. With that in mind, we have organized our documentation to help you find the information you need when you need it. Each product has a landing page that looks like this.
Install
|
Permissions
|
License
|
Permissions
|
- In this quadrant you will discover topics relating to installing Bamboo products for the first time or how to handle installation if you migrate to a new version of SharePoint. Each time you see an ellipsis after the phrase (…), you will find a list of topics rather than a single page of content or there may be no topics for that particular topic and an empty page will display. We will continually be updating and adding topics so you will likely see more content in the future!
|
 |
- Whether you try one Bamboo product, a toolkit or a suite of products, the download is a fully-functional version to install and configure in your environment. When you decide to purchase, this section guides you through activation and licensing, including information about handling your licensed products when you move your Bamboo product to a different server or farm, as well as troubleshooting tips about product licensing.
|
|
Configure
|
Permissions
|
Work With
|
Permissions
|
- Configuring your product is the how to set it up as it was intended by the developers so that you can best leverage the product features. This quadrant provides information relating to configuring your Bamboo product as well as a list of troubleshooting tips relating to configuration. You may see a link to a video within any topic in our documentation; all of those videos are in our Bamboo Solutions Support YouTube channel.
|
 to configure this Bamboo product.") |
- We want you to use our products and this quadrant covers how users will interact with them. Many of the screens you interact with are featured in this section with a plethora of helpful, how-to topics that explain not just what you see on the screen and how to fill in the fields, but tips on why to choose one option versus another option.
|
 |
At the bottom of the quadrants, we include a link to all
the topics relating to that product. If you still cannot
locate what you need, take advantage of our search
boxes. At the top of each page is a global search to find
topics relating to keywords. We also provide filtering
to narrow down your search results. |
 |
Each page also gives you a quick link to the storefront page where you can download a trial or purchase our products.
Not sure which SharePoint platform you are using? Check out this informative article. |
| We hope you find our new layout easy to use as you interact with our products. We welcome your feedback on any page. Simply leave us a message at the bottom of a page; if you cannot find what you need, let us know. We will continue improving and expanding our product information. |
In addition to the Product Documentation, Bamboo offers the following resources accessible from the Reference Section on the home page to help you use our products during your trial period or after purchase:
- Knowledge Base: Our searchable Knowledge Base includes release notes and product updates as well as articles and answers to frequently asked questions.
- User Forums: Get help from other Bamboo Nation users by posting your question in our user forums. There is a dedicated forum for each Bamboo product. We also welcome your feedback and feature suggestions in the New Product Requests forum.
- Customer Support Website: The Bamboo Support Website includes links to our searchable Knowledge Base, Bamboo Nation user forums, support plan details, and more. To report issues or ask questions, use the official Help Desk portal at My Bamboo.
- My Bamboo: Register with My Bamboo to track product downloads and purchases, submit tickets through our Help Desk portal, manage product notifications and more.
To further augment our online documentation, check out our YouTube channel where may find a growing list of helpful videos.
Not quite what you need? E-mail Bamboo Sales at [email protected] with any questions about functionality, pricing or licensing. |
About Permissions in TTM
The Time Tracking and Management (TTM) site uses the built-in SharePoint permissions to determine what actions a user can perform, plus some additional configuration to determine who can enter and approve timesheets.
Permissions required to perform basic actions in TTM:
| Action |
Requirements |
| Save and Submit Timesheets |
To save and submit a timesheet, a users account must:
- Have Contribute permissions in the SharePoint site.
- Must be in the resource list configured in the Timesheet Entry Web Part:
- If the Timesheet Entry Web Part is configured to use the local Timesheet Resources list, your user account must have an entry in this list.
- If the Timesheet Entry Web Part is configured to use the Project Management Central resources list, your account must be in the PM Central ERP or project Resources list.
- Identify a Primary Timesheet Manager for the user in the configured list
|
| Approve timesheets |
To approve and reject timesheets, a user account must:
- Your account must have the Contribute permission level in the SharePoint site.
- Your account must be configured as a Primary Timesheet Manager or Secondary Timesheet Manager in the resource list configured in the Timesheet Entry Web Part:
- If the Timesheet Entry Web Part is configured to use the local Timesheet Resources list, your user account must be listed as a Primary or Secondary Timesheet Manager for at least one resource. You can only approve timesheets for your resources.
- If the Timesheet Entry Web Part is configured to use the Project Management Central resources list, your account must be configured as a Primary or Secondary Timesheet Manager for at least one resource in the Enterprise Resource Pool. You can only approve timesheets for your resources.

Click the links for information on how to streamline the timesheet approval process:
|
| Access the Time Tracking and Management Control Panel |
To access the Time Tracking and Management Control Panel option in the Site Actions menu, an account must have at least the Design permission level in the SharePoint site.
 Users with Design permissions will not have access to all the configuration tools available to users with the Full Control permission. Click here for more information. Users with Design permissions will not have access to all the configuration tools available to users with the Full Control permission. Click here for more information.
NOTE: Administrative pages accessed from the Control Panel can also be accessed directly by browsing to the configuration page in the TimesheetPages library. Any user with the Contribute permission level or above can access these pages. However, they will not see the options. To restrict access to a TTM configuration page, customize the item-level permissions for that page using the Manage Permissions link in the item drop-down menu.
|
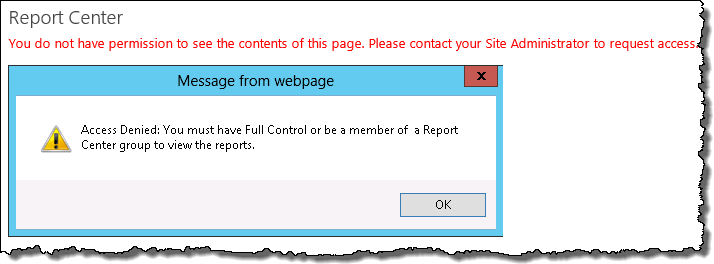
| Access the Report Center |
To view TTM reports in the Report Center through the Time Tracking and Management Control Panel or from the left navigation/quick launch, your account must be a member of:
- Owners
- Report Center Administrators
- Report Center Members
Users with the Contribute permission who are not members of one of the above groups will be able to access the Report page, however, they will not be able to see any options or data.
|
|
How to Modify KPI Settings
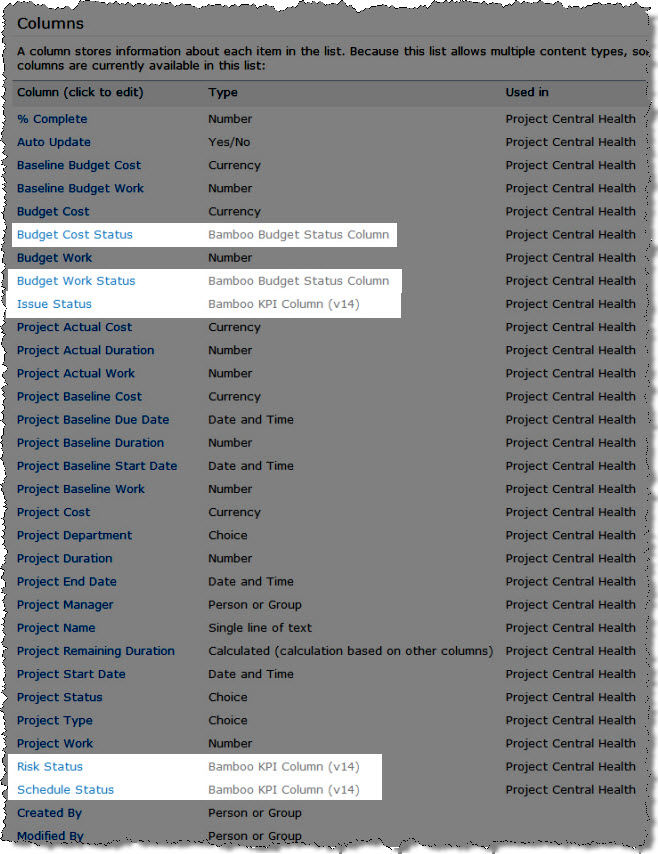
Some of PM Central’s lists feature the Bamboo KPI Column. This is a custom column type that evaluates the contents of a column in another list (e.g., Sum, Count, etc.), compares the results against a set of criteria, and displays the value and an icon indicating which of three categories the value falls in.
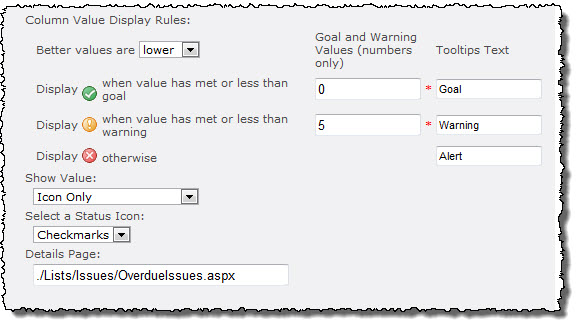
For example, in the project Site, the Project Info section uses Bamboo KPI Columns to indicate the current health of the project. One of these columns, Issue Status, looks at the project’s Issues list and counts the number of items displayed in the Overdue Issues view.
- If there are no items in that view, a green icon is displayed.
- If there are between one and five issues, a yellow icon is displayed.
- If there are more than five issues, a red icon is displayed.

To modify the settings for the KPI custom columns:
- Navigate to the list containing the KPI column you want to update, such as the Project Health List.
- From the List Tools tab on the top ribbon, select List.
-
Select List Settings from the right side of the ribbon.

-
Select the column you want to customize under Columns.
-
Under Additional Column Settings, modify the settings as desired, such as choosing the list, the view, how the column values are evaluated, what the criteria for the values are, and how the KPI is displayed (type of icon, whether to include values, etc.).
-
Click OK.
About File Share Library Timer Jobs

Monitoring Bamboo File Share Timer Jobs
The status of File Share Library timer jobs can be monitored in SharePoint Central Administration. In the Monitoring section, click Check job status. Use the links in the Timer Links section of the Quick Launch to check job definitions, job history, or currently running jobs.
Understanding the Timer Jobs from Bamboo
Bamboo File Share Master Job
When File Share Library is installed, the Bamboo File Share Master Job is added to the Web application(s) selected during installation. This job runs every two minutes, and monitors the Web application for new, updated, and deleted File Share Libraries. The Master Job creates, updates, or deletes secondary timer jobs for individual File Share Libraries. The secondary jobs are responsible for synchronizing the individual File Share Library with its connected network file share. There is one Bamboo File Share Master Job per Web application.
Bamboo File Share Library Sync Job for Library in Site
When a File Share Library is configured to continuously synchronize files or when a one-time sync is requested, the File Share Master Job creates a secondary timer job for the synchronization activity. This job triggers synchronization of the File Share Library with its connected network file share. The Web application will contain as many of these jobs as there are File Share Libraries configured for synchronization. If a File Share Library is configured for continuous synchronization, there will be a timer job definition with a schedule that matches the frequency configured in the File Share Library Settings.
Bamboo File Share Library Content Import Job for List/Item in Site
If the File Share Library Sync Job detects items in the File Share Library that are marked for import, a Content Import Job is created to import the items from the network file share to the File Share Library. This one-time job is created only when the Sync Job requests it.
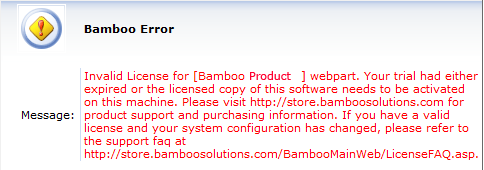
A license error occurs after successful license activation
SYMPTOM
You followed the directions in Activating Your Bamboo Product License successfully activated your license. However, when you go to a page where the web part is used you see a license error:
CAUSE
If this happens immediately after successful activation, the error is typically that one or more WFE servers on the farm do not have an activated license. If you are sure all servers have been successfully activated, another cause could be that a trial extension file (.lic) remains on one of the WFE servers in the farm and is causing a conflict.
If the license error happens after you have been using your activated product for some time, the cause for the issue could be that the hardware profile of one of your WFE servers has changed. Bamboo product licenses are tied to the hardware profile. If that profile changes (i.e., you add a new hard drive), the license needs to be re-activated. See How to move your Bamboo Product License to a new server for resolution information.
RESOLUTION
Confirm that there are no Bamboo trial extension files (Bamboo.lic) on the any of the WFE servers. Follow these steps:
| Step |
Action |
| 1. |
From the SharePoint server, use Windows Explorer to drill down the inetpub folder structure to locate and access the appropriate virtual directory for the web application where the license error appears. |
| 1. |
Locate the ‘bin’ folder where the Bamboo product’s DLL should be found. |
| 1. |
Search for files that start with “Bamboo” and have a .lic extension. If one exists for the product with the license issue, delete it.
NOTE: Be sure to check all WFE servers for the .lic file.
|
About Bamboo product Release Numbers
Overview
Bamboo products have several releases throughout the year. To understand more about the type of releases available, see the Bamboo Solutions Upgrade Policy.
Its important to know what release you have installed on your farm because:
- You can better follow the Release Notes for the product, which tell you about new features and known limitations for each version/release.
- If you are planning to migrate to a new version of SharePoint, you need to make sure you have a certain minimum version/release installed.
- If you need to report an issue to our Support Team, they will need to know what version/release you are using.
Where to find Release Notes
 As you look at each product’s documentation page, you will see there is a link to the Release Notes for that product at the top of the page.
Bamboo produces different version numbers of our products for the different SharePoint platforms.
SharePoint 2007 (WSSv3/MOSS) Release Numbers
If you are running SharePoint 2007, the version/release number consists of 4 parts, such as:
R1.2.3.0
- The first digit indicates the Major Release. In the case above, this is “1”.
- The second digit indicates the Minor Release (2 in the example above).
- The third number indicates the build number.
- The fourth number will always be 0 unless you are using SharePoint 2013 (see explanation below).
SharePoint 2010 Release Numbers
If you are running SharePoint 2010 (SharePoint Foundation 2010 or SharePoint Server 2010), the Major Release digit of the installed product’s file version includes a zero (0) in the digit such as:
10.2.3.0
To match your current installed product with the release notes, remove the first zero (0). The end result is version 1.2.3.0.
SharePoint 2013 Release Numbers
If you are running SharePoint 2013 (SharePoint Foundation 2013 or SharePoint Server 2013), the Major Release digit of the installed product’s file version includes a zero (0) and the fourth digit is “2013” such as:
10.2.3.2013
To match your current installed product with the release notes, remove the first zero (0) and the 2013. The end result is version 1.2.3.0.
