Skin Templates available in In/Out Schedule Board

Skin Templates available in In/Out Schedule Board

Below is a preview showing the skins that are available within the In/Out Schedule Board.

Skin Name Description
Default This is the default look of In/Out Schedule Board if you do not change the skin.
Black Skin-Black.jpg
This skin uses grey text on a black background and is not the easiest look for users to use.
Forest Skin-Forest.jpg
If your site is leveraging a green look and feel, this uses a nice gradient green.
Hay Skin-Hay.jpg
This skin uses a brighter green than the gradient one above and the lower bar in tan.
Office 2007 Skin-Office07.jpg
This skin uses the gradient blue bars seen in Office 2007.
Outlook Skin-Outlook.jpg
This skin takes the look and feel of Outlook.
Simple Skin-SImple.jpg
The simple skin uses a variety of grey colors.
Sitefinity Skin-Sitefinity.jpg
This skin removes color from the look but adds rounded pagination buttons as compared to the square buttons used in the skins above.
Sunset Skin-Sunset.jpg
The sunset skin uses a brick-red gradient bar and a lighter version of that in the pagination bar.
Telerik Skin-Telerik.jpg
The Telerik skin uses a gradient gray color scheme.
Vista Skin-Vista.jpg
Vista skin uses a gradient set of blues.
Web20 Skin-Web20.jpg
Web20 skin turns the column header background to a darker blue and the pagination bar background a lighter blue.
WebBlue Skin-WebBlue.jpg
The WebBlue skin uses a gradient gray/blue and grey bars.
Windows7 Skin-Windows7.jpg
The Windows7 skin uses a very pale blue background.

Localize Bamboo Applications or Custom Columns

Localize Bamboo Applications or Custom Columns

Overview of the localization process for Bamboo Products

Bamboo applications and custom columns are slightly different than web parts when it comes to localizing/translating. The user interface isn’t confined to a web part, but can exist as site definitions or other custom pages. For example, the configuration of a Bamboo custom column is within the SharePoint list settings area.
The text strings that require translation are located in different files than the strings that appear in a web part.

Changing the language or text for an application or custom column is a multi-step process:

Top

About the Language Files

Text displayed in a Bamboo application may be included in one or both of the following locations:

  • Provisioning Resources. These resources are located in the 12, 14, or 15 “Hive”, in the Resources folder. The number of the Hive depends on the version of SharePoint you are using (e.g., SP2007 has a 12 Hive, SP2010 has a 14 Hive, and SP2013 has a 15 Hive). 14Hiveresources.jpg

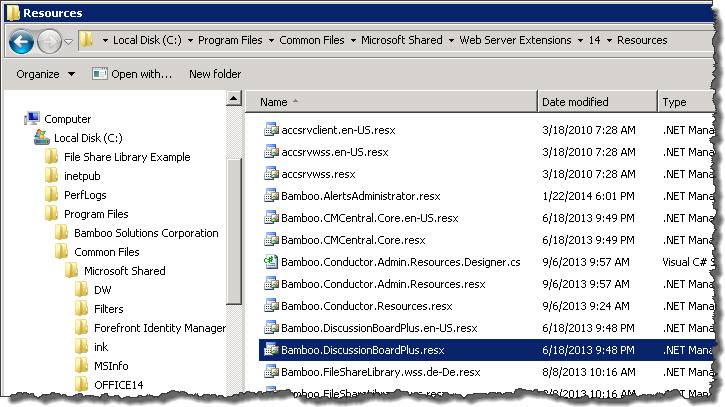
    The Bamboo.*.resx files include text used in site features, site definitions, list definitions, and other provisioning resource elements. Any changes you make in these files will apply to new product instances only.

  • Application/Runtime Resources. These are also located in the 12, 14, or 15 Hive, but in the CONFIGResources folder.The Bamboo.*.resx file in the CONFIG folder is different than the one included in the Resource folder.14HiveCONFIGResources.jpg 
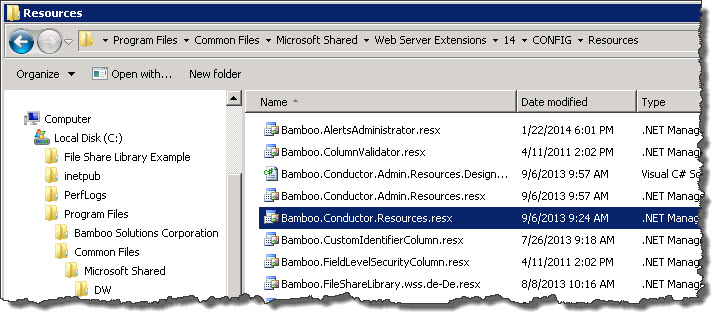
This one includes text used in application pages, custom site menu actions, navigation elements, and other runtime resources. Any changes you make will apply to new and existing product instances only.

In each location, there may be multiple versions of Bamboo.*.resx files with identical content. The different files are provided for English (en-US), German (de-DE), French (fr-FR), and Spanish (es-ES). The content of all files is in English until you translate it to your language. If your site is configured to use a language that does not have a corresponding Bamboo product .resx file, copy an existing file and rename it to include the culture name for that language pack. For example, create a file for Italian by saving the default file as Bamboo.[Product].it-IT.resx. Make your changes to this new file. If your site is configured to use a specific language but you do not have a culture-specific file, the product will use the default Bamboo.[Product].resx file instead.

Icon-WarningIMPORTANT: If you customize one of the default resource files provided with the product, your changes will be overwritten when you upgrade.

To avoid losing customizations, copy the customized file to a different location (not the same folder) before upgrading. After the upgrade is finished, compare the new file with your customized file to incorporate any new entries. Then copy the merged file to the Resources folder. Culture-specific files created for languages that are not provided with the product will not be overwritten during an upgrade, but you still need to incorporate new resource entries.

Top

Editing text in resource files

Icon-WarningIMPORTANT: Before making any changes, back up your original file to a different folder.

To change text in a resource file, open it in a text editor and locate the text you want to change. Editable text is usually found between the <value></value> tags, as shown in the screen shot below. Do not modify the data tag. If you want to remove text completely, delete only the text; do not delete the <data> or <value> entries from the file, or the server will display an error message. In the example below, the editable text is highlighted in gray.

Common_resxEdit.jpg

When you are finished with your changes, save the file and copy it to the appropriate Resources *folder on *all Web front-end servers in your SharePoint farm. Follow the instructions below to make your changes take effect.

Top

Applying Language File Updates

To apply changes to Provisioning Resource Files:

If you modified the provisioning resources file, apply your changes by restarting Web services with the following command on all Web front-end servers.

iisreset

NOTE: changes to provisioning resources affect new instances of the Bamboo product only; existing instances of the product are not updated.

To apply changes to Application/Runtime Resource Files:

If you modified the application/runtime resources file, apply your changes by executing the following stsadm command on all Web front-end servers. This command copies the updated resource file to the App_GlobalResources folder of each Web application. Changes apply to existing product instances and any new instances you create.

stsadm -o CopyAppBinContent

NOTE: Changes apply to EXISTING product instances AND any new instances you create.

Create an In/Out Schedule Board Site

Create an In/Out Schedule Board Site

Return to Configuration Overview

NewSite.jpg
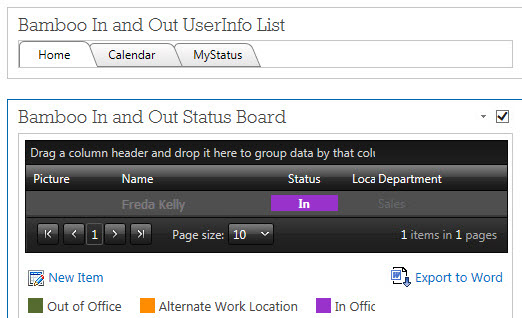
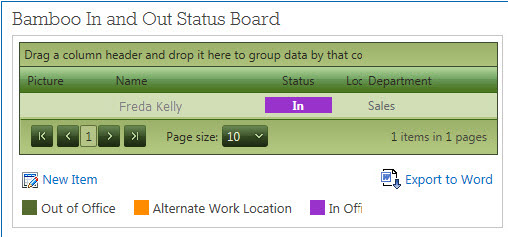
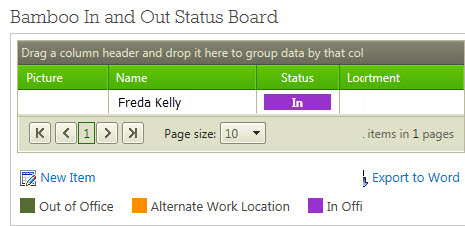
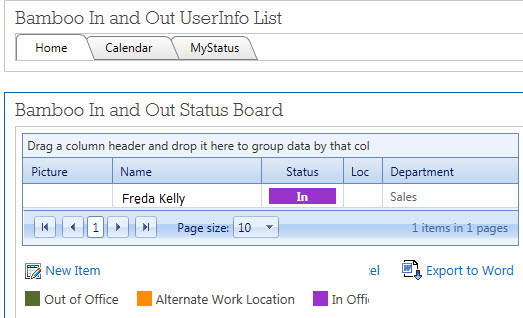
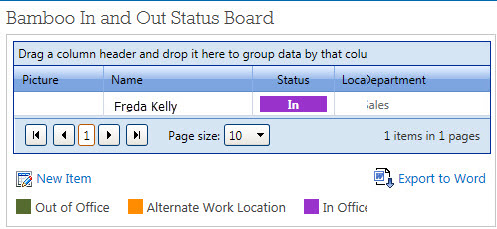
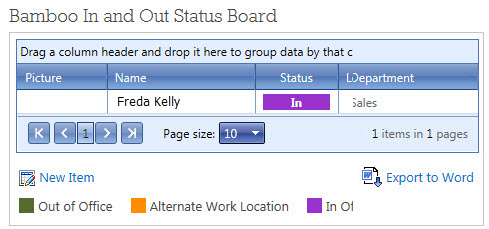
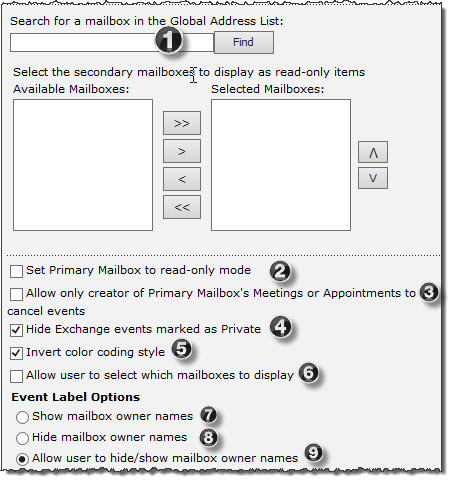
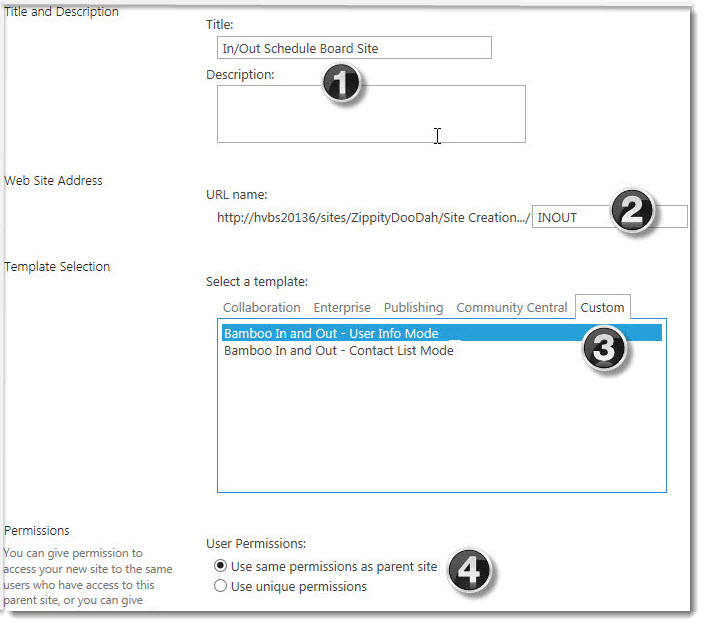
After In/Out Schedule Board and corresponding site template are installed, you can create a Schedule Board site by using the site template.

NOTE: Even if you plan to use the My Status web part separately on an existing site, you still need to create a new site based on the Schedule Board site template to store the necessary data.

You will need to log in as a user with the rights to create sites from the top level of your site collection.

From the Site Contents menu of your top-level site, select “New Subsite

Step Action
1. Fill in the Title & Description fields to give your site a name.
2. Label your site with a short URL name (we recommend no spaces or punctuation).
3.

Click the Custom tab to select from the available Custom templates; there are two In and Out options. What is the difference?

  • A Schedule Board site that is created using the User Info Mode will hold all of the users in the SharePoint User Info List; in other words, all of the users that have permission to your site.
  • A Schedule Board site created from a separate Contacts list will only contain the users who are in that list. You can always add or remove users to or from the list later.
4. Click Create – The site will now be created. In a few moments, once the site has been created, your browser will load it, and you can start configuring the web parts on the site.

Congratulations! The new In/Out Schedule Board site is now ready to configure.

Configure the My Status Web Part Tool Pane

Configure the My Status Web Part Tool Pane

Return to Configuration Overview

InOutStatus.jpg
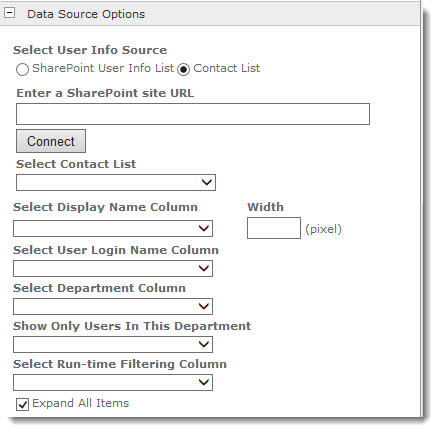
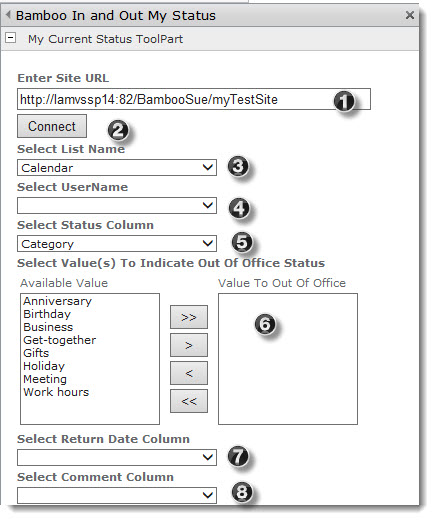
If you are adding the My Status web part to a SharePoint site outside of the In/Out Schedule Board site, it must be configured so it can read and update scheduling information from the site’s lists. To do so, use the following procedure to configure the Web Part from the tool pane.

Step Action Result
1. Enter Site URL: Pick the site URL for your site that contains the list to which you want to connect.
2. Connect Click the connect button to make the connection to the site. You’ll see a message explaining whether or not the connection is successful.
3. Select List Name Pick the list you want to use from the drop down options.
4. Select UserName This is the column the Web Part will use to determine which items are associated with the user.
5. Select Status Column This is the column from which the Web Part will determine the user’s status.
6. Select Value(s) To Indicate Out of Office Status Select all of the status values to associate with “Out” status from the Available Value list, and add them to Value To Out of Office. Any status value included here will be considered “Out” by the My Status Web Part – anything not included will be considered “In.”
7. Select Return Date column Select End Time from the Return Date Column so that viewers at a glance see when that person is expected to be back in the office.
8. Select Comment Column The Web Part will display this column’s information along with the status of the user.

Configure the Home Page Web Part

Configure the Home Page Web Part

Return to Configuration Overview

While the different pages and web parts that make up In/Out Schedule Board are designed to work straight out of the box without necessarily being configured, there are a number of features that can be customized from the respective tool panes of the three web parts.

NOTE: If you are using any of the included site templates (recommended), most of these options will already be set, and In/Out Schedule Board will function properly as is. It is not recommended or necessary to manually configure the Home or Calendar web parts for regular usage.

Use the following procedure to manually configure the Home page Web Part. Note that many of these options are pre-configured when the Schedule Board site is created, and that the part may no longer work properly if they are changed. Those options are marked as such in this procedure.

Step Action Result
1. Edit the web part and select the Bamboo In And Out Calendar List from the drop down list. This is the list that will hold the event data that determines In/Out status for each user. By default, the “Bamboo In And Out Calendar List” view is selected. The Schedule Board site template creates this list automatically, and it is not recommended that you change this value.
DisplayOptions.jpg
2. Select the Bamboo In And Out Calendar View from the drop down list. This is the View that will be used to determine which items on the Calendar List will be included on the Schedule Board. By default, the “Calendar” view is selected, and it is not recommended that you change this value.
3. Select the Column to Color Code from the drop down list. The contents of this column will be used to determine how each user’s information will be color coded on the Schedule Board. By default, “Status” is selected.
4. Select colors for each of the available values in the column set in Column For Color Code. To automatically apply colors to all values, click AutoSelect. ColorCoding.jpg
5. Select a User Info Source, either the SharePoint User Info List, or a separate Contact List. SelectingSource.jpg
You have two options here; 1) choose the users from a SharePoint User Info List or 2) use a Contact list to pull in user data.
Choice1.jpg Select the User Login Name Column. The value in this column is used to associate events with individual users, and should contain a user login name. SelecUserDept.jpg
By default, the “Account” column is selected, and it is not recommended that you change this value.

Select the Department Column for Display

The list of available departments appear in the left box; highlight the one(s) you want to show and press the > button to set it as a display column. This column will be used to quickly sort users into groups; the default setting is “Department”.
Choice2.jpg If you choose to use a Contact List, enter the URL of the SharePoint site containing the List in the Enter a SharePoint site URL field.

ContactListChoice.jpg
If you used the Bamboo In And Out – Contact List Mode site template, this option is already set, and it is not recommended that you change it.

  • If you’ve entered a new URL, click Connect.
  • Choose the contact list to use from the Select Contact List drop down list.
    Select a column from the Select User Login Name Column drop down list that contains valid user login names. The login name is used to associate an event with a particular user.
Choice3.jpg Define Item Sort Order

sa06-define-item-sort.jpg

Select the drop down list options in Define Item Sort Order if you prefer to change the default sort order of items by up to two columns.

6. Add any columns you want displayed in the Home Schedule Board Web Part from the Available Columns list to the Display Columns list. SelectDispCol.jpg
7. Optionally, you can toggle the Web Part’s filtering, sorting, grouping and export controls by selecting or deselecting the Display Settings check boxes. ColSort.jpg
8. To set a pre-established, custom column width : Select a unit of measurement (Pixel or Percent) from the Measure Columns In drop down list.
Measure.jpg
Enter the desired widths into the Enter column width(s) field, separating each value with a column. For instance, to set the values of three columns to 100, 150, and 200 pixels, select Pixel from the Column Width Unit drop down, and enter “100, 150, 200” into the field.
9. Display Setting sa06-display-settings.jpg
Optionally, you can toggle the Web Part’s filtering, sorting, grouping and export controls by selecting or deselecting the Display Settings check boxes.
10. If you have included a Picture column the Display Column list, you can set the size of the displayed picture. PicSiz.jpg
Enter the Width and Height values into the corresponding fields under Picture Size.
11. To alter the visual appearance of the web part, select from one of the options from the Skin drop down list. Skin.jpg
Preview the available skins

Configure the Calendar Page Web Part Tool Pane

Configure the Calendar Page Web Part Tool Pane

Return to Configuration Overview

Use the following procedure to manually configure the Calendar page Web Part.

NOTE: Many of these options are pre-configured when the Schedule Board Site is created and the web parts may no longer work properly if they are changed. Those options are marked as such in this procedure.

Step Action Result
1. Edit the web part and select the Bamboo In And Out Calendar List from the drop down list. This is the list that will hold the event data that determines In/Out status for each user. By default, the “Bamboo In And Out Calendar List” view is selected. The Schedule Board site template creates this list automatically, and it is not recommended that you change this value.
DisplayOptions.jpg
2. Select the Bamboo In And Out Calendar View from the drop down list. This is the View that will be used to determine which items on the Calendar List will be included on the Schedule Board. By default, the “Calendar” view is selected, and it is not recommended that you change this value.
3. Select the Column to Color Code from the drop down list. The contents of this column will be used to determine how each user’s information will be color coded on the Schedule Board. By default, “Status” is selected.
4. This section is not visible until you select a column in Step 3. You can pick the hex colors for each of the available values. To automatically apply colors to all values, click AutoSelect. ColorCoding.jpg
5. Select the Location Column from the drop down list.
CalDisplayOptions.jpg

The contents of this column will be used to provide location information for each event so be sure your users fill it in.

  • Select Start Date Column:
  • Select End Date Column:
  • Select User Login Name Column:
  • Allow Show Status In: Select to display status even when users are scheduled as “In”; if this option is not selected, the Web Part will only display those who have an out of office status on the calendar.
  • Users per page: Note that exceptionally large numbers of users per page may negatively affect performance.
6. SharePoint User Info List Options
CalDataSourceOptions.jpg

Depending on whether you select the User Info List or the Contact List on which to base your user data, there are some columns that need to be filled in.

  • Select Display Name Column: The selected column’s values will display under the Employee/Subject Column in the Web Part interface.
  • Width: Enter the number of pixels wide you want to set the Display Name column.
  • Select User Login Name Column: This is the list that contains valid user login names. The login name is used to associate an event with a particular user.

  • Select Department Column: This column will be used to quickly sort users into groups; the default setting is “Department”.

  • Show Only Users in This Department: To show only the users from certain departments (or groups), add any departments you want displayed in the Calendar Schedule Board view from the Available Departments list to the Display Departments list.
  • Select Run-time Filtering Columns: Optionally, you can toggle the Web Part’s Display Settings by selecting or deselecting the Expand All Items and Allow Runtime Filtering check boxes:
    Select a Run-Time Filtering Column. This is the column that can be quickly sorted alphabetically by clicking the A through Z links at the top of the web part. By default, this is set to “Name”, so that clicking on “J” would display all users with first names that began with “J”.
  • Expand All Items: To automatically show all events for all users select the Expand All Item check box.
Contact List
UserInfoListOptions.jpg

If you select Contact list, you still have some of the same columns as above, except the web part needs to make a connection to know which list you are picking data from.

  • Enter a SharePoint Site URL: Enter the URL of the SharePoint site containing the Contact List.
  • Connect: Click the button to make a connection to the site.
  • Select Contact List: Choose from the available lists shown in the drop down.

All subsequent column choices are identical to above.