How the Video Library-File Share Library Connection Works
Q: Where are media files stored?
A: When Video Library is connected to a File Share Library, the Video Library itself does not contain any files. The files are stored in the network file share configured in File Share Library. The Video Library only contains links to the File Share Library content, the thumbnail images, and metadata information for the media files. Because the files are not stored in SharePoint, your SharePoint content database is not affected by the size of the files in the library. Storage is limited by the size of the external file system configured as the File Share Library network file share, not by your SQL Server database size or SharePoint storage limits.
Q: What happens when files are uploaded?
When a file is uploaded in Video Library, it is processed by File Share Library immediately, and a link is created in the Video Library. Available metadata is extracted from the file and stored with the link. You can play your video file as soon as it is finished uploading.
Q: What about links to external media content?
Links to external media, such as YouTube videos, exist only in the Video Library. There is no file added to the File Share Library or the network file share.
Q: What if the File Share Library contains non-media files?
Only supported media file types are visible in Video Library. If the File Share Library contains other file types, the files are not visible in Video Library. If you attempt to upload an unsupported file type, a warning message will be displayed. You can only upload supported file types to the Video Library.
Q: How are files synchronized?
When Video Library is first connected to a File Share Library, it will take a few minutes to synchronize content from the File Share Library to the Video Library. During this initial synchronization, links are created in the Video Library to the files in the File Share Library. Metadata information is automatically extracted and stored with the link. The time this takes will vary according to the number of files in the File Share Library.
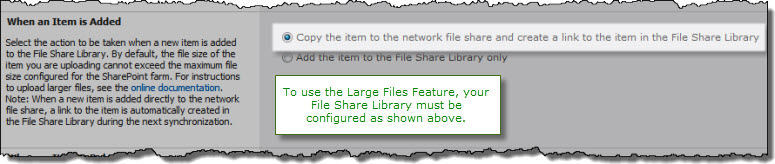
After the initial synchronization is complete, you can add, delete, or rename files directly in Video Library. When an item is added or deleted from Video Library, it is added or deleted according to the settings defined in the File Share Library settings. For example, if you delete an item from Video Library and File Share Library is configured to archive deleted files to a network location, the file will be archived. If you add an item and File Share Library is configured to copy new files to the network file share (recommended), that is what will happen. When you make changes in Video Library, they are done immediately; you do not have to wait for the File Share Library synchronization job to run.
If you choose to add, delete, or modify files directly in the network file share, the changes will be reflected in Video Library the next time the File Share Library synchronization job runs. For example, if you want to add a large number of items to the Video Library, it may be faster to do this directly in the network file share rather than use the Video Library page. If the File Share Library Synchronization Settings are configured to sync items daily, the new files will be available in Video Library the next time the daily synchronization job runs. If File Share Library is not configured to sync according to a specific schedule, Video Library will sync every 30 minutes. There is no one-time or on-demand synchronization option in Video Library, and performing an on-demand synchronization in File Share Library does not update the Video Library.
Whenever possible, use the Video Library page in SharePoint to manage media files; do not use the network file share or the File Share Library.
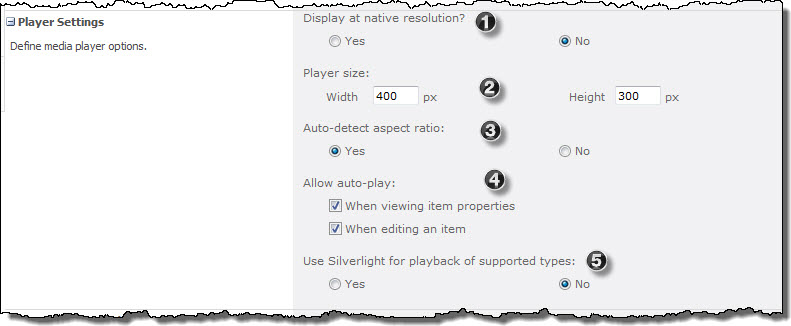 Some of the settings you can customize let you define how the Video Library will play back your video: through native resolution, pixel size and ratio and whether to allow automatic playback as well as using Silverlight in supported browsers. Details for each setting are listed below.
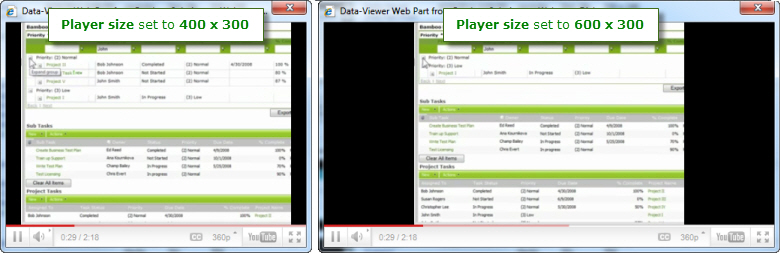
 In addition to standard SharePoint library settings, Video Library provides additional library settings that can be used to customize each Video Library instance. To access these settings, click the Video Library Settings button in the Library tab of the Tools ribbon.
  Select the Video Library option to store media files directly in the Video Library (the default).
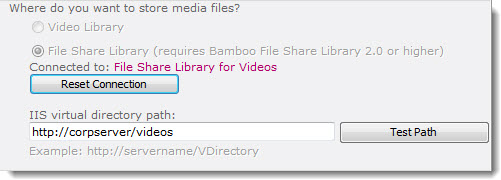 To switch from storing files in a File Share Library to storing them directly in Video Library, click the Reset Connection button. Any existing links in Video Library to the files that reside in the File Share Library will be deleted. The actual files in the File Share Library are not affected. The Video Library will be empty and ready for you to upload new files.
 To view content from a File Share Library in Video Library, you must enter an IIS virtual directory path. This path serves content from the network file share configured in File Share Library.

 The default maximum upload size for SharePoint Web applications is 50 MB. This limit affects all uploads to SharePoint. The Maximum Upload Size setting can be customized in the Web Application General Settings page, but changes to it affect all libraries—not just Video Library.
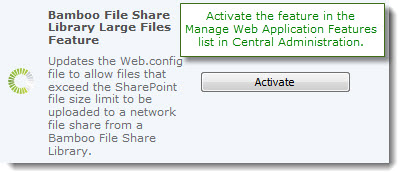 The File Share Library Large Files Feature is not activated by default; you must activate it after installation. Activating the feature enables large file support for all File Share Libraries in the Web application, including the ones connected to Video Libraries. After activating this Web application feature, you can upload large files from the Video Library; you do not need to upload them from the File Share Library page.
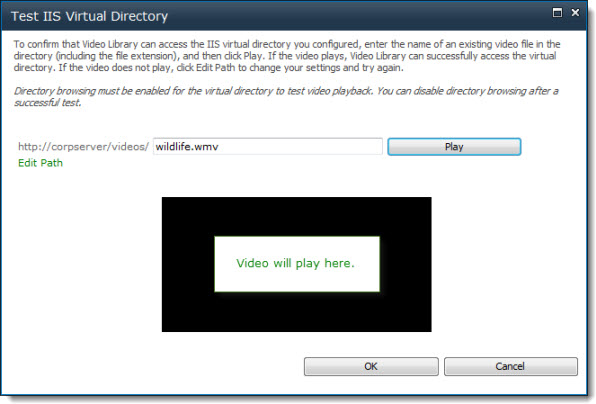 If the video plays, Video Library can access the virtual directory. Click OK to return to the Video Library Settings page. If the video does not play, check your IIS virtual directory settings. If you need to correct the IIS virtual directory path, you can click the Edit Path link in the Test IIS Virtual Directory page. Changing the path there will update it in the settings page.