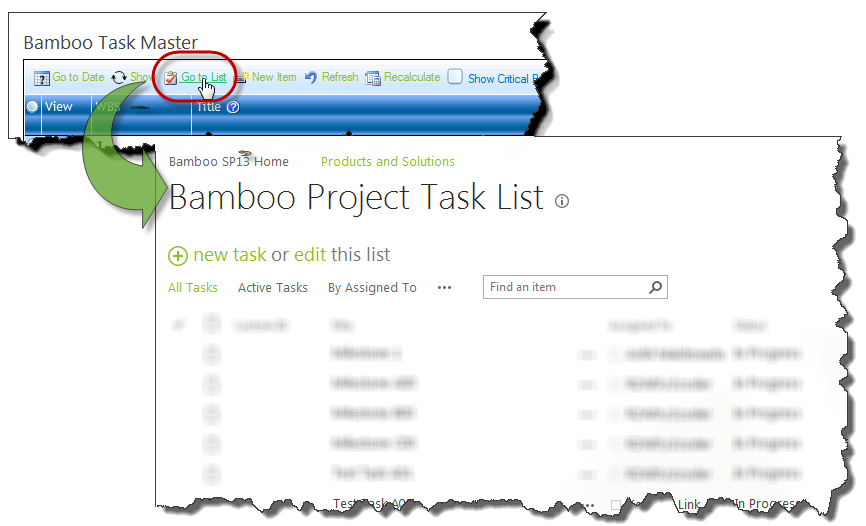
 To view the task list in SharePoint list view instead of in Task Master, click the Go to List option in the Task Master toolbar menu.
The list view will open in a new window.
Bamboo Solutions
Product Documentation
To view the task list in SharePoint list view instead of in Task Master, click the Go to List option in the Task Master toolbar menu.
The list view will open in a new window.
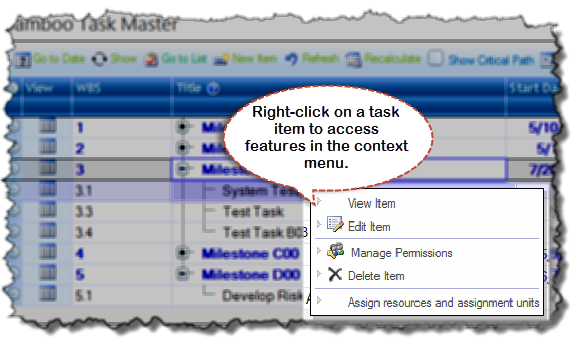
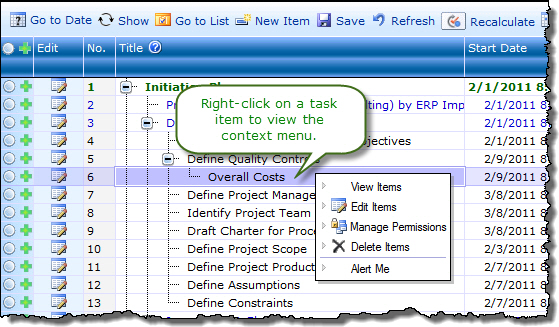
Right-click on a task item directly from the Web Part interface to open the edit form or to delete the task item.
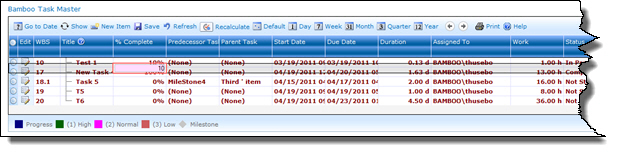
 In Task Master Release 3.5 for SharePoint 2010 and SharePoint 2013, there is a new Find search function in the toolbar menu. This is helpful if you have a lot of tasks and want to quickly see a subset of tasks that are related.
Enter a word in the Find field and click Enter.
All of the tasks that contain the word will be highlighted as shown below.
With Task Master, you can edit task items directly in the grid view, called inline editing. This feature allows you to save time while you manage your tasks because you can quickly edit task items directly from the Web Part interface without having to click to access the edit form.
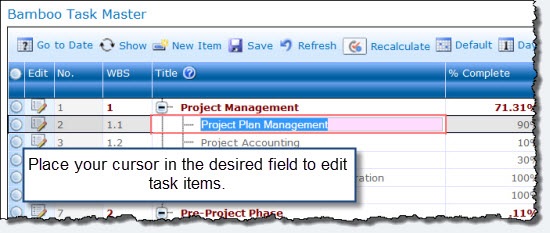
To use inline editing:
| Step | Action | Result |
| 1. | Double-click to place your cursor in the desired field in the grid view. The field displays a red border and the background is pink. | 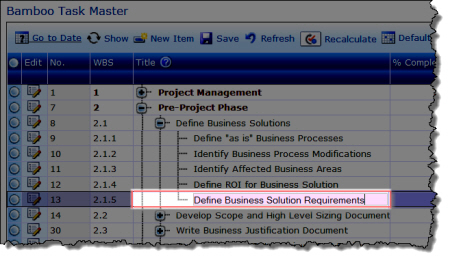 |
| 2. | Enter your changes. If you are using the Save and Refresh options, click Save. | 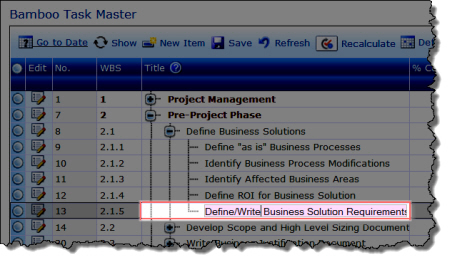 |
| 3. | To edit a task item using the edit form, click the |
  |
| 4. | When using inline editing in a filtered view, such as My Tasks, the tasks may not line up correctly. Refresh the browser using CTRL + F5 to resolve this issue. Doing so will refresh the page to the All Tasks view. Select the desired filtered view again. |
|
See Also:
| Return to Configuration Overview |
|---|
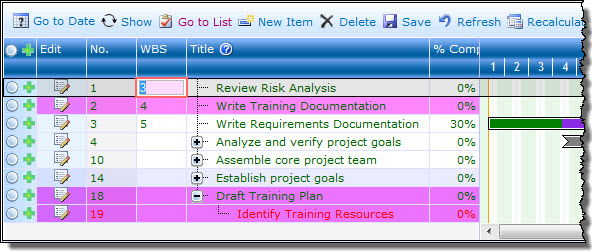
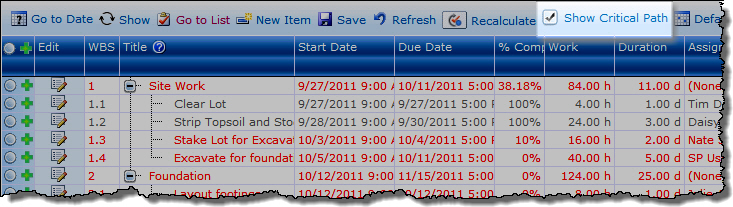 The Show Critical Path feature highlights all tasks in the critical path in red in the task grid and the Gantt chart. Tasks in the critical path are those tasks that cannot be delayed without affecting the project finish date: tasks in the critical path have zero slack. To return to the standard grid/Gantt view, uncheck the Show Critical Path option.
Note: To use this feature, the Show Critical Path option must be checked in the Task Master properties. See Task Master Preferences for more information.
Bamboo Solutions
HW03
 You can undo recent changes that you have made to your task items using the Save and Refresh options located on the Task Master toolbar. Clicking Refresh will undo changes you have made since the last time you saved. The Refresh option saves you time because you do not have to manually edit one or multiple task items in order to undo changes that you no longer want or need.
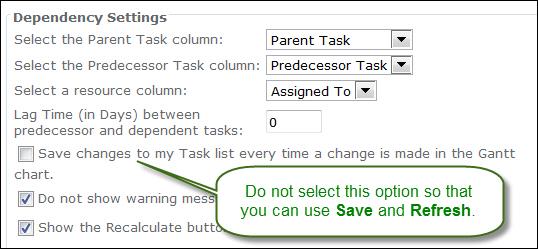
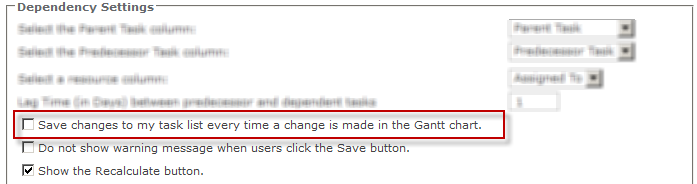
To use Save and Refresh, you need to set the tool pane settings so that you can manually save changes that you make. To do this, do NOT select Save changes to my Task List every time a change is made in the Gantt chart in the Task Master tool pane under Dependency Settings as shown below:
Now the Save and Refresh buttons are displayed on the Task Master toolbar menu. (To disable the warning message that appears after you click Save, select Do not show warning message when users click the Save button in the tool pane under Dependency Settings.)

To use the Refresh option, read the following use case:
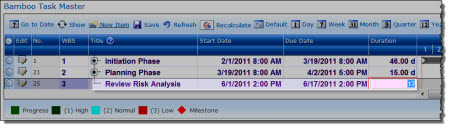
Richard Kimble is a project manager. His team member, Jessica Andrews, is assigned the Review Risk Analysis task, which is scheduled to take 16 days to complete.

Jessica has to miss work one day, so Richard changes the task’s duration to 17 days instead of 16 days using Task Master inline editing feature. (Read How to Use Inline Editing for more information on this feature.)
However, Jessica no longer has to miss work, so Richard needs to change the task back to the original duration:
| Step | Action | Result |
| 1. | Richard clicks Refresh on the Task Master toolbar to undo the change. | |
| 2. | Task Master reloads the page with the original duration of 12 days displayed. | |
The SAVE option will not display on the web part toolbar if the Dependency Setting – “Save changes to my task list every time a change is made in the Gantt chart” has been selected.
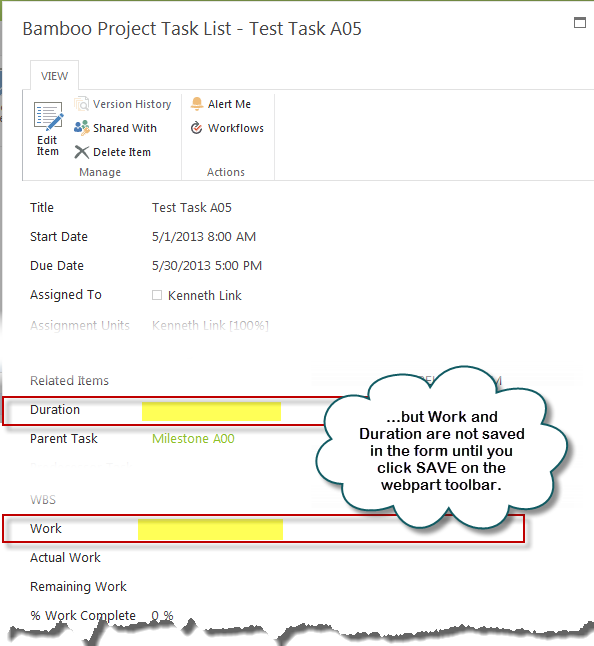
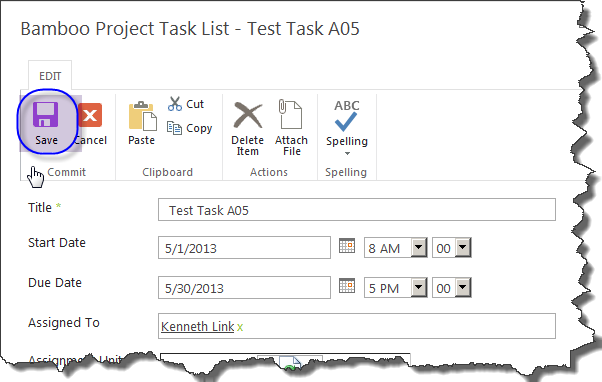 When creating a new task, Task Master will save only the data in fields that were completed and saved using the SAVE button in the new item form.
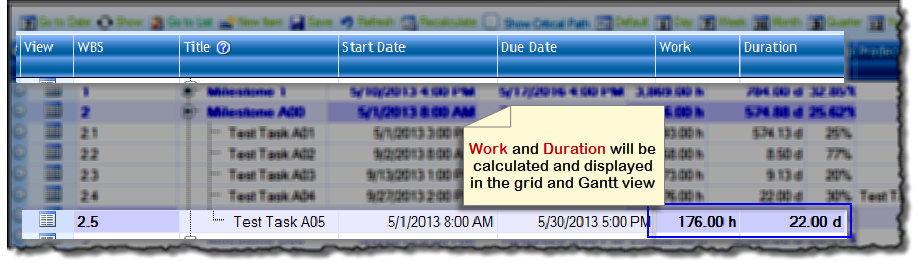
Task Master will compute calculated fields and display them in the grid and Gantt views, but those fields will not be populated in the display form until you click the Save button on the web part toolbar.
If you modify the Due Date field using inline editing, Task Master will calculate and display the Duration and Work in the grid and Gantt views, but it will not save those fields. For example, if you modify the Due Date from 9/12/2013 to 9/13/2013 and immediately view the task in the display form without saving the change, the Due Date value will still reflect the original date – 9/12/2013.
 For example, if you create a new task item and enter values for Start Date, Due Date and Assigned To, the data will be saved when the SAVE button on the form is clicked. Task Master then calculates Duration and Work and displays them in the grid and Gantt views.

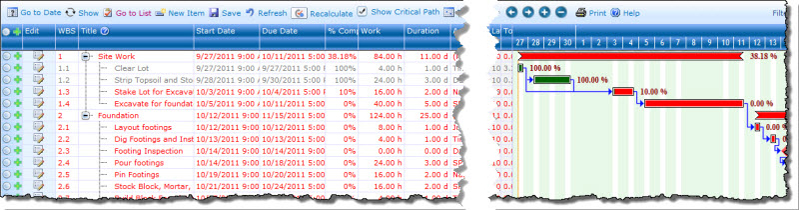
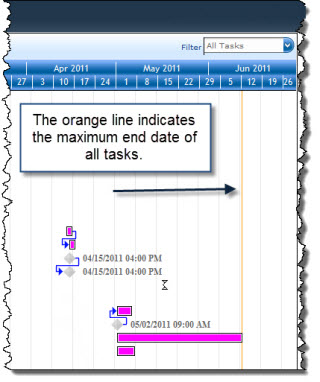
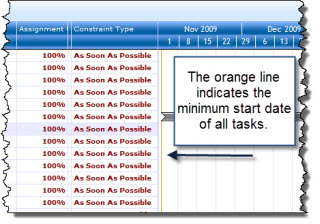 The Task Master Gantt view automatically displays an orange line to show the minimum start date of all tasks (the project start date) and the maximum end date of all tasks (the project finish date).
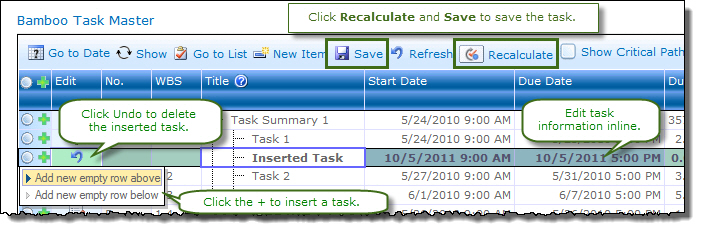
You can insert tasks directly in Task Master.
| Step | Action | Result |
| 1. | To insert a blank task directly above or below an existing task, click the Insert Task icon  in front of the existing task. in front of the existing task. |
|
| 2. | Choose to insert the task above or below the existing one. | |
| 3 | Complete required task information fields using the inline editing features of Task Master. | |
| 4. | When you are finished, click Recalculate and Save in the toolbar menu. |
|
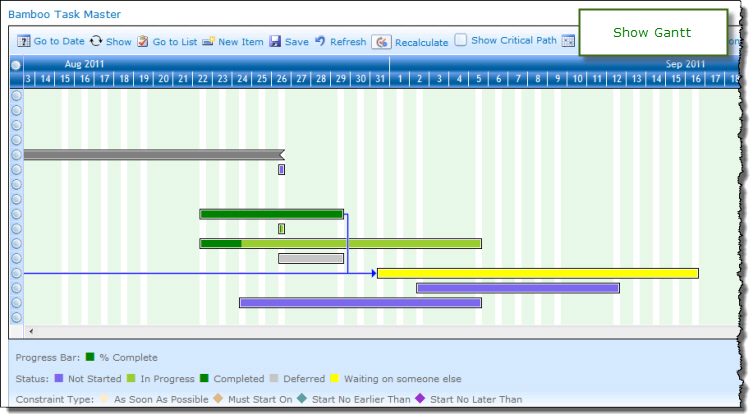
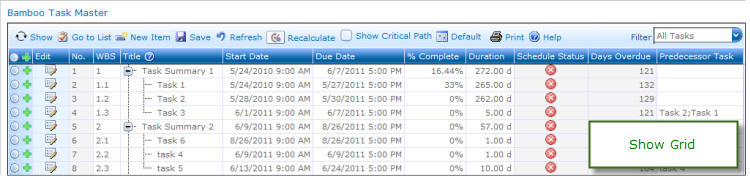 In Task Master, you can display tasks in grid view, Gantt view, or both. Change the Show Grid and/or Show Gantt options in the Display Settings section of the Web Part properties.
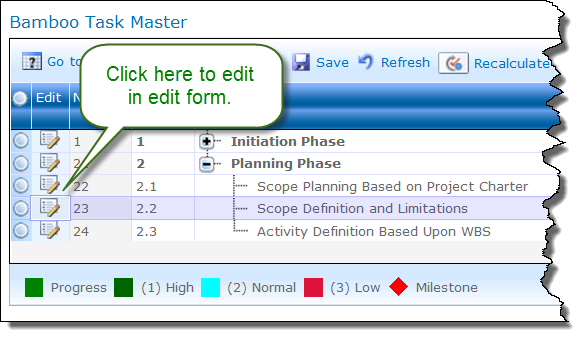
Edit tasks by clicking the Edit icon next to a task, right-clicking on a task and choosing Edit Item, or change a value by editing it directly in Task Master.
See also: How to Use Inline Editing
NOTE: The option Show Delete Items is not part of the default configuration and must be checked in Task Master properties. See the Display Settings section of Configuring Task Master for more information.
| Step | Action | Result | |
| 1. | To delete one or more tasks, select the radio button next to the task(s) and click Delete in the toolbar menu. | 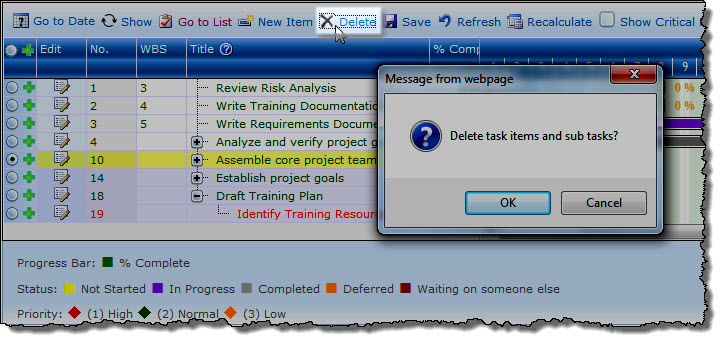 > NOTE: If you do not see the Delete button on the toolbar, you are using an earlier version of Task Master and you need to delete tasks directly from the toolbar menu |
|
| 2. | Click OK in the prompt to delete the selected task(s) and its subtasks. | ||
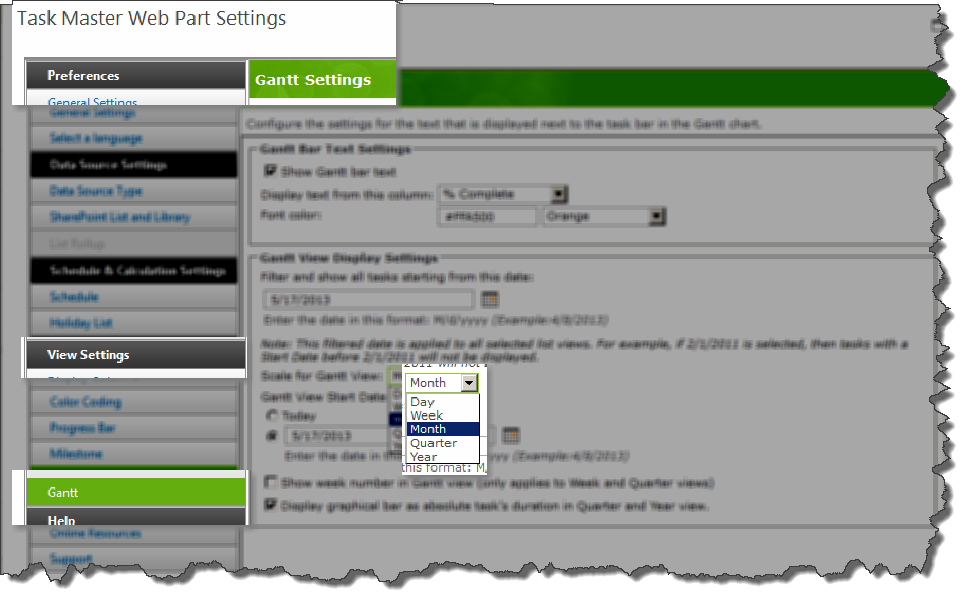 The Task Master Gantt view defaults to the current day, week, month, quarter or year view, depending on what is configured in the tool pane under Gantt View Display Settings > Scale for Gantt View.
For example, if you configured the Gantt view to display the month view, then the Default view is the Month view.
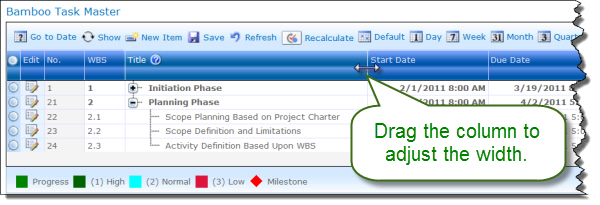 The columns displayed in the grid view of Task Master can be adjusted to the desired width.
Hover the mouse cursor over the column until you see the double-sided arrow.
Then drag the column to the desired width.