Print the Data-Viewer display

Data-Viewer lets you easily print the current data display. Keep in mind:
-
Only the data displayed on the current page will be printed
-
The Print page link is typically found in the bottom left corner, but this may change with some of the available skins

To print displayed data
NOTE: This feature require your administrator to have selected Print current page as an Interactive option on the General Settings page of the Data-Viewer configuration screen.
| Action |
Result |
| Click the Print Current Page link.
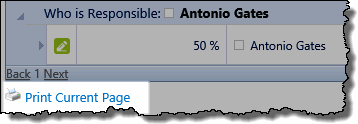
|
-
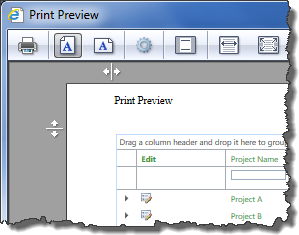 A separate browser page will be displayed and then a print preview window. A separate browser page will be displayed and then a print preview window.
-
Change settings as appropriate.
-
Click the printer
( ) icon to initiate the print. ) icon to initiate the print.
|
How to Work with Nested Data
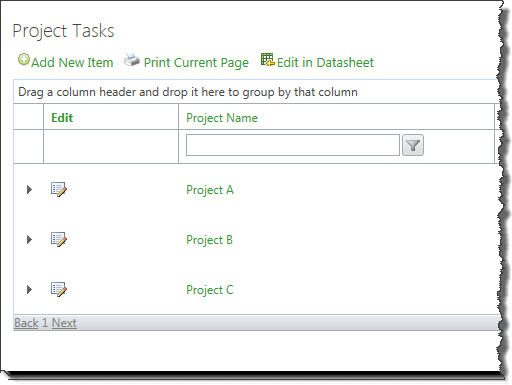 The example here shows a Data-Viewer Web Part configured to display data from two lists. The main list is referred to as the parent and the other is the nested or child list. In this example, the parent list is a Projects list and there are three items in the list (Project A, Project B, and Project C). None of the items are expanded, so no nested items are displayed by default.
To expand an item in the main/parent list to see the nested items, click the  icon in the left-most column for the desired item. The example below shows the nested data for the first project in the main/parent list.
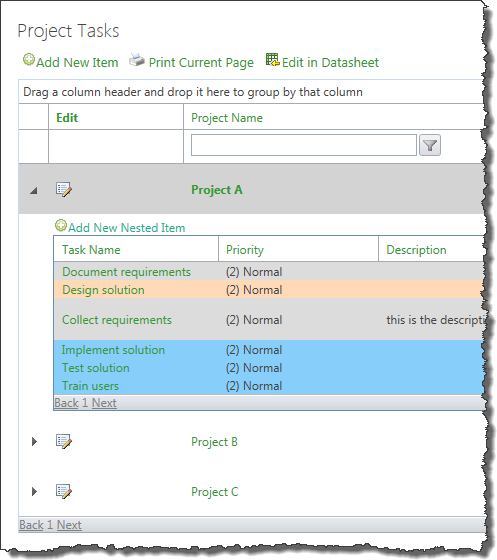 To collapse expanded data, click
  or click for another item in the main/parent list.
NOTE: Only one item can be expanded at a time, so expanding another item will automatically close the previously expanded item.
Using the Data-Viewer Inline Edit form

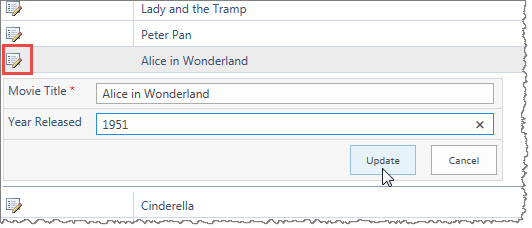
Inline editing is a useful feature because it displays a short, easy to fill in form, within the Data-Viewer display.
When using the Inline Editing feature keep in mind:
-
By default, the following columns will be available for edit in the inline edit form-
- Editable columns that are included in the display
- Columns that are required in the form.
-
If the Edit Default Fields option was selected the columns configured for default display will appear in the form, even if the column was dynamically removed from the display by the user.
Edit Default Fields was added in Data-Viewer 3.7
-
Inline editing is supported for SQL Server if the user account configured for access has edit rights and the database is defined with a primary key.
-
Inline editing is not supported for BCS data sources.
To edit data inline:
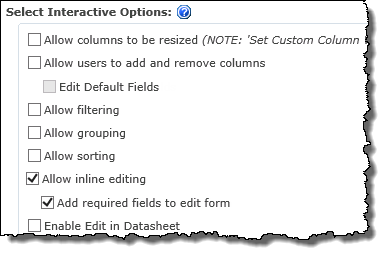
NOTE:
1. This feature requires your administrator to have selected Allow inline editing as an Interactive option on the General Settings page of the Data-Viewer configuration screen.
2. When Allow inline editing is selected, Add required fields to edit form will be selected by default
| Step |
Action |
| 1. |
|
| 2. |
-
Update the available fields.
-
When ready, click Update to save your changes and close the online form, or click Cancel to close the form without saving any changes.
NOTE: Only one form is displayed at a time.
|
Dynamically group a Data-Viewer display

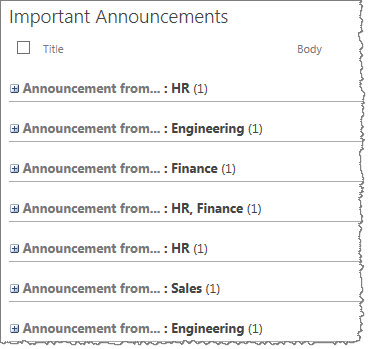
Grouping data at run-time helps you manage and organize the presented data.
When using the interactive grouping feature keep in mind:
- When dynamic grouping is enabled you will see a grouping bar at the top of the web part

-
Groupings will only be applied to Parent Data. Nested data sets cannot be grouped.
-
 IMPORTANT: All changes made in run-time will be lost when you leave the page, and the default configuration will be restored.
To group data in runtime:
NOTE: This feature require your administrator to have selected Allow Grouping as an Interactive option on the General Settings page of the Data-Viewer configuration screen.
How to Filter Data
The example below shows a Data-Viewer Web Part with filtering enabled.
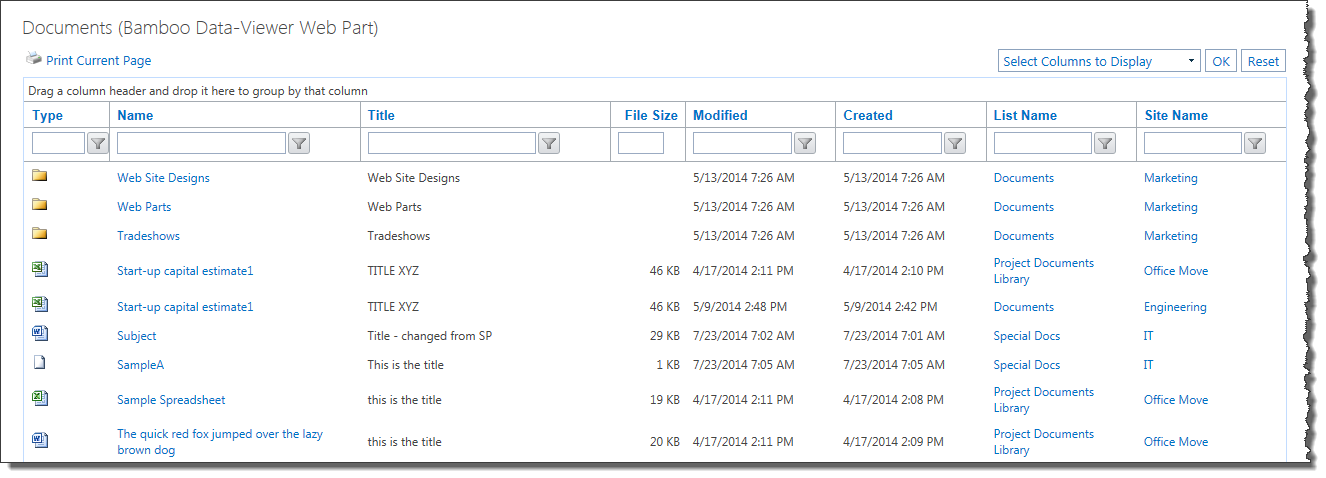
If the Allow filtering option is enabled, the filter boxes are displayed at the top of each column included in the Data-Viewer display. Follow these steps to filter the data:
| Step |
Action |
| 1. |
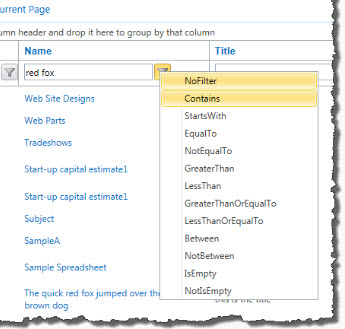
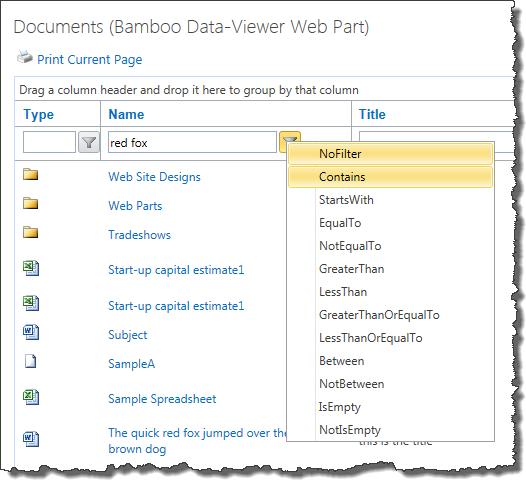 Filter data by entering a value in the filter text box displayed at the top of each column. For example, enter red fox in the filter box for the Name column, as shown here. Filter data by entering a value in the filter text box displayed at the top of each column. For example, enter red fox in the filter box for the Name column, as shown here.
Then click the associated Filter icon ( ) and choose the operator. In the example shown, choose Contains to filter the list to show only the items where the Name column contains the string red fox. ) and choose the operator. In the example shown, choose Contains to filter the list to show only the items where the Name column contains the string red fox.
Selecting the operator implements the filter.
NOTES:
- The list of operators is the same, regardless of the type of column displayed.
- The filter is NOT case sensitive.
|
| 2. |
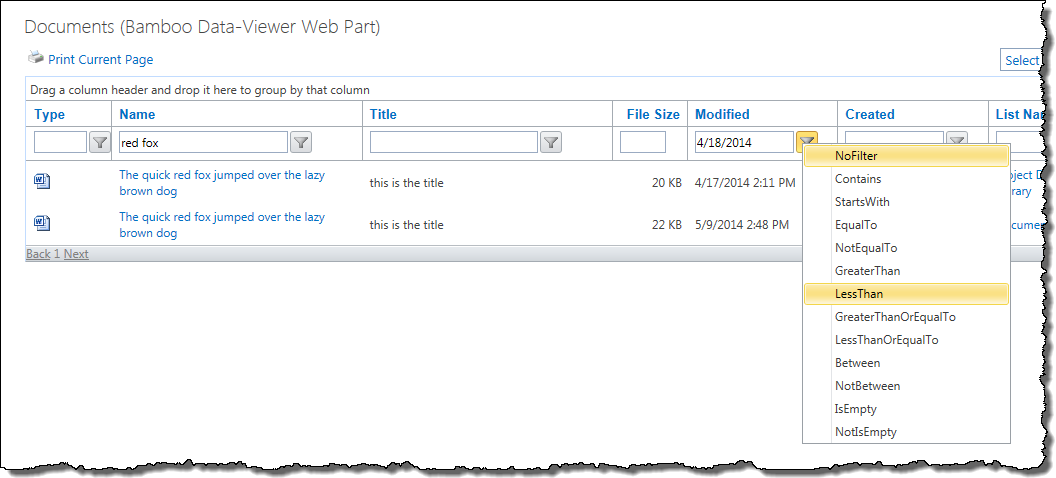
To further filter the data set using a filter in a different column, simply enter the text for the appropriate column and choose the operator. The additional criteria will be added to the previous one to further filter the data set.
 |
| 3. |
To remove a filter from a column, click the filter icon and select No Filter.
NOTE: This will remove all the filters, not just the filter from the column when you clicked NoFilter.
|
|
See also:
How to Export to Excel
The example below shows a Data-Viewer Web Part with Export to Excel enabled. Since it is configured with nested data, there are two export links shown:
- Export to Excel. This will export the data from the parent list.
- Export Nested Data to Excel. This will export the nested data. Depending on the configuration option chosen, it will export all the nested data or just the expanded nested data.
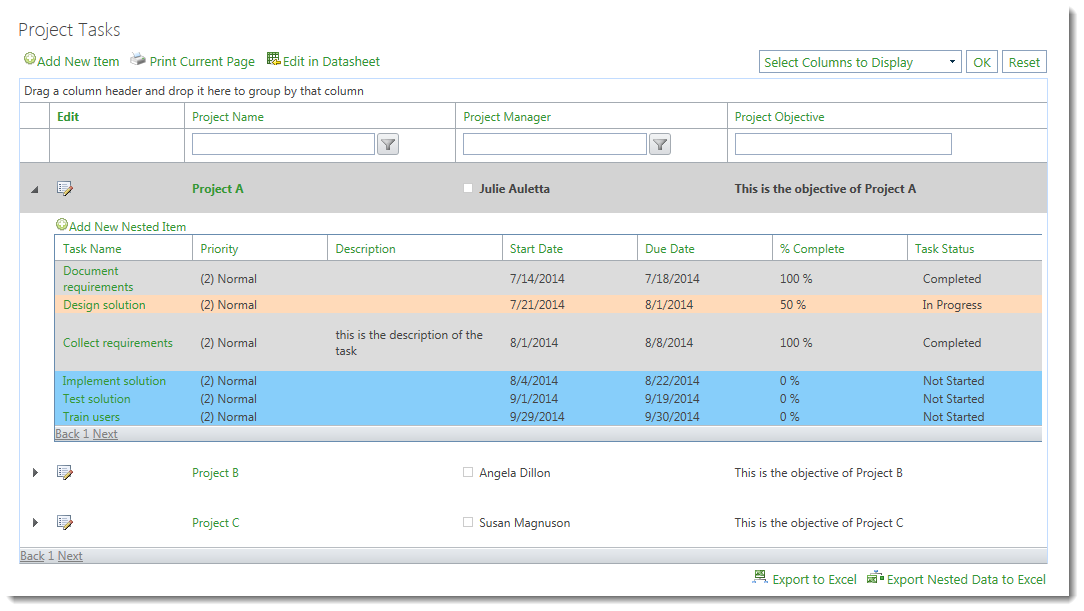
If the Enable Export to Excel or Enable Export Nested Data to Excel option is enabled, an Export to Excel link is displayed at the bottom right corner of the Data-Viewer display. Follow these steps to export the data:
| Step |
Action |
| 1. |
Export data by clicking either Export to Excel link. The message below will appear:

Choose to Open the file, or choose Save or Save As from the Save menu to save it before opening. Otherwise, click Cancel to close the message without opening or saving the file.
|
| 2. |
Open the Excel file. Depending on how your export was configured, you may see all the nested data, or just the nested data that was shown (expanded) when you clicked Export.
If your data is exported with formatting, it will look similar to that shown below.
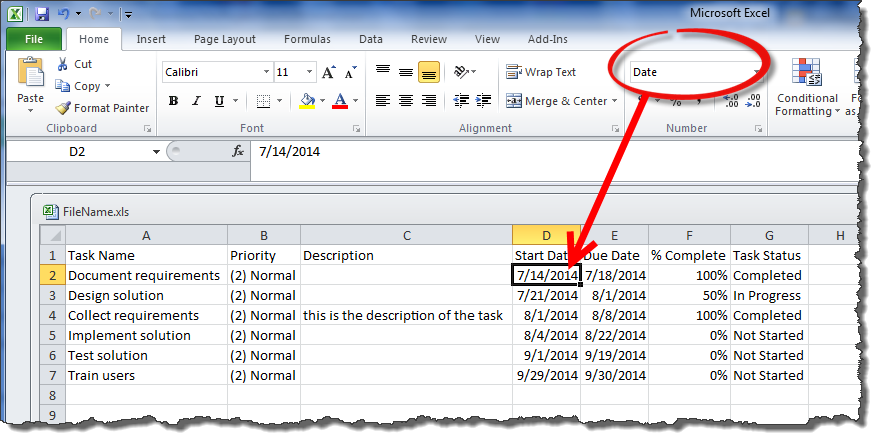
NOTE: Exporting with formatting means that dates will appear in Excel as Date columns, as shown in the screen shot above. Other columns, such as the % Complete column will be formatted appropriately as well.
The screen shot below shows the same data exported without formatting. Notice how the Date columns and the % Complete appear differently. Also, notice that tags (i.e., <p> and </p>) appear in the Description column, which is a multi-line rich text column.
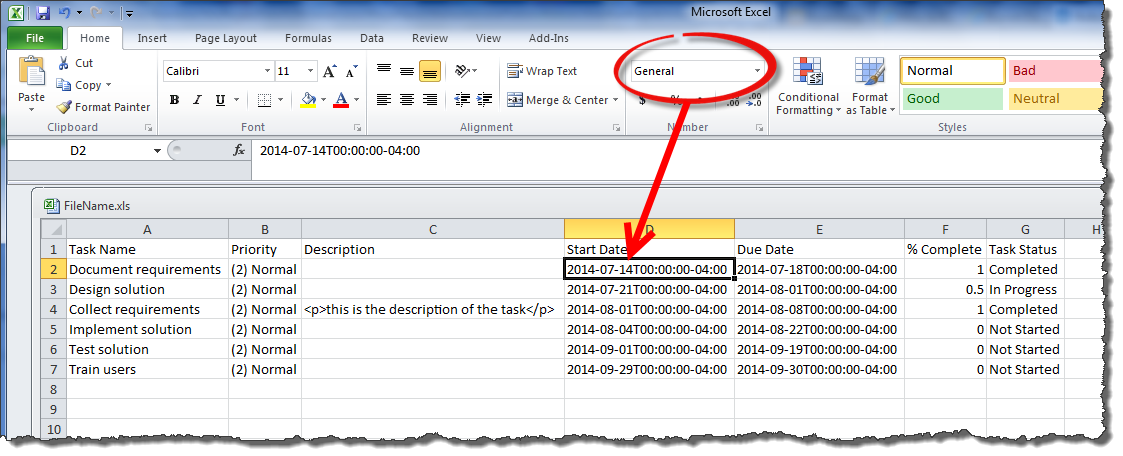
 Although it takes a bit longer to export with formatting, if you will need to format the Excel data, you may save some time by exporting with formatting! Although it takes a bit longer to export with formatting, if you will need to format the Excel data, you may save some time by exporting with formatting!
|
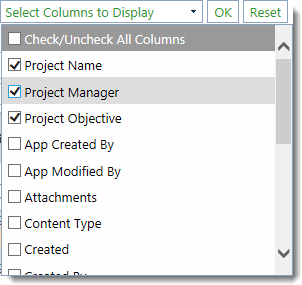
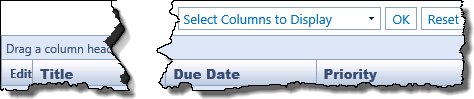
Dynamically add or remove columns displayed in Data-Viewer

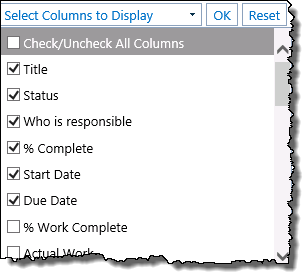
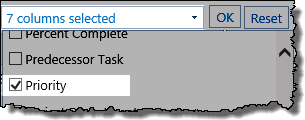
This feature lets users control what information is presented in the Data-Viewer by adding and removing columns from the display.
When using the Allow uses to add and remove columns feature keep in mind:
-
You cannot control the order that the column is displayed from this interface. New columns will be added in alphabetical order to the right side of the display.
-
This feature is available only for the parent list. It is not currently possible for the end user to change the columns displayed in the nested list.
-
IMPORTANT: All changes made in run-time will be lost when you leave the page, and the default configuration will be restored.
To add or remove columns from the runtime display:
NOTE: This feature requires your administrator to have selected Allow uses to add and remove columns as an Interactive option on the General Settings page of the Data-Viewer configuration screen.
Edit multiple items in Data-Viewers Datasheet View

The Data-Viewer Web Part includes a Datasheet mode to allow quick edits to multiple items. Datasheet mode replaces the default display with a grid view that is similar to SharePoint’s Datasheet mode.
Keep in mind:
- This feature is not supported for BCS data sources.
- Edit in Datasheet is supported for SQL Server if the user account configured for access has edit rights and the database is defined with a primary key.
To edit items in datasheet mode:
NOTE: This feature require your administrator to have selected Enable Edit in Datasheet as an Interactive option on the General Settings page of the Data-Viewer configuration screen.
| Step |
Action |
| 1. |
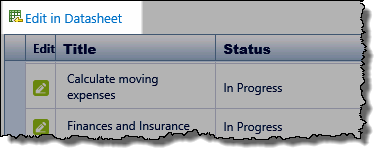 Click Edit in Datasheet to open the datasheet mode. Click Edit in Datasheet to open the datasheet mode. |
| 2. |
You will be presented with a datasheet display 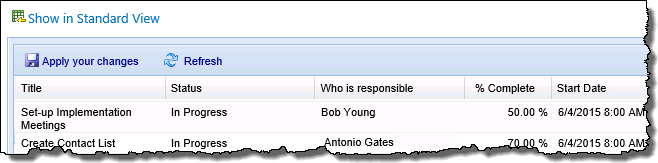 |
| 3. |
Click in the column to make changes.
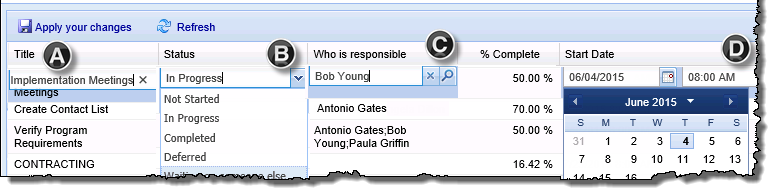
A. Clicking the x in the Text field editor will clear current content from the editor. If you do not make a change and click in another cell the original text will remain.
B. Choice column selections will display in the drop down.
C. 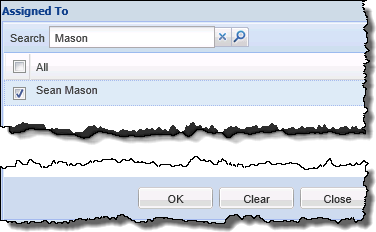 To change a Person and Group value click the ( To change a Person and Group value click the ( ) to access the people picker ) to access the people picker
IMPORTANT: If a new user is selected using the people picker, the original content of the cell with be replaced.
D. Date and Time selector
NOTE: Some column types may display with additional markup. Always use the edit features to the right of the value to select or search for new values when changing these columns.
|
| 4. |
Updated columns will be marked with a red triangle in the upper left corner. This indicates that there are changes that have not yet been saved.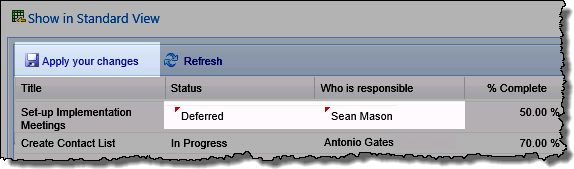
A. Click Apply your Changes to save your updates
B. Refresh to see any changes that may have been made in the data source.
|
| 5. |
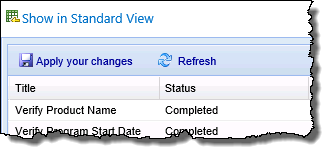 When ready, click Show in Standard View at the top of the datasheet to close the datasheet view and return to the standard view. When ready, click Show in Standard View at the top of the datasheet to close the datasheet view and return to the standard view.
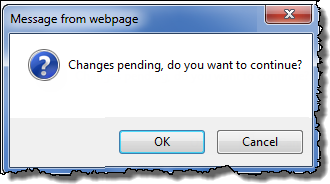 IMPORTANT: Changes will NOT be saved until you click Apply your changes. If you click Show in Standard View without first applying your changes, this message will appear: IMPORTANT: Changes will NOT be saved until you click Apply your changes. If you click Show in Standard View without first applying your changes, this message will appear:
Click OK to continue without saving. Otherwise, click Cancel to return to Datasheet view so you can Apply your changes. |
Add a new item to the displayed data source

Add New Items lets users quickly add new items to the displayed data-source right from the Data-Viewer.
When using the Add New Item feature keep in mind:
-
This option is not available when Data-Viewer is configured to use List Rollup or BCS data sources.
-
If Add New Item is enabled and Data-Viewer is configured to display nested data, the Add New Item option will be available for both parent and nested data sets.
-
The Add New Item link is typically found in the top left corner of the Data-Viewer grid.
To add a new item from the display:
NOTE: This feature require your administrator to have selected Enable Add New Item as an Interactive option on the General Settings page of the Data-Viewer configuration screen.
| Step |
Action |
Result |
| 1. |
Click Add New Item to create a new item 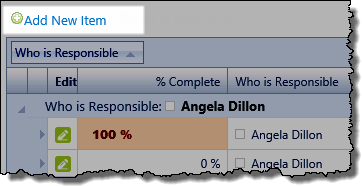 |
The appropriate New Item Form will be displayed.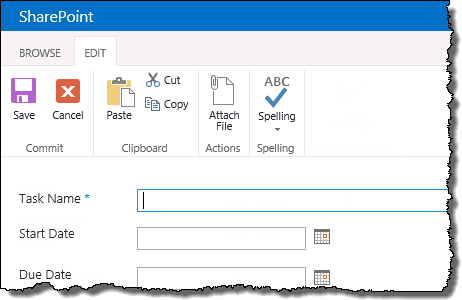 |
| 2. |
Clicking Save on the new item form will return you to the Data-Viewer display. The new item will be included in the Data-Viewer display. Otherwise, click Cancel to close the new item form without creating an item. |




 ).
).  ) in Data-Viewer 3.7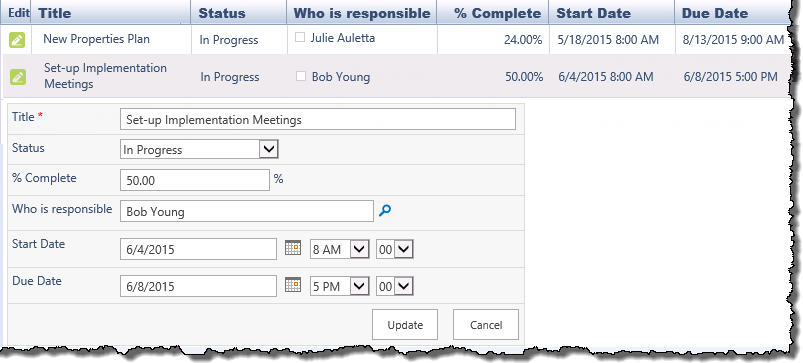
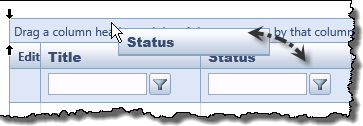 Group data by clicking the heading for the column you wish to group by, dragging it to the grouping bar, and dropping it.
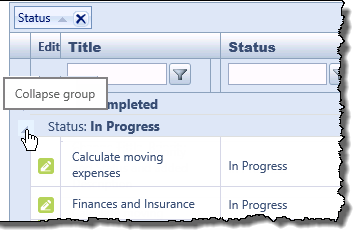 When the header is dropped in the grouping bar, the data is grouped.
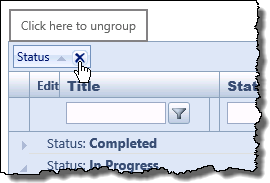 To ungroup the data, simply click the ungroup icon (
 ).
).

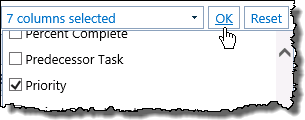
 Click OK