Task Master Glossary of Terms
Top
The terms listed below are words that are commonly used in task and resource management, scheduling and other related practices. There are also explanations for what some of the functions in Task Master are.
% A B C D E F G H I J K L M N O P Q R S T U V W X Y Z
%
% Complete: The percentage of the duration that actually is completed for the task (or sub-tasks, if a summary task). For more information on how % Complete is calculated, read this Microsoft KB.
% Work Complete: The percentage of work that is completed for the task (or sub-tasks, if a summary task). % Work Complete is calculated the same way as % Complete, but using the Actual Work and Work fields instead of Actual Duration and Duration.
A
Actual Cost: Based on the percentage of the cost.
Actual Cost (Enter): This field allows you to manually enter the Actual Cost if you want to replace Actual Cost, which is automatically calculated by the application.
Actual Duration: The actual span of a task from start to finish, based on % Complete.
Actual Finish: The date when an assigned resource is actually finishing working on a task.
Actual Start: The date when an assigned resource actually begins to work on a task.
Actual Work: The actual percentage of the work that the resource has completed.
Actual Work in Days: The actual percentage of the work in days that the resource has completed.
Actual Work in Hours: The actual percentage of the work in hours that the resource has completed.
**
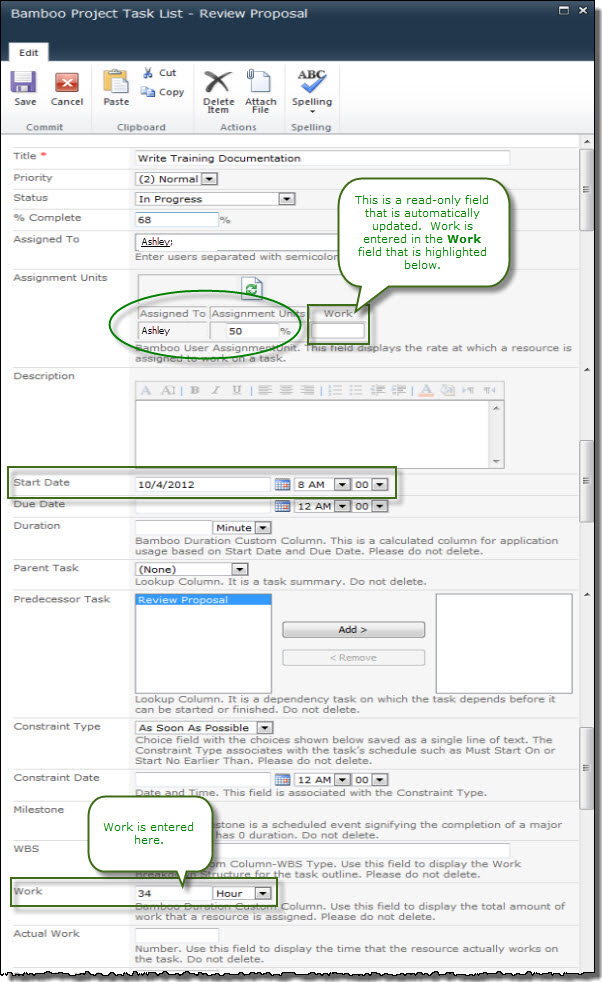
Assigned To: The resource that has been delegated to a task, risk, issue, etc.
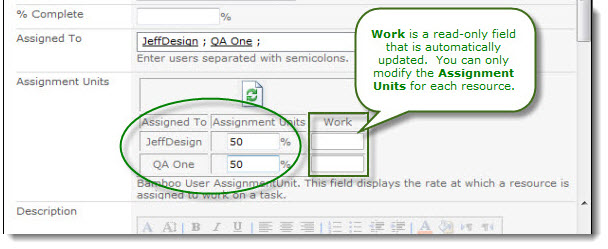
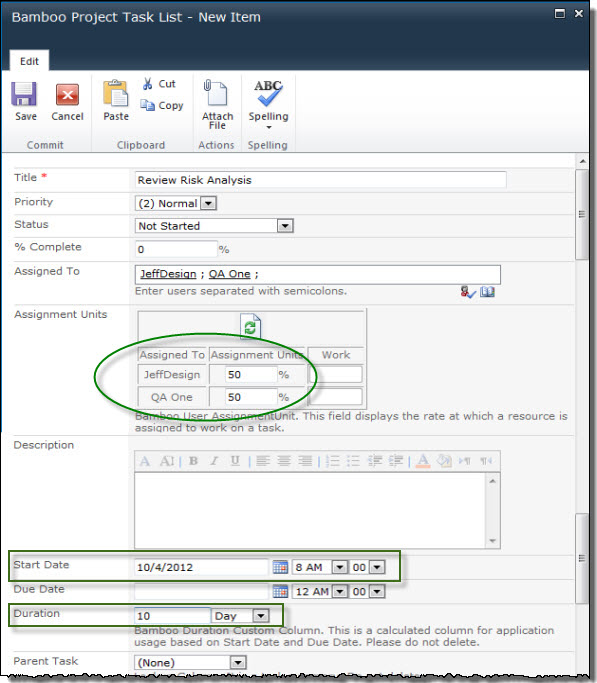
Assignment Units: Determines the assigned resource’s allocation to a task, such as 50% or 100%.
Top
B
BSC: Balanced scorecard–a performance management tool used to keep track of the execution of the activities by staff members.
C
Child Task: The subtask of a Parent Task or Summary Task.
Constraint: Applied to a task to restrict how the task’s start and finish dates are calculated. Use constraints when you need to control the start or finish date of a task. See Constraint Type.
Constraint Type: Constraints are applied to a task to restrict how the task’s start and finish dates are calculated. See Constraints. Constraint Types include:
- As Soon As Possible (ASAP): Schedules the task to begin as early as possible. Do not enter a start or finish date with this constraint. This is the default choice.
- Start No Earlier Than (SNET): Schedules the task to start on or after a specified date. Use this constraint to ensure that the task does not start before a specified date.
- Start No Later Than (SNLT): Schedules the tasks to start on or before a specified date. Use this constraint to ensure that the task does not start after a specified date.
- Must Start On (MSO): Schedules the task to start on a specified date.
- Critical Path: The longest path to finish a project. It includes the series of tasks that dictate the finish date for the project. If one task in the critical path is delayed, the project finish date will change.
Critical Task: A task that has zero Total Slack: the task is in the Critical Path. Critical tasks cannot be delayed without affecting the project finish date.
Top
D
Days Overdue: The number of days an incomplete task is overdue. If Today > Due Date and % Complete < 100%, the task is overdue. The number of days it is overdue is the number of workdays between today and the Due Date.
Duration: The total span of a task from start to finish. Duration is calculated by (Due Date – Start Date)(Working Hours/Day)
E
Early Finish: The earliest date a task can finish based on the Early Finish dates of predecessor and successor tasks and other task constraints. This is the earliest date a task can finish if all predecessor and successor tasks also finish on their Early Finish dates.
Early Start: The earliest date a task can start based on predecessor and successor tasks and other constraints.
F
Finish: The date when an assigned resource is scheduled to finish working on a task.
L
Late Finish: The latest date a task can finish without delaying the project finish date.
Late Start: The latest date a task can start without delaying the project finish date.
Top
M
Milestone: A scheduled event that signifies the completion of a major deliverable. Milestones are used to monitor the project’s progress. Typically, they are tasks with a duration of 0 time units (such as hours, days or weeks).
O
Overallocation: Assigning more tasks to a resource than the resource can accomplish in the available working time.
P
Parent Task: Tasks that are made up of subtasks and that summarize those subtasks. Also called Summary Tasks.
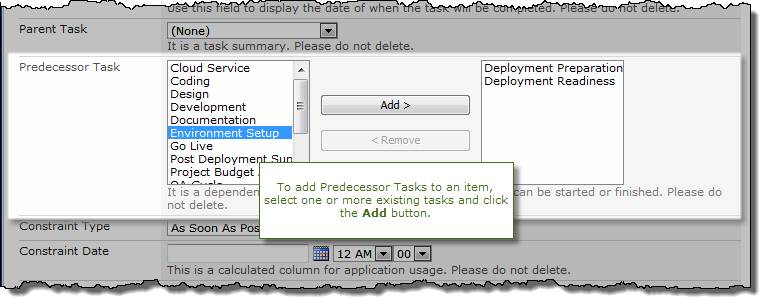
Predecessor Task: A dependency task on which the task depends before it can be started or finished.
R
Resource Allocation: How a resource is assigned to a task or project.
Top
S
Schedule Status: A status indicator based on the number of days a task is overdue. The indicator and number of days can be configured by modifying the Schedule Status column settings in the task list.
Start: The date when an assigned resource is scheduled to begin working on a task.
Summary Tasks: Tasks that are made up of subtasks and that summarize those subtasks. Also called Parent Tasks.
Top
T
Task Dependency: The relationship between tasks.
Total Slack: The amount of time a task finish date can be delayed without affecting the project finish date. A Total Slack of zero indicates the task is a critical task.
U
Units: The quantity that a resource is assigned to a task. See Assignment Units and Maximum Units.
W
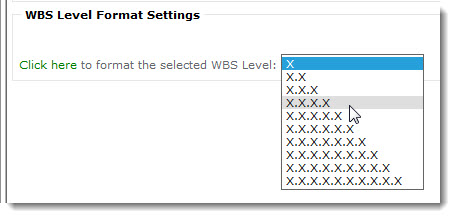
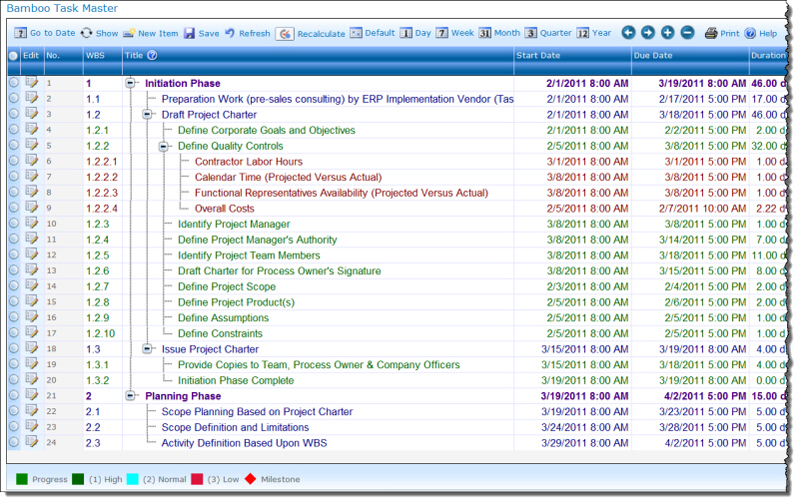
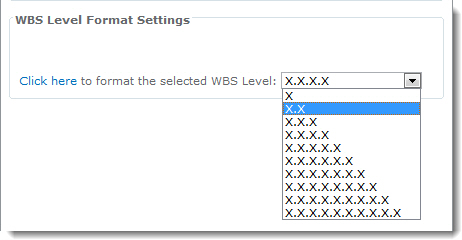
WBS (Work Breakdown Structure): A hierarchical structure used to organize tasks for reporting schedules and tracking costs. Tasks are typically grouped beneath their summary or parent tasks, with each level down representing an increasingly detailed description of the task deliverable. For example, the Parent Task Develop Application has a WBS of 1.0. It has two child tasks, Write Requirements Document, which has a WBS of 1.1, and Review Preliminary Build, which has a WBS of 1.2.
Work: The hours that the resource works on a task.
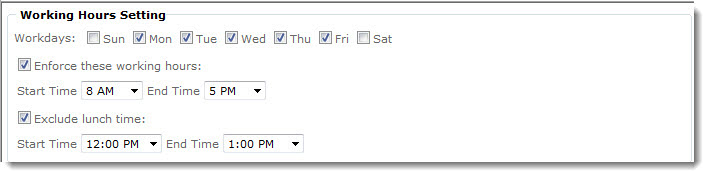
Workdays: The days of the week when work can be done on a project task. Workdays can be defined in the Task Master Web Part settings.
Working hours: The hours of the day when work can be done on a project task. Working hours can be defined in the Task Master Web Part settings.
Top
IMPORTANT: The new Telerik assemblies are deployed from Bamboo.Framework.wsp. Some Bamboo component products may error if there are older and/or newer versions of Telerik assemblies in the SharePoint environment.
 Select the first product component in the Components section in the Setup program. When a component is selected, information specific to it is displayed on the right side of the interface. Verify the
 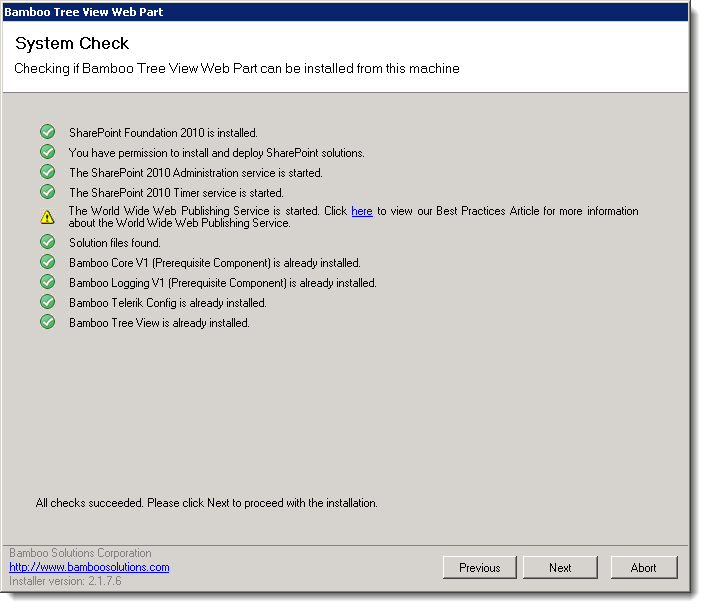 Click Next to begin the upgrade. Verify that the system checks pass successfully and click Next. If the system checks do not pass, you will not be able to proceed.
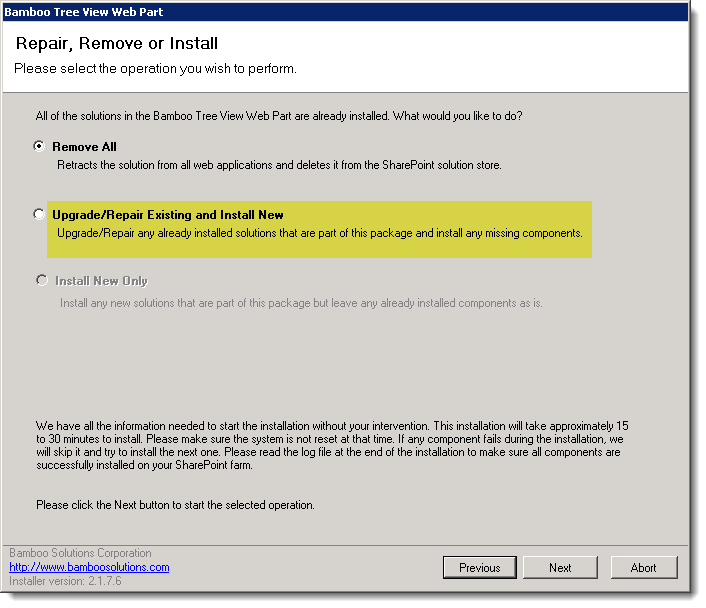 In the Repair, Remove or Install screen, select the Upgrade/Repair Existing and Install New option and click Next.
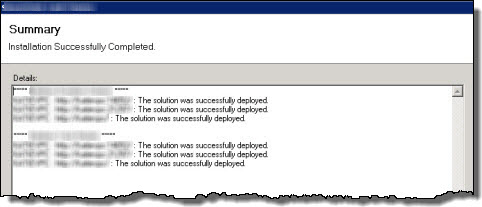 When the upgrade is complete, click Next to review the Summary screen and confirm that the product upgrade was successful. You may need to scroll up to review the entire summary. When satisfied, click Close.
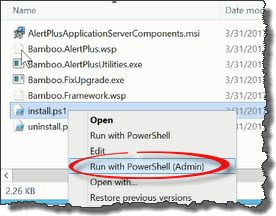 Run the Install.ps1 from a WFE server in PowerShell as an admin.
 The script will look for WSPs in the install folder and list those found.
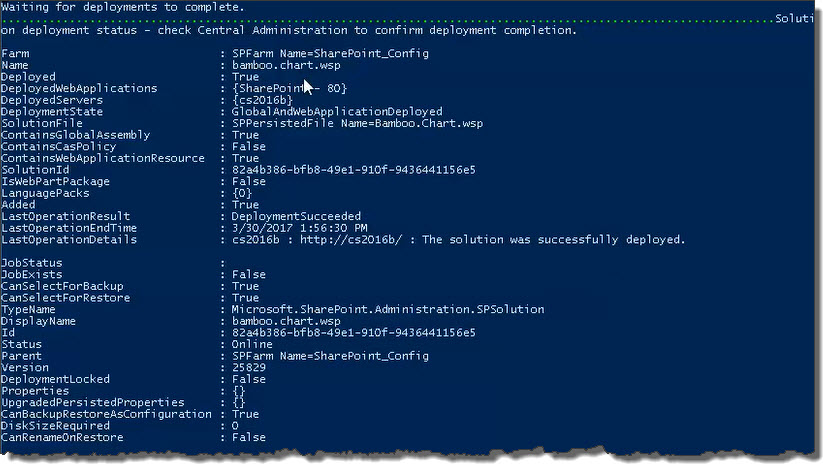 When the deployment completes, deployment status information will be displayed for each solution.
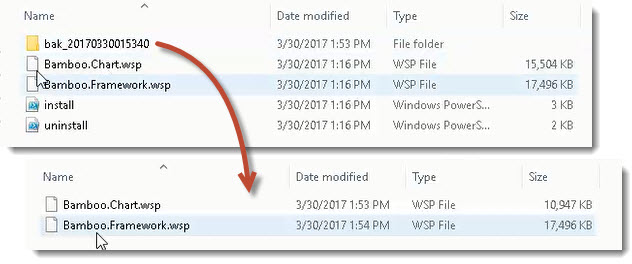
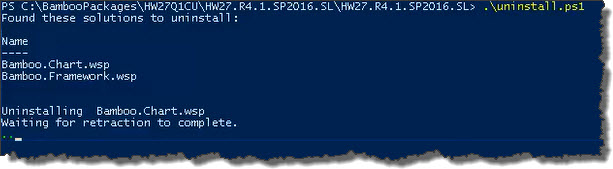 The script will look for WSPs in the install folder and list those found. It will uninstall them in alpha order.

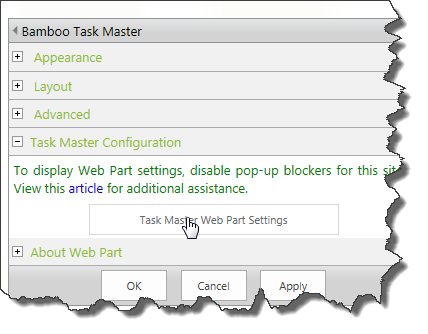
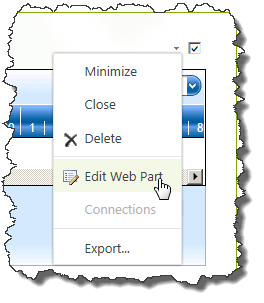
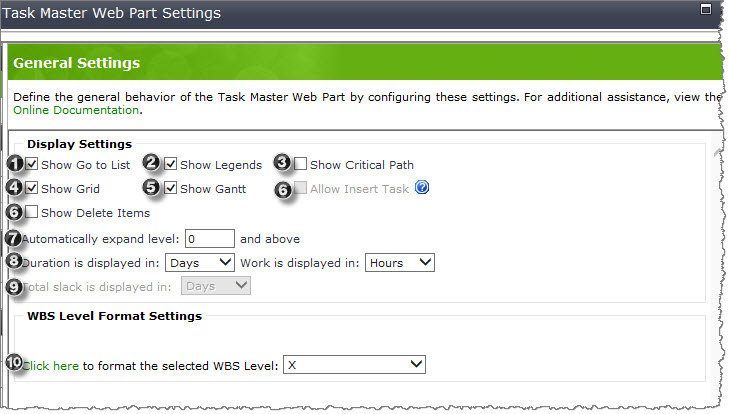 Click on a category name below for details about the options available in the Preferences section of the Web Part Settings. To edit Task Master Web Part Settings, edit the Web Part properties and click the Task Master Web Part Settings button in the Web Part tool pane.
 is displayed next to each task in the task list so that users can click the Insert Task icon.
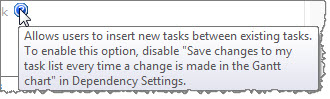
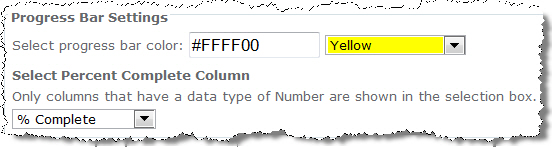 Use these settings to configure the progress bar for tasks in the Gantt chart.
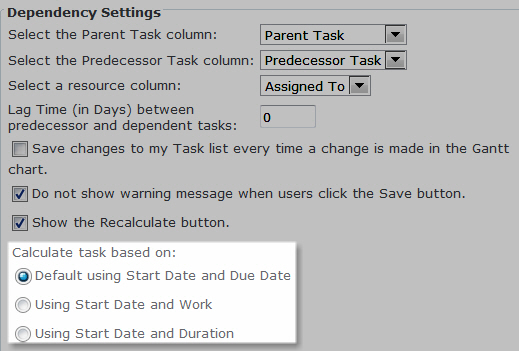
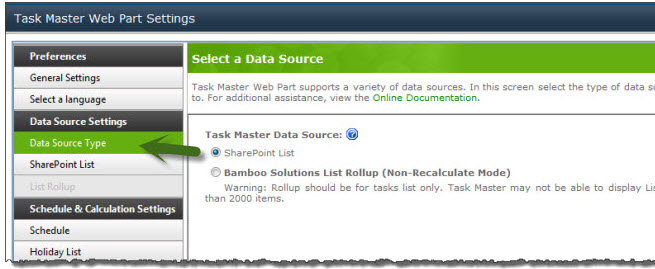 Click on a category name below for details about the options available in the Data Source Settings section of the Web Part Settings.
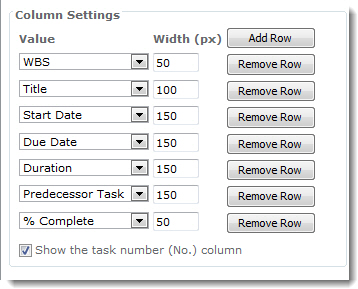 Column Settings: Configure these settings to display specific columns in the task grid.
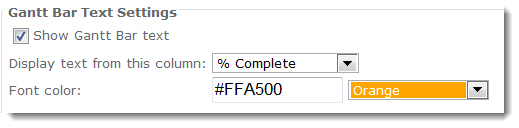 Gantt Bar Text Settings: Configure the settings for the text that is displayed next to the task bar in the Gantt chart.
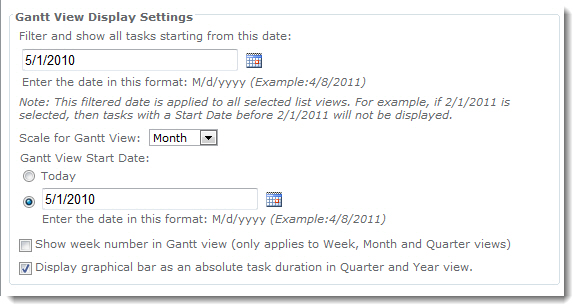
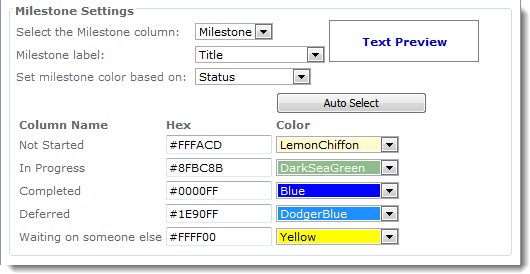 Configure the appearance of milestones in the Gantt chart.
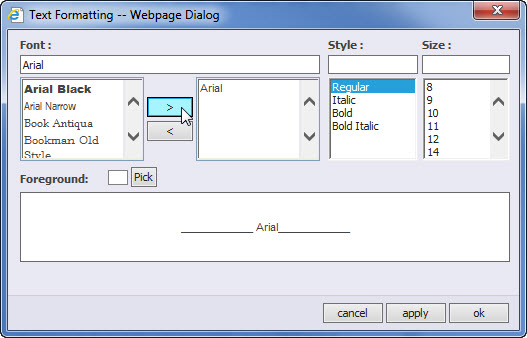
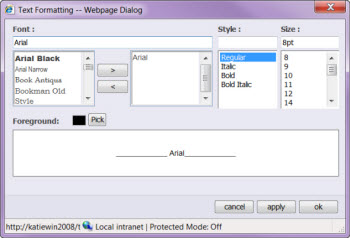 Click inside the box next to the Milestone label column drop-down list to set formatting for the Milestone label text. A dialog box is displayed so that you can choose font color (Foreground > Pick), font size and font style.
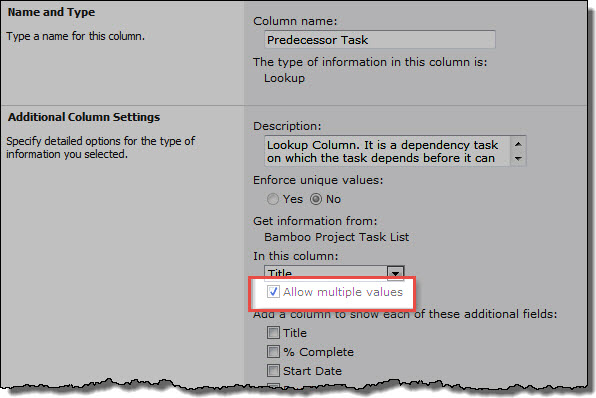


 Configure the color of the Gantt bar for any Choice column in the task list, such as Constraint Type, Priority or Status. Color coding is automatically added to the Task Master legend (if displayed).
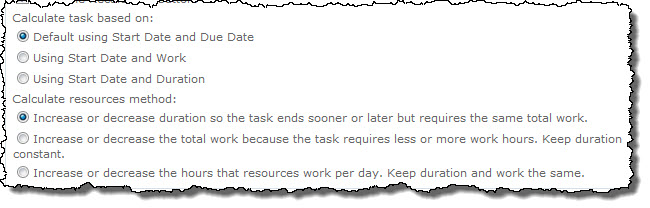
 Assign tasks using Start Date and Work if you know how much work is required to complete the task and when your resource can start working on the task. You can only use this option if the task is assigned to a resource in the Assigned To column.
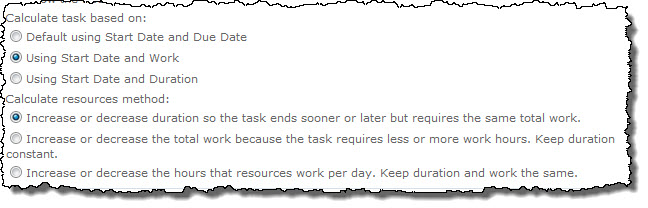
 ) at the top of the components list to return to the Setup main page.
 To start editing the settings for Task Master,