Creating a project site template allows you to reuse sites that have already been configured and/or “lightly” customized to help ensure standardization across project sites, and reduce administrative overhead.
When creating a customized PM Central project template keep in mind:
-
When a newer version of PM Central is installed your existing PM Central sites will be updated, but your customized template, stored as a .wsp file in the Solutions gallery, will not get updated.
-
We strongly recommend that the project site that is modified in the steps below for the purpose of creating the project template be maintained strictly for the purpose of creating future templates.
How to create a template:
| Step | Action |
|---|---|
| 1. | Create a new PM Central project site |
| 2. |
Configure the project site to meet your business requirement. This can include, but is not limited to:
|
| 3. | Select Site Settings from the Site Actions drop down menu on the project site |
| 4. | Click Save Site as Template |
| 5. | Enter a File Name and a Template Name 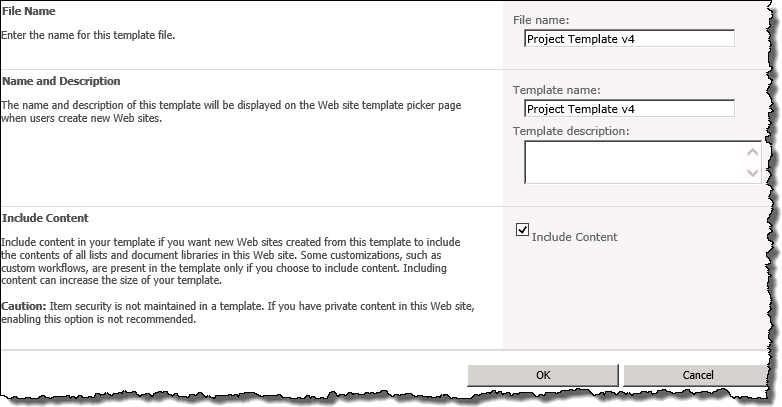 |
| 6. | Select the checkbox to Include Content and click OK |
| 7. | Recommended: Verify that the project status in the Project Health list is not Active and enter text in the Project Name field to advise that the site should not be deleted e.g., Project Template Site – DO NOT DELETE. |
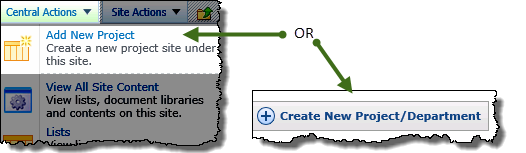
| 8. |
OR From the Central Actions drop down menu, click Add New Project |
| 9. | Edit the page and access the Bamboo Site Creation Plus configuration tool pane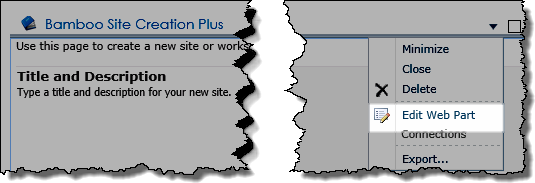 |
| 10. |
Select the new template from the Site Template drop down selector.
|
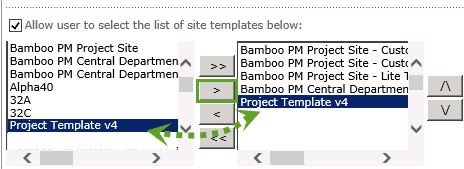
| 11. |
From the Allow user to select the list of site templates below selector box, add the newly created project site template to the list of available site templates on the right.
|
| 12. | Click Save. You will need to stop editing the page to see the changes in the Bamboo Site Creation Plus web part. Additional information on how to configure Site Creation Plus is available here. |

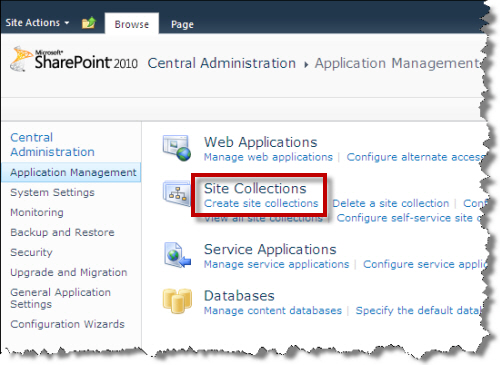
 In Central Administration, navigate to Application Management > Site Collections > Create Site Collections.
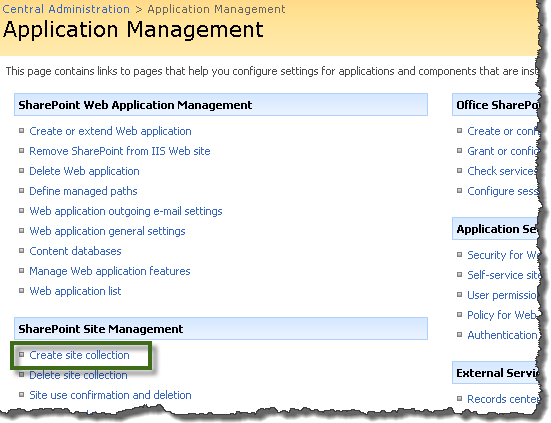
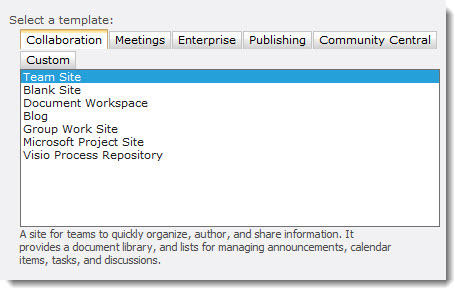 On the Create Site Collection page, fill in the information as you would to create a regular site collection. However, be sure to select Team Site in the Collaboration tab as the template for the top level site.
 Set up PM Central
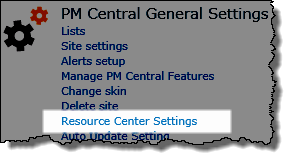
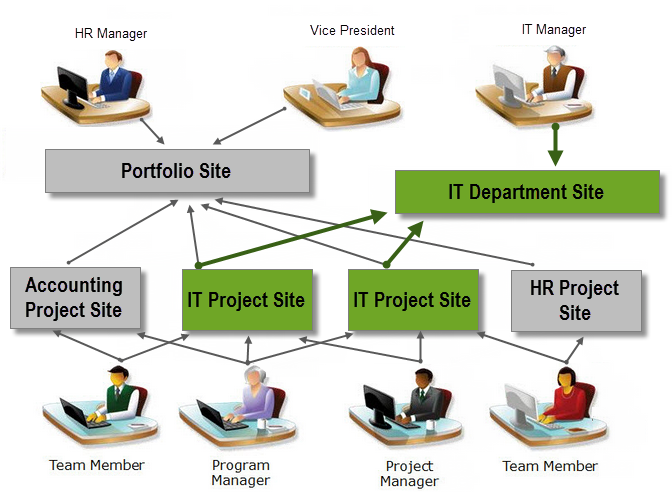 When working with Department sites keep in mind:
 You will find many of our products complement each other quite nicely saving you the time and trouble to write custom code. With Bamboo at the heart of your SharePoint investment, you gain access to a huge catalog of enhancements, components, and accessories that add the critical functionality your business requires.


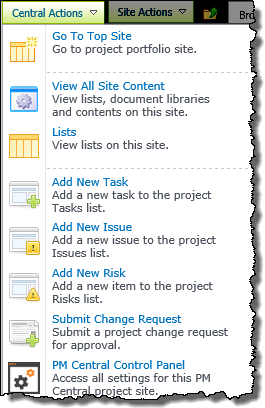
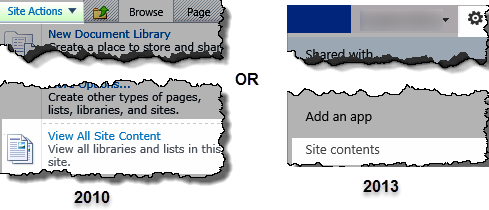
 to access the Central Actions menu on SharePoint 2013
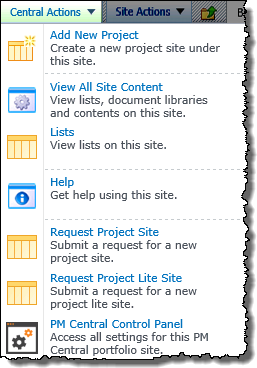
 Request Project Site & Request Project Lite Site: Allows users without access to the Add New Project option, or companies who have an approval process for new project sites, to submit a project site request for approval.
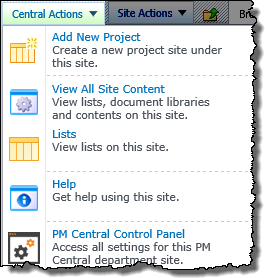
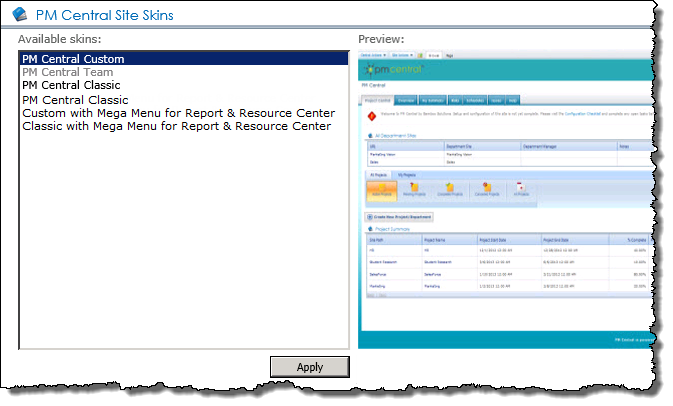
 From the site where you want to change the skin go to Central Actions > PM Central Control Panel
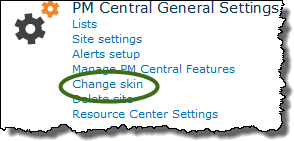
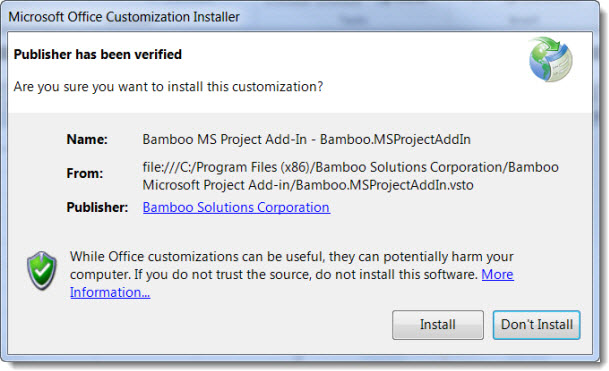 Select Program Files (x86) > Bamboo Solutions Corporation > Bamboo Microsoft Project Add-in > Bamboo.MSProjectAddin.
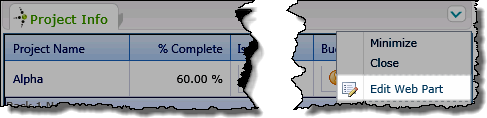
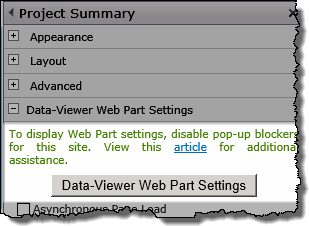
 Click SharePoint List and Library if you are editing the Project Info display on the project site
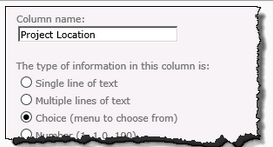
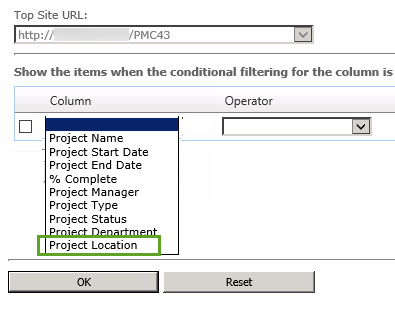
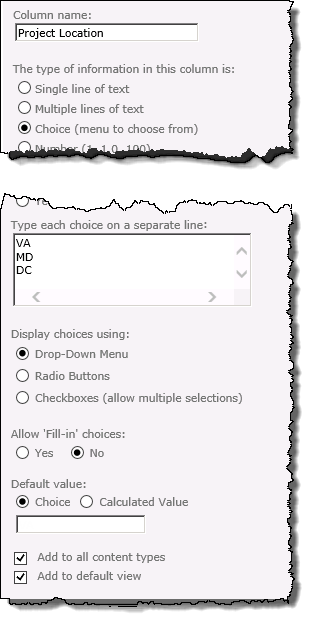
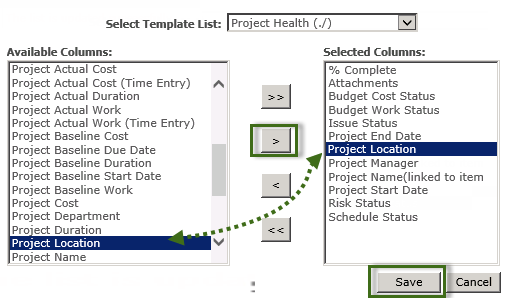
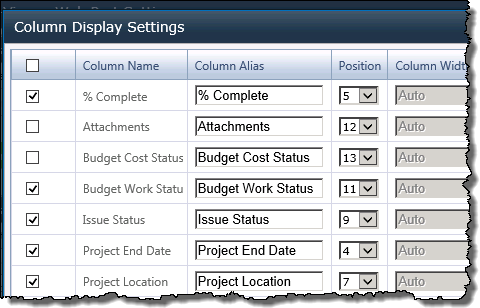
 You have added a custom column, Project Location, to the Project Health lists associated with your PM Central portfolio and project sites.
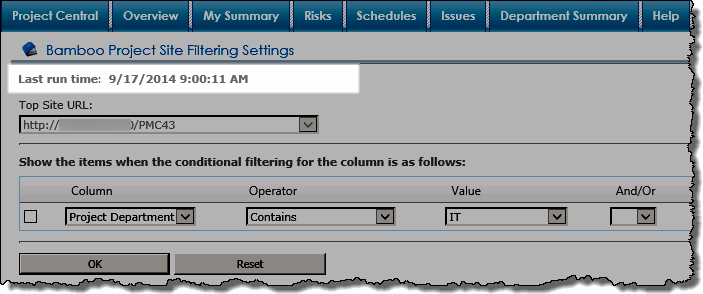
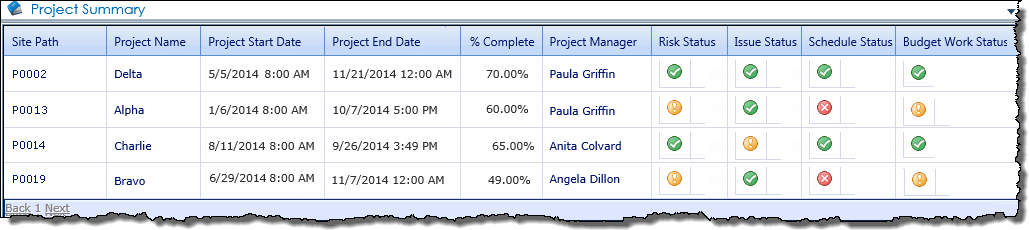


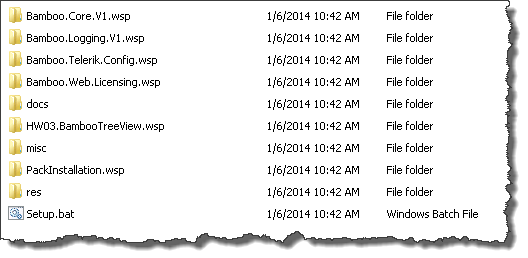 When you extract the product EXE to a location on your SharePoint server, several folders are created that contain installation files and Setup program configuration files. The root level of the extracted file system includes the file Setup.bat, which launches the Setup program. The list below shows the installation files for the Tree View Web Part, as an example.
 As you look at each product’s documentation page, you will see there is a link to the Release Notes for that product at the top of the page.