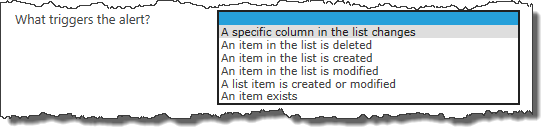
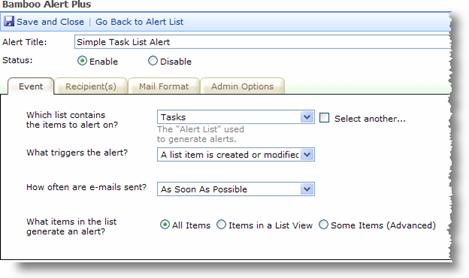
When configuring an alert, one of the most important considerations is the trigger type. The trigger type determines how the alert is triggered. The available options are shown in the screen shot below.
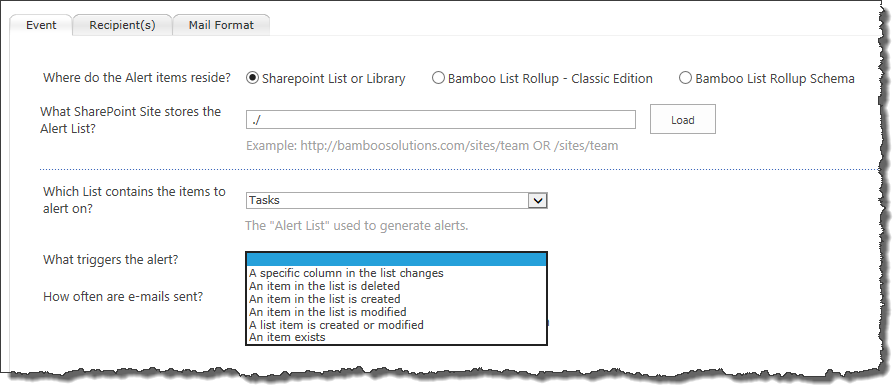
While all trigger types are available when alerting on SharePoint Lists or Libraries, some are not available when alerting on the contents of the List Rollup. Refer to the table below for more information about each trigger type. The List Rollup column indicates whether the trigger is or is not available for List Rollups.
| Type | Description | List Rollup? |
|---|---|---|
| A specific column in the list changes |
Use this trigger type when alerting on a SharePoint List or Library when you want to watch the value of a specific column (or a few columns). When an alert with this trigger is created, an event handler is added to the list and every change to items in the list are tracked in the Alert+ AlertchangeList list.
|
No |
| An item in the list is deleted |
Use this trigger type when alerting on a SharePoint List or Library when you want to send an alert when an item is deleted. When an alert with this trigger is created, an event handler is added to the list and every time an item is deleted, the action is tracked in the Alert+ AlertchangeList list. |
No |
| An item in the list is created. | Use this trigger type to send an alert when an item is added to a SharePoint List or Library or to the lists/libraries included in a Bamboo List Rollup. | Yes |
| An item in the list is modified. | Use this trigger type to send an alert when an existing item in a SharePoint List or Library or in any of the lists/libraries included in a Bamboo List Rollup is modified. | Yes |
| An item in the list is created or modified |
Rather than create a separate alerts of when items from the same source (SharePoint List/Library or Bamboo List Rollup) are created and modified, use this trigger type to create only one alert.
|
Yes |
| An item exists |
Use this trigger to type to send reminder emails. This type of message isn’t triggered when data changes, but when an item exists under certain conditions. It is not currently possible to send these types of alerts from SharePoint out-of-the-box. When this trigger type is selected, the number of Follow-up Wait Days must be entered. Because alerts with this type of trigger are often processed by the As Soon As Possible timer job, it is important to specify how long to wait between successive email messages. Enter the number of days to wait before alerting on the same item again.

|
Yes |
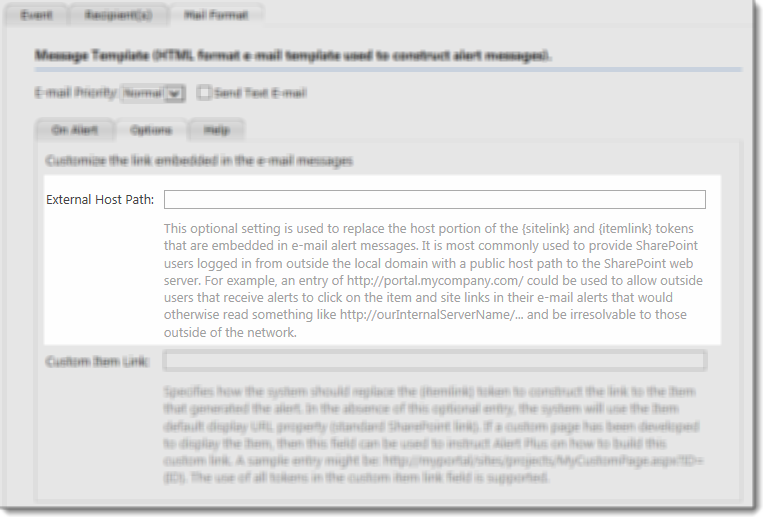 Configure an External Host Path on the Options page of the Mail Format tab.
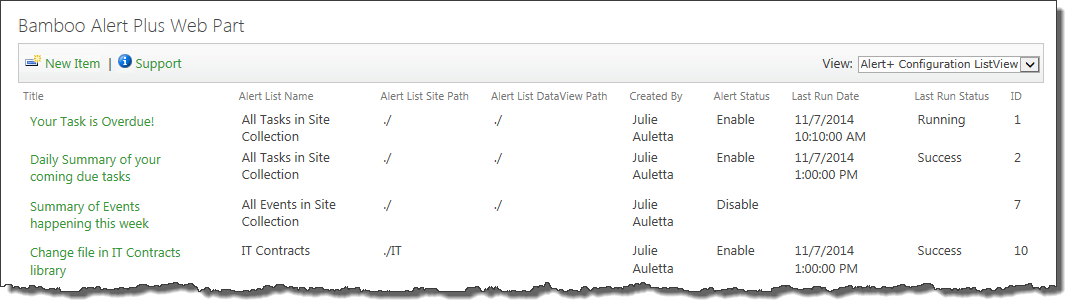

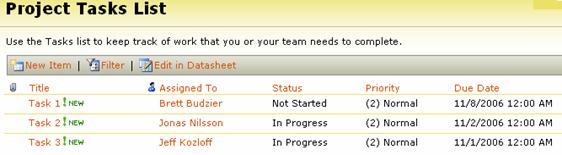
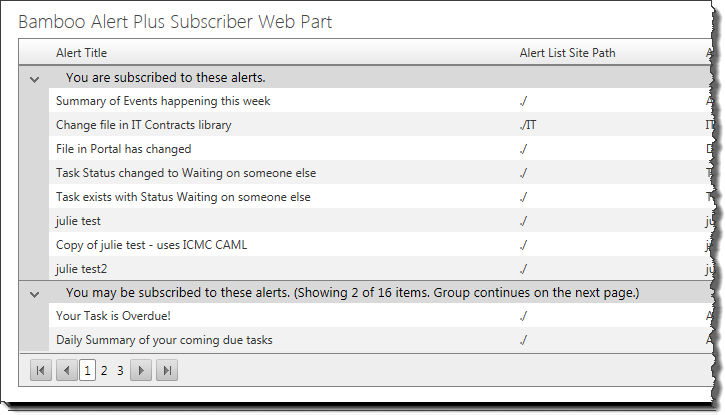 Some users may see a grouped view, as shown here. The group called You may be subscribed to these alerts appears if alerts are configured for items like Tasks where the alert is sent to the task assignee. In other words, the recipient is not specifically defined.
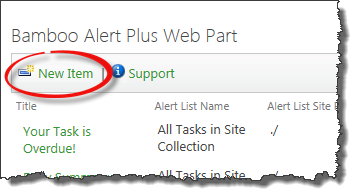 From the Alert Plus toolbar, click New Item.
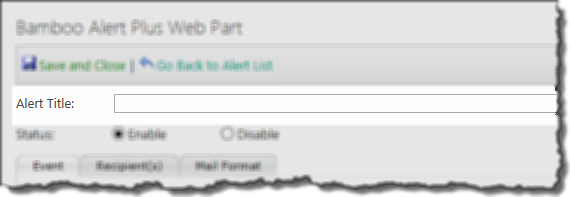 Give the new alert a title. You won’t be able to save the alert without a title.
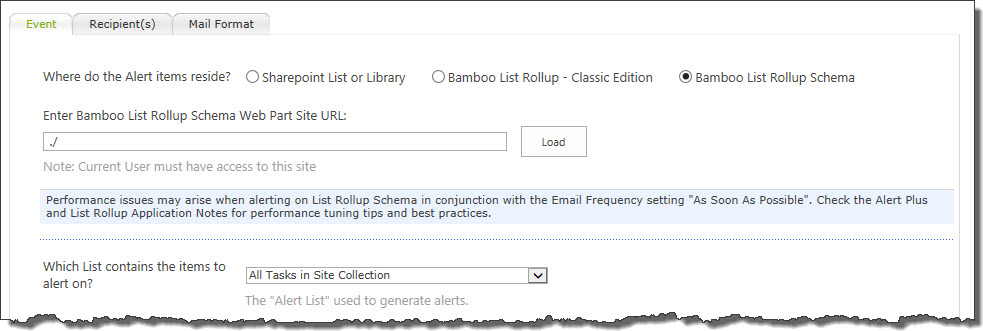

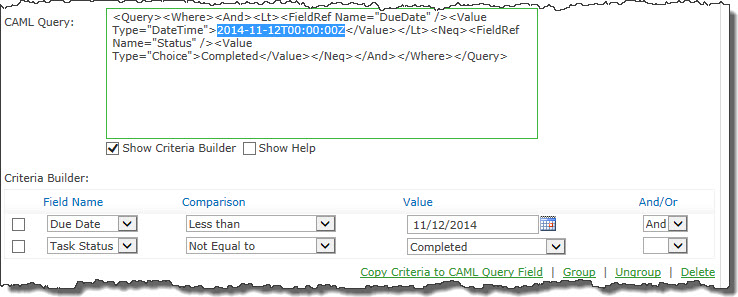 Highlight the date value entered, as shown here:
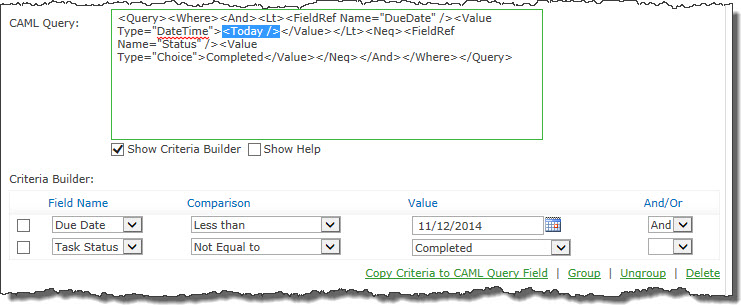 Enter <Today /> where the date value was, as shown here:
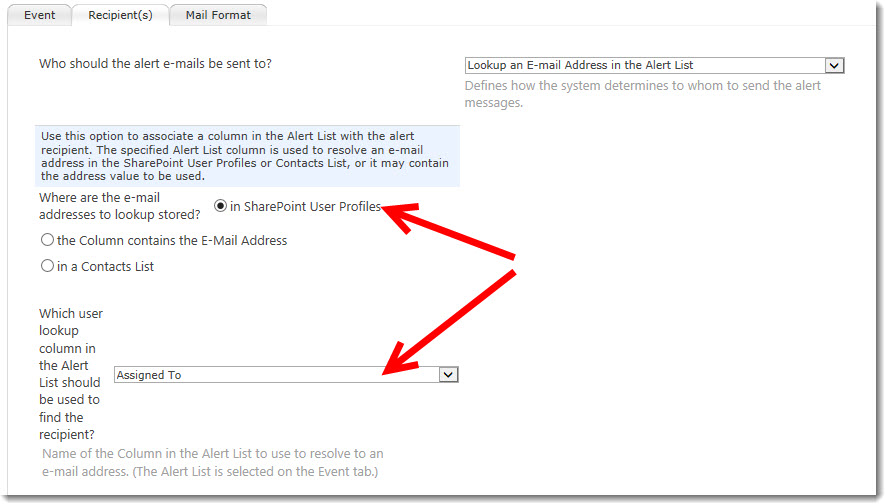

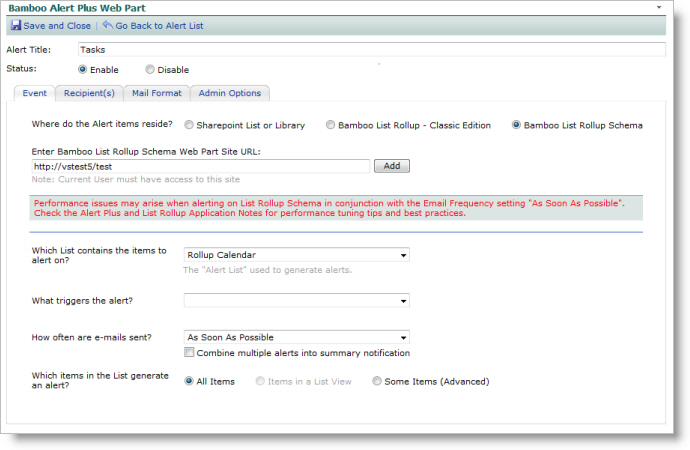
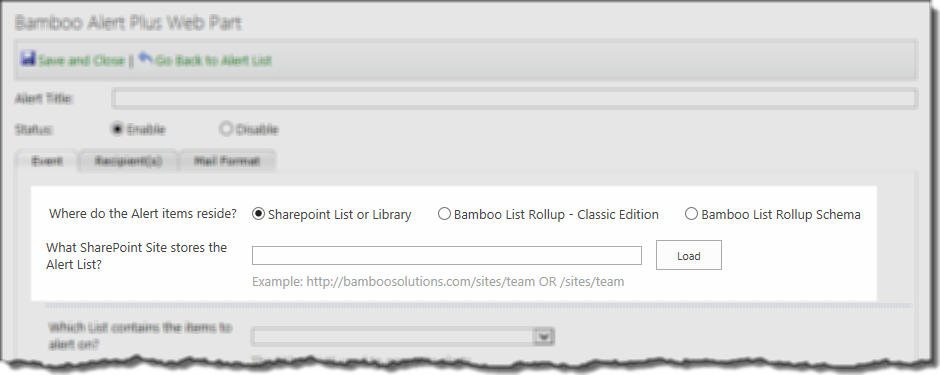
 Alert Plus has three tabs where parameters for an alert need to be configured.
 Alert Plus is very flexible and has a variety of ways you can set up alerts. Configure the Alert Plus Event Tab following the steps below.
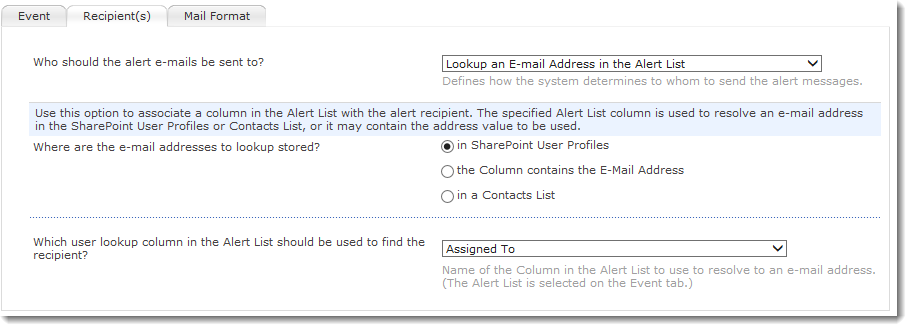
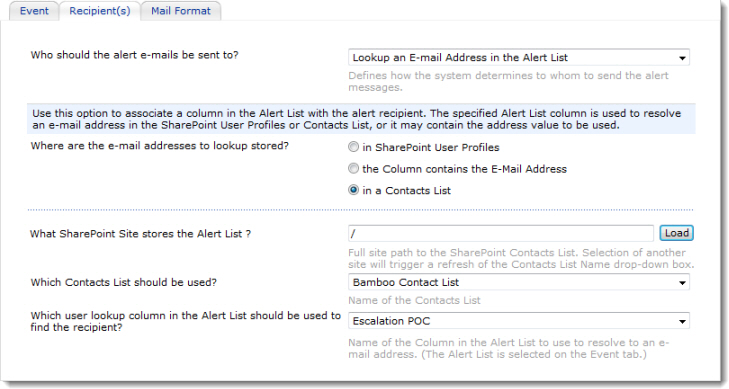
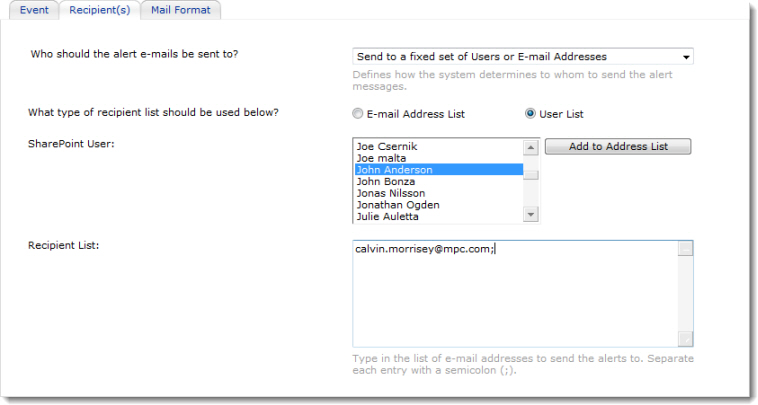
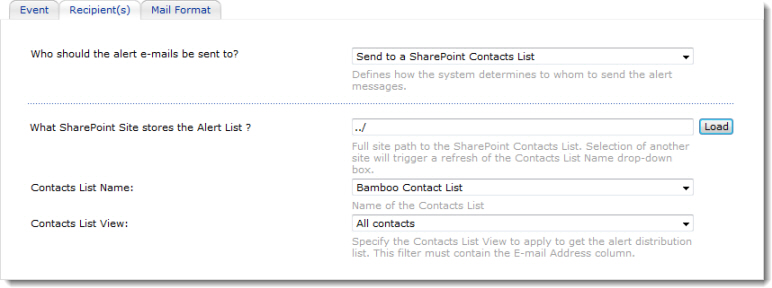
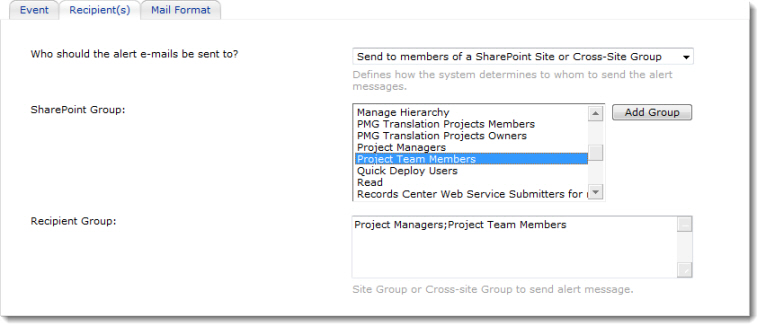
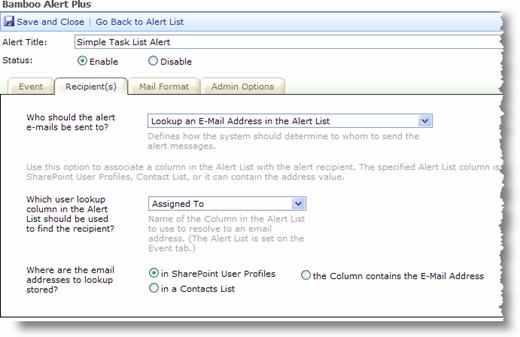
 On the Recipient tab, define how the system determines to whom the alert messages will be sent. With the variety of options available to you in Alert Plus, you might be wondering which is the better one to use? The simplest option is to set an alert to send to yourself. This choice is often used when setting up a new alert. Send the message to yourself as you work through the configuration for the first time so that you see the results and can modify anything as needed. When you are ready to establish your notifications, you can define the alert recipients several different ways.
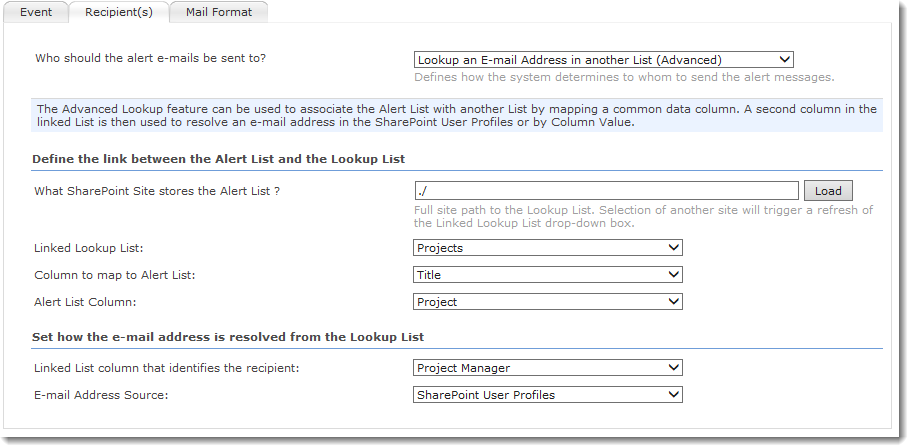
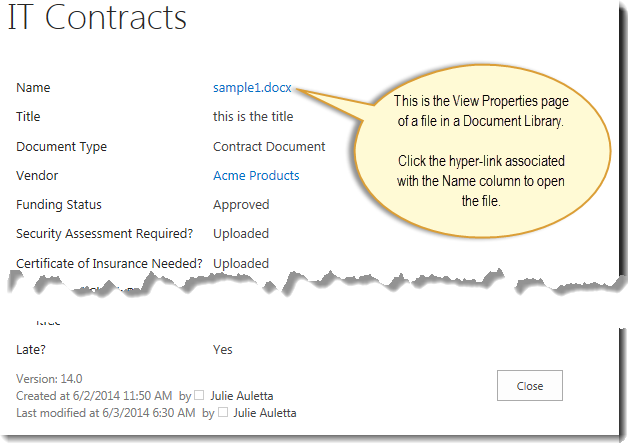 In other words, when your users click on the default link they see the meta data for the document in the document library and need to click on the link there to view the file. For some, this is one too many clicks.
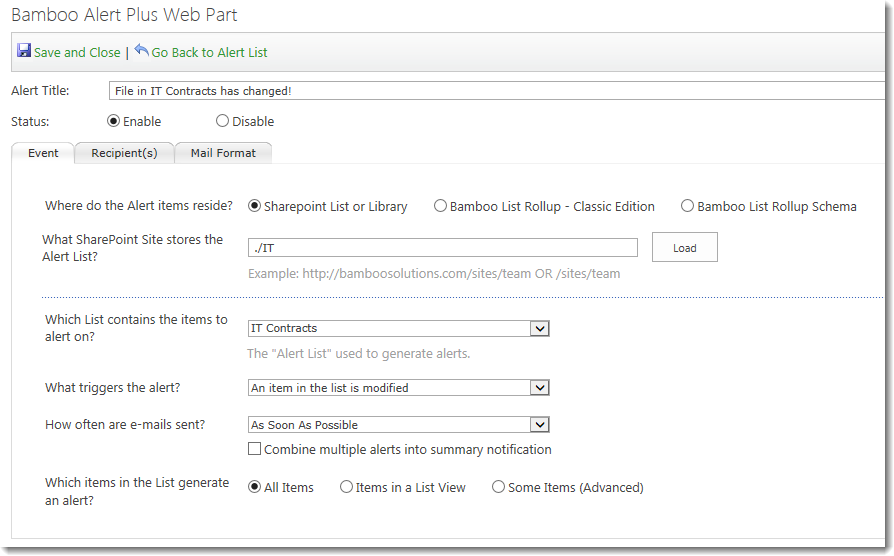


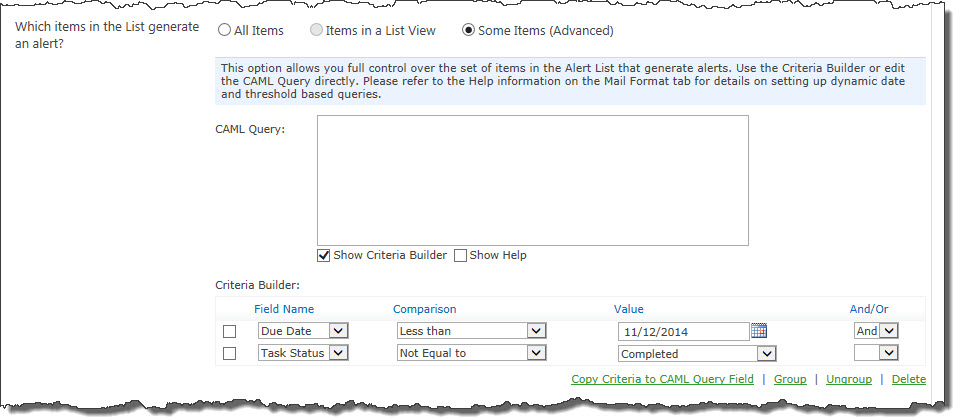
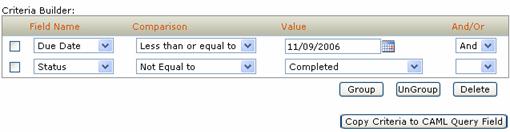
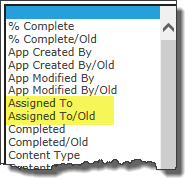 When you choose this trigger type, the contents of the Field Name lists in the Criteria Builder change. Two entries appear for each column in the list or library. One entry is the normal column name and the other is the normal name with /Old at the end.
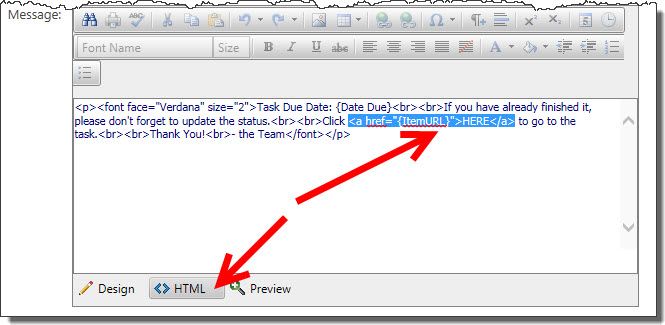
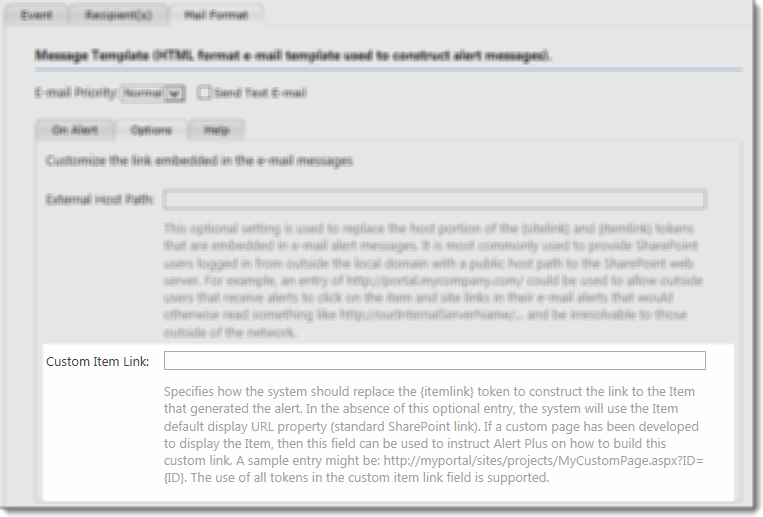 Configure a Custom Item Link on the Options page of the Mail Format tab.
 Choose how often emails are sent and whether to combine alerts for multiple items in a single message.
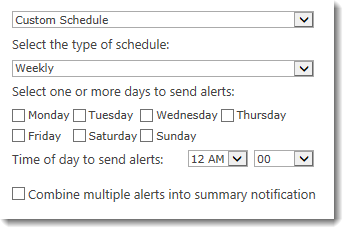
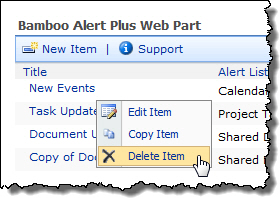
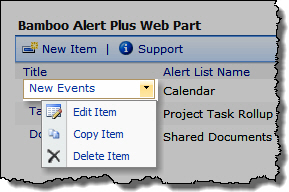 To edit an existing alert in Alert Plus, click the Title of the alert or select Edit Item from the drop-down menu for the alert Title.
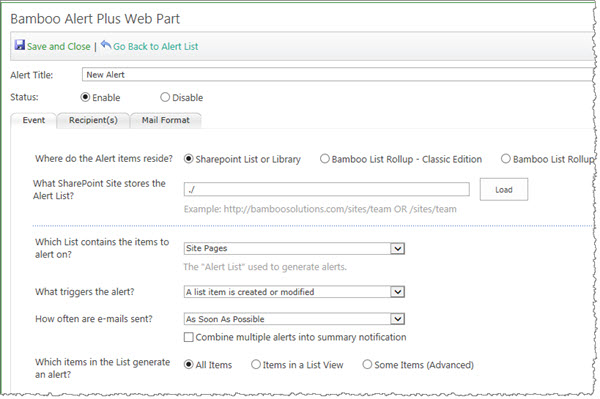 Make your changes and then click the Save and Close button in the Alert Plus toolbar to save the updated alert configuration.
 On the Event Tab, specify the frequency of the alert.
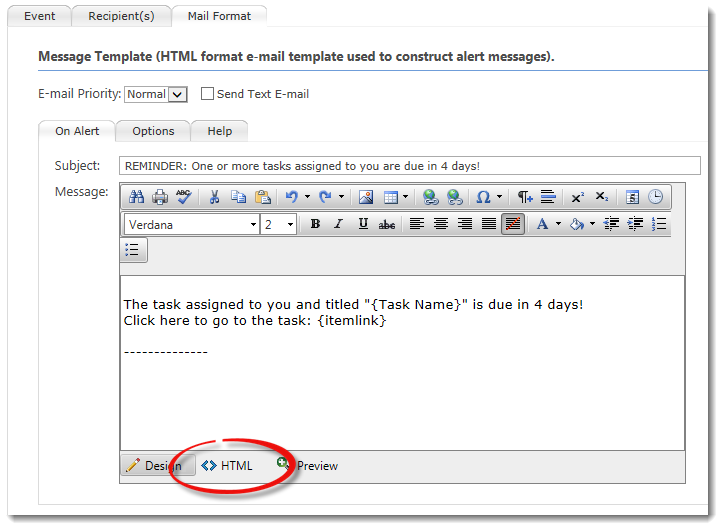
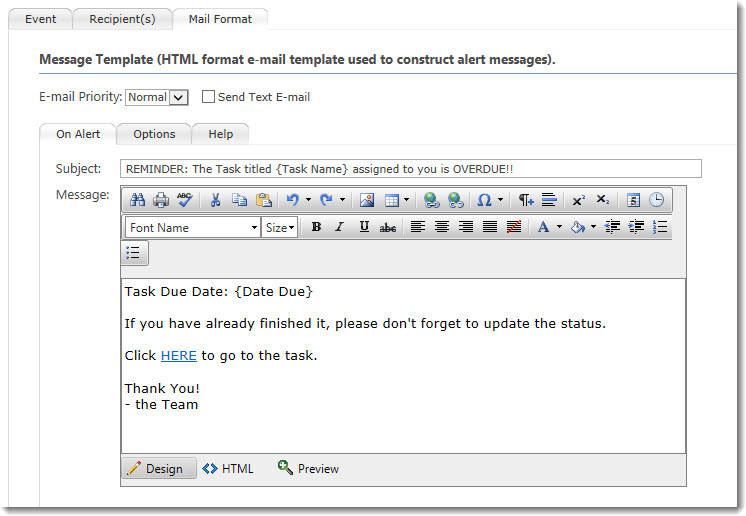
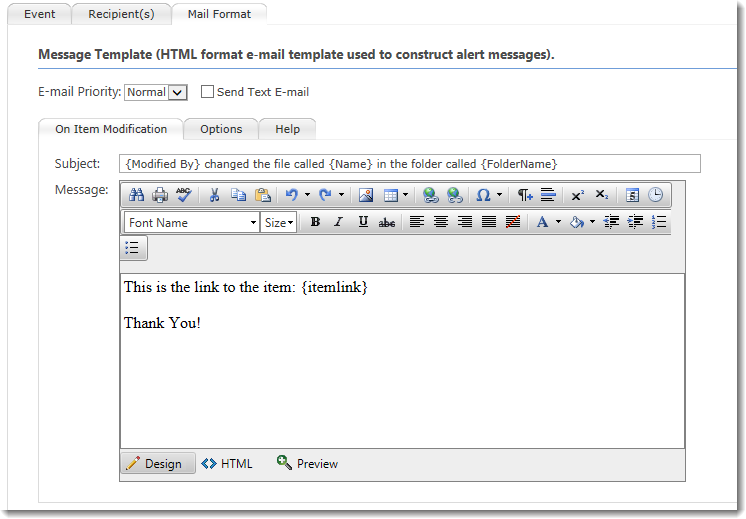
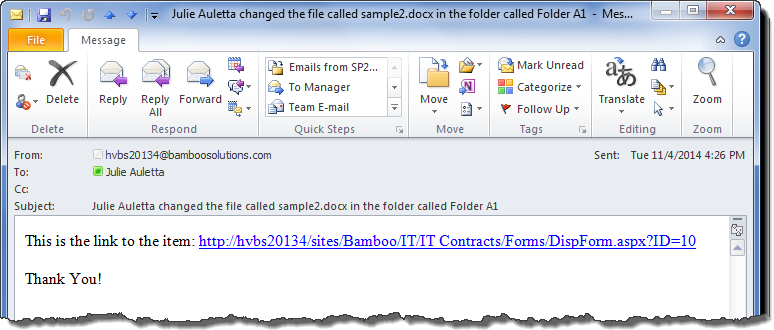
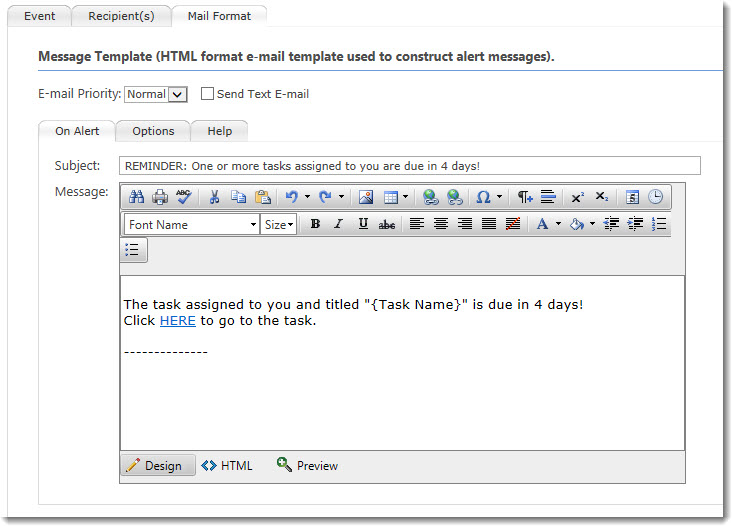 1. This format…
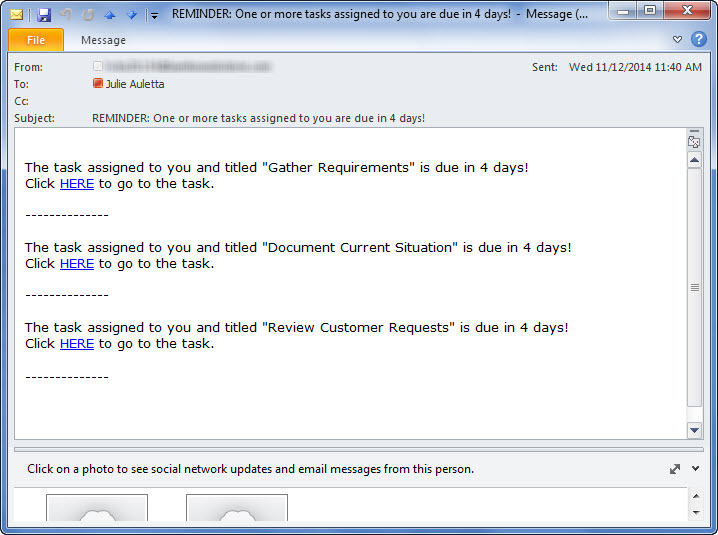 Generates an email that looks like this.
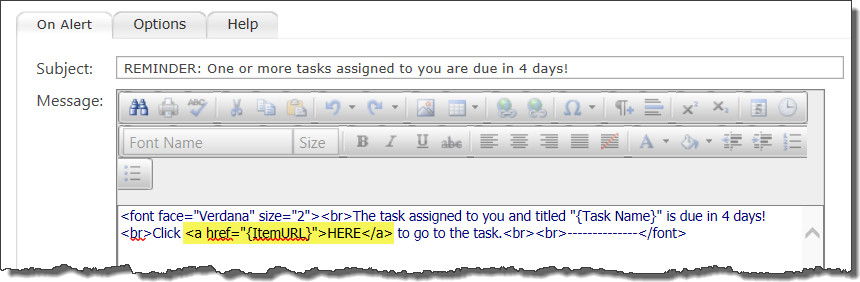
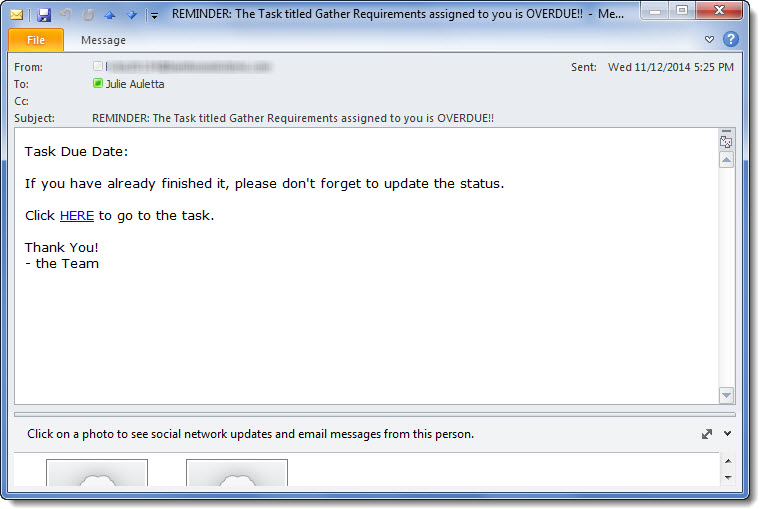
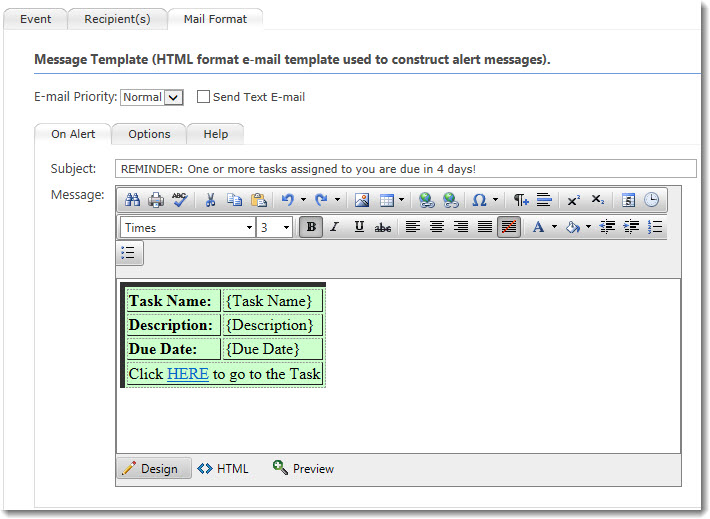 2. This format…
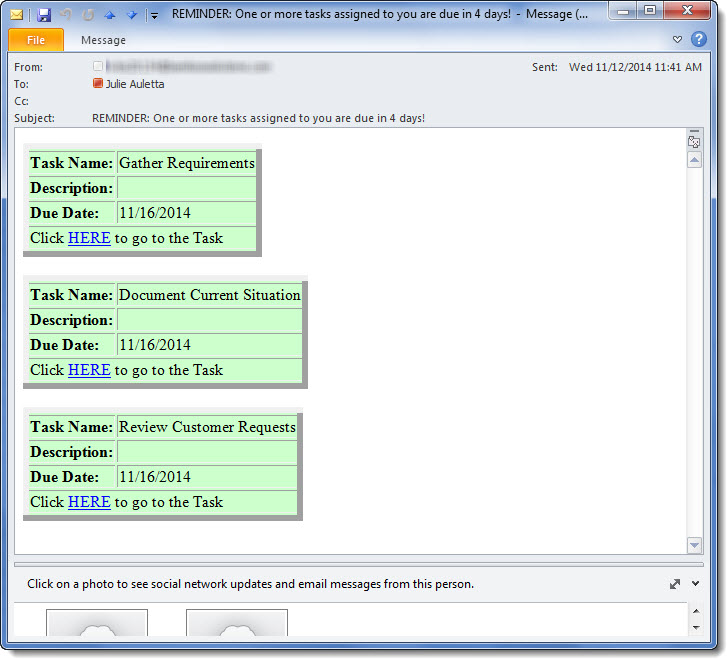 …generates an email message like this:


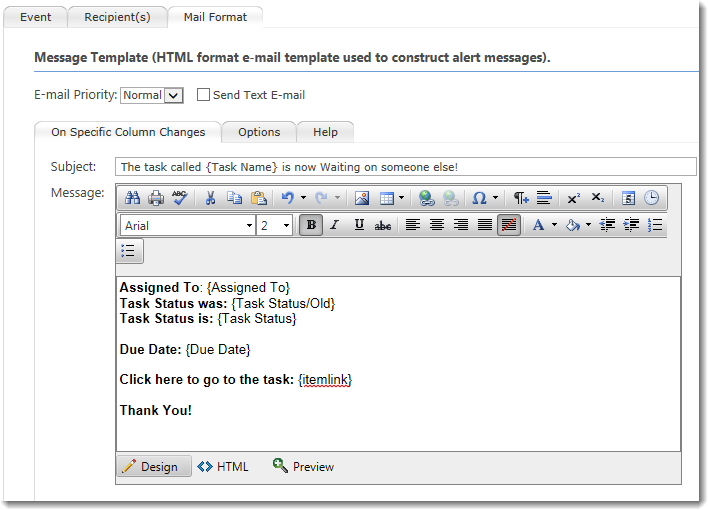
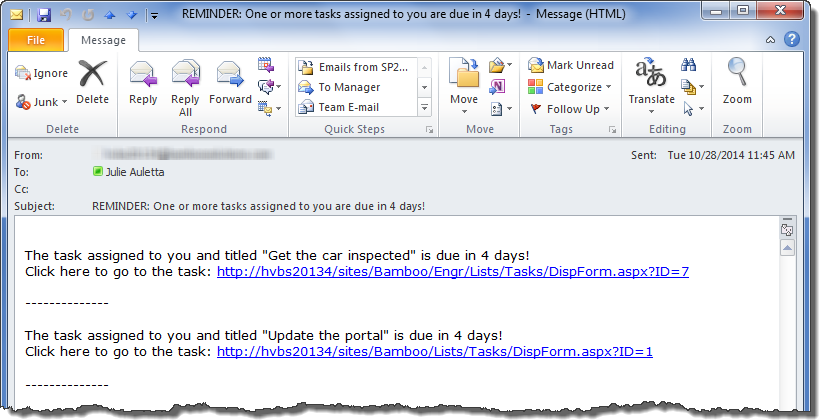 When you use the {itemlink} token in the body of your email message, the URL to the item that triggered the alert is displayed in the message, as shown here.