Release Notes for Calendar Plus
NOTE: Release Notes will open in a new browser tab
| WSSv3/MOSS |
SharePoint 2010 |
SharePoint 2013 |
SharePoint 2016 |
| Release Notes |
Release Notes |
Release Notes |
Release Notes |
Microsoft ended mainstream support for SharePoint 2007 in October 2012. See Microsoft’s Lifecycle Support Policy.
At that time, Bamboo stopped enhancements to our SharePoint 2007 product line, but continues to provide support and bug fixes to customers with active support contracts until October 2017. Previously purchased licenses will continue to function after October 2017, but support for these products will end, and no additional bug fixes will be provided beyond that time. Bamboo plans to cease selling new licenses and annual support contacts for its SharePoint 2007 products in October 2016 to ensure customers will be eligible to receive support for at least one year after purchase. |
Microsoft plans to end mainstream support for SharePoint 2010 in October 2015. See Microsoft’s Lifecycle Support Policy. At that time, we will stop any enhancements for our SharePoint 2010 product line but will continue to provide support and bug fixes for our SharePoint 2010 products to customers with active support contracts until October 2020. Previously purchased licenses will continue to function after October 2020, but support for these products will end, and no additional bug fixes will be provided beyond that time. Bamboo plans to cease selling new licenses and annual support contacts for its SharePoint 2010 products in October 2019 to ensure customers will be eligible to receive support for at least one year after purchase. |
Visit our website where you can get the latest info about each of our products for SharePoint 2013.
A separate installation package and license key is required for SharePoint 2013 deployment. For additional details, review the following knowledge base articles:
|
Bamboo Solutions has also begun releasing products for SharePoint 2016. For additional details, check the product release notes in the link above, or contact us.
For details on migration, see the Knowledge Base Article “Migrate Bamboo Products from SharePoint 2013 to SharePoint 2016”
|
Understanding Bamboo Releases:
- Bamboo offers Trial, Basic and Premium support.
- Free Trial support expires after 30 days.
- For more information about Basic and Premium support, please see the Support Plans page.
- There may be a fee to upgrade from a major version to another.
See Also:
Release Notes for Bamboo Premier
NOTE: Release Notes will open in a new browser tab
| WSSv3/MOSS |
SharePoint 2010 |
SharePoint 2013 |
| Release Notes |
Release Notes |
Release Notes |
Microsoft ended mainstream support for SharePoint 2007 in October 2012. See Microsoft’s Lifecycle Support Policy.
At that time, Bamboo stopped enhancements to our SharePoint 2007 product line, but continues to provide support and bug fixes to customers with active support contracts until October 2017. Previously purchased licenses will continue to function after October 2017, but support for these products will end, and no additional bug fixes will be provided beyond that time. Bamboo plans to cease selling new licenses and annual support contacts for its SharePoint 2007 products in October 2016 to ensure customers will be eligible to receive support for at least one year after purchase. |
Microsoft plans to end mainstream support for SharePoint 2010 in October 2015. See Microsoft’s Lifecycle Support Policy. At that time, we will stop any enhancements for our SharePoint 2010 product line but will continue to provide support and bug fixes for our SharePoint 2010 products to customers with active support contracts until October 2020. Previously purchased licenses will continue to function after October 2020, but support for these products will end, and no additional bug fixes will be provided beyond that time. Bamboo plans to cease selling new licenses and annual support contacts for its SharePoint 2010 products in October 2019 to ensure customers will be eligible to receive support for at least one year after purchase. |
Bamboo Solutions has also begun releasing Bamboo Apps to the SharePoint Store, for additional details, see the SharePoint Apps & Mobile products page where you can get the latest info about each of our Apps as they release to the Microsoft Store.
A separate installation package and license key is required for SharePoint 2013 deployment. For additional details, review the following knowledge base articles:
|
Understanding Bamboo Releases:
- Bamboo offers Trial, Basic and Premium support.
- Free Trial support expires after 30 days.
- For more information about Basic and Premium support, please see the Support Plans page.
- There may be a fee to upgrade from a major version to another.
See Also:
Release Notes for Alerts Administrator
NOTE: Release Notes will open in a new browser tab
| WSSv3/MOSS |
SharePoint 2010 |
SharePoint 2013 |
SharePoint 2016 |
| Release Notes |
Release Notes |
Release Notes |
Release Notes |
Microsoft ended mainstream support for SharePoint 2007 in October 2012. See Microsoft’s Lifecycle Support Policy.
At that time, Bamboo stopped enhancements to our SharePoint 2007 product line, but continues to provide support and bug fixes to customers with active support contracts until October 2017. Previously purchased licenses will continue to function after October 2017, but support for these products will end, and no additional bug fixes will be provided beyond that time. Bamboo plans to cease selling new licenses and annual support contacts for its SharePoint 2007 products in October 2016 to ensure customers will be eligible to receive support for at least one year after purchase. |
Microsoft plans to end mainstream support for SharePoint 2010 in October 2015. See Microsoft’s Lifecycle Support Policy. At that time, we will stop any enhancements for our SharePoint 2010 product line but will continue to provide support and bug fixes for our SharePoint 2010 products to customers with active support contracts until October 2020. Previously purchased licenses will continue to function after October 2020, but support for these products will end, and no additional bug fixes will be provided beyond that time. Bamboo plans to cease selling new licenses and annual support contacts for its SharePoint 2010 products in October 2019 to ensure customers will be eligible to receive support for at least one year after purchase. |
Visit our website where you can get the latest info about each of our products for SharePoint 2013.
A separate installation package and license key is required for SharePoint 2013 deployment. For additional details, review the following knowledge base articles:
|
Bamboo Solutions has also begun releasing products for SharePoint 2016. For additional details, check the product release notes in the link above, or contact us.
For details on migration, see the Knowledge Base Article “Migrate Bamboo Products from SharePoint 2013 to SharePoint 2016”
|
Understanding Bamboo Releases:
- Bamboo offers Trial, Basic and Premium support.
- Free Trial support expires after 30 days.
- For more information about Basic and Premium support, please see the Support Plans page.
- There may be a fee to upgrade from a major version to another.
See Also:
Release Notes for Administration Toolkit
NOTE: Release Notes will open in a new browser tab
| WSSv3/MOSS |
SharePoint 2010 |
SharePoint 2013 |
| Release Notes |
Release Notes |
Release Notes |
Microsoft ended mainstream support for SharePoint 2007 in October 2012. See Microsoft’s Lifecycle Support Policy.
At that time, Bamboo stopped enhancements to our SharePoint 2007 product line, but continues to provide support and bug fixes to customers with active support contracts until October 2017. Previously purchased licenses will continue to function after October 2017, but support for these products will end, and no additional bug fixes will be provided beyond that time. Bamboo plans to cease selling new licenses and annual support contacts for its SharePoint 2007 products in October 2016 to ensure customers will be eligible to receive support for at least one year after purchase. |
Microsoft plans to end mainstream support for SharePoint 2010 in October 2015. See Microsoft’s Lifecycle Support Policy. At that time, we will stop any enhancements for our SharePoint 2010 product line but will continue to provide support and bug fixes for our SharePoint 2010 products to customers with active support contracts until October 2020. Previously purchased licenses will continue to function after October 2020, but support for these products will end, and no additional bug fixes will be provided beyond that time. Bamboo plans to cease selling new licenses and annual support contacts for its SharePoint 2010 products in October 2019 to ensure customers will be eligible to receive support for at least one year after purchase. |
Bamboo Solutions has also begun releasing Bamboo Apps to the SharePoint Store, for additional details, see the SharePoint Apps & Mobile products page where you can get the latest info about each of our Apps as they release to the Microsoft Store.
A separate installation package and license key is required for SharePoint 2013 deployment. For additional details, review the following knowledge base articles:
|
Understanding Bamboo Releases:
- Bamboo offers Trial, Basic and Premium support.
- Free Trial support expires after 30 days.
- For more information about Basic and Premium support, please see the Support Plans page.
- There may be a fee to upgrade from a major version to another.
See Also:
Release Notes for List Bulk Import
NOTE: Release Notes will open in a new browser tab
| WSSv3/MOSS |
SharePoint 2010 |
SharePoint 2013 |
| Release Notes |
Release Notes |
Release Notes |
Microsoft ended mainstream support for SharePoint 2007 in October 2012. See Microsoft’s Lifecycle Support Policy.
At that time, Bamboo stopped enhancements to our SharePoint 2007 product line, but continues to provide support and bug fixes to customers with active support contracts until October 2017. Previously purchased licenses will continue to function after October 2017, but support for these products will end, and no additional bug fixes will be provided beyond that time. Bamboo plans to cease selling new licenses and annual support contacts for its SharePoint 2007 products in October 2016 to ensure customers will be eligible to receive support for at least one year after purchase. |
Microsoft plans to end mainstream support for SharePoint 2010 in October 2015. See Microsoft’s Lifecycle Support Policy. At that time, we will stop any enhancements for our SharePoint 2010 product line but will continue to provide support and bug fixes for our SharePoint 2010 products to customers with active support contracts until October 2020. Previously purchased licenses will continue to function after October 2020, but support for these products will end, and no additional bug fixes will be provided beyond that time. Bamboo plans to cease selling new licenses and annual support contacts for its SharePoint 2010 products in October 2019 to ensure customers will be eligible to receive support for at least one year after purchase. |
Bamboo Solutions has also begun releasing Bamboo Apps to the SharePoint Store, for additional details, see the SharePoint Apps & Mobile products page where you can get the latest info about each of our Apps as they release to the Microsoft Store.
A separate installation package and license key is required for SharePoint 2013 deployment. For additional details, review the following knowledge base articles:
|
Understanding Bamboo Releases:
- Bamboo offers Trial, Basic and Premium support.
- Free Trial support expires after 30 days.
- For more information about Basic and Premium support, please see the Support Plans page.
- There may be a fee to upgrade from a major version to another.
See Also:
Release Notes for Rating Column
NOTE: Release Notes will open in a new browser tab
| WSSv3/MOSS |
SharePoint 2010 |
SharePoint 2013 |
| Release Notes |
Release Notes |
Release Notes |
Microsoft ended mainstream support for SharePoint 2007 in October 2012. See Microsoft’s Lifecycle Support Policy.
At that time, Bamboo stopped enhancements to our SharePoint 2007 product line, but continues to provide support and bug fixes to customers with active support contracts until October 2017. Previously purchased licenses will continue to function after October 2017, but support for these products will end, and no additional bug fixes will be provided beyond that time. Bamboo plans to cease selling new licenses and annual support contacts for its SharePoint 2007 products in October 2016 to ensure customers will be eligible to receive support for at least one year after purchase. |
Microsoft plans to end mainstream support for SharePoint 2010 in October 2015. See Microsoft’s Lifecycle Support Policy. At that time, we will stop any enhancements for our SharePoint 2010 product line but will continue to provide support and bug fixes for our SharePoint 2010 products to customers with active support contracts until October 2020. Previously purchased licenses will continue to function after October 2020, but support for these products will end, and no additional bug fixes will be provided beyond that time. Bamboo plans to cease selling new licenses and annual support contacts for its SharePoint 2010 products in October 2019 to ensure customers will be eligible to receive support for at least one year after purchase. |
Bamboo Solutions has also begun releasing Bamboo Apps to the SharePoint Store, for additional details, see the SharePoint Apps & Mobile products page where you can get the latest info about each of our Apps as they release to the Microsoft Store.
A separate installation package and license key is required for SharePoint 2013 deployment. For additional details, review the following knowledge base articles:
|
Understanding Bamboo Releases:
- Bamboo offers Trial, Basic and Premium support.
- Free Trial support expires after 30 days.
- For more information about Basic and Premium support, please see the Support Plans page.
- There may be a fee to upgrade from a major version to another.
See Also:
Also see our support video:
* How to Find the Version of your Bamboo Custom Column for SharePoint 2013
Redirect Users to Change Their Passwords
This topic describes how to configure Password Expiration properly, which is part of the Password Management Toolkit. It is assumed that the Web Part is properly installed, added to the desired page and the Active Directory Settings and SharePoint Settings options are configured.
Note: When Password Expiration is installed, the Bamboo Password Expiration Reminder Web Part is added to the Web Part Gallery.
| Step |
Action |
| 1. |
To configure the Active Directory Settings and SharePoint Settings options, follow the steps described in Configuring the Password Expiration Web Part. |
| 2. |
Expand the Password Expiration Rules option. Fill in the following sections:
- Redirect Page URL: the user is automatically redirected to this URL.
- Grace period: if the password of the currently logged in account expires in fewer days than specified in the Grace period, the currently logged in user is redirected to a different page based on the Web Part configuration.
|
| 3. |
Next, select the Automatically redirect users to the above URL option. |
|
NOTE: After successfully configuring the Web Part, the currently logged in user is automatically redirected to the specified URL if their password expires within the specified grace period. If the user’s password does not expire within the defined grace period, no text is displayed. Bamboo Solutions recommends setting the Web Part’s Chrome Type in the Web Part Tool Pane under the Appearance option to None for improved user experience. Additionally, Bamboo Solutions recommends the purchase and integration of Password Change to meet the need of a password change control.
Best Practices for a successful Workflow Conductor Install
The Workflow Conductor installation process has been streamlined as much as possible, but there are still areas of the installation that might present issues. This section is intended to highlight some important aspects of the installation process that are sometimes overlooked.
Top
| Top
Before Installing for the first time
|
- Read Best practices for a successful intstall. This information is generic and applies to all Bamboo products.
|
- If you are installing Workflow Conductor on Windows Server 2008, disable Admin Approval Mode in the UAC policy or turn off UAC on any SharePoint server where Workflow Conductor will be installed. For more information, read KB.12430: Workflow Conductor Studio displays a blank diagram when UAC is enabled on Windows Server 2008.
|
- Required SQL Server permissions for the Workflow Conductor Configuration Database component are listed in the installation, but also shown in the screenshot below because they are often overlooked.
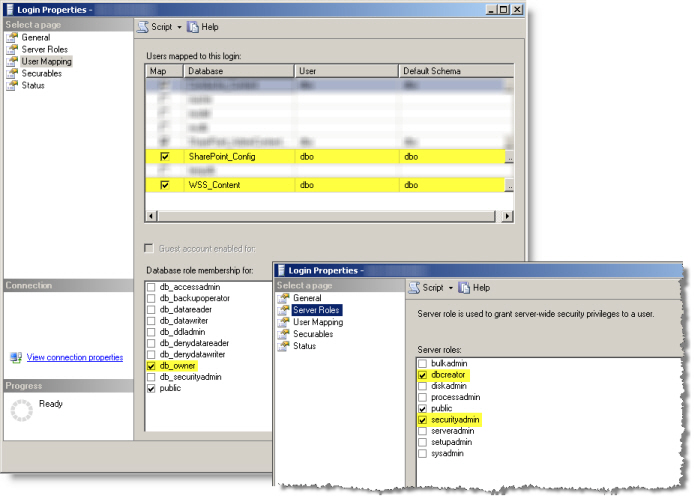
|
- See Options for Installing and Overview of Workflow Conductor Components to Install for additional details.
|
| Top
During the Install
|
- The Workflow Conductor component installation takes an average of 10 minutes to complete. This may take longer in your environment. Be sure to give this part of the installation extra time. We recommend that you bring your SharePoint environment to an inactive state before starting the installation. You can also shut down the World Wide Web Publishing service or the App Pools if you are using SharePoint 2013 or Claims-based Authentication to ensure that no one can access the system.
|
- Take notes during the installation process so you can successfully repeat it if you need to move the application or install it on another server. These notes can also be used to assist the Bamboo Support Team if you need assistance getting Workflow Conductor installed in your environment.
|
- The Workflow Conductor Setup program will not abort the installation if one feature in a component package fails; it will continue to install the next feature in the list. The installation summary screen at the end of the component installation will tell you what, if anything, went wrong. Fix the issue, and then reinstall any failed features individually by running Setup again for that component and selecting the Install New Only option.
|
| Top
After Installing
|
|
Go to the Workflow Conductor section in Central Administration and configure Workflow Conductor settings. At a minimum, you must configure the following:
-
System Settings
- Enter the SQL Server name and instance where Workflow Conductor is installed,
- Select the Workflow Conductor database you created during installation, and
- Enter the e-mail server to use for e-mail sent by Workflow Conductor widgets.
NOTE: Workflow Conductor will not work if you do not configure the SQL Server and Workflow Conductor Database settings.
-
Account Settings. Configure the access accounts for Workflow Conductor. Workflow Conductor will not work if you do not configure these accounts.
-
Licensing. If you have purchased a license for Workflow Conductor, see [] for more information about activating it.
All other Workflow Conductor settings are optional, and can be configured as needed to customize Workflow Conductor for your environment.
|
Best Practices for a successful install
Follow these guidelines to ensure a successful installation:
| No. |
Function |
| 1. |
Back up your system. |
| 2. |
Make sure that your system meets the requirements listed in the System_Requirements section. |
| 3. |
Installing PM Central, Community Central, Grants Management, or other applications may upgrade some Bamboo components previously installed in your SharePoint farm. For example, PM Central includes the Data Viewer Web Part (among other things) and installing PM Central may upgrade the Data Viewer Web Part that you may have previously installed.
Before installing PM Central or another Bamboo application, make sure you understand the effect upgrading installed components will have on your existing solutions.
|
| 4. |
Before installing, review information about where to run the Setup program in Location of Install Files and the Required Installation Permissions. This information is shown on the Installation/Setup program interface, but is also available from the links above. |
| 5. |
If you are upgrading an existing, installed product rather than installing it for the first time, read the information about Upgrading for the product you are interested in. The upgrade process is slightly different than installing for the first time. |
| 6. |
On all servers in the SharePoint farm where the solution will be deployed:
Go to Start > Administrative Tools > Services and stop or restart the following services:
- Stop the World Wide Web Publishing Service on all servers. Do this step first because it prevents users from accessing sites during installation and files that may need to be updated from being locked.
Note: If your SharePoint environment is configured for Claims Based Authentication or is running SharePoint 2013 or SharePoint 2016, you should NOT stop the World Wide Web Publishing Service if you wish to automatically activate product features during installation. Read SharePoint 2010 solution deployment when Claims Based Authentication is configured for more information.
- Restart the Microsoft SharePoint Foundation Timer service (called SharePoint Timer Service for SharePoint 2013 and 2016, SharePoint 2010 Timer service if you are using SharePoint 2010, or Windows SharePoint Services Timer service if you are using SharePoint 2007) on all servers. Do this step even if the service is currently running. It will ensure no files that may need updating are locked.
- Restart the Microsoft SharePoint Foundation Administration service (called SharePoint Administration in SharePoint 2013 and 2016, SharePoint 2010 Administration service if you are using SharePoint 2010, or Windows SharePoint Services Administration service if you are using SharePoint 2007) on all servers. Do this step even if the service is currently running. It will ensure no files that may need updating are locked.
|
| 7. |
Review the Options for Installing. |
Return to Installing for the first time
Reassign Task
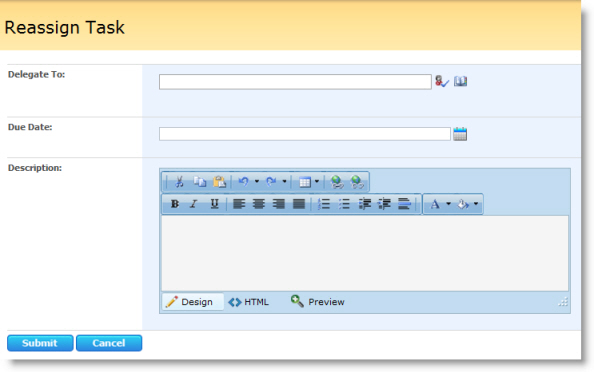
 Reassign Task is an option reviewers and approvers have when completing Request Feedback and Request Approval tasks, and is not a separate widget. This option allows a reviewer or approver to delegate the original review, approval, or data collection task to another user. The Reassign Task option is available if the Allow Reassignment property for the Request Feedback or Request Approval Widget is set to Yes, as shown here. If this property is set to Yes, a Reassign Task button is displayed at the bottom of the feedback, approval, or data collection task form.
To reassign a review or approval task to another user, edit a task assigned to you:
| Step |
Action |
Result |
| 1. |
Click the Reassign Task button at the bottom of the review or approval task form. |
 |
| 2. |
Enter a single user or group in the Delegate To box, enter a due date in the Due Date* box (if the task needs one), and enter a Description for the task. |
NOTE: The earliest Due Date is always used. Forexample, if the reviewer or approver assigns a Due Date that is earlier than the Due Date in the original task, the workflow uses the new Due Date. However, if the reviewer or approver assigns a Due Date that is later than the Due Date in the original task, then the workflow uses the Due Date in the original task.
|
| 3. |
Click Submit to reassign the task. |
 |
|
After you click Submit in the Reassign Task form, several things happen:
- A new task is created for the user or group you entered in the Delegate To box.
- If the Send Email property in the Request Feedback or Request Approval widget is set to Yes, the new user or group is sent a notification e-mail. You can customize the content of this e-mail in the Request Feedback or Request Approval widget Reassignment Subject/Body properties. Default text is specified in the Request Approval or Request Feedback Task Reassignment sections of the Workflow Conductor Control Panel E-mail Settings.
- The original task status is updated to Completed.
- The Outcome field for the original task and the Description field for the new task show the task reassignment details.
Read this before upgrading PM Central
Before upgrading PM Central:
- Always back up your sites before upgrading.
- Keep a detailed log of your changes.
Bamboo recommends that you perform the upgrade during off hours and that you either lock down the sites or render them unavailable by stopping the World Wide Web Publishing Service on all Web front-end servers or stop the App Pool(s) to prevent access. Doing so prevents the software assemblies from being locked by a process which sometimes prevents a successful upgrade.
ATTENTION: You must have PM Central R2.0 or higher to upgrade to R3.0 or R3.5 before upgrading to PM Central R4.0/4.1/4.2 from a previous version. It is not possible to upgrade from PM Central R2.x to R4.x directly. If you have an older version of PM Central (R1.x), contact Bamboo Support or your Bamboo Account Manager to obtain the correct prerequisite version.
The table below lists several customizations and whether you will lose the customizations after an upgrade. For more information, read Customization Best Practices.
|
Customization |
Can I make the customization in the current version? (PM Central 4.2/4.1/4.0 or older version) |
Will the customization be retained after I upgrade to the current version (R4.0/4.1/4.2)? (PM Central 3.0 or newer version) |
| 1. |
Add new Web Parts to the pages |
Yes, new web parts can be added to pages in the current or older version. |
Yes, the new web parts will be retained when you upgrade from R3.0 or higher to R4.0.
NOTE: You need to upgrade from R2.x to R3.0 or R3.5 first before upgrading to R4.0/4.1.
However, If you upgrade from a pre-R3.0 version, web parts added to pages will not be retained.
|
| 2. |
Add additional columns and/or views to existing lists or add new lists (e.g., project tasks list, status reports, custom lists, etc.) and/or libraries (wiki, collaboration, translation, Shared Documents folders, etc.) to sites. |
Yes, you can add additional columns or views to existing lists as well as add new lists or libraries to sites in the current or older version. |
Yes, the additional columns, views, lists, and/or libraries will be retained after the upgrade. |
| 3. |
Change the look and feel of themes and graphics. |
Yes, you can modify graphics and themes in the current or older version.
NOTE: In R2.x or higher, be sure to follow the Customization Best Practices and use the nested master page and the nested CSS files for modification as recommended.
|
Yes, these modifications will be retained when you upgrade from R3.0 or higher to R4.0/4.1/4.2 if you used the nested master page and the nested CSS files for modifications in R2.x.
However, if you upgrade from a pre-R3.0 version, modifications to graphics or themes will not be retained.
(need to check this one…)
|
| 4. |
Add new navigation tabs on portfolio, department, and/or project sites |
Yes, you can add new navigation tabs in the current or older version. |
Yes, the new navigation tabs will be retained after the upgrade. |
| 5. |
Create new web part pages in the portfolio, department, and/or project sites. |
Yes, you can create new web part pages in the current or older version.
NOTE: Be sure to store the new pages in the PMCentralPages library.
|
Yes, new web part pages will be retained after the upgrade, as long as the new pages are stored in the PMCentralPages Document Library. |
| 6. |
Modify the master page and CSS files with or without SharePoint Designer. |
Yes, you can modify the master page and CSS files with or without SharePoint Designer in the current or older version.
NOTE: In R2.x or higher, follow the Customization Best Practices to use the nested master page and the nested CSS files for modification.
|
Yes, these modifications will be retained when upgrading from R3.0 or higher to R4.0/4.1/4.2 if you used the nested master page and the nested CSS files for modifications in the previous version. Follow our policies for customization in Customization Best Practices.
NOTE: If you upgrade from a pre-R3.0 version, modifications to the master page or CSS files will not be retained.
|
| 7. |
Modify some properties in the web part tool panes |
Yes, you can modify some properties in the web part tool panes in the current or older version. |
Changes to Chart Plus Web Part and Data-Viewer Web Part configuration properties will not be retained. All other Web Part configuration properties will be retained when you upgrade from R3.0 or higher to R4.0/4.1/4.2.
If you upgrade from a pre-R3.0 version, modifications to Web Part properties will not be retained.
|
| 8. |
Add additional columns and views to existing lists; add new lists; add documents to the document libraries; change logos; and save the template as a standard site template for creating other project sites.
}
|
Yes, you can add additional columns and views to existing lists; add new lists; add documents to the document libraries; change logos; and save the template as a standard site template in the current or older version. |
Yes, these modifications will be retained after the upgrade. |
 With the Rating Column ,SharePoint users can easily provide effective feedback for items in Lists, Libraries and Site Pages through a content-rating solution.
Install
|
Permissions
|
License
|
Permissions
|
|
|
 |
|
|
Configure
|
Permissions
|
Work With
|
Permissions
|
|
|
 to configure this Bamboo product.") |
|
 |
Click here if you would rather see a complete list
of all topics for this product. |
 Click on the shopping bag or here to download a trial of the product or to purchase it. Click on the shopping bag or here to download a trial of the product or to purchase it. |
Quick Add Release Notes
Quick Add does not have a SharePoint 2007 version; it is available for SharePoint 2010 and SharePoint 2013 only.
NOTE: Release Notes will open in a new browser tab
| WSSv3/MOSS |
SharePoint 2010 |
SharePoint 2013 |
SharePoint 2016 |
| Not Available |
Release Notes |
Release Notes |
Release Notes |
Microsoft ended mainstream support for SharePoint 2007 in October 2012. See Microsoft’s Lifecycle Support Policy.
At that time, Bamboo stopped enhancements to our SharePoint 2007 product line, but continues to provide support and bug fixes to customers with active support contracts until October 2017. Previously purchased licenses will continue to function after October 2017, but support for these products will end, and no additional bug fixes will be provided beyond that time. Bamboo plans to cease selling new licenses and annual support contacts for its SharePoint 2007 products in October 2016 to ensure customers will be eligible to receive support for at least one year after purchase. |
Microsoft plans to end mainstream support for SharePoint 2010 in October 2015. See Microsoft’s Lifecycle Support Policy. At that time, we will stop any enhancements for our SharePoint 2010 product line but will continue to provide support and bug fixes for our SharePoint 2010 products to customers with active support contracts until October 2020. Previously purchased licenses will continue to function after October 2020, but support for these products will end, and no additional bug fixes will be provided beyond that time. Bamboo plans to cease selling new licenses and annual support contacts for its SharePoint 2010 products in October 2019 to ensure customers will be eligible to receive support for at least one year after purchase. |
Visit our website where you can get the latest info about each of our products for SharePoint 2013.
A separate installation package and license key is required for SharePoint 2013 deployment. For additional details, review the following knowledge base articles:
|
Bamboo Solutions has also begun releasing products for SharePoint 2016. For additional details, check the product release notes in the link above, or contact us.
For details on migration, see the Knowledge Base Article “Migrate Bamboo Products from SharePoint 2013 to SharePoint 2016”
|
Understanding Bamboo Releases:
- Bamboo offers Trial, Basic and Premium support.
- Free Trial support expires after 30 days.
- For more information about Basic and Premium support, please see the Support Plans page.
- There may be a fee to upgrade from a major version to another.
See Also:
https://store.bamboosolutions.com/KB/article.aspx?id=13139
Quick Add Highlights
 SharePoint is a great tool for collaboration, but in some instances, the interface can slow down business processes. For instance, capturing a list of project tasks in real-time can be difficult using SharePoint. There can also be times when you just want to get content from some existing notes to populate a list, but entering each piece of information to create items one at a time can be painful. These are only a couple of examples, but there are so many cases in which it would be nice to bypass the “slow lane” and capture/create items as quickly as you can come up with them. To give users a quicker way to kick start their lists, Bamboo created Quick Add. By allowing simple text entry for item creation, creating new items is as simple as taking notes, or even using notes that were taken previously. Whether you are capturing information during a meeting, or following up on a list of to-do items in an email, creating new SharePoint items is as simple as typing the names, or copying any existing text lists into the box and clicking a button.
Query Database
The Query Database widget executes a single SELECT, INSERT, UPDATE, or DELETE SQL statement against a database. The results of SELECT statements can be stored in a workflow variable. The widget supports SQL Server, Oracle, ODBC, and OLEDB connections.
NOTE: In the case of SELECT statements, the Query Database widget returns either a single value (field) or a single record (row). SQL statements should be constructed with this in mind.
If the query returns multiple fields or rows, the widget will only store the first row or the first field from the first row of results, depending on the variable type selected for the results. See the Save To Variable property description below for more information.
Widget Properties:
| Column |
Description |
| Connection Type (Required) |
Select the type of database connection to use. Available choices are SQL Server, ODBC, OLEDB, and Oracle. |
| Connection String (Required) |
For ODBC, OLEDB, and Oracle connection types, manually enter the connection string. For SQL Server connections, click the  button to define the following additional properties: button to define the following additional properties:
- Server name: Enter the Server name for your SQL Server database.
- Authentication: Select Windows Authentication or SQL Server Authentication. Windows Authentication will use the login credentials of the workflow initiator. SQL Server Authentication will use the Username and Password defined in the widget.
- Username/Password: To connect using SQL Server Authentication, enter a Username and Password.
- Database: Click the Get Database button to retrieve a list of databases on the specified server, and select the database you want to query.
- Query: Enter a valid SQL statement. Any SQL statement you enter here will propagate to the Query String property in the main Widget Properties form.
-
Results: To test your database connection, enter a SQL statement in the Query box and click the Test button. For INSERT, UPDATE, or DELETE statements, only the database connection string is tested. For SELECT statements, the query string is also tested, and a result indicating success or failure is shown in the Results field. Statements containing lookups cannot be tested, since lookup values are not determined until the workflow runs.
NOTE: You can also test ODBC, OLEDB, and Oracle connection types from this property form.
|
| Query String |
Enter a single SQL statement to execute against the database. SELECT statements should be constructed to return a single field from a single row or a single record (row) of results. Click the button to include lookups in your statement. |
| Save to Variable |
Select a workflow variable with a Text or Record data type to store the query results (applicable only for the results of a SELECT statement). Create variables in the Workflow Settings tab in the settings pane, or click the Create new variable link next to the variable list. |
| Run As |
This widget can run with the permissions of the workflow initiator, the workflow designer, or another user. Select the option in the Run As property that best matches your requirement. For more information, see the Common Widget Properties topic. |
| Click Apply to save the widget settings. |
Example Using Query Database Widget
Return to External Data Widgets
See Also:
Work with the project site’s Project Resource Pool
Users with Full Control or Design permissions to a project site can access the Report Center to add users to the site’s Contacts list (Project Resource Pool), which acts as a repository of information about project team members.
To access the Report Center:
| Step |
Action |
Result |
| 1. |
Access the PM Central Control Panel from the Central Actions menu
 |
Keep in mind:
Access to the Control Panel is security trimmed, requiring either Full Control or Design permissions |
| 2. |
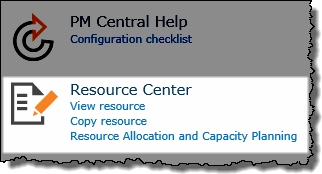
Under Resource Center select View resource or
Copy resource |
Based on your selection, you will be taken to a specific page in the Resource Center
 |
From the Resource Center you can:
-
Copy multiple users from the Enterprise Resource Pool into the Project Resource Pool.
-
Update user information in the Project Resource Pool with the current information maintained in the Enterprise Resource Pool
|
Quick Add SharePoint App
 As a project manager, you typically need to take notes at the same time that you’re creating project action items, in your kick off meetings and among your collaborative teams. Quick Add App for Lists provides both convenience and ease of use in allowing users to quickly create/add multiple tasks/action items to a tasks list. Using Quick Add App for Lists, users can create multiple items on a tasks list with a single click in real-time during meetings. Later on, they can come back to fill out additional information such as detailed assignments and due dates.
Install
|
Permissions
|
License
|
Permissions
|
| Bamboo SharePoint Apps let you explore the versatility that SharePoint represents. Apps are available to install through the Microsoft Store for SharePoint Online and for on-premises for free trial and purchase.
|
|
If you need to assign licenses for an app to specific users, buy more licenses for an app, add a license manager, or remove or recover an app license, you can do that all on the App License Management page.
|
|
Configure
|
Permissions
|
Work With
|
Permissions
|
|
|
|
|
|

Quick Add is a fast way to create a number of new items in a list by simply entering text in a form that can be accessed from the list or through a configurable web part. Simply open a form, enter text separated by line or by semicolon, and new entries are created for each of the items you entered. The field populated by the entered information is the required field for the list, such as the “Title” on a Task List, or “Last Name” on a Contact List. Quick Add can be used on custom lists as well, where it will automatically detect the required field.
NOTE: Quick Add cannot currently be used on lists with more than one required field, with the exception of Calendar entries, where the required start and end times default to the current date/time.
Install
|
Permissions
|
License
|
Permissions
|
|
|
|
|
|
Configure
|
Permissions
|
Work With
|
Permissions
|
|
|
|
|
|
Click here if you would rather see a complete list
of all topics for this product. |
Click on the shopping bag or here to download a trial of the product or to purchase it. |
Project Site Lists and Libraries
 IMPORTANT: DO NOT delete any of the default lists and Libraries. Changes to the default lists should be made with caution due dependencies in the application. Please refer to the Customization Guide before making any changes
| Libraries |
| PMCentral Pages |
The PMCentralPages library stores all PM Central Web Part pages for the site. The pages in this library should not be deleted or renamed as that will impact navigation in the site |
| Pics |
A picture library that stores the default site images and logos |
| PM Central Skins |
By default, there will be no items found in this document library. Items will only be added to the library if the template skin is changed |
| Project Documents Library |
Used to store documents associated with the project |
| Lists |
| Announcements |
Announcements for the project are displayed on the Project Home page |
| Bamboo Project Task List |
Created automatically when the Task Master Web Part is added to a page. This list is not used by PM Central. |
| Calendar |
Contains the calendar information used by the Calendar Plus Web Part on the Project Home page. |
| Change Requests |
This list stores all the Change Request submitted for the project. Change requests will be rolled up and displayed in the portfolio site, and applicable department sites. |
| Configuration Checklist |
This list is pre-populated on site creation and provides instructions for final configuration steps. The Warning Web Part pulls its configuration status from this list. |
|
| Contacts |
The Contacts list (aka Project Resource Pool) is a list of users available to work on the project as resources. |
| Favorites |
The Favorites list stores favorite links added from the PMC Favorites section of the page ribbon. |
|
| Gantt Chart Information |
This list is used for the system to store the task’s information (Title, Start Date, Due Date, Assigned To… etc.) to display data in the Resource Assignments report. Do not delete or modify any of the columns in this list. |
| Issues |
The Issues List is used to track issues. An issue is an unfavorable circumstance that has already occurred or is currently occurring and that is affecting the project’s cost, schedule or quality. Active issues will be rolled up and displayed in the portfolio site, and applicable department sites. |
|
| Lessons Learned |
Documenting lessons learned helps the project team discover the root causes of problems that occurred and avoid those problems in later project stages or future projects. Lessons learned will be rolled up and displayed in the portfolio site, and applicable department sites. |
| Modified Pages |
This list is used to track and save all the changes to the pages at the top site by the applications or by the users to prepare for future upgrades. |
| Monthly Resource Actual Cost Allocation Summary |
This list is used to store the monthly resource actual cost allocation for the resources of all the projects. |
| Objectives |
Maintains the project objective’s which are displayed on the Project Home page |
| Project Baseline |
The Project Baseline list is used to track information for multiple baselines in the Project Baseline Web Part. |
| Project Health List |
The Project Health List stores key information about the project including Project Manager, Project Start Date, Project End Date, % Complete and key performance indicators. Project Health information will be rolled up and displayed in the portfolio site, and applicable department sites. |
| Project Managers Checklist |
This checklist provides project managers with steps for setting up a project in PM Central.
The Project Managers Checklist was added in PM Central 4.3 |
| Project Site Navigators |
The Project Site Navigators List is used to create the tabs and provide navigation links throughout the site. It contains columns such as Menu Title, Description, URL, Parent Menu and Sort Order. This list is pre-populated with data. |
| Project Status Report |
The Project Status Report list is used by project managers to report the weekly status of the project, including accomplishments and issues for that week. Project Status Reports will be rolled up and displayed in the portfolio site, and applicable department sites. |
| Report Settings |
The Report Settings list stores options for PM Central reports. |
| Risks |
The Risks List is used to track risks. A risk is an uncertain event or condition that, if it occurs, has a negative effect on the project’s objectives. Risks will be rolled up and displayed in the portfolio site, and applicable department sites. |
| Tasks Baseline |
The Task Baseline list is used to track information for multiple baselines in the Task Baseline Web Part. |
| Tasks |
The Tasks List is used to track the timeline, work and resource assignment for the tasks. Tasks will be rolled up and displayed in the portfolio site, and applicable department sites. |
|
Overview of the PM Central Project Site
The Project Site is a sub site of the portfolio site and is designed to have its data rolled up to the portfolio site for a comprehensive status of all projects in your portfolio. Its enhanced template supports uniform project data input, visualization of task, issue and risk status, along with a file explorer-type interface for document management, and a built in discussion board.
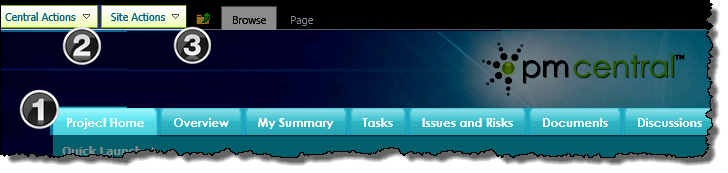
On each page of the project site you will see:
|
|
Name / Web Part |
Description |
| 1. |
Project Site Navigators
SharePoint Navigators |
The seven default items in the Project Site Navigator view of the Project Site Navigators list make up the project site’s top level navigation.
The tabs take users to different aspx pages that contain Web Parts that are used to display specific content relevant to the project.
|
| 2. |
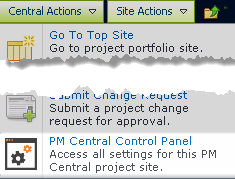
Central Actions Menu |
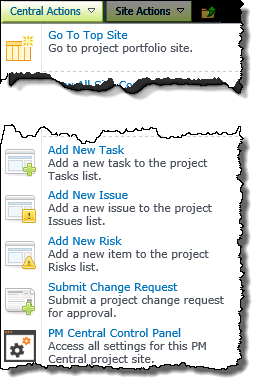 The Central Actions menu provides quick access to areas where common activities are performed on the site, including Adding a New Task and the PM Central Control Panel. The Central Actions menu provides quick access to areas where common activities are performed on the site, including Adding a New Task and the PM Central Control Panel.
Keep In Mind:
1. Use the bulls eye icon  to access Central Actions in 2013 to access Central Actions in 2013
2. Users must have Design permissions or higher on the site to see the PM Central Control Panel in the Central Actions menu
3. Quick links to commonly accessed forms are part of the Enhanced Central Actions menu.
|
| 3. |
Site Actions Menu |
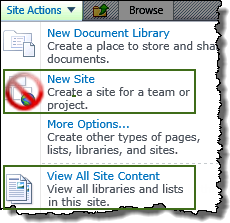 The SharePoint Site Actions menu provides shortcuts to commands commonly used when working with SharePoint sites. The command options you see depend on your permissions on the site. The SharePoint Site Actions menu provides shortcuts to commands commonly used when working with SharePoint sites. The command options you see depend on your permissions on the site.
Notes:
1. New Sites should be created using the PM Central Site Creation Plus tool NOT from SharePoint’s New Site page
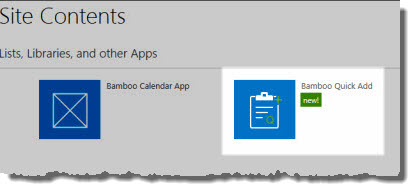
2. A list of Site Contents is available here
|
|
PM Central Project – Risks Tab
The Risks page displays the active risks associated with the project.
When working with Risks keep in mind:
-
All Risks with an active phase status that are associated with active projects will be rolled up and displayed under the Risk tab of the portfolio, and applicable department sites.
-
By default, the number of overdue risks will be used by the Risk Status Key Performance Indicator in the Project Health list.
-
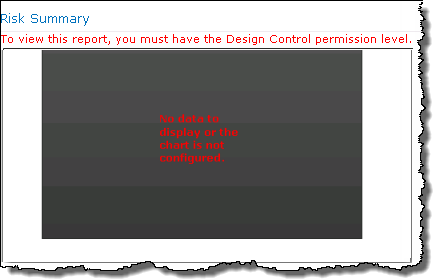
Starting with PM Central 4.3 the Business Value field in the Risk form must be populated for the risk to be displayed in the Risk Summary chart.
The Issues and Risks pages were separated under the Issues and Risks tab in PM Central 4.3

|
|
Name / Web Part |
Description |
| 1. |
All Active Risks
Bamboo Data Viewer Web Part |
Displays the active risks associated with Active projects in the portfolio.
-
Risks that have not been addressed by the designated Due Date will be highlighted in red
-
The total Exposure, Cost Exposure and Business Value of the Active items will be calculated by the Data-Viewer Web Part.
NOTE: It may be necessary to reload the page to update the column totals.
|
| 2. |
Risk Summary
PM Central Custom Web Part |
The Risk Summary chart enables project managers to identify risks that pose a threat to the project at a glance.
-
Only Active Risks will be displayed in the chart with consists of three zones; Red: high risk, Yellow: medium risk,Green: low risk
-
A risks placement on the chart will be determined by the identified Probability and Value
-
The size of the bubble will be determined by the Business Value
The Business Value column was added in PMC 4.3
Keep in mind:
Unless the default configuration settings are modified by the administrator, users must have Design permissions or higher to see the Risk Summary.
|
| 3. |
Risks Search
Bamboo List Search Simple |
Use the Risks Search Web Part to search the project site’s Risks list for items according to specific criteria.
Keep in mind:
-
The Web Part is configured by default to use an AND joiner. If you enter more than one criterion, all criteria must be met for a result to be returned.
-
The Status “choice” selector will list the valid choices in the drop-down selector (Active, Postponed, Cancelled) and a Select All option.
-
Search in all columns for: leverages SharePoint Search and allows searching in all list or library columns using a single search field.
-
Click the links for additional information on using or configuring the Risks Search Web Part.
|
|
Using the PM Central Risks list
When working with Risks keep in mind:
-
Active risks associated with active projects are rolled up and displayed on the portfolio site, and applicable department sites.
-
By default, the number of overdue risks will be used by the Risk Status Key Performance Indicator in the Project Health list.
-
The My Active Risks display, found under the My Summary tab at all levels of the PM Central hierarchy, will show risks the logged in user has been Assigned To
To create a new risk:
| Step |
Action |
Result |
| 1. |
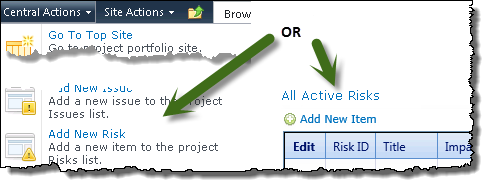
Click
Add New Risk in the Central Actions drop down
Or
From the Risks tab, under Issues and Risks, click Add New Item above the All Active Risks data view. |
 |
| 2. |
Enter a Title, Owner and Assigned To |
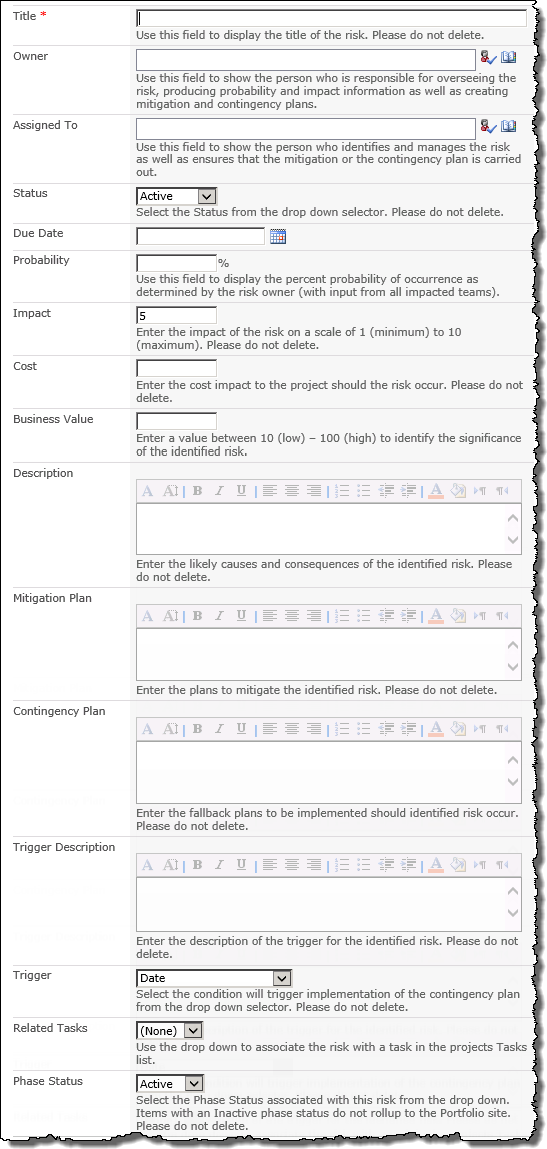 |
| 3. |
Enter a Due Date for the risk. |
| 4. |
Enter:
The Probability that the risk will occur
The Impact the event will have on the project using a scale of 1 (low) – 10 (high)
Probability x Impact will be used to calculate the risk’s Exposure.
|
| 5. |
The Cost that will be incurred should the risk occur
This value will be used when calculating cost of risks for the project displayed in the Summarized View of Project Risks on the Portfolio site
|
| 6. |
The Business Value on a scale of 10 (low) -100 (high)
This value will determine the size of the risk bubbles displayed in the Risk Summary chart
The Business Value column was added in PMC 4.3 |
| 7. |
Describe the risk, and the associated Contingency and Mitigation plans, along with the Trigger Description. |
| 5. |
Click Save |
Risks with an Active Status will be displayed in the All Active Risks data-view on the Risks page |
|
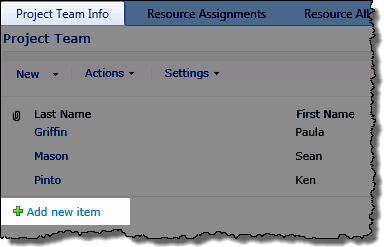
Add individual resources from the ERP to the Project Resource Pool
When you select the View resource link under the Resource Center Heading you will be taken to the Project Team Info page where you can:
-
Add users individually to the Project Resource Pool (Contacts list) from the Enterprise Resource Pool
-
View a display of the current Project Team Resources
-
Update user information to reflect the current contents of the Enterprise Resource Pool
-
Enter resources into the Project Resource Pool who are not part of the Enterprise resource pool. This option will require changing the default behavior of the Bamboo Role column.
NOTE: When users are added individually to the Project Resource pool, SharePoint permissions can be simultaneously assigned by users with the Full Control permission level on the site.
Add an individual resource to the Project Resource Pool from the Enterprise Resource Pool
| Step |
Action |
Result |
| 1. |
Access the PM Central Control Panel from the Central Actions menu drop down |
Keep in mind:
Access to the Control Panel is security trimmed, requiring either Full Control or Design permissions |
| 2. |
Click View resource
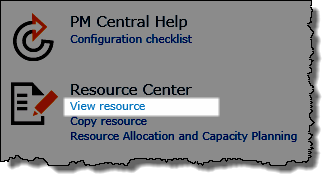 |
You will be taken to the Project Team Info page of the Resource Center
 |
| 3. |
From the Project Team Info page, click Add New Item |
 |
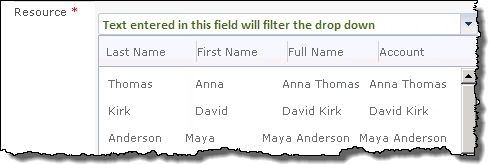
| 4. |
Click the drop-down arrow to see all the resources in the Enterprise Resource Pool
OR
Type the user name into the Resource field to filter the drop-down’s contents
|
 |
| 5. |
Optional:
Assign the Project Team member to a SharePoint group to provide access to the site
NOTE: Full control permissions are required to add a user to a SharePoint group
|
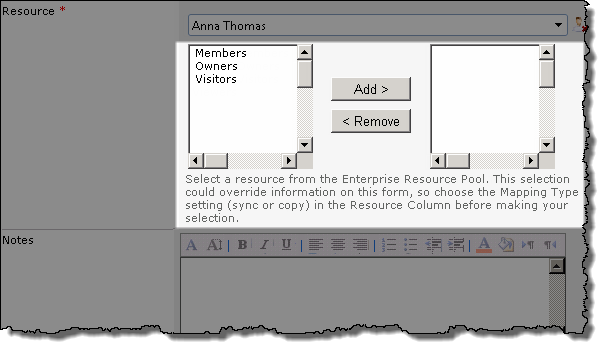
NOTE: Users with Design permissions can add users to the project team, but will not be able to assign users to SharePoint groups.
|
| 6. |
Click Save |
All information associated with the selected user in the Enterprise Resource Pool will be copied to the Project site’s contact list and displayed under the Project Team Info tab of the Resource Center. |
|
Update user profile’s in the Project Resource Pool
User information that is modified or updated in the Enterprise resource pool will not automatically get updated on the project site. This update process can be manually initiated on an “as needed” basis.
Individual user update
| Step |
Action |
Result |
| 1. |
From the Project Team Info page of the project Resource Center, select the user whose information you want to update |
You will be taken to the display view of the user’s contact information
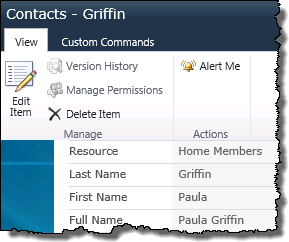 |
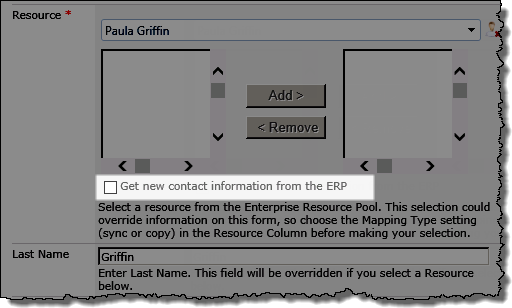
| 2. |
Click Edit Item
and then click the checkbox to Get new contact information from the ERP
Important: User information that was modified after the initial copy from the Enterprise Resource Pool may be lost. Click here for additional information
|
 |
| 3. |
Click Save |
The user’s information will be re-copied from the Enterprise Resource Pool into the local Contacts list. |
|
Perform a bulk copy of users from the ERP to the Project Resource Pool
Click Copy resource link under the Resource Center header in the PM Central Control Panel to be taken directly to the Copy Resource page where you can:
-
Perform a bulk copy of user profile information from the Enterprise Resource Pool to the Project Resource Pool (Contacts list).
-
Update the profile details of multiple users to reflect the current contents of the Enterprise Resource Pool
Overview of Project Portfolio Dashboard
Many companies are implementing SharePoint for the sole purpose of handling their project management at all levels within their business. While SharePoint out-of-the-box provides quite a bit of functionality to accomplish this goal, it is lacking in its ability to provide project progress measurement. For enterprise MOSS 2007, SharePoint 2010, SharePoint 2013 owners, you can purchase a reporting pack and even purchase MS Project for the enterprise to handle this, but for many companies this is time and cost prohibitive.
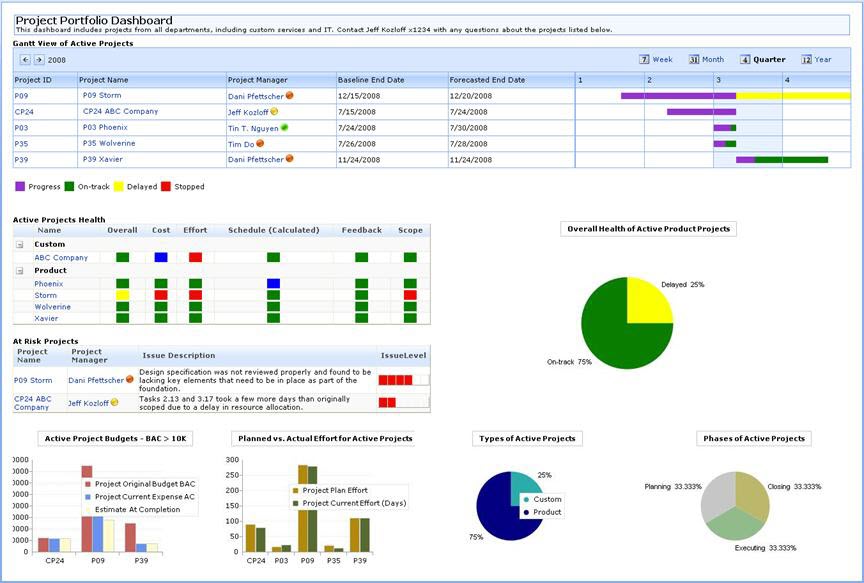
The SharePoint Project Portfolio Dashboard provides you with a single view of the progress, health and risk level of the projects in your entire project portfolio. Project Managers can communicate the status of the effort, cost and budget for each project using configurable red/yellow/green indicators, issues meter, bar or pie chart and Gantt view widgets. You can use one or all of these widgets to display your project data in the dashboard as well as the layout for how the widgets are displayed.
Bamboo’s SharePoint Project Portfolio Dashboard is one Web Part that is made up of multiple, customizable widgets. Each widget provides measurement of project progress from various perspectives, including budget, schedule, risk, and overall health. You can show only the widgets that make sense for your project management needs.
The widgets you can choose from are:
| Widget |
Type |
Description |
| Gantt View of Active Projects |
Gantt/Progress Bar |
Displays a Gantt View with a color-coded progress bar for each project. |
| Active Projects Budget |
Bar Chart |
Shows the Project Original Budget (BAC) vs. Project Current Expense (AC) vs. Estimate at Completion (EAC) in a bar graph. |
| Active Projects Health View |
Gantt/Progress Bar |
Displays a Gantt View with a color-coded progress bar for each project. |
| Gantt View of Active Projects |
Red/Yellow/Green Indicator List |
Show the health of your projects in 6 typical tracking categories (i.e. Overall, Cost, Effort, Schedule, Feedback, Scope) using red/yellow/green indicators. |
| Active Projects Health View (Calculated) |
Red/Yellow/Green Indicator List |
Show the health of your projects in 6 typical tracking categories (i.e. Overall, Cost, Effort, Schedule, Feedback, Scope) using red/yellow/green indicators. The Schedule and Cost categories can be calculated instead of manually indicated. |
| Types of Active Projects |
Pie Chart |
Displays the percentage of projects in each category. You can custom categorize your projects to communicate which department has primary responsibility (i.e. Product, Custom, Marketing, etc.) |
| Phases of Active Projects |
Pie Chart |
Shows the percentage of projects in each phase of the Project lifecycle (i.e. Initiating, Planning, Execution, Controlling, or Closing). |
| Overall Health of Active Projects |
Pie Chart |
Displays the percentage of projects in each of the health statuses of On-track, Delayed, or Stopped. |
| At Risk Projects |
Issues Meter |
Configurable list that displays a red bar meter indicating the degree of risk for specific projects. |
|
All the project data that supplies these widgets is stored in the Project Dashboard List which is automatically installed on the site when you add the Bamboo Project Portfolio Dashboard to a page on the same site.
You can also configure the placement of these widgets inside the Web Part by editing the Web Part’s HTML source code directly. Each widget that you want to show can be configured in the tool pane of the Bamboo Project Portfolio Dashboard. Your SharePoint Project Portfolio Dashboard could look like this:
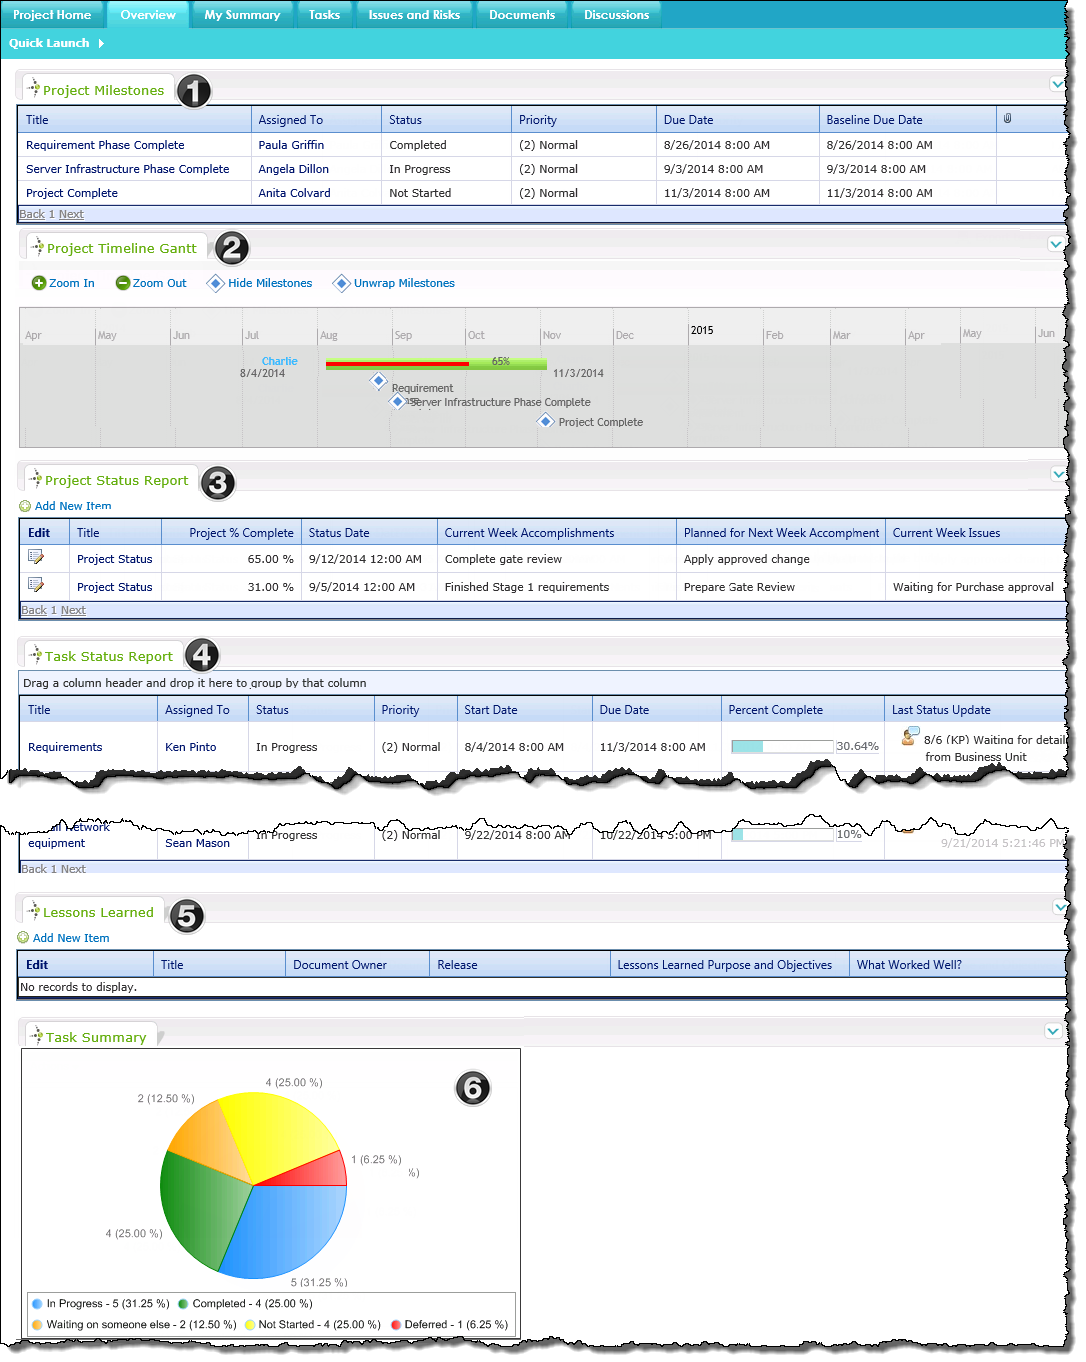
PM Central Project – Overview Tab
The Overview tab on the project site provides users with the high level view of the project.
|
|
Name / Web Part |
Description |
| 1. |
Project Milestones
Bamboo Data Viewer Web Part |
Displays the Overview/Milestones view of the Tasks list.
 Baseline Due Date values will only display if a Schedule Tasks Baseline was created. Baseline Due Date values will only display if a Schedule Tasks Baseline was created.
|
| 2. |
Timeline Gantt
PM Central Custom Web Part |
The Timeline Gantt Web Part displays a summary of the project, showing the project timeline and project’s % complete.
Use the provided toolbar to modify the display: 
-
The default time scale in the Timeline Gantt is months. To change the scale, click Zoom In or Zoom Out in the toolbar menu.
-
Display project milestones by clicking the Show Milestones option. Click Hide Milestones to remove them from the Gantt.
-
Milestones are stacked vertically, or wrapped, by default. To display milestones horizontally, click Unwrap Milestones. To display them vertically again, click Wrap Milestones.
Milestones are stacked vertically, or wrapped, by default. To display milestones horizontally, click Unwrap Milestones. To display them vertically again, click Wrap Milestones.
Information on configuring the Timeline Gantt web part is available here
|
| 3. |
Weekly Project Status Reports
Bamboo Data Viewer Web Part |
The Weekly Project Status Reports display provides a view of the Project Status Reports with a Status Date within the last 30 days.
- Project Status Reports with a Status Date within 7 days of today that are associated with active projects will be displayed under the Overview tab of the portfolio,and applicable department sites

NOTE: Prior to PMC 4.3 only items with a Status Date within in 7 days would be displayed
|
| 4. |
Task Status Reports
Bamboo Data Viewer Web Part |
Displays all Tasks in the project Task’s list that do not have a status of Completed or Not Stated
-
Allows Project Managers to quickly read the contents of the lists Last Status Update column.
-
All Tasks with an active phase status that are associated with active projects will be rolled up and displayed under the Schedule tab of the portfolio, and applicable department sites.
|
| 5. |
Change Requests
Bamboo Data Viewer Web Part |
The Change Requests data view provides information regarding any change requests submitted for the project.
- All Change Requests associated with active projects will be rolled up and displayed under the Overview tab of the portfolio, and applicable department sites.
|
| 6. |
Lessons Learned
Bamboo Data Viewer Web Part |
Capture lessons learned by the project team as part of the project closeout or phase end.
- All Lessons Learned will be rolled up and displayed on the Lessons Learned page of the portfolio, and applicable department sites.
|
|
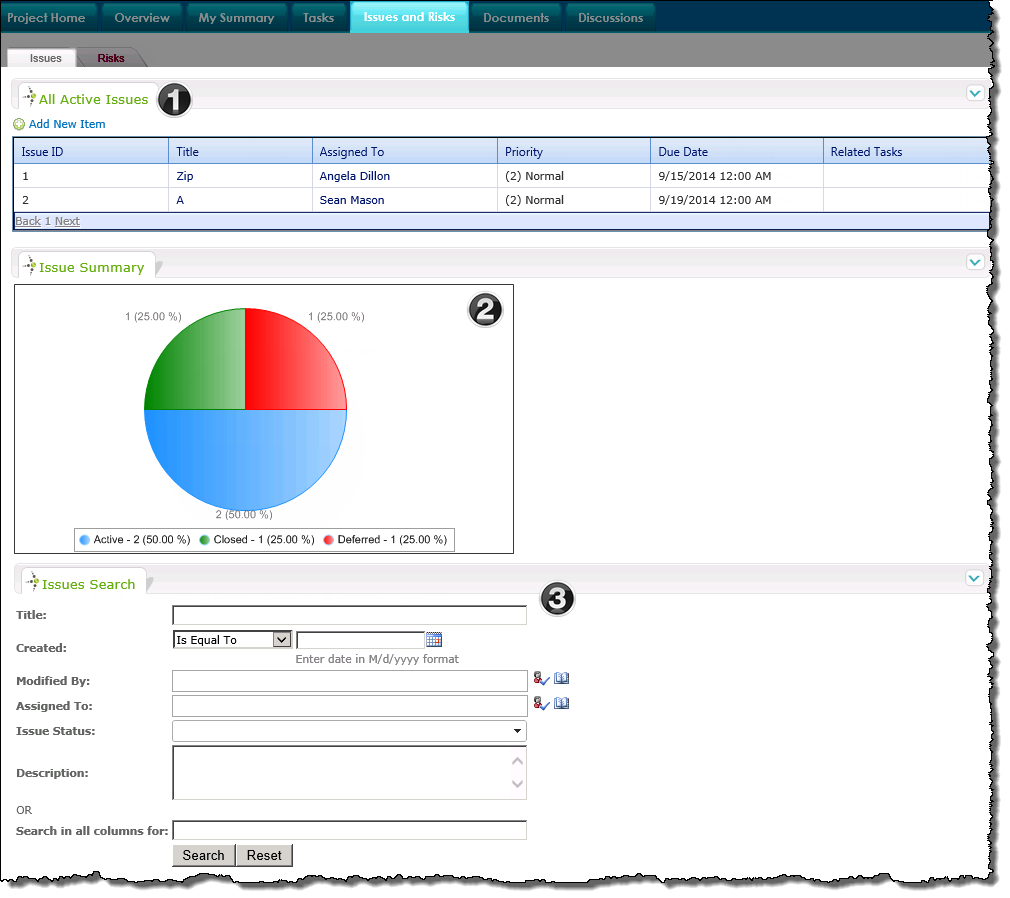
PM Central Project – Issues Tab
An issue is an unfavorable circumstance that has already occurred or is currently occurring and that is affecting the project’s cost, schedule or quality.
The Issues page displays the active issues associated with the project, along with a chart summarizing all the issues created.
When working with Issues keep in mind:
-
All issues with an active phase status that are associated with active projects will be rolled up and displayed under the Issues tab of the portfolio, and applicable department sites.
-
By default, the number of overdue issues will be used by the Issues Status Key Performance Indicator in the Project Health list.
-
Information about creating a new issue is available here
The Issues and Risks pages were separated under the Issues and Risks tab in PM Central 4.3
|
|
Name / Web Part |
Description |
| 1. |
All Active Issues
Bamboo Data-Viewer Web Part |
- The Issues tab shows the active issues associated with the project.
|
| 2. |
Issue Summary
Bamboo Chart Plus Web Part |
- The Issue Summary displays, in chart form, the number and percentage of issues by status (Active, Deferred and Closed).
|
| 3. |
Issues Search
Bamboo List Search Simple |
Use the Issues Search Web Part to search the project site’s Issues list for items according to specific criteria.
Keep in mind:
-
The Web Part is configured by default to use an AND joiner. If you enter more than one criterion, all criteria must be met for a result to be returned.
-
The Status “choice” selector will list the valid choices in the drop-down selector (Active, Deferred, Closed) and a Select All option.
-
Search in all columns for: leverages SharePoint Search and allows searching in all list or library columns using a single search field.
-
Click the links for additional information on using or configuring the Issues Search Web Part.
|
|
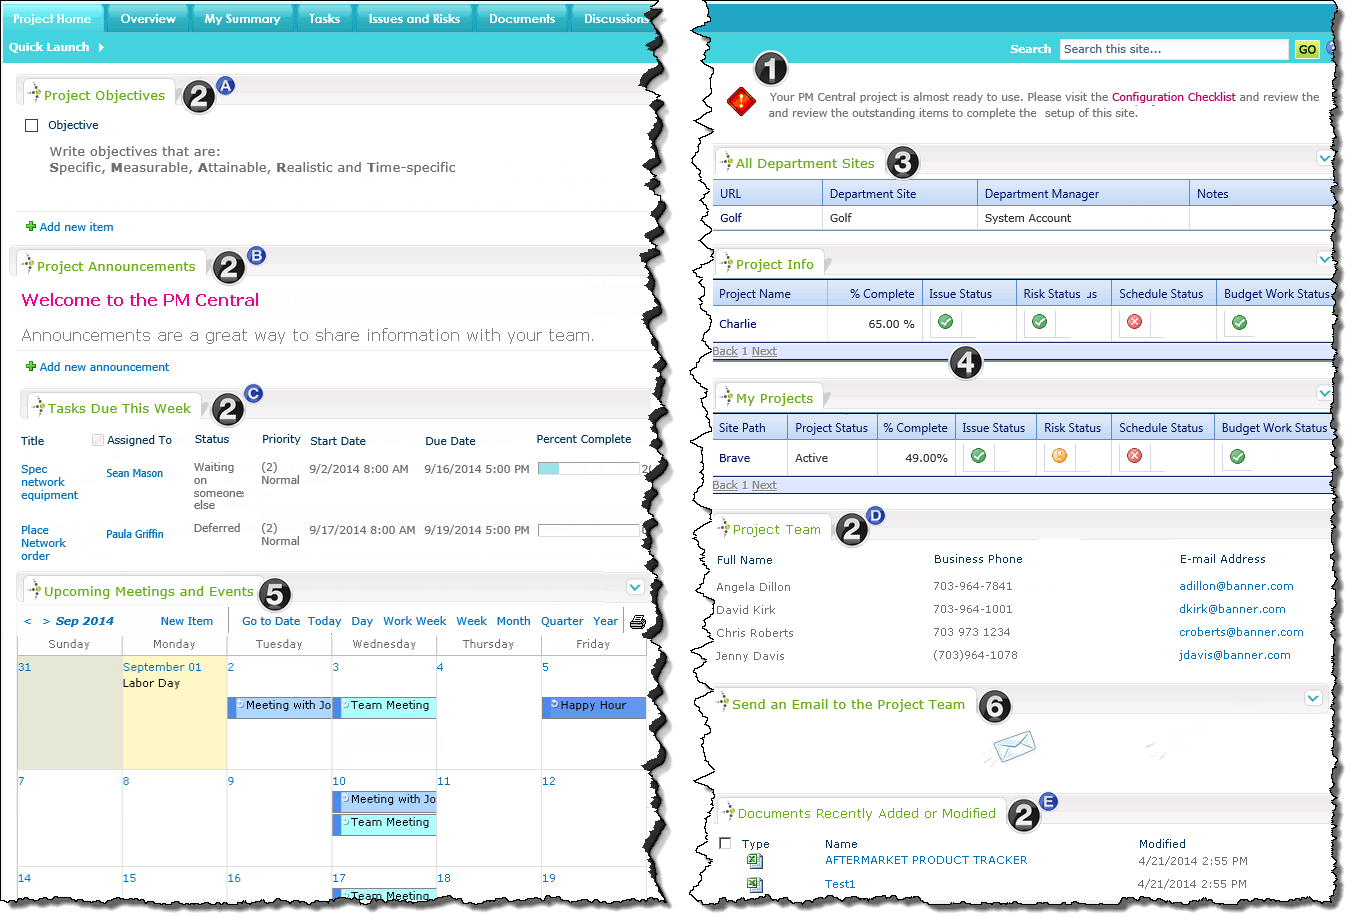
PM Central Project – Project Home Tab
Project Home is the default home page of the Project site.
|
|
Name /Web Part |
Description |
| 1. |
PMC Message Configuration Web Part
PM Central Custom Web Part |
The Warning message displayed in the custom PMC Message Configuration web part provides a reminder to complete the site’s Configuration Checklist. The warning text will remain on the page until all Mandatory items in the checklist have a Closed status. A Complete welcome message will be displayed when all Mandatory items are closed.
|
| 2. |
A.Objectives
B.Announcements
C.Tasks Due This Week
D. Project Team
E.Documents Recently Added or Modified
SharePoint List Views |
SharePoint list views display useful information about the project
Keep in mind:
-
Announcements will not be displayed after their due date
-
To add users to the Project Team you must access the Resource center via PM Central Control Panel
-
The ten most recently added or modified documents will be displayed in this view. All other documents can be accessed from the Documents tab
|
| 3. |
Department Sites
PM Central Custom Web Part |
The Department Sites custom web part will only be displayed on the page if the project site meets the filter criteria of an existing department site |
| 4. |
Project Info and My Summary
Bamboo Data Viewer Web Part |
The Project Info and My Summary data views display high-level Project Health information for each project including % Complete, and health status KPI’s
Keep in mind:
-
Project Info – pertains to the current project
-
My Projects – offers the same health information but only for projects where the logged-in user has been assigned as the project manager
-
Select the link under the Project Name header to access the Project Health list to view/edit additional project related data.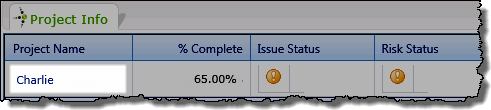
|
| 5. |
Upcoming Meetings and Events
Bamboo Data Viewer Calendar Web Part |
Displays items entered into the site’s Calendar list.
- The Calendar can configured to reference a Holiday list to display your organization’s designated holidays.
|
| 6. |
Send an Email to the Project Team
Bamboo Group Email Web Part |
 Clicking the envelope icon will generated a mail form pre populated with the email address information of all project team members. Clicking the envelope icon will generated a mail form pre populated with the email address information of all project team members.
NOTE: 1.Emails are not saved to the project site.
|
Project Health Overview
The PM Central Project Health list contains basic information about the project, the contents of which are visible throughout the PM Central hierarchy.
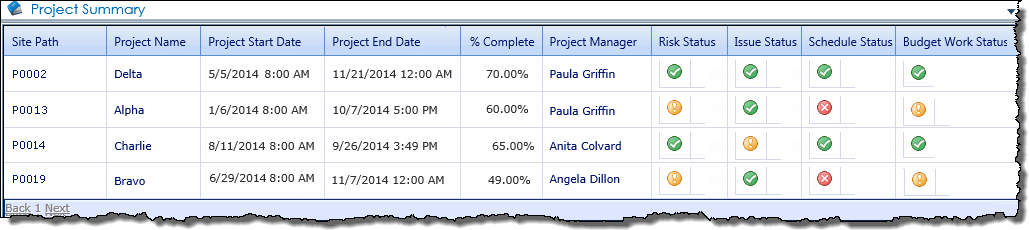
When working with the Project Health list keep in mind:
-
There will only be one item with project health information in the Project Health list
-
Project Health information for all projects is rolled up and displayed in Project Summary dashboards found on the project, and applicable department sites.
-
Project Health information for the current project is is displayed Project Info display on the Project Home page
-
To view all the Project Health information, or to edit the project details, click the link found under Project Name
-
Some columns in the Project Health list, including the Key Performance Indicators, cannot be manually edited.
Project Health related topics:
Project Management
Measure project performance, track deliverable completion, visually communicate project status, and efficiently communicate with geographically diverse team members to deliver projects on time and on schedule with Bamboo’s multifaceted project management tools.
| Product Details |
Documentation |
Description |
 |
Grants Management |
The Grants Management Solution Accelerator from Bamboo helps grantee organizations track their grant obligations to ensure that needed reports are filed on time and that funds received are spent effectively. |
 |
Project Management Central |
Project Management CentralTM provides tailored top-level and sub-site workspace templates for maintaining, tracking, organizing and reporting statuses, tasks, risks and issues for projects within an organization. |
 |
PMC Mobile |
PM Central MobileTM adds mobile functionality to existing Project Management CentralTM installations, allowing users to interact with their projects on the go. |
 |
Project Management Suite |
With PM Suite, you don’t just get PM Central, the world’s best SharePoint project management solution, you gain the ability to use many of the application’s powerful features – charting, task management, alerting, and much, much more – anywhere in SharePoint. With over twenty additional components and tools, the Bamboo Project Management Suite allows you to easily get the most out of your SharePoint-managed projects. |
 |
Project Portfolio Dashboard |
Project Portfolio Dashboard provides program managers and executives a high-level view of the status of company projects. Select from 9 dashboard components to create a custom dashboard layout consisting of color-coded lists and bar, pie and Gantt charts. |
|
Quick Add App |
As a project manager, you typically need to take notes at the same time that you’re creating project action items, in your kick off meetings and among your collaborative teams. Quick Add App for Lists provides both convenience and ease of use in allowing users to quickly create/add multiple tasks/action items to a tasks list. Using Quick Add App for Lists, users can create multiple items on a tasks list with a single click in real-time during meetings. Later on, they can come back to fill out additional information such as detailed assignments and due dates. |
 |
Task Master |
Task Master allows users to create tasks and dependencies between tasks, identify milestones, view tasks in a Gantt view and more. |
 |
Time Tracking & Management |
Time Tracking & Management provides a central location for team members to report and track their time, and for timesheet managers to review and approve timesheets as well as create informative reports. |
|
Click here for a list view of the help topics.
Bamboo’s Project Portfolio Dashboard is a web part that is made up of multiple, customizable widgets. Each widget provides measurement of project progress from various perspectives, including budget, schedule, risk, and overall health. You can show only the widgets that make sense for your project management needs.
Install
|
Permissions
|
License
|
Permissions
|
|
|
|
|
|
Configure
|
Permissions
|
Work With
|
Permissions
|
|
|
|
|
|
Click here if you would rather see a complete list
of all topics for this product. |
Click on the shopping bag or here to download a trial of the product or to purchase it. |
PM Central – Project Health List KPI’s
The Project Health list’s Key Performance Indicators (KPIs) allow executives to quickly draw conclusions about the current state of a project.

When working with the Project Health list’s Key Performance Indicators keep in mind:
-
The Budget Work and Budget Cost fields in the Project Health list must be manually populated with the budget values before PM Central will be able to determine your project’s budget health. If no budget data is provided the associated KPI will always be green.
-
The Budget Cost Status KPI is not displayed by default. Click here for information on how to expose this column in the dashboards.
The removal of the Budget Cost Status KPI from the default Project Summary display was new in PM Central 4.3
-
The Bamboo KPI Column thresholds can be modified. Information about configuring the Bamboo Key Performance Indicator column is available here.
Update key Project Health fields with “Auto Update”
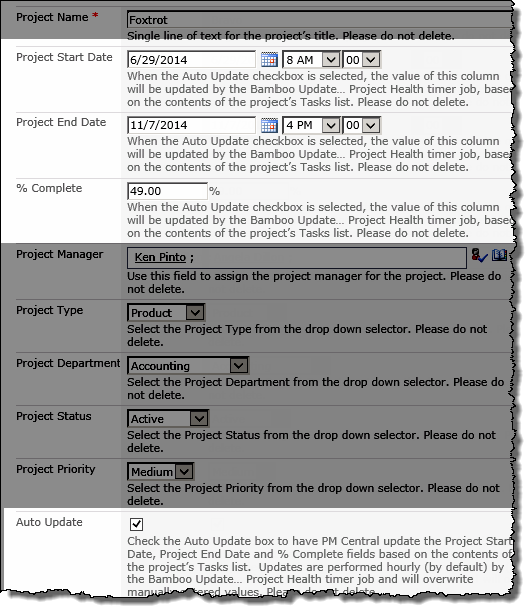
When the Project Health list’s Auto Update field is checked, the lists Project Start Date, Project End Date and % Complete fields, will be automatically updated based on information in the project’s Task list.
When working with Auto Update keep in mind:
-
The Project Start Date will be determined by the item in the project’s task list with the earliest Start Date
-
The Project End Date will be determined by the item in the project’s task list with the latest End Date
-
Auto Update is completed by the Bamboo Update Project Health… Timer job which, by default, runs every 59 minutes.
-
The Bamboo Update Project Health…timer job can be forced to run from the Update Data page accessed from the portfolio site’s PM Central Control Panel.
NOTE: The Bamboo Update Project Health..timer job will also update the Project Name field in lists that have content rolled up and displayed on the Portfolio site.
The Auto Update field is unchecked by default, but can be easily checked from one following locations:
| PM Central Control Panel – Auto Update Settings |
Administrators can set the default value of the Auto Update field to Yes from the portfolio site’s PM Central Control Panel > Auto Update Settings.
The setting will be applied to all new sites created in the Portfolio.

Portfolio Auto Update Settings were added in PMC. 4.3.
NOTE: When this option is selected, the Auto Update field will not be displayed in the PM Central Site Creation tool
|
| PM Central Site Creation tool |
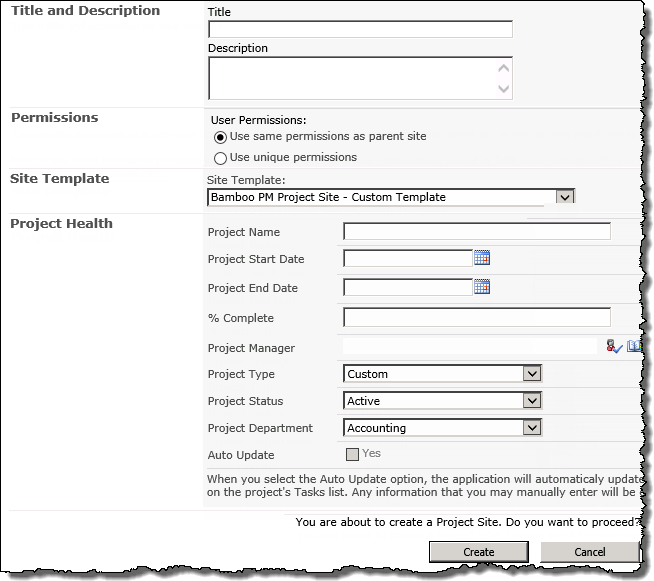 Check the Auto Update checkbox in the Project Health section of the site setup screen. Check the Auto Update checkbox in the Project Health section of the site setup screen.
NOTE: The Auto Update checkbox is not available from this screen in PM Central 4.3
|
| Project Health list |
Change the setting directly from the Edit form of the project’s Project Health list |
|
Project General Settings
Like everything in PM Central the options presented under PM Central General Settings are security trimmed. The features available to users working with a standard PM Central project site will depend on whether they have Full Control or Design permissions on the site.
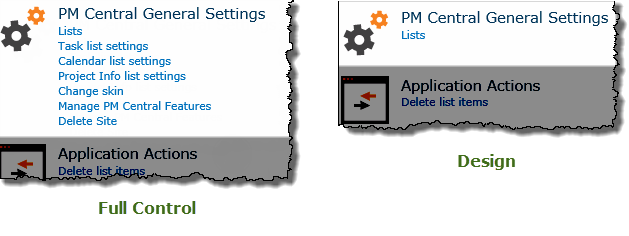
| Link |
Permissions |
Function |
| Lists |
Full Control / Design |
Provides access to the list of all lists, libraries and sites on the site. For a summary of the default List and Libraries included in the project site click here.
NOTE: This page can also be accessed by selecting View All Site Content under Site Actions
|
| Task list Settings |
Full Control only |
Provides a link to the Task’s List Settings page |
| Calendar list settings |
Full Control only |
Provides a link to the Calendar’s List Settings page |
| Project Info List Settings |
Full Control only |
Provides a link to the Project Health’s List Settings page. |
| Change Skin |
Full Control only |
Five site skins are provided for the project site to allow the apperance of the site to be quickly changed. |
| Manage PM Central Features |
Full Control only |
There are several optional features that can be activated or deactivated from the Manage PM Central Features page of the Portfolio site. |
| Delete Site |
Full Control only |
Using the Delete Site link in the Portfolio’s Control Panel will delete the project site and all related site content.
IMPORTANT: You cannot undo this action
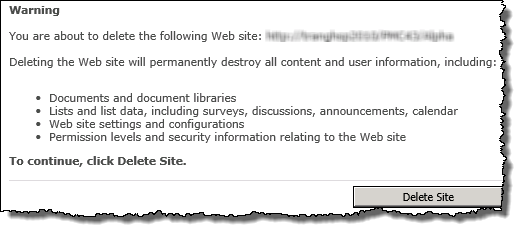 |
Project Control Panel – Resource Center
From the PM Central Control Panel, you can access the Resource Center, with direct links to three of the five available subsections.
NOTE: The Resource Center will not be available under PM Central General Settings if the project site was created using a Lite or Stand-alone template.
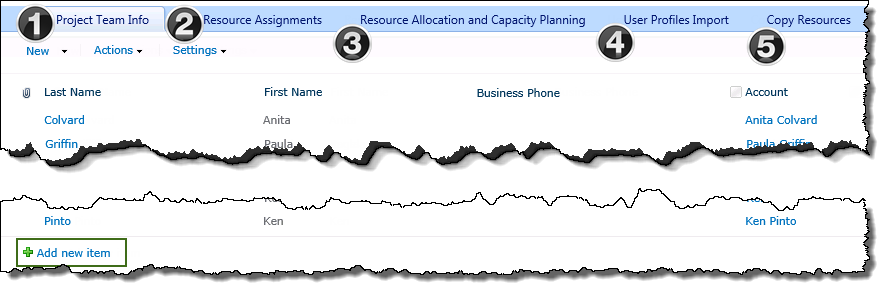
|
|
Function |
| 1. |
The Project Team Info tab displays a view of the sites Contacts list that stores user information for the resources associated with the project.
Project Managers can:
|
| 2. |
Under the Resource Assignments tab you will find a Gantt display of all tasks for all projects sorted by resource.
-
For information on using the web part click here.
-
For information on changing the number of items per page, click here.
|
| 3. |
The Resource Allocation and Capacity Planning tab provides access to a number of reports detailing resource capacity, allocation by resource, project, resource availability and others. |
| 4. |
Users who are not part of the portfolio’s Enterprise Resource Pool, can be added in bulk to the Project Resource pool using the User Profile Import utility.
NOTE: Use of this tool requires a modification to the default behavior of the Bamboo Role column. Click here for more information.
|
| 4. |
Copy Resources provides a tool to import multiple resources simultaneously from the Enterprise Resource Pool
into the Project Resource Pool. |
Project Control Panel – Manage Features
Manage PM Central Features, found under PM Central General Settings in the project’s PM Central Control Panel, allows administrators to enable or disable optional site features with the click of a button.
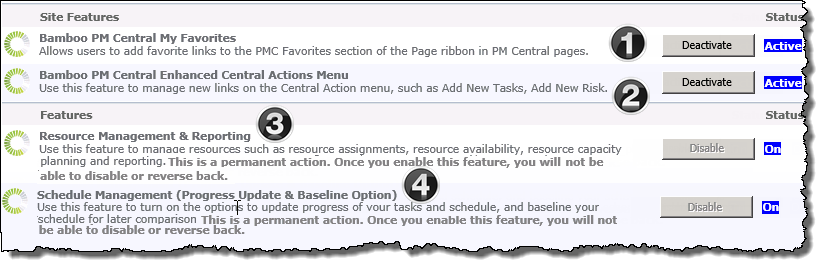
|
|
Function |
| 1. |
Bamboo PM Central My Favorites
This option is activated by default and allows users create favorite links to frequently accessed PM Central pages using the PMC Favorites section of the Page ribbon.
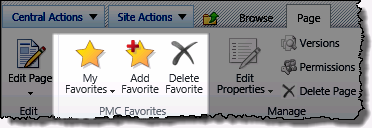 |
| 2. |
Enhanced Central Actions Menu
The Enhanced Central Actions menu is activated by default. Deactivating this option will remove the quick links from the drop down menu.
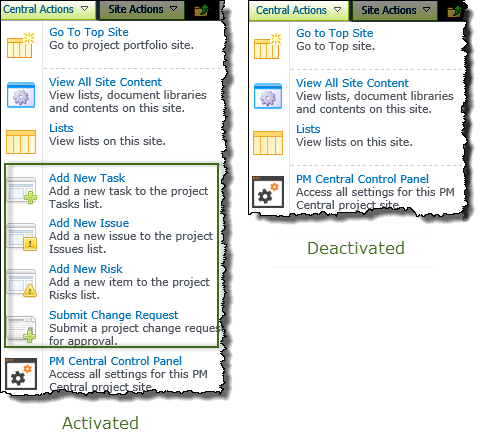 |
| 3. |
Resource Management and Reporting
A project site created using the PM Central Lite template can be upgraded to a standard PM Central site by clicking Enable. This will activate Resource Management and Reporting features on the site.
IMPORTANT: You cannot undo this action
NOTES: 1.If the project site was created using a Standard template this option will be grayed out and the Status will be On.
2. This option is not available on project sites created with a Stand-alone template
|
| 4. |
Schedule Management (Progress Update & Baseline Option)
Select this option to activate enhanced Schedule Management,including the option to create baselines and have access to additional views of the Tasks list, on a project site created with Lite template
IMPORTANT: You cannot undo this action
NOTE: This option is not available on project sites created with a Stand-alone template
|
|
Completing the PM Central Project Configuration Checklist
The Configuration Checklist associated with the project site provides administrators with instructions on how to prepare the site for use. A link to the Configuration Checklist will be available in the warning message displayed at the top of the project home page.

When working with the Configuration Checklist keep in mind:
-
You will need Full Control permission on the project site to complete items in the checklist.
-
The Warning message on the Project Home page will be displayed until all Mandatory items associated with the Configuration Checklist have a been closed.
-
A link to a separate Project Manager’s Checklist will be displayed as part of the Complete message text

NOTE: The contents of the project site’s Configuration Checklist changed in PMC 4.3
| Action |
Description |
| Review Task Master Work Week settings |
Task Master is configured to define working hours as Monday – Friday, 8AM – 5PM with lunch between 12-1PM, resulting in an 8 hour work day and 40 hour work week.
Working hours will be enforced when the project is Recalculated from the Task Master toolbar.
If your organization officially uses a longer or shorter standard work week you will need to update Task Master’s Work Week Settings.
- Navigate to the Tasks tab, or click this item’s action link to access the main Task page
-
Click the gear icon on the right of the toolbar to access Project Schedule Settings.
-
Make the necessary modifications and click Update.
Important:
The working days and hours defined on the project site must be consistent with the settings defined in Report Center Settings on the Portfolio site.
|
| Associate Task Master with the Holiday list |
If your organization is using a “Holiday” list you will need to associate it with the Task Master web part to prevent work being scheduled on the identified “holidays”.
- Navigate to the Tasks tab, or use this this item’s action link, to access the main Tasks page
- Edit the All Tasks web part
- Click the Task Master Web Part Settings button
- Click Holiday List on the left navigation pane
- Enter the URL of the SharePoint site that maintains the Holiday list, then select the list from the drop down.
Note: The same holiday list must be used throughout a PM Central Portfolio and associated sites, and must be created using a SharePoint Calendar list.
|
| Validate the Report & Schedule settings
Standard templates only |
The working days, hours, and holidays specified in Resource & Schedule Settings will be referenced by PM Central when generating the project site’s Resource Allocation and Capacity reports.
- From the PM Central Control Panel, or this item’s action link, access Resource & Schedule Settings and validate the work schedule is consistent with the schedule used in Task Master.
Important: The working days, hours, and holidays, identified here must be consistent with those defined in Report Center Settings at the Portfolio site.
|
| Determine how the Group Email Web Part should send messages |
The Group Email Web Part is configured to send notifications to identified project team members using your email client. This option does not require additional configuration, but it is subject to a limitation that prevents more than 2083 characters being passed across a query string.
If you think the number of characters in the email addresses of project team members will exceed this limit, or if you want to have the email form load in the SharePoint page, make the following changes to the default Group Email configuration:
- Navigate to the Project Home page, or click the action link associated with this item.
- Edit the Send an Email to Project Team web part
- In the configuration tool pane, under Bamboo Group Email, select the Use SMTP radio button
- Enter the SMTP Server Name used by SharePoint, (this information is available from Configure Outgoing Email Settings in Central Administration) and a Notification Email From address
Note: Group Email will not save a history of the messages sent.
|
| Expose the Budget Cost Status KPI in the Project Info dashboard (Optional)
Standard templates only |
When Standard Rates are associated with user profiles in the Project Resource Pool, and tasks are assigned to Project Team Resources, PM Central can calculate the human resource cost of the project. The calculated Project (Human) Cost can then be compared with the Budget (Estimated) Cost value entered in the Project Health list, and the budget health of the project displayed in the Budget Cost Status KPI.
The Budget Costs Status column is not displayed in the Project Info dashboard by default. To display this column you will need to complete the following steps:
- From the Project Home page (Project Home tab) edit the Project Info web part
- Click the Data-Viewer Web Part Settings button
- Click SharePoint List or Library on the left navigation pane
- Click the Column Display Settings button and check the Budget Cost Status box
- Click Save & Close and OK to exit the configuration tool pane
Note: The Budget Cost Status column was removed from the default display in PM Central 4.3
|
| Hide fields in the Project Health and Tasks forms (Optional) |
|
| Save your site configuration in a template (Optional) |
You don’t want to have to complete these configuration steps for every site, so consider creating a custom project template.
When the template is available in the Solutions gallery completing the following steps on the Portfolio site will make the project site template available in PM Central’s site creation tool:
|
PM Central Project Control Panel – Application Actions
The options presented under the Application Actions header in the PM Central Control Panel are security trimmed, so the features available to users will depend on whether they have Full Control or Design permissions on the site.
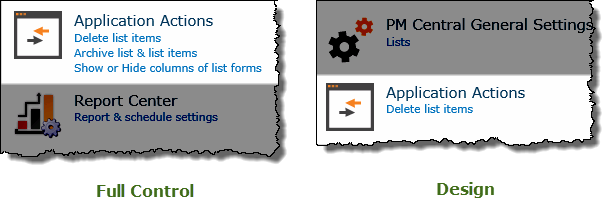
| Link |
Permissions |
Function |
| Delete list items |
Full Control / Design |
This feature allows you to delete all of the items contained within a specific list at one time or multiple lists at the same time. 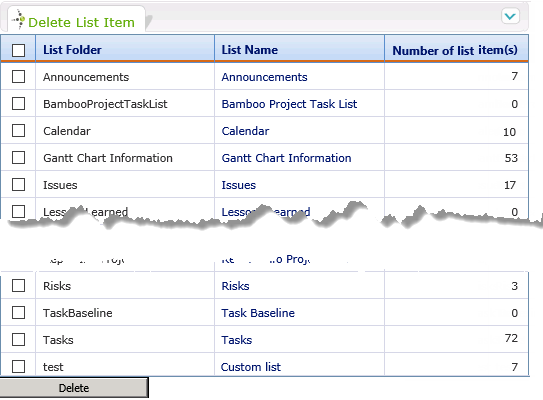
Important: Only use this option if you want to delete all the items within a list. |
| Archive list & list items |
Full Control only |
Allows site owners to archive the contents of the Tasks, Risks or Issues lists. 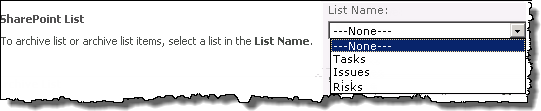
There are 2 archive options available:
Option 1: Archive Items
This will change the Phase Status of all items in the list to Inactive. The items will still be visible from the list but will not be rolled up or included in any PM Central calculations.
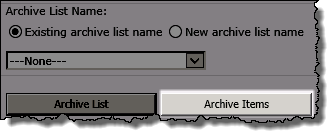
Option 2: Archive List
This will copy the contents of the selected list into another list on the project site and then delete the items from the originating list. 
|
| Show or Hide columns of list forms |
Full Control only |
This feature allows you to hide or show all of the contained information within a PM Central Tasks list or Project Health list.
Important:
This is the only supported method for hiding columns in PM Central. Do not delete columns from PM Central lists.
1. Select the Tasks list or the Project Health list from the drop-down selector
2. Uncheck columns that you want to hide from the available views of the list.
NOTE: The Assigned To column cannot be hidden from the Tasks list
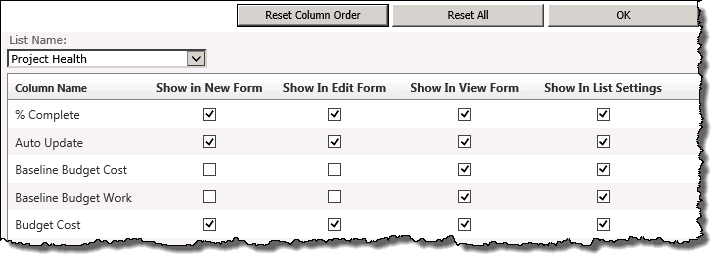
3. Click OK. You will get a confirmation that the update was completed successfully.
NOTE: Use the column ordering settings link to modify the order of columns in the list forms.
|
|
Highlights of Tree View
 An important element for any SharePoint project management portal application, Tree View provides users with the familiar Windows Desktop Explorer navigation, allowing them to maneuver through any SharePoint list, document or picture library. Using folders in document libraries and grouping within the list views, users can organize any SharePoint list, library, discussion, wiki or site collection to display the hierarchy within. Users can group and display similar items into folders, such as high priority tasks, making it easier to navigate through large data sets.
- Folder items are displayed in the left pane while their contents are displayed in the right pane.
- When displaying a SharePoint List, the tree hierarchy is based on the Group By configuration of the selected list view.
- Users can select another view from the Current View drop-down box.
Printing and Exporting Search Results
If the options to allow search result printing and exporting are enabled in the Search Results Configuration, the Print and Export to Excel buttons are available when search results are displayed.
To print results from your search:
| Step |
Description |
Result |
| 1. |
Click the Print button to format search results for printing and send them to your printer. |
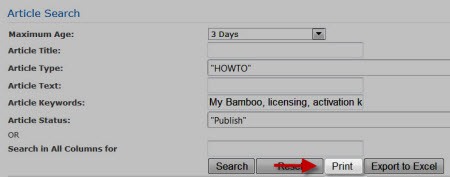 |
|
To export results to Excel:
| Step |
Description |
Result |
| 1. |
Click the Export to Excel button to export search results to a Microsoft Excel spreadsheet. |
 |
|
See also:
Color printing of a Calendar Plus view
 If Calendar Plus has been configured to allow printing, the print icon will be visible in the upper right corner of the Calendar Plus display.
Clicking the print icon opens an HTML browser, and printing capabilities are dependent your browser and desktop OS.
Bamboo supports Microsoft Internet Explorer or higher on Windows for SharePoint 2007, and Microsoft Internet Explorer 8 or higher on Windows for SharePoint 2010 and 2013.
Enable Internet Explorer to print background color:
Internet Explorer 9 or higher
| Step |
Action |
Result |
| 1. |
Before printing, click File (Alt+f) in the IE toolbar and click Page Setup… |
 |
| 2. |
Check the box to Print Background Colors and Images
Keep in Mind:
- Printing changes within Internet Explorer are temporary.
|
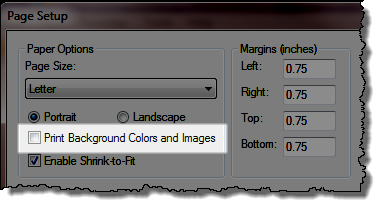
|
Internet Explorer 8
| Step |
Action |
Result |
| 1. |
From the Internet Explorer toolbar select Tools > Internet Options |
 |
| 2. |
Click the Advanced tab and scroll to the Printing section and select the Print Background colors and images checkbox
NOTE: Internet Explorer may need to be closed and re-opened before this change takes effect
|
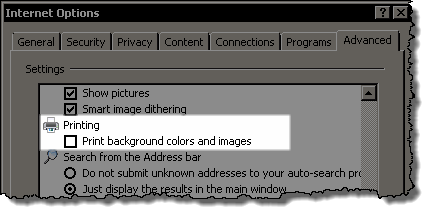 |
Overview of the List Print user display
When List Print is accessed a new window with the contents of the current list will open in a popup window.
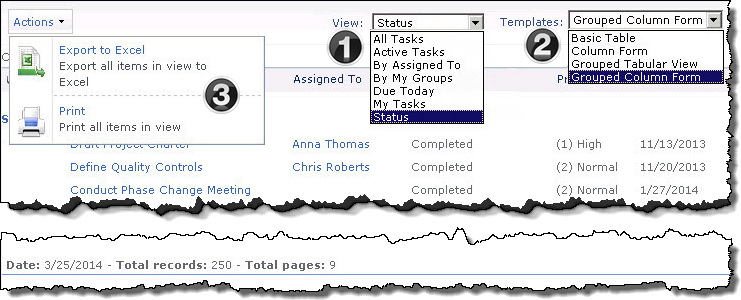
The image has been edited to better display the configuration options
| Item |
Function |
| 1. |
Select the list View that you want to print. |
| 2. |
The Template selected will determine how the list information is presented when it is printed or exported. The following template options are available for all list views:
If the selected View is Grouped two additional options will be available :
-
Grouped Tabular View
-
Grouped Column Form
NOTE: The Grouped templates will only be available when selected View is Grouped. The following message will display when an ungrouped view is displayed.
 |
| 3. |
The Actions button gives you the option to:
- Export all the contents of the selected list view to Excel
OR
- Print all the contents of the selected list view
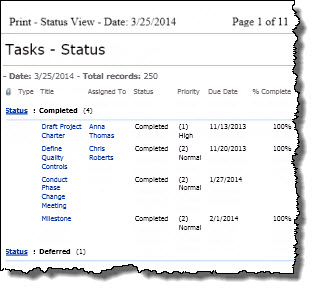
|
|
Print Preview Button
 When the site admin configures the User Profile Plus web part, s/he can select a check box to show the Print Preview Button in the web part. You can preview and print user profile information with a click of a button if this has been enabled to show.
Where does the button show up?
When this button has been configured to show, you will see it on the user profile page.
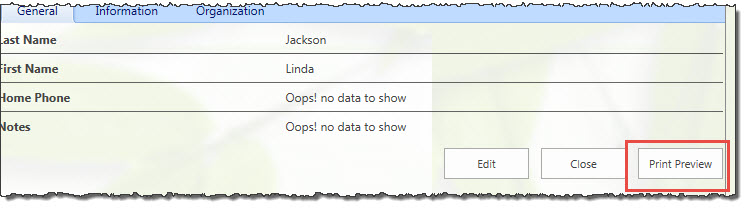
It appears at the bottom of the window pane so that you can click it and see a preview of the user’s profile information in printed form before you send it to the printer as shown below:
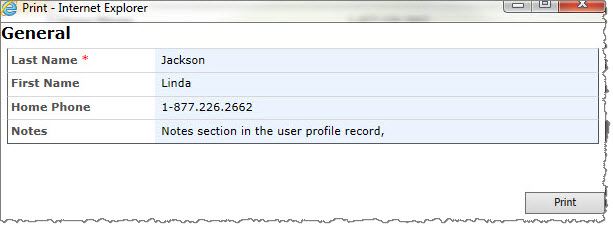
Print the Data-Viewer display

Data-Viewer lets you easily print the current data display. Keep in mind:
-
Only the data displayed on the current page will be printed
-
The Print page link is typically found in the bottom left corner, but this may change with some of the available skins

To print displayed data
NOTE: This feature require your administrator to have selected Print current page as an Interactive option on the General Settings page of the Data-Viewer configuration screen.
| Action |
Result |
| Click the Print Current Page link.
|
-
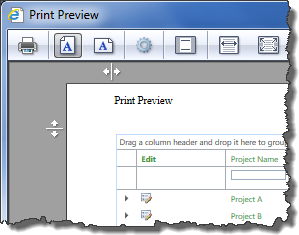 A separate browser page will be displayed and then a print preview window. A separate browser page will be displayed and then a print preview window.
-
Change settings as appropriate.
-
Click the printer
( ) icon to initiate the print. ) icon to initiate the print.
|
Preconfigured skins for Team Calendar
You can change the style and color scheme of Team Calendar by selecting from several preconfigured skins. Samples are shown below for comparison.

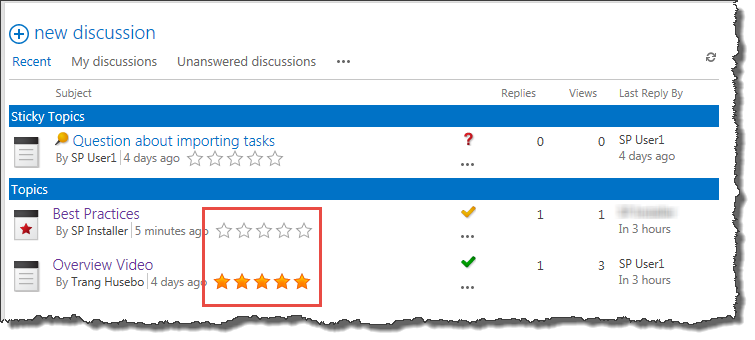 Community Central forum readers can rate forum topics and posts. Ratings allow other readers to easily identify the most helpful forum content. Forum ratings are provided by the Bamboo Rating Column custom column, which is configured to use 5-star ratings by default. For tips on using the 5-star rating feature, and other rating types, see Using Bamboo Rating in a List or Library. For more information about configuring rating options, see Configuring Forum Rating.
 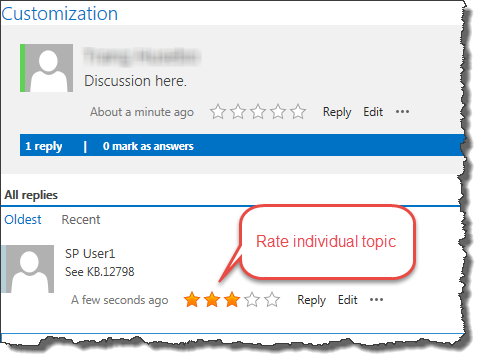 To rate an individual forum post, click a topic to view its posts. Click on the rating in the toolbar for the post you want to rate. Note: Ratings are available in Flat or Thread view only.
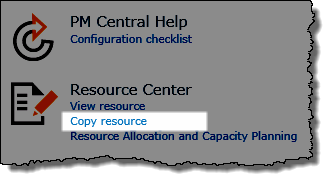
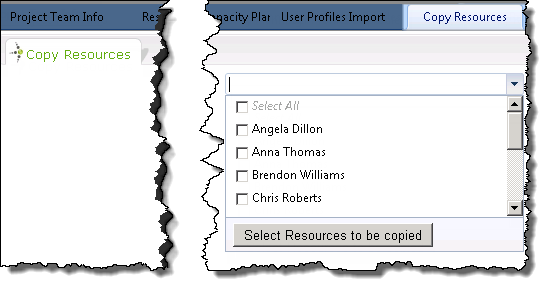
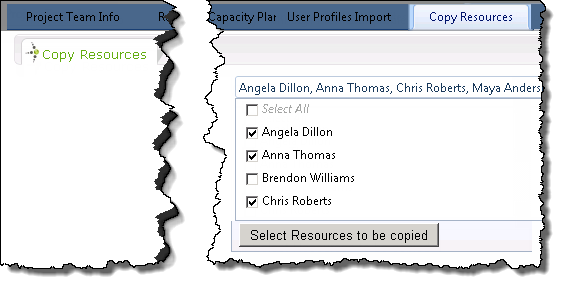
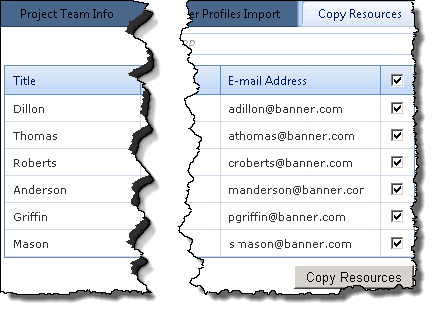

 0 overdue Issues
 Between 1 – 4 overdue issues
 5 or more overdue issues

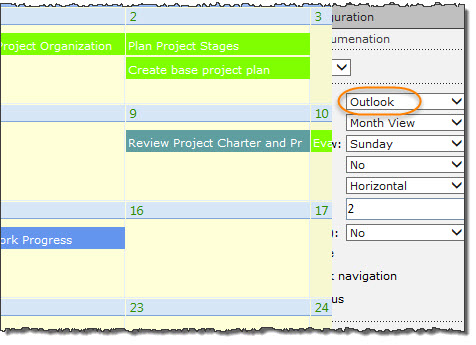


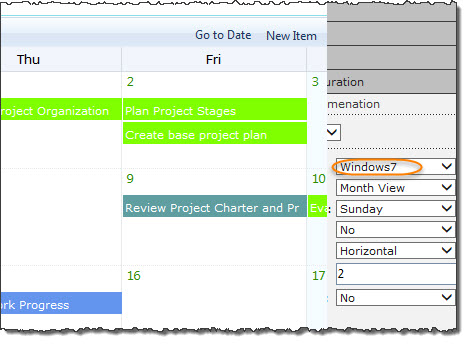
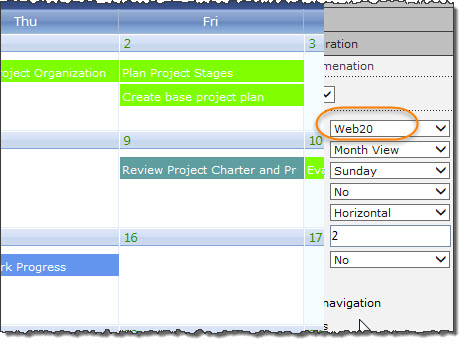
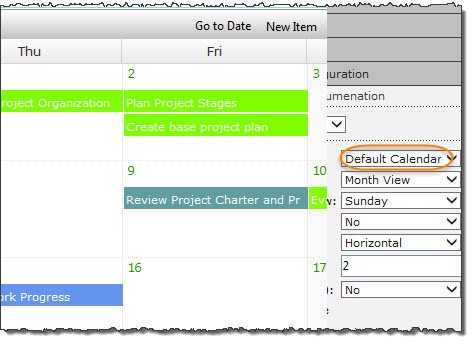
 The Post Settings section of the tool pane helps you configure how posts behave in Discussion Board Plus. Many of the options to configure Post Settings is a simple check on a box or radio button as described below.