Use a Bamboo List Rollup as the Data-Viewer data source

Use a Bamboo List Rollup as the Data-Viewer data source

Configuration Infographic Overview of Configuration Screens

ListRollup Bamboo List Rollup is one of the four available data sources for Data-Viewer.

When working with List Rollup keep in mind:

  • Data-Viewer can connect to Bamboo List Rollup Schemas and Data Views from List Rollup 5.0 or higher.

  • List Rollup must already be installed (sold separately) and a rollup created in order to use Bamboo List Rollup as a data source. For information on how to create List Rollups, view the List Rollup Online Documentation.

  • Data-Viewer will use a single Bamboo List Rollup as the data source, however List Rollup can aggregate an unlimited number of lists.

To configure Data-Viewer to display data from a Bamboo List Rollup:

NOTE: The following steps require you to have accessed the Data-Viewer Settings screens by clicking the Data Viewer Web Part Settings button in the web parts configuration tool pane.

Step Action Result
1.

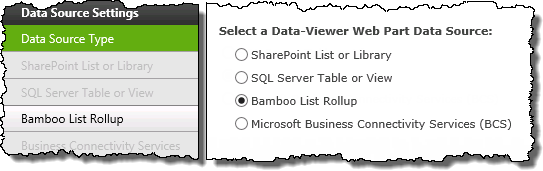
Click the Bamboo List Rollup button under Data Source Settings in the navigation tool pane. Image of the Navigation Pane with the Bamboo List Rollup button available. All other data source buttons are grayed out

NOTE:You will only be able to select this button if Bamboo List Rollup is selected as the Data Source Type

The Bamboo List Rollup Settings screen will be displayed on the right side of the configuration pop-up and allows you to scroll through the configuration options associated with the data source.
2.

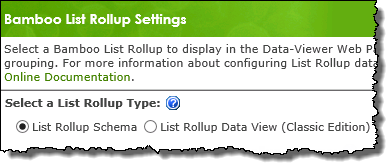
Select the type of List Rollup that will be used as a data source:

  • A List Rollup Schema created with List Rollup Schema

  • A List Rollup Data View (Classic Edition) created with
    List Rollup Classic

    Information on the differences between the Bamboo List Rollup tools is available
    here

Radio buttons to select List Rollup type

Icon-Tip The List Rollup Schema is the preferred List Rollup aggregation method. List Rollup Data View (Classic Edition) is available to support legacy aggregations.

3.

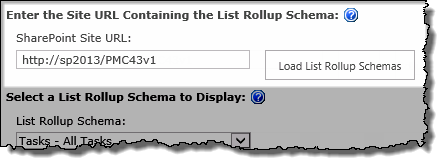
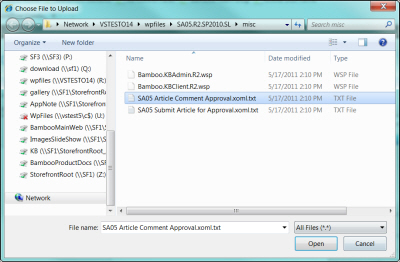
Enter the location of the schema or Data View then click the Load List Rollup… button.

  • If you selected List Rollup Schema in the previous step, enter the SharePoint Site URL where the schema you want to display was defined. The Schema definition may be in a different site collection. Schemas definitions are stored in a known list and therefore, only the site URL is needed.

  • If you selected List Rollup Data View (Classic Edition), enter the URL of the page that contains the Data View you want to display. Data Views are web parts themselves and exist on a particular page of a site. The page may be in a different site collection.

    Icon-WarningIMPORTANT: Although you can enter a URL for another Site Collection, be careful about going across Web Applications. You may have issues if the other web app has a significantly different security setup.

The predefined rollups associated with the List Rollup source selected will be listed in List Rollup… drop-down selector.
Image of the Page or  Site URL field and the Load List Rollup button

  • Both absolute paths (http :// server name/site ) or relative paths(./Site/) can be used for the site URL. Bamboo recommends using relative paths if:
    1. Multiple Alternative Access Mappings are being used
    2. The Web part will be included in a site template
4. Select the Schema or Data View rollup to display.
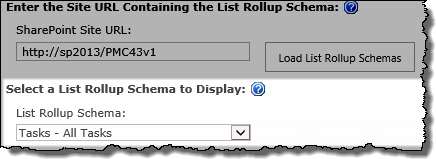
 List Rollup schema/ data view drop down selector
5.

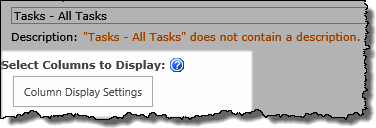
Click the Columns Display Settings button to specify:

  • Which columns to display (required)
  • Column Alias, or alternate header text
  • Column position
  • Column Width
  • Text Justification

Columns Display Settings button

NOTES:
1. You must select at least one column to display in the Web Part.
2. For information on how to add new columns to an existing Data View click here

6.

You have now configured the web part to use a Bamboo List Rollup as the data source.

Continue to scroll down the screen to optionally configure how displayed data will be organized including specifying:

  • Sorting

  • Grouping

  • Filtering

Configuration Infographic Overview of Configuration Screens

Knowledge Base Client Site Lists and Web Parts

Knowledge Base Client Site Lists and Web Parts

Knowledge Base Overview


All of the Web Parts used in the KB Client sites (both Team Site and Meeting Workspace sites) need to be configured to point to lists in the KB Admin site. The KB Client site uses lists from the KB Admin site.

For the Bamboo KB Client site, the following Web Parts are used:

Name Type Description Configuraton
Bamboo KB Ask Question Web Part Allows users to enter and submit a question to KB Administrators. Required
Bamboo KB Display Article Web Part Allows the article content to be displayed in a user-friendly format that includes the ability to print and e-mail the article. Required
Bamboo KB Search Web Part Allows users to search for specific article content or ratings and comments. Required
Bamboo KB Tag Cloud Web Part Displays a list of top tags (i.e. articles with the most views that have these tags associated with them) in a tag cloud on the Tag Cloud tab. Required
Bamboo Tab View Web Part Displays tabs of articles for easy navigation. Required
Bamboo KB Tree View Web Part Displays the category tree on the Home page for navigating the Knowledge Base as well as the Most Popular Articles list and the Latest Additions list. Required
Bamboo Navigators (Meeting Workspace site template only) List Used to create the tabs in the Meeting Workspace site template only. This list is pre-populated with data. Optional
SharePoint Navigators (Meeting Workspace site template only) Web Part Used for the tabs on the Meeting Workspace site template only. Optional

Bamboo Knowledge Base Admin Site Lists and Web Parts

Bamboo Knowledge Base Admin Site Lists and Web Parts

Knowledge Base Overview


For the Bamboo KB Admin site, the following lists and web parts are used. All of the Web pages for the web parts are stored in the Site Pages Document Library.

Name Type Description Description
Bamboo Article Questions and Answers List A discussion board list that stores all questions from the KB Client site and answers from the KB Admin site through the Answer Questions link on the Quick Launch bar. N/A
Bamboo KB Answer Questions Web Part Allows KB Administrators to post the answer to end-user questions in the Bamboo Article Questions and Answers discussion board while at the same time e-mailing the answer to the end user. Required
Bamboo KB Article View Counts List Determines the number of views for each article in the Knowledge Base. Do not modify this list. No. Do not modify this list.
Bamboo KB Articles List Stores all articles created for the Knowledge Base. Uses content approval to restrict articles from being published before they are reviewed or approved. Articles are published to the KB Client when the Status column is set to Publish. The Status column must be set manually and does not require the Content Approval Status to be set to Approved in order to publish the item. The Content Approval feature in this instance is meant to be a KB Administrator reviewing tool only. N/A
Bamboo Category Search Web Part Allows KB Administrators to search article categories using specific criteria. Required
Bamboo KB Categories List Stores the categories used to organize the Knowledge Base. N/A
Bamboo KB Configuration List List Designates the name of your e-mail server and the e-mail address from which e-mails will be sent Required
Bamboo KB Ratings and Comments List Stores all ratings and comments for each article submitted by KB Client users along with a status (i.e. Submitted, Rejected, Published) so the KB Admin can review the submitted comments and determine which comments are posted to the KB Client site. N/A
Bamboo KB Search Web Part Allows KB Administrators to search articles or comments and ratings to determine their existence, their publishing status and article content approval status. Required
Bamboo KB Tag Cloud List Stores all tags created for article association, the number of times the tag has been used and in which articles it has been associated. N/A
Bamboo KB Tree View Web Part Displays the category tree on the Home page for navigating the Knowledge Base as well as the Most Popular Articles list and the Latest Additions list. Required
KB Picture Library Library Stores all pictures uploaded during article creation N/A
Workflow Configuration List List The Workflow Configuration List is part of the Workflow Start Feature optional component for users who have Workflow Conductor installed with SharePoint Knowledge Base, or users who wish to use out-of-the-box SharePoint workflows. Use the Workflow Configuration List to create buttons, located in the ribbon, for workflows automated processes, such as article or comment approval or article publishing. See: How to Use Workflow Conductor for Process Automation in SharePoint Knowledge Base Solution Accelerator. Optional, unless Workflow Conductor is installed.

Bamboo Premier

Bamboo Premier

Bamboo-Premier.jpg No matter what you’re trying to do in SharePoint, Bamboo Premier includes a smarter, faster way to do it. Aggregate data, build complex navigation systems, orchestrate context-sensitive alerts, or streamline everyday administration tasks with a full range of solutions that are ready to use with a click of the mouse. Contact us today to learn more, and find out how Bamboo Premier can make the high cost of SharePoint customization a thing of the past.

Highlights Release Notes

Everything about your suite or toolkit, from retrieving your license keys to downloading products included in the suite or toolkit, can be managed through My Bamboo. All Bamboo Toolkit products are license-protected and must be activated for use on each Web front-end server beyond the initial trial period. This requires the installation of the Toolkit License and Bamboo Web License Manager. Once you have installed these components, all products included in your Bamboo Toolkit can be activated using a single license key.

This section provides instructions for the following required steps:

To get started, log in to My Bamboo using the account information provided by your Bamboo Account Manager when you purchased your suite or toolkit. Until the license package is installed, the suite or toolkit will not appear in the Bamboo Web License Manager in SharePoint Central Administration.

Suite/Toolkit Installation and Licensing

Permissions

ServerAdmin

Icon-Tip No need to license each product! All of the products within your toolkit are licensed through your Suite or Toolkit License. When you are ready to install a product that is part of your suite or toolkit, use the links below to open the product landing page where you can follow the instructions under each section to Install, Configure and Work With each specific product(s) that are included in your suite or toolkit.

NOTE: The web parts included in the Toolkit require installation; however, installation can occur before OR after license activation of the Toolkit, Suite, or Library.

Listed below are all of the products included in Bamboo Premier:

Alerts Management Tools: Visual Presentation Tools: Profile Management Tools:
AlertAdmin
Alerts Administrator
ChartPlus
Chart Plus
UserRegAccelerator
User Registration Accelerator
AlertPlus
Alert Plus
CrossSite
Cross Site
UserAcctSetup
User Account Setup
GroupEmail
Group Email
ListRoator
List Rotator
UserDir
User Directory
MyAlertOrgzr
My Alerts Organizer
LookupSelector
Lookup Selector
UserMgr
User Manager for Sites
Rating
Rating Column
UserProfilePlus
User Profile Plus
Applications:
RichText
Rich Text
UserProfileSync
User Profile Sync
CommCentral
Community Central
Validator
Validator Column
KBSuiteAccelerator
Knowledge Base Solution Accelerator
WorldClockWeather
World Clock and Weather Project Management Tools
PMC
Project Management Central
ChartPlus
Chart Plus
TimeTrackingMgt
Time Tracking and Management List and Library Extensions
KPI
KPI Column
ColumnSecurity
Column Level Security
PMC
Project Management Central
Calendaring Tools
CustomId
Custom Identifier Column
ProjectPortfolioDashboard
Project Portfolio Dashboard
CalPlus
Calendar Plus
DiscussionBdPlus
Discussion Board Plus
TaskMaster
Task Master
InOut
In/Out Schedule Board
FileShare
File Share Library
MIniCal
Mini Calendar
KPI
KPI Column Site Management Tools
TaskMaster
Task Master
LookupSelector
Lookup Selector
FiltersCollection
Filters Collection
TeamCal
Team Calendar
Rating
Rating Column
GroupRedirect
Group Redirect
RichText
Rich Text
Navigator
Navigators
Data Management Tools:
Validator
Validator Column
SiteCreation
Site Creation Plus
CrossList
Cross List
VideoLib
Video Library
UserRedirect
User Redirect
DataViewer
Data-Viewer
VisualIndicator
Visual Indicator
BulkExport
Bulk Export Workflow and Business Process Automation Tools:
BulkImport
Bulk Import Password Management Tools: WFconductor Workflow Conductor
ListConsolidator
List Consolidator
PWchange
Password Change
ListPrint
List Print
PWexpire
Password Expiration
ListRollup
List Rollup
PWreset
Password Reset
ListSearch
List Search (Advanced)
ListSearch
List Search (Simple)
SQLView
SQL View
WikiPub
Wiki Publisher
Click here if you would rather see a complete list
of all topics for this product.
Bamboo Shopping BagClick on the shopping bag or here to download a trial of the product or to purchase it.

Bamboo Feature Needs to be Activated

Bamboo Feature Needs to be Activated

Ever get an error when creating a site that tells you a feature needs to be activated before you can create the site? Unfortunately, the feature that it tells you about is in the form of a GUID, so it’s not immediately helpful. If it is a SharePoint feature, you search the ID (via Google or Bing) and figure out which one it is. But if it is a Bamboo feature, search will probably not help.

How can you get a list of all the Bamboo features and their associated Feature IDs?

You can generate a report using PowerShell granted you have the appropriate permissions on your server.

Here’s the command we use on a server (CSMoss2) to get that info:

 Get-Spfeature 
 | Where-Object {$_.DisplayName -ilike "*bamboo*"} 
 | Select-Object DisplayName, Scope, ID 
 | Sort-Object scope | ConvertTo-HTML 
 | Out-file C:BambooFeatureIDS.htm

The breakdown:

  • Get-Spfeature – lists all the features in the farm
  • Where-object – shows all the features that contain “Bamboo” in the Display Name
  • Select-object – for the properties to display
  • Sort-object – sort by scope
  • Convert-HTML – converts the results to an html file
  • Out-file – puts the html file in your preferred location

The resulting file looks like this:

Output.jpg
The variety of scopes have been highlighted and truncated for clearer display purposes.

Automatically Subscribe Authors to Email Alerts

Automatically Subscribe Authors to Email Alerts

Return to Post Settings

EnableAutoEmail.png
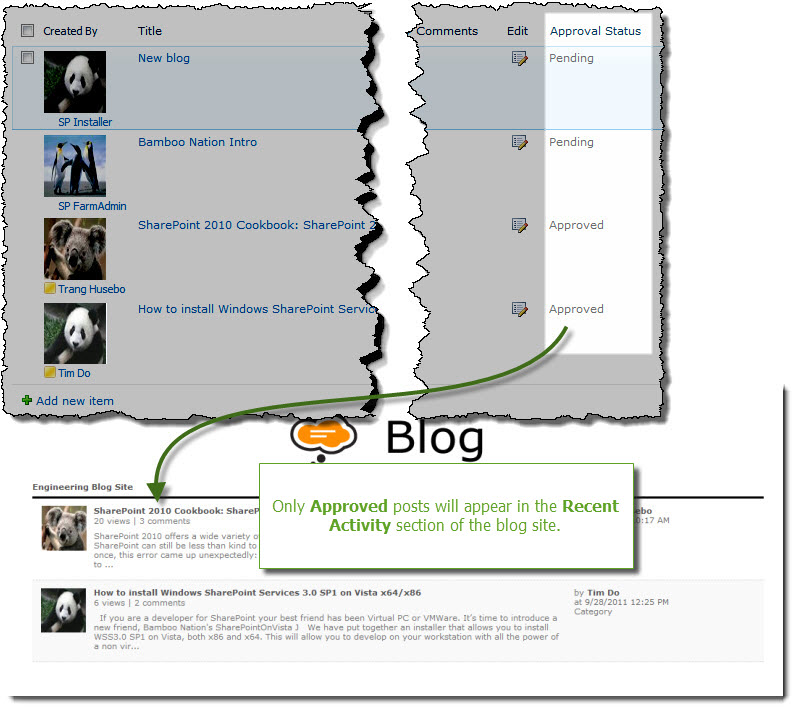
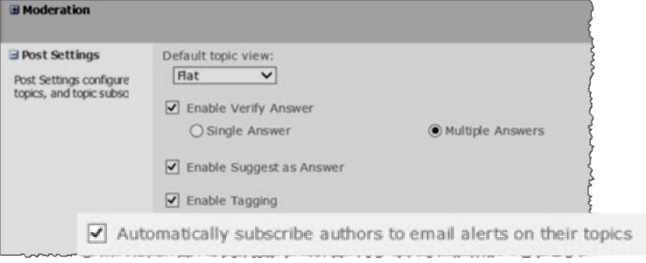
Enabling Automatically Subscribe Authors to Email Alerts allows users to receive email notifications each time there is activity in a discussion thread. Users can also request that notifications are sent immediately after new posts, or in a scheduled summary email.

To enable this option, you must perform two steps: enable the feature in the forum settings and configure the outgoing email settings.

1. Enable the Auto Subscribe Feature in Forum Settings

  1. Click the Forum Settings icon on the List tab of the ribbon.

  2. Select the checkbox to enable “Automatically subscribe authors to email alerts on their topics” to send email alerts to the associated author address.

2. Configuring Outgoing Email Settings

From the Central Administration > Site Settings > Configure email settings page, enter the required email settings:

  • Outbound SMTP server
  • From address
  • Reply-to address
  • Character set

NOTE: For detailed instructions on configuring email settings go to this Microsoft TechNet article.

Auto-Discovery of lists with the List Rollup Classic

Auto-Discovery of lists with the List Rollup Classic

Create a new List Rollup

HW24 LRC Auto-disc list name.png

Step Action
1.

Auto-Discovery Mode. By default, the Auto-Discovery Mode is set to None and it is expected that you will specifically identify the lists that you want to rollup data from. However, being able to auto-discover new lists when they are created is a very beneficial feature and minimizes the updates that you might need to make to your rollup.

HW24 LRC Auto-disc mode.png

To use the auto-discovery feature, choose to find, or auto-discover, the lists to rollup by:

  • Name Match by List name will automatically roll up all the lists that have the same Display Names (i.e., Tasks)
  • Type Match by List Type will automatically roll up all lists that are of the same type (i.e., Tasks, Workflow Tasks, Project Tasks).

The list selected in the Select List area will be used as the basis for matching lists by either name or type.

2.

HW24 LRC Auto-discsearch path1.png
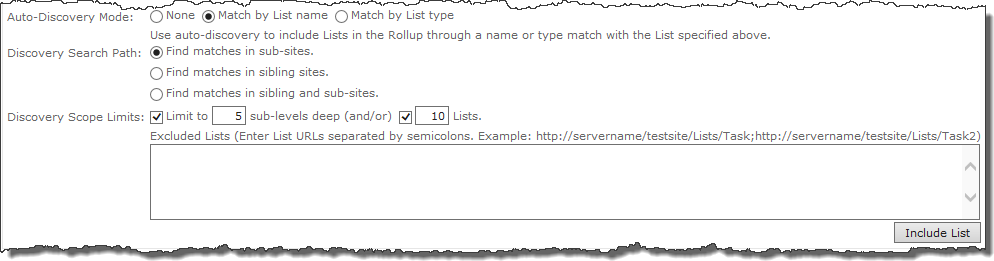
Discovery Search Path. Select the desired Discovery Search Path option to indicate which sub-sites are to be searched during the automatic discovery of lists.

  • Select Find matches in sub-sites to include only the sites underneath the level where the list selected in the Select List area is located. In this example shown below: Sub Sites 1 and 1.1 will be rolled up.

  • Select Find matches in sibling sites to include the SharePoint web site at the same level where the list selected in the Select List area is located. In this example: Sub Sites 1, 2 and 3 will be rolled up.

  • Select Find matches in sibling sites and sub-sites to roll up all the sites, across from the same level where the List selected in the List dropdown is located and below. In the example: Sub Sites 1, 1.1, 2, 2.1, 2.2, 3, and 3.1 will be rolled up.

hw24014.gif
3.

HW24 LRC Auto-disc scope limit1.pngDiscovery Scope Limits. You can limit the scope of the automatic discovery process by specifying a limit to the number of sub-sites or number of lists that the discovery process will traverse. Setting these limits is important for obvious performance reasons. Note that there is no way to guarantee that a particular set of lists is included when the limit is applied. Lists will be selected for inclusion in the order they are returned from SharePoint.

You can also exclude a set of lists that you do not want to be rolled up by entering a static site URL or a relative URL path (./) in the Excluded Lists text box.

NOTE: It is recommended that you use relative paths for site templates and when multiple Alternative Access Mappings are used, this page is included in the Site Template, or if you plan to migrate the content database at anytime in the future.

4. Click on the Include List button to add the selected individual List or auto-discovery List to the rollup.

Create a new List Rollup

KB Solution Accelerator Authors

KB Solution Accelerator Authors

The Authors section in Knowledge Base displays a data view of All Articles, which displays all articles in the Knowledge Base, or My Articles, which displays the articles authored by the logged-in user. You can sort, filter, and make changes in datasheet view by selecting the Edit in datasheet option in the tool pane. For more information, see Overview of Data Viewer Features for End Users.

sa05-2010-dataview.jpg

Associating a site or site collection workflow with a new list

Associating a site or site collection workflow with a new list

This topic applies to workflows that have been published to the site or site collection or deployed as a solution to the site collection.

Step Action
1.

wf setting icon in list ribbon.png
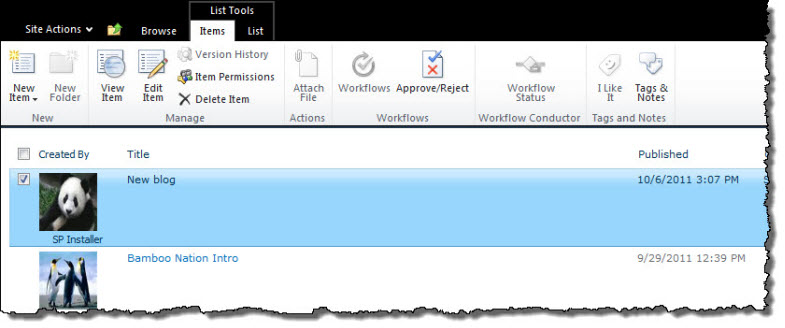
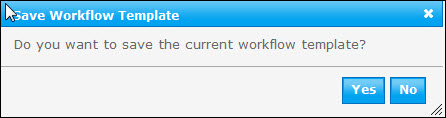
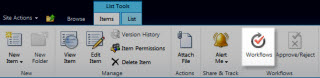
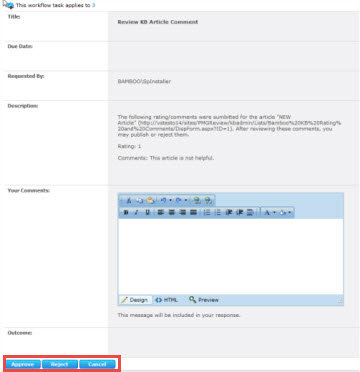
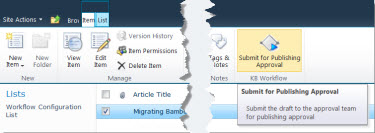
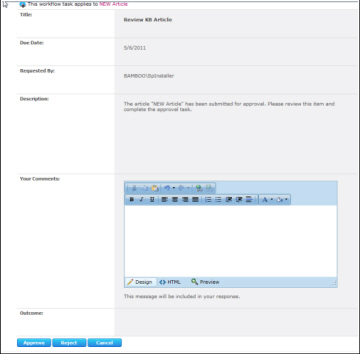
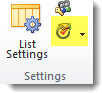
On the list where you want to associate a workflow that has been published to the site or site collection, go to the list ribbon.

In the Settings area of the ribbon, click the Workflow Settings icon. The Workflows page appears.

2.

wf settings - choose a content type.png
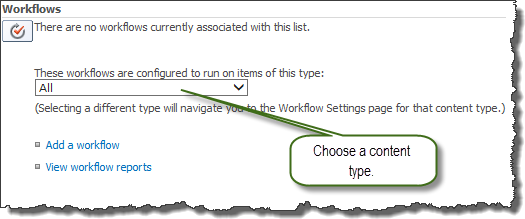
On the Workflows page, see the workflows that are already associated with the list, if any.

NOTE: There may be some workflows associated with a specific content type on the list; you won’t see them until you select the content type.

wf settings - chose a content type.png
If you want to associate a workflow that was published to a specific content type, select the content type from the drop down selection box and click Add a workflow. Otherwise, select All and then click Add a workflow.

3.

Select the workflow template from the list at the top of the page. SharePoint out-of-the-box workflows will be listed here, as well as Workflow Conductor workflows that may have been published to the site or site collection.

NOTE: If you don’t see the template you want, it may be associated with a specific content type (or not). Be sure to choose the correct content type or All.

assoc top.jpg
4.

Give the new workflow a unique name. This will be the name that will be listed in the Workflow Settings page.

Icon-Tip The name you give the workflow will also be used in the Tasks list and/or History list if you choose to create new tasks and history lists (see Steps 5 & 6 below).

assoc new name.jpg

Icon-WarningIMPORTANT: When you give the workflow a unique name, it will not be as easy to link it to the workflow template that was used to publish the workflow. You might consider using the original name as part of the new, unique name.

5.

Choose the task list to use for storing tasks created in the workflow. All tasks lists that exist on the site will be listed.

NOTE: Not all workflows create tasks, so worrying about this selection may be unnecessary.

If you choose New task list, a new task list will be created in the site when the workflow is associated with the list. The new tasks list will be named according to the unique name you give your workflow. For example, if the unique name given is XXX, the new tasks list will be called XXX Tasks.

assoc new tasks with selection.jpg

Icon-WarningIMPORTANT: If your workflow references a workflow task (i.e., a Collect Data From User widget references the Workflow Tasks list), choosing a different workflow tasks list may result in a broken workflow if the workflow designer assumed the workflow tasks list would not change. See Using the Collect Date from User Widget in a Workflow Published to a Site or Site Collection for more information.

6.

Choose the history list to use for storing the history of this workflow. All workflow history lists that exist on the site will be listed.

NOTE: All workflows generate history, but workflow history lists are hidden lists. You will not see them listed in Site contents.

If you choose New history list, a new history list will be created in the site when the workflow is associated with the list. The new history list will be named according to the unique name you give your workflow. For example, if the unique name given is XXX, the new history list will be called XXX History.

assoc history list.jpg

7.

Choose the desired start options for this workflow on this list.

Icon-Tip If some start options are disabled, it is because those options were NOT checked when the workflow was published to the site or site collection.

assoc start options.jpg
8. Click OK to complete the workflow association. Your workflow is now associated with the list.

Assigning template managers

Assigning template managers

Template managers have special rights in the template gallery:

  • Template managers can open or delete any template created by any workflow designer using the Manage Templates tab. This template gallery area is only visible to template managers.
  • Template managers can stop sharing templates shared by any designer by deleting the shared copy in the Manage Templates tab.
  • Template managers can add or remove templates from the Featured Templates list.

To assign one or more template managers for Conductor Studio:

Step Action Result
1. Go to Central Administration and click the Workflow Conductor section.

sa08_templatemanagers.jpg

2. In the Workflow Conductor Control Panel, click Template Management.
3. In the Template Management page, add individual users to the Template Managers list. The users you select must also have access to Conductor Studio (see Workflow Designers for more information).
4. Click OK to save your changes.

See Also:

Assigning Cost Codes to Resources

Assigning Cost Codes to Resources

Assigning Cost Codes to Resources

Before a cost code can be used on timesheets, you must assign it to the resources who can charge time to it. Assign cost codes in the Timesheet Resources list. You must use entries in the Timesheet Resources list to assign cost codes even if you use the PM Central Enterprise Resource Pool as the data source for resources. For more information, read the topics below.

Top

Assigning Cost Codes Using the Timesheet Resources List

costcodes-aggregated.jpg
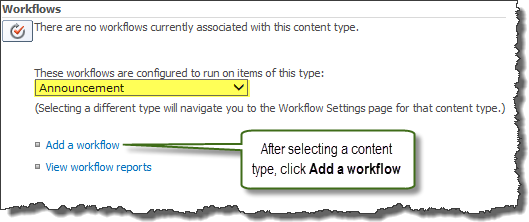
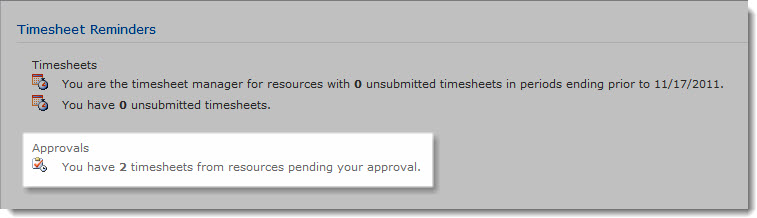
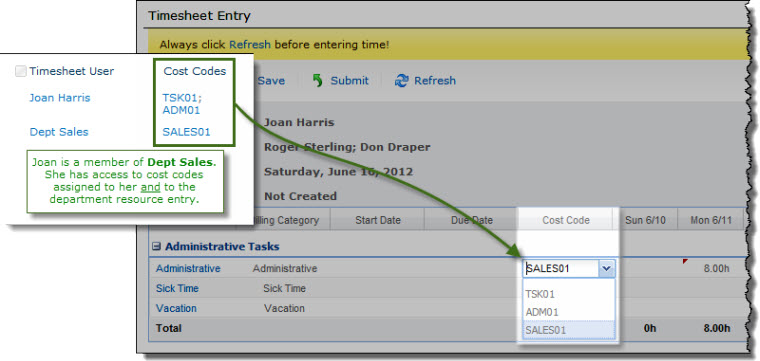
To assign a cost code to a resource, edit an entry in the Timesheet Resources List that applies to the resource. This could be an individual entry or the entry for a group that the resource belongs to. Edit the entry and select the rates the resource can use. These rates will be available in the Cost Code column in the resource’s timesheet.

If an individual has his own entry in the Timesheet Resources list and is also a member of a group resource, cost codes from both entries will be available for that individual. For example, if Joan is a member of the Sales group and the entries shown below exist in the Timesheet Resources list, Joan will have all the cost codes from both entries available in her timesheet as shown above.

Top

Assigning cost codes to PM Central Enterprise Resource Pool (ERP) resources

sa12a-erpexample.jpg
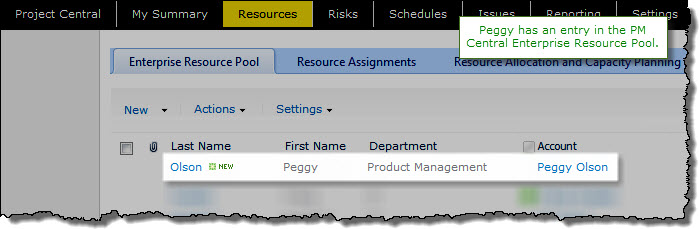
If you selected the PM Central Enterprise Resource Pool (ERP) as the data source for timesheet resources and you want to use cost codes, you must create entries in the Timesheet Resources list so you can assign cost codes to them. sa12a-erpexample2.jpg
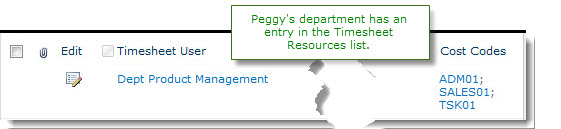
However, you do not need to create a duplicate entry for each ERP resource in the Timesheet Resources list. Instead, you can add one or more groups that contain the same resources accounts as members and assign cost codes to the group. Individual resources will inherit the cost code entries for each group of which they are a member.

sa12a-erpexample3.jpg
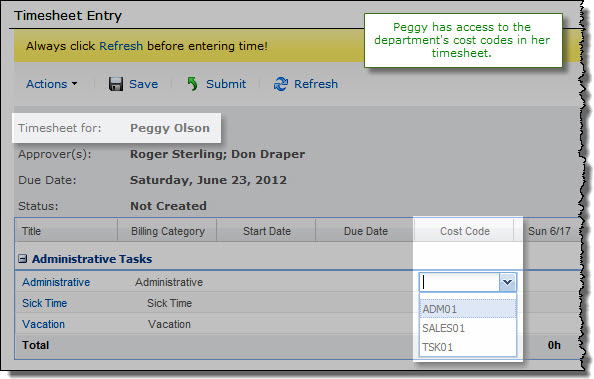
The screen shots here illustrate this example.

  • Peggy is a member the Dept Product Management group.
  • Peggy has an entry in the PM Central ERP and Dept Product Management has an entry in the Timesheet Resources list with several cost codes assign to the group.
  • Peggy’s timesheet automatically gives her access to all the cost codes assigned to Dept Product Management because she is a member of the group.
  • She does not need her own entry in the Timesheet Resources list.

Using groups is a good way to avoid having to duplicate entries between the PM Central ERP and TTM. However, you can also add individual entries if you need to add special cost codes for just one person.

Top

Entering cost codes in a timesheet

costcodeselect.jpg
To enter a cost code for a timesheet task, select it from the Cost Code list. If you use TTM only to track time, cost codes are informational and are not used in any other timesheet calculations. If you have cost tracking enabled, selecting a cost code for a task allows cost data to be calculated for the task.

Top

Ask a Question Page in Knowledge Base

Ask a Question Page in Knowledge Base

How to Use the KB Client Site

The Ask a Question page allows end users to submit questions to Knowledge Base Administrators, who can then review the questions and respond to them.

To submit a question:

Step Action Result
1. From the KB Client site, click Ask a Question Ask.jpg
2. Fill out the form with a short subject and some text in the body that clearly states the information you are seeking. Check the box if you are asking for feedback from others. Leave the “Answered” box unchecked until you get an answer. Click the Need KB box if you also want an article written to add to the Knowledge Base. Include you e-mail address and user name. Form.jpg
3. Click Submit Question. The question gets submitted to the Knowledge Base Administrators through the Pending Questions section in the KB Admin site. The Knowledge Base Administrator can e-mail the reply to the question directly to the user from this section.

See also:

Article Usage Report

Article Usage Report

KBSA Configuration Overview

This report shows Knowledge Base administrators which articles have the most views. This report orders the list of articles by number of page views in descending order by the most at the top. Each article also has a rating count to give you an idea of the articles that users find most helpful (if everyone is rating them).

UsageReport.jpg
Article Usage Report

See also:

Article Counts by Categories

Article Counts by Categories

KBSA Configuration Overview

ByCat.jpg
When you open the link for Reporting, you see a page with four tabs across the top. The first tab is the Article Counts by Categories displaying a box containing the categories and a data view at the bottom of the page.
ArticleCounts-Cat.jpg
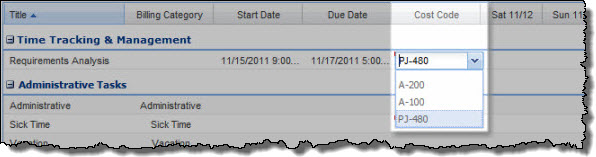
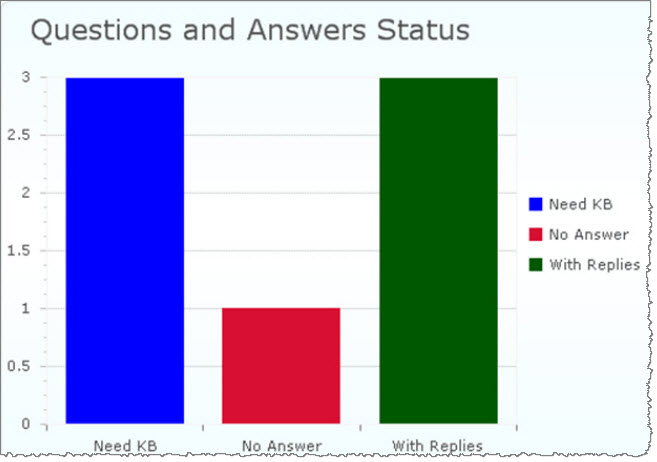
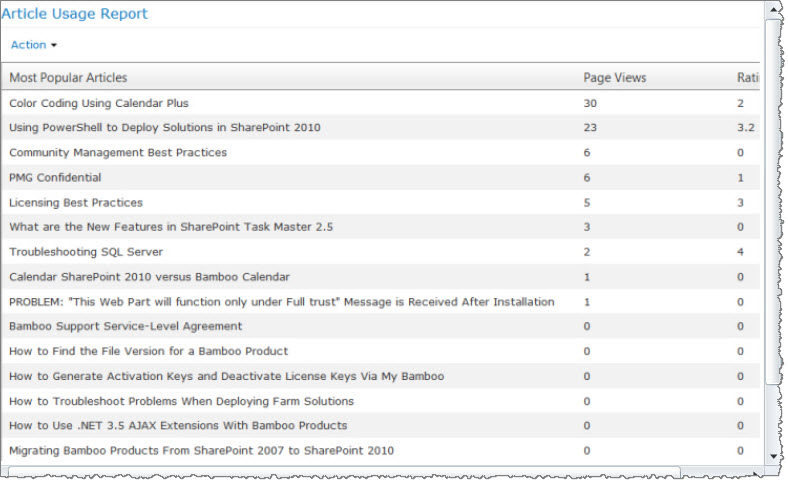
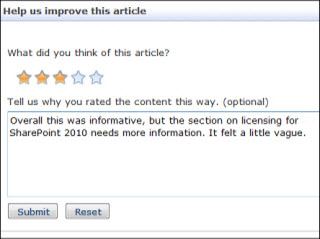
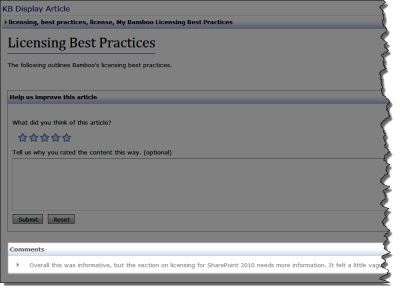
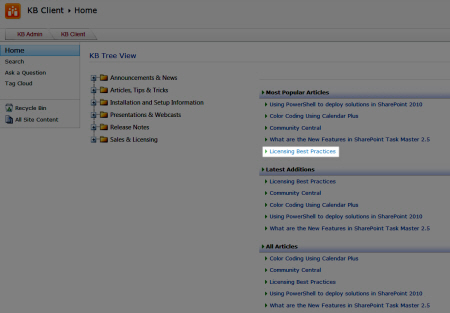
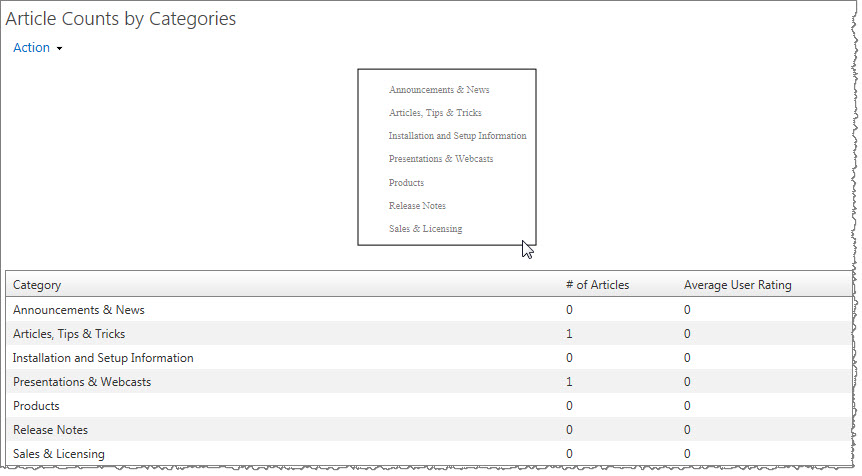
A data view is displayed underneath Article Counts by Categories and Article Counts by Article Type. This data view displays the number of articles in each category or article type as well as the average user rating for that category or article type.

You can modify the web part so that each of your categories has a color corresponding to it so that the plain chart becomes a bit more colorful to look at.
To select colors for the chart, edit the Web Part to open the tool pane where you can configure the category color options.

Step Action Result
1. In the tool pane, click the button Choose colors for the chart. In SharePoint 2013, the button reads “Edit colors.” EditButton.jpg
A new window opens where you can select the desired colors for the chart.
2. You have the option to click the Auto Select button to automatically assign colors. ChooseColors.jpg
3. Or you can choose your colors individually using the drop-down arrows next to each category to set the color for that category.
4. Click Save to save your choices. The chart containing categories will update with the colors that you picked.
ViewChanges.jpg

See also:

Article Counts by Article Type

Article Counts by Article Type

KBSA Configuration Overview

byTypes.jpg
When you open the link for Reporting, you see a page with four tabs across the top. When you click the second tab on the Reporting page, you are presented with a view of a chart and a data sheet view at the bottom of the page showing a summary report of articles by article type.

CountsByType.jpg 
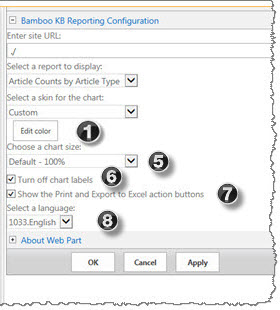
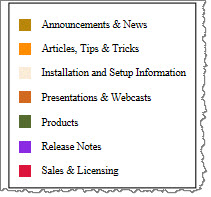
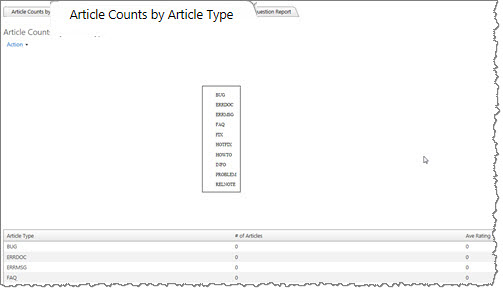
This data view displays a summary list of article types as well as the number of articles and average user rating for that article type.

You can modify the web part so that the chart with all of your article types has a color corresponding to it; the plain chart becomes a bit more colorful to look at than the default.

To select colors for the chart, you can choose to use either the Skin for the chart or customize the colors. Edit the Web Part to open the tool pane where you can configure the article type color options.

Skins

You can select a pre-formatted color scheme by simply selecting a skin.
Skins.jpg 
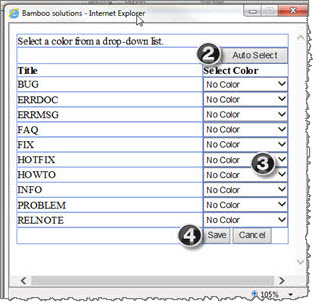
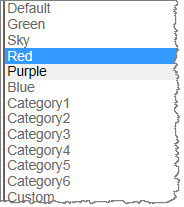
Several skins are embedded into the web part and all you do is pick a skin and the chart changes color.

RedScheme.jpg 
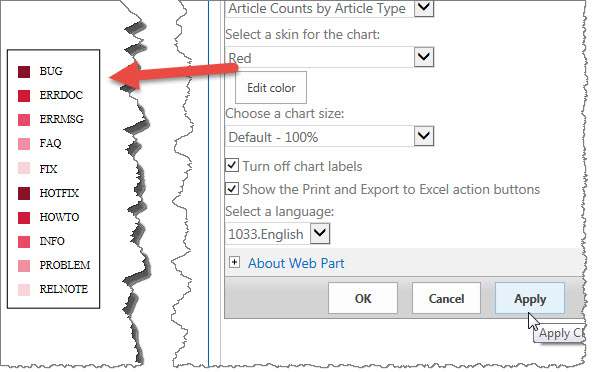
For example, choosing Red will give you a group of colors in the red family.

To select your own colors for each article type, in the tool pane, click the button Choose colors for the chart. In SharePoint 2013, the button reads “Edit colors.”

Step Action Result
1. In the tool pane, click the button Choose colors for the chart. In SharePoint 2013, the button reads “Edit colors.” EditButton.jpg
A new window opens where you can select the desired colors for the chart.
2. You have the option to click the Auto Select button to automatically assign colors. ChooseColors.jpg
3. Or you can choose your colors individually using the drop-down arrows next to each category to set the color for that category.
4. Click Save to save your choices. The chart containing categories will update with the colors that you picked.
ViewChanges.jpg
5. Choose a chart size Charts can be sized from 50% to 200% using the drop down selector.
6. Turn off chart labels By default this box is checked. If you prefer not to show any labels, you can click the check box next to Turn off chart labels. When you uncheck it,
7. Show the Print and Export to Excel action buttons: You can optionally Show the Print and Export to Excel action buttons by clicking or unclicking the boxes.
8. Select a language. More details about languages here.

See also:

Knowledge Base Article Control

Knowledge Base Article Control

sa05-2010-usingadmin2.jpg

The Create New Article link uses the Bamboo KB Articles List. To edit the columns used in the list, or to modify the options available in the list such as for Article Type, edit the list settings. To do this, navigate to the list by selecting All Site Content > Lists > Bamboo KB Articles. Use the ribbon to edit the list settings by selecting List > List Settings.

Create a new article

From the KB Admin site, click Create New Article.

Step Column Name Description
1. Article Title: Enter a name for the article. This is a required field. sa05-2010-newarticle.jpg
2. Related Articles: Add other articles that are related to this new article, if applicable. Click the related articles, then click Add. Click Remove to delete a related article.
3. Article Keywords: Enter keywords that you want to be associated with the article, such as “SharePoint 2010,” “installation” or “troubleshooting”.
4. Article Type:

Select the type of article. This list is prepopulated with the following options:

  * BUG
  * ERRDOC
  * ERRMSG
  * FAQ
  * FIX
  * HOTFIX
  * HOWTO
  * INFO
  * PROBLEM
  * RELNOTE
5. Related External Links: Enter any related links to this article, if necessary, for example: links to Microsoft TechNet.
6. Article Status: Choose the article’s status, such as Draft, Under Review, Publish or Archived.
7. Review Date: Enter a date, or click on the calendar icon, to select a review date.
8. Article Category: Choose one or multiple categories for the article. Click Add to add the categories; click Remove to delete them. Use the CTRL key to select multiple categories.
9. Article Text: Enter the text for the body of the article. Use the formatting options at the top to format text, images and more. sa05-2010-articleview.jpg
Use the Design option to edit in rich text format. Use the HTML option to edit in source code. Click Preview to view how the article will appear when it is submitted.
10. Tag Term: Choose tags to be applied to the article. These tags will allow the article to be searched via the Tag Cloud on the KB Client site.
11. Expiration Date: Enter a date, or click the calendar icon, when the article will expire. This ensures that the Knowledge Base remains up to date and current.
12. Click Save.

Knowledge Base Article Control

Knowledge Base Article Control

Knowledge Base Overview

The Create New Article link uses the Bamboo KB Articles List. To edit the columns used in the list, or to modify the options available in the list such as for Article Type, edit the list settings (it is a normal SharePoint list).

To do this, navigate to the list by selecting All Site Content > Lists > Bamboo KB Articles. Use the ribbon to edit the list settings by selecting List > List Settings.

To create a new article:

Step Action Result
1. From the KB Admin site, click Create New Article. CreateArticle.jpg
2. Create the new article with the content as described below:
Column Description
Article Title: Title.jpg
Enter a name for the article. This is a required field.
Related Articles: Related.jpg
Add other articles that are related to this new article, if applicable. Click the related articles, then click Add. Click Remove to delete a related article.
Article Keywords: Keywords.jpg
Enter keywords that you want to be associated with the article, such as “SharePoint 2010,” “installation” or “troubleshooting”.
Article Type:

Select the type of article.
ArticleType.jpg
This list is prepopulated with the following options:

  • BUG
  • ERRDOC
  • ERRMSG
  • FAQ
  • FIX
  • HOTFIX
  • HOWTO
  • INFO
  • PROBLEM
  • RELNOTE
Related External Links: ExtLinks.jpg
Enter any related links to this article, if necessary, for example: links to Microsoft TechNet.
Article Status: ArticleStatus.jpg
Choose the article’s status, such as Draft, Under Review, Publish or Archived.
Review Date: RevDate.jpg
Enter a date; if you prefer, click on the calendar icon to select a review date.
Article Category: Choose one or multiple categories for the article. Click Add to add the categories; click Remove to delete them. Use the CTRL key to select multiple categories.
Article Text: ArticleText.jpg
Enter the text for the body of the article. Use the formatting options at the top to format text, images and more. Use the Design option underneath to edit in rich text format. Use the HTML option to edit in source code. Click Preview to view how the article will appear when it is submitted.
sa05-2010-articleview.jpg
Tag Term: TagTerms.jpg
Choose tags to be applied to the article. These tags will allow the article to be searched via the Tag Cloud on the KB Client site.
Expiration Date: ExpDate.jpg
Enter a date, or click the calendar icon, when the article will expire. This ensures that the Knowledge Base remains up to date and current.
3. Click Save.

Create or Edit an Article

Create or Edit an Article

From the left quick launch bar, click “New Article” under “articles and follow the steps in the table below.

quicklaunch.png

Or, to edit an article, open the article and click the “Edit Item” button in the top ribbon.

edit.png

Step Column Name Description
1. Article Title: Enter a name for the article. This is a required field. draft1.png
2. Related Articles: Add other articles that are related to this new article, if applicable. Click the related articles, then click Add. Click Remove to delete a related article.
3. Article Keywords: Enter keywords that you want to be associated with the article, such as “SharePoint 2010,” “installation” or “troubleshooting”.
4. Article Type: Select the type of article.
5. Related External Links: Enter any related links to this article. Hyperlinks can be added using the “Link” button on the “Insert” ribbon.
6. Article Status: Choose the article’s status, such as Draft, Under Review, Publish or Archived. Default status is configured under List Settings for “Bamboo KB Articles,” in the “Status” column.
7. Review Date: Enter a date, or click on the calendar icon, to select a review date.
8. Article Category: Choose one or multiple categories for the article. Click Add to add the categories; click Remove to delete them. Use the CTRL key to select multiple categories.
9. Article Text:

Enter the text for the body of the article or select a template from the dropdown menu. Learn more about managing templates.
You can save your article text as a template by using the “Save Template” button.

Use the Design option to edit in rich text format. Use the HTML option to edit in source code. Click Preview to view how the article will appear when it is submitted.

draft2.png
10. Tag Term: Choose tags to be applied to the article. These tags will allow the article to be searched via the Tag Cloud on the KB Client site.
11. Expiration Date: Enter a date, or click the calendar icon, when the article will expire. This ensures that the Knowledge Base remains up to date and current.
12. Mark as Sticky to make the article always appear at the top of list views that include the article.
13. Click Save.

Advanced Settings

Articles point to the Bamboo KB Articles List. To edit the columns used in the list, or to modify the options available in the list such as for Article Type, edit the list settings. To do this, navigate to the list by selecting All Site Content > Lists > Bamboo KB Articles. Use the ribbon to edit the list settings by selecting List > List Settings.

Approving and Rejecting Timesheets

Approving and Rejecting Timesheets

Approving a Single Timesheet

sa12a-homepagewithapprovals.jpgIf you are configured as a timesheet manager for one or more resources, you have the ability to approve (and reject) timesheets for those resources. You cannot approve or reject time for a resource if you are not the timesheet manager (or secondary timesheet manager) for that resource.

When one of your resources submits a timesheet for approval, the following actions occur:

  • If alerts are enabled, you will be notified by email that you have a timesheet to approve. The email will include a link to the timesheet.
  • On your home page, the number of timesheets you have waiting for approval is updated.
  • The timesheet is available in the Pending My Approval section of the site.

To approve a timesheet:

Step Action Result
1. Click the Pending My Approval link in the Quick Launch menu to view submitted timesheets waiting for your approval. sa12a-approvetimesheets.jpg
Timesheets are grouped by time period and by resource. You will see timesheets for any resource for whom you are the primary or secondary timesheet manager.
2. Locate the timesheet you want to approve and review it. The timesheet will include the list of tasks assigned to the resource, task details, and a summary of the hours worked each day. The timesheet also includes a link to view detailed work and cost information. Any comments the resource entered for the timesheet are displayed below the timesheet details.
3.

When you are ready to approve the timesheet, check the Select All box below the resource name to select all tasks on that timesheet.

NOTE: You must approve all timesheet tasks at once; line-item approval is currently not available.

4. Click the Approve button at the top of the page. You will be prompted to enter comments for the timesheet (optional).

Approving or Rejecting Multiple Timesheets

To review and approve (or reject) multiple timesheets at once, follow the same steps as above, checking Select All for each timesheet as you review it. When you click Approve or Reject, all timesheets you selected will be approved or rejected at the same time. You will not be prompted to enter comments.

Rejecting a timesheet

Follow the same steps as above for approval, but click the Reject button instead.

When you reject a timesheet:

  • The timesheet Status is updated to Rejected.
  • The timesheet is saved to the resource’s My Rejected Timesheets list.
  • The timesheet is saved to your Rejected by Me list.
  • If alerts are enabled, the resource will be notified by email that the timesheet was rejected.
  • If you reject a timesheet, the resource can edit it again to make any required changes, and then resubmit the timesheet for approval.

Approve Blog Posts

Approve Blog Posts

By default, Community Central blogs are configured to use out-of-the-box SharePoint content approval. This allows community Moderators to review and approve new posts before they are published to the blog site. For details about configuring (or disabling) content approval options, see Configuring Content Approval.

When a blog post is saved as draft, its approval status is changed to Pending. Community Central Moderators can approve or reject posts.

NOTE: If you need to make changes to a post before approving it, edit the post. When you click Publish as a Moderator, the post is automatically approved and you can skip the steps below.

To change the approval status for a post, sign in as a Community Central Moderator.

Step Action Result
1. In the blog site page, click Manage posts in the Blog Tools list. SA15_ManagePosts_2013.png
2. Click on the Title link for the post with an Approval Status of Pending to review it.
3. Return to the Posts list and select the post you want to approve. SA15_BlogSelection.jpg
4. Click the Approve/Reject button in the Items ribbon. Select an Approval Status, enter any Comments (optional), and click OK to submit the status change. SA15_ApproveRejectBlog_2013.png
5. If you changed the Approval Status to Approved, the item is now visible in the blog site. Items with an Approval Status of Rejected or Pending are not visible. SA15_ApprovedRecentPosts1.jpg

See also:

Configure Approval Process for Publishing Comments

Configure Approval Process for Publishing Comments

Applies To:

  • SharePoint Knowledge Base Solution Accelerator R2.0 or newer
  • Workflow Conductor R1.6 or newer
  • SharePoint Server and Foundation 2010
  • MOSS 2007 and WSS v3.0

Icon-Warning IMPORTANT: Set up the following workflow processes during off hours. Publishing the workflow templates requires the application pool to be recycled.

Icon-Warning LIMITATIONS: To approve workflow tasks, users require the following permissions: Assignee, Initiator, Site Collection Administrator.

NOTE: To complete task forms and to view the Approve, Reject and Submit buttons, users must be able to:

  1. Read the workflow item that the workflow is running on and
  2. Edit items in the Workflow Tasks List that is associated with the workflow.

To create a workflow to approve and publish comments:

  1. Install and configure SharePoint Knowledge Base Solution Accelerator. See the KBSolution Accelerator for more information.
  2. Install and configure Workflow Conductor. See Workflow Conductor for more information.
  3. Configure the approval workflow for publishing comments following the steps below.
Import and publish the workflow template
Step Action Result
1.

From the KB Admin site, go to Site Actions > View All Site Content > Bamboo KB Articles List.

  • Use the ribbon to select the List Settings.
  • Under the Workflow Conductor section of the ribbon, select Create or Edit Workflows.
12669-1.jpg
Workflow Conductor Studio opens.
2. Click Import from the Workflow Conductor Studio menu. 12669-2.jpg
3.

Click Browse and navigate to the SharePoint Knowledge Base Solution Accelerator product extraction folder.

Open the misc folder and select SA05 Article Comment Approval.xoml.txt.

Click Open, then Import.

12669-20.jpg
4.

The workflow template is loaded into Workflow Conductor Studio.

In the workflow diagram pane, click on Submit to KB Comment Approval Team.

12669-21.jpg
5. In the Widget Properties tab in the settings pane, enter the account(s) for the user(s) who will approve comments. 12669-22.jpg
6.

If desired, modify the other widget properties:

  • Approval Type: The default is All Approvals Required. If desired, change the setting to One Approval Required or Multiple Approvals Required.
  • Days Until Due: Enter the number of days until this workflow task is due.
  • Due Date: Enter a due date for the workflow task.

    NOTE: If the Days Until Due and Due Date fields both have values, the earliest date will be selected as the due date.

  • Allow Reassignment: The default is No. Choose Yes to allow the workflow task to be assigned to another approver.
  • Allow Request Change: The default is No. Choose Yes to allow the approver to enter a comment for the requester to make changes and resubmit for approval.
  • Logging Level: The default is Errors Only. Choose another option to allow more detailed logging, such as Errors and Warnings or Errors, Warnings and Info.
  • Click Apply.

Workflow Conductor updates the diagram.

7. Select Publish > Deploy from the Workflow Conductor Studio menu. 12669-6.jpg
Icon-Warning IMPORTANT: This action will recycle the application pool, and users will receive a 500 error.
8. Click Yes to save the workflow as a template. 12669-7.jpg
The template is saved to the template gallery, and the application pool is recycled.
12669-23.jpg
9. Configure the Workflow Start Feature. You can start a workflow using the out-of-the-box SharePoint button, located in the ribbon, or you can create your own buttons for the KB workflow approval process (available for SharePoint 2010 only). For SharePoint 2007, start a workflow using the out-of-the-box SharePoint button.
12669-10.jpg
10. From the KB Admin site, navigate to Site Actions > Site Settings > Site Actions > Manage Site Features and activate the Workflow Start Feature. 12669-11.jpg
11. Return to the KB Admin site and select the Workflow Configuration List. Complete the following fields.

12669-22.jpg
Make sure to associate the workflow with the correct Bamboo Comments List and workflow template.

  • Ribbon Section Name: Enter a name for the section of the ribbon that will contain the workflow button. This is a required field.
  • Workflow Button Name: Enter a name for the button that will be displayed in the ribbon. This is a required field.
  • Tooltip Title: Enter a title for the workflow that will appear in a tooltip.
  • Tooltip Description: Enter a description for the workflow that appear in a tooltip.
  • Associated Workflow: Choose a list and a workflow that is associated with the button.

    12669-25.jpg
15.

Start a workflow to approve and publish comments:

To begin the workflow, an end user or a Knowledge Base Administrator submits a rating or a comment for an article and clicks Submit.

12669-24.jpg
16. The approver receives an email notification with a link to the comment and a link to the form to Approve or Reject the comment.

12669-26.jpg
When the approver clicks the link, a form appears for approving or rejecting the comment.
12669-27.jpg
If the approver has already rejected or approved the comment, the only available option is Cancel.
17. Return to the article in the KB Client site. The comment is now published.

12669-28.jpg

NOTE: When publishing comments, users with the appropriate level of permission can publish comments using the Publish button through the Approve & Manage Comments link in the KB Admin site instead of using the workflow to publish comments. However, the KB Comment Approval status for that comment will show as In Progress instead of Completed because the comment was not published through the open workflow. This can lead to many open tasks in the Workflow Tasks List.
12669-37.jpg

18. To close out workflow tasks, navigate to All Site Content > Lists > Workflow Tasks List. 12669-38.jpg
19. Approve the desired comments. 12669-39.jpg
The item’s status will change to Completed.
Status.jpg

See Also:

Configure Approval Process for Publishing Articles

Configure Approval Process for Publishing Articles

Applies To:

  • SharePoint Knowledge Base Solution Accelerator R2.0 or newer
  • Workflow Conductor R1.6 or newer
  • SharePoint Server and Foundation 2010
  • MOSS 2007 and WSS v3.0

Icon-Warning IMPORTANT if you are using Workflow Conductor prior to Release2.x: Set up the following workflow processes during off hours. Publishing the workflow templates requires the application pool to be recycled. (Upgrade your WFC product soon so that you won’t need to publish during off hours!)

LIMITATIONS:

To approve workflow tasks, users require the following permissions: Assignee, Initiator, Site Collection Administrator.

NOTE: To complete task forms and to view the Approve, Reject and Submit buttons, users must be able to:

  1. Read the workflow item that the workflow is running on and
  2. Edit items in the Workflow Tasks List that is associated with the workflow.

To create an approval process to publish KB articles:

  1. Install and configure SharePoint Knowledge Base Solution Accelerator. See the KBSolution Accelerator for more information.
  2. Install and configure Workflow Conductor. See Workflow Conductor for more information.
  3. Configure the approval workflow for publishing articles following the steps below.
Import and publish the workflow template
Step Action Result
1.

From the KB Admin site, go to Site Actions > View All Site Content > Bamboo KB Articles List.

  • Use the ribbon to select the List Settings.
  • Under the Workflow Conductor section of the ribbon, select Create or Edit Workflows.
12669-1.jpg
Workflow Conductor Studio opens.
2. Click Import from the Workflow Conductor Studio menu. 12669-2.jpg
3.

Click Browse and navigate to the SharePoint Knowledge Base Solution Accelerator product extraction folder.

Open the misc folder and select SA05 Submit Article for Approval.xoml.txt.

Click Open, then Import.

12669-3.jpg
4.

The workflow template is loaded into Workflow Conductor Studio.

In the workflow diagram pane, click on Submit to KB Approval Team.

12669-4.jpg
5. In the Widget Properties tab in the settings pane, enter the account(s) for the user(s) who will approve KB articles. 12669-5.jpg
6.

If desired, modify the other widget properties:

  • Approval Type: The default is All Approvals Required. If desired, change the setting to One Approval Required or Multiple Approvals Required.
  • Days Until Due: Enter the number of days until this workflow task is due.
  • Due Date: Enter a due date for the workflow task. Note: If the Days Until Due and Due Date fields both have values, the earliest date will be selected as the due date.
  • Allow Reassignment: The default is No. Choose Yes to allow the workflow task to be assigned to another approver.
  • Allow Request Change: The default is No. Choose Yes to allow the approver to enter a comment for the requester to make changes and resubmit for approval.
  • Logging Level: The default is Errors Only. Choose another option to allow more detailed logging, such as Errors and Warnings or Errors, Warnings and Info.
  • Click Apply.

Workflow Conductor updates the diagram.

7. Select Publish > Deploy from the Workflow Conductor Studio menu. 12669-6.jpg
Icon-Warning IMPORTANT: This action will recycle the application pool, and users will receive a 500 error.
8. Click Yes to save the workflow as a template. 12669-7.jpg
The template is saved to the template gallery, and the application pool is recycled.
12669-8.jpg
10. Click Close to close Workflow Conductor Studio. 12669-9.jpg
12. Configure the Workflow Start Feature. You can start a workflow using the out-of-the-box SharePoint button, located in the ribbon, or you can create your own buttons for the KB workflow approval process (available for SharePoint 2010 only). For SharePoint 2007, start a workflow using the out-of-the-box SharePoint button.
12669-10.jpg
13. From the KB Admin site, navigate to Site Actions > Site Settings > Site Actions > Manage Site Features and activate the Workflow Start Feature. 12669-11.jpg
14. Return to the KB Admin site and select the Workflow Configuration List. Complete the following fields.

12669-12.jpg
Make sure to associate the workflow with the correct Bamboo KB Articles List and workflow template.

  • Ribbon Section Name: Enter a name for the section of the ribbon that will contain the workflow button. This is a required field.
  • Workflow Button Name: Enter a name for the button that will be displayed in the ribbon. This is a required field.
  • Tooltip Title: Enter a title for the workflow that will appear in a tooltip.
  • Tooltip Description: Enter a description for the workflow that appear in a tooltip.
  • Associated Workflow: Choose a list and a workflow that is associated with the button.
15.

Start a workflow to approve and publish articles: ◦From the KB Admin site, select Article Control > Manage Articles.

Locate the desired draft article for which you want to start the workflow. The New button is located in the ribbon.

12669-13.jpg
To view the New button, view the draft article in view form, or navigate to the Bamboo KB Articles List, select the desired article, and use the ribbon to select List > Items and click the button.
12669-14.jpg
16. Click Submit for Publishing Approval. Workflow Conductor will open. Click Start Workflow. 12669-15.jpg
17. Return to the article. The article now has a new field, Article Status, with the value Under Review. 12669-16.jpg
18. The approver will receive an e-mail notification with a link to the article and a link to the approval form. 12669-17.jpg
20. The approver can either Approve or Reject the article. If the article has already been approved or rejected, the form only displays the Cancel button. 12669-18.jpg
21. Once the article has been approved, the status changes from Draft to Publish, and the article is available to end users in the KB Client site. 12669-19.jpg

See Also:

Social

Social

Product Details Documentation Description
Community Central Community Central™ is a flexible, scalable, and affordable knowledge-sharing application, complete with forums, blogs, and social networking features like ratings and scoring for top contributors.
Community Management Suite With its robust collection of components and tools, Bamboo Community Management Suite provides a flexible, scalable, and affordable social solution for your SharePoint environment. Not only will your users benefit from best-in-class discussion boards, blogs, and community administration tools, your organization will also gain the ability to access Community Management Suite’s powerful features throughout your SharePoint environment.
Discussion Board Plus Bamboo Discussion Board Plus for SharePoint enhances out-of-the-box SharePoint Discussion Boards with features such as Ratings, Sticky, Suggest and Verify Answers, search capabilities, and more.
Poll Bamboo’s Poll web part enables you to quickly create polls while automating voting response collection and feedback as well as ensuring that you automatically meet polling deadlines.

Click here for a list view of the help topics.

Append view

Append view

sa75breadcrumb.png 
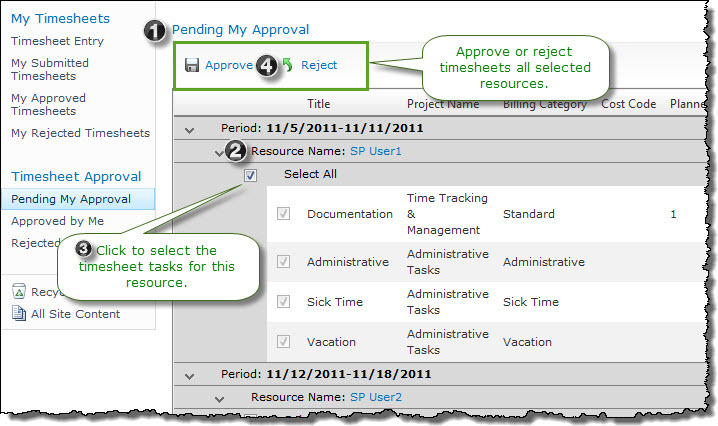
Append view (available for SharePoint 2010 only) is a printer-friendly view that simply appends replies to the original post.

This view does not allow replies, Suggest/Verify Answer, or other functionality available in Flat or Thread views. It is intended as a simple summary or print view only.

sa75appendview.png

See also:

Announcements

Announcements

Top

Keep your user community informed with the Community Central Announcements feature. You can do the following tasks within the announcements:

Add a new announcement

SA15_NewAnnouncement.jpg
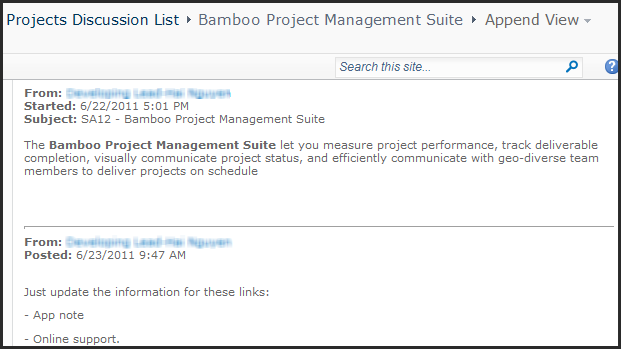
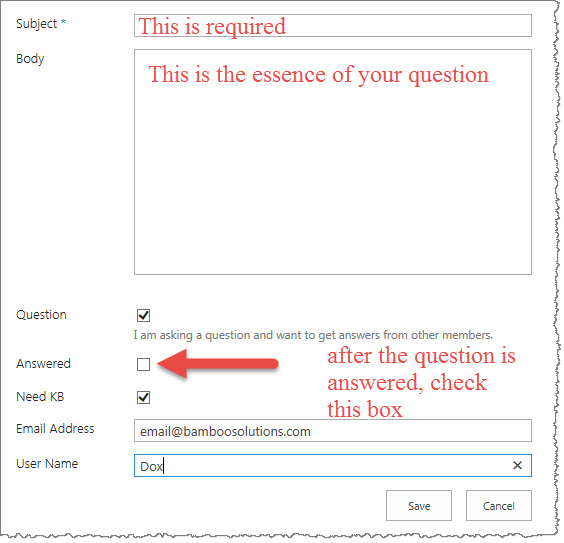
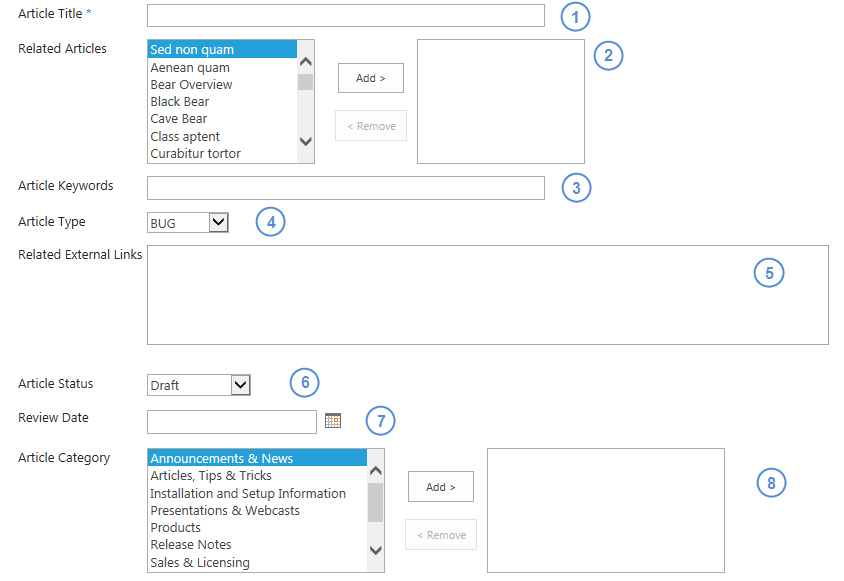
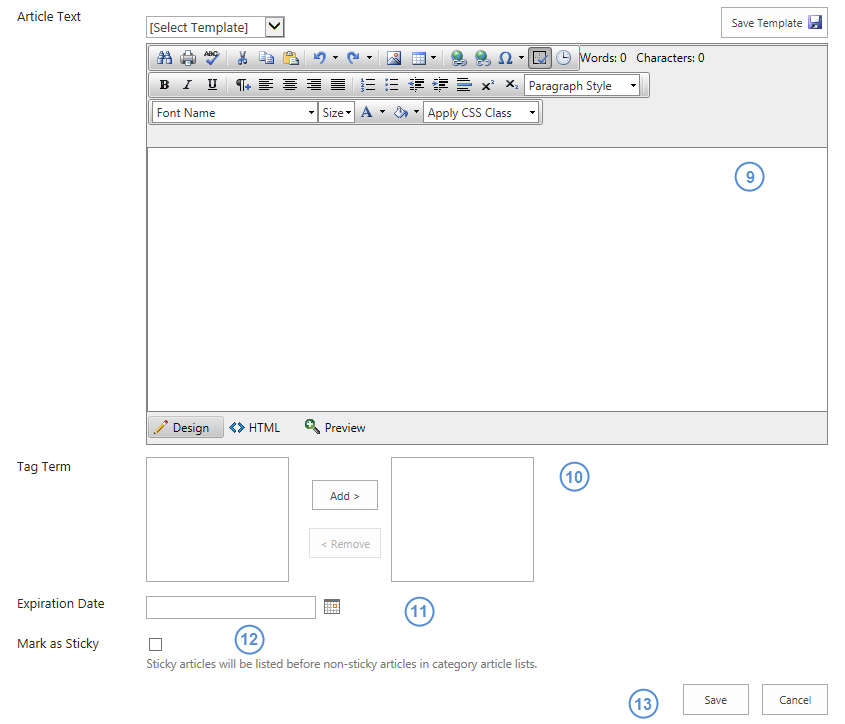
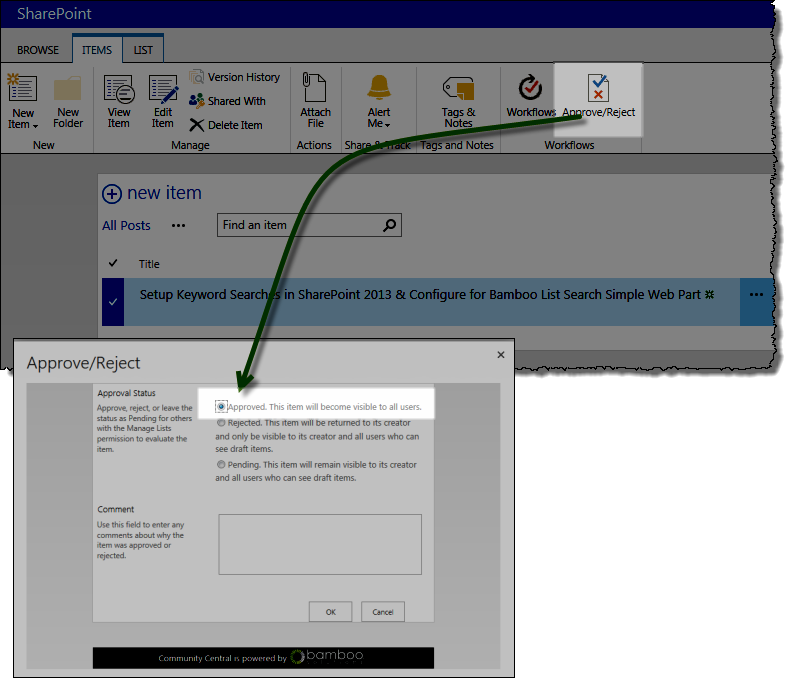
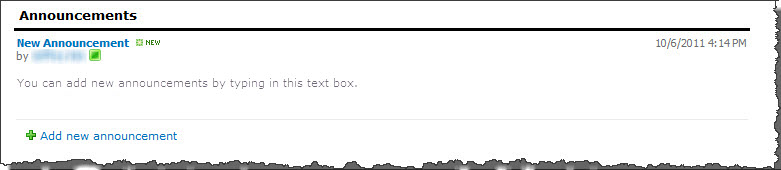
To add a new announcement, click the Add new announcement link in the Announcements section of the Community Central Home page. Enter the announcement Title and Body.

SA15_NewAnnouncementScreen_2013.png 
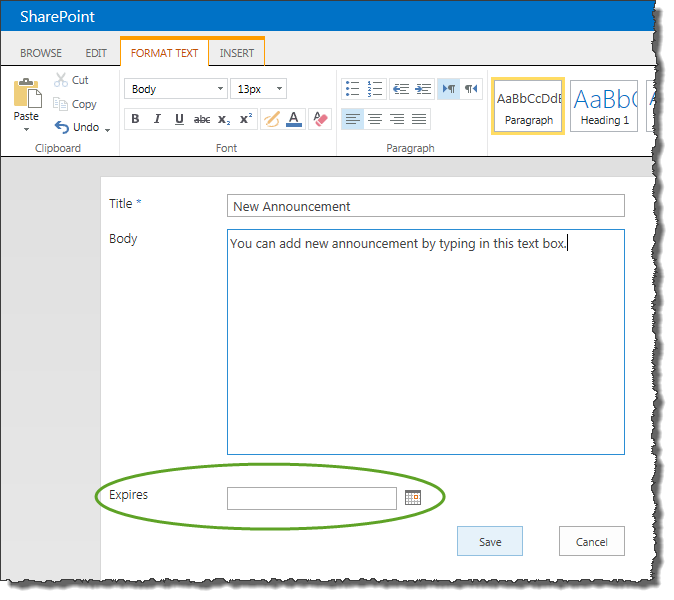
If you would like the announcement to expire on a certain date, select the date in the Expires field. When that date is reached, the announcement will no longer be displayed on the Community Central Home page.

NOTE: If you do not see the Add new announcement link, you do not have permission to add announcements to the Announcements list.

Top

Edit an announcement

SA15_EditAnnouncementButton.jpg
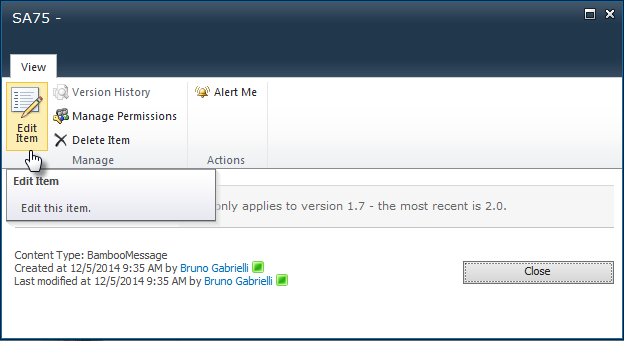
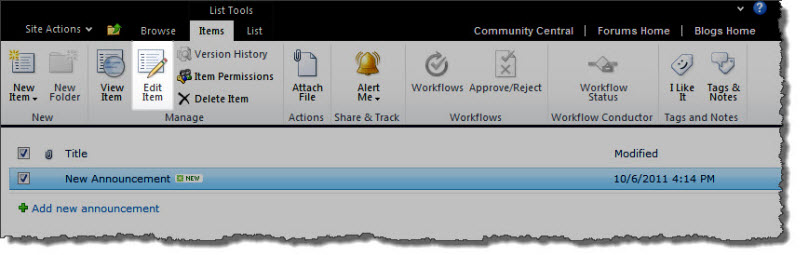
To edit an existing announcement, click on it in the Announcements list and click the Edit Item button in the View ribbon. Click Save when you have finished making changes.

Top

Delete an announcement

SA15_DeleteAnnouncementButton.jpg
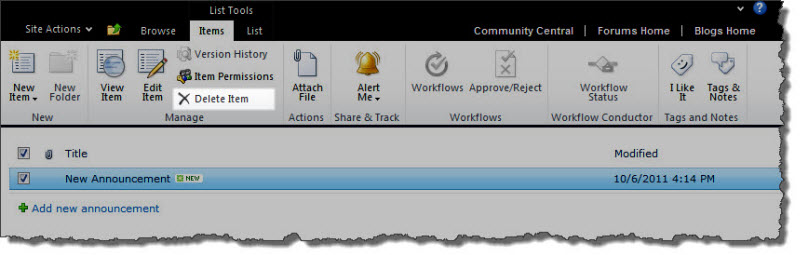
To delete an existing announcement, click on it in the Announcements list and click the Delete Item button in the View ribbon.

Top

See also:

An error occurred while parsing EntityName

An error occurred while parsing EntityName

When you see errors on the World Clock and Weather web part, the first thing to look at is the error verbiage. You will see this particular error when something has changed to prevent your server from accessing the Internet:

**Error Message:

 **CreateListLocation:: : An error occurred while parsing EntityName. Line 26, position 61.

World Clock and Weather needs to access the following external web service at either:

  • https//weather.yahoo.com/
    or
  • http://weather.msn.com/

If your server is unable to access the Internet, you will not see the weather appear in your web part that is on your page.

NOTE: As of 11 December 2014, we began seeing issues with the weather feeds.

We released a patch to correct some of our code that syncs with the weather feeds. You can download the patch from our store here. This patch contains the following builds:

Both the MSN and Yahoo weather feeds are now working correctly in all three versions. If you continue having issues, be certain that you have the most recent versions on your site:

  • SP2007 (R2.4.54)
  • SP2010 (R2.4.58 – File Version 20.4.58)
  • SP2013 (R2.4.66.2013 – File Version 20.4.66.2013)

An Error Appears When You Try to License Your List Search Pack

An Error Appears When You Try to License Your List Search Pack

Issue

You try to license your List Search Web Part and get this error:

license error message.png

Resolution

There are two Bamboo Search Web Parts, List Search Simple and List Search Advanced. It is possible to purchase them separately, or in a pack. They may also appear in your Web License Manager if you have purchased/installed PM Central or Time Tracking and Management.

Icon-WarningIMPORTANT: If you purchase the search web part(s) individually, you will have a license key for each web part, for each WFE Server on your farm. If you purchased the pack, you will have one license key for the pack, for each WFE Server.

packs and indiv products.pngThe red activation error shown above appears when you try to activate the List Search Pack under the Suites and Packs section of Web License Manager when the license key is for an individual web part.

To resolve the issue, you should license the individual web part. Please look under the Individual Products section of Web License Manager for List Search Simple Web Part or Advanced Search Web Part, and you will be able to activate the individual product successfully.

Alphabetical List of Workflow Conductor Widgets

Alphabetical List of Workflow Conductor WidgetsTop

A B C D E F G H I J K L M N O P Q R S T U V W X Y Z

A

Top

C

Top

D

E

Top

G

  • Get User Info: Get a SharePoint user profile property.
  • Get Previous Version: Query and return the value of a field for the previous version of an item if Item Versioning is enabled.

L

Top

M

  • Move Item: Move an item to a list or library.

Q

Top

R

Top

S

Top

U

  • Update AD Account: Update Active Directory account information for an AD account.
  • Update Item: Update one or more fields for an item in a list or library.
  • Update User Info: Update information in a SharePoint user profile.

Top

W

Allowing Other Users to Use the MS Project Add-in

Allowing Other Users to Use the MS Project Add-in

When the add-in is installed, it will only be available in Microsoft Project for the user who performed the installation. To allow other users on the same computer to use the add-in:

Step Action
1. Log in using a different user account than the one used to install the add-in.
2. Publisher has been verified
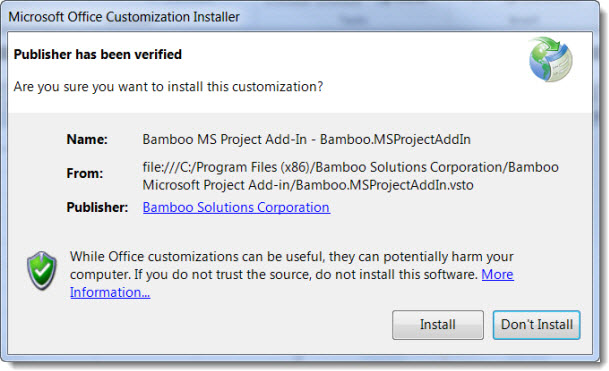
Select Program Files (x86) > Bamboo Solutions Corporation > Bamboo Microsoft Project Add-in > Bamboo.MSProjectAddin.
3.

Click Install.

Other user accounts are now able to use the Microsoft Project Add-in without having to perform the full installation.

In PM Central R4.0/4.1, you can also log in using a form-based authentication account.

All (Export and Import) Using Discussion Board Plus Migration Tool

All (Export and Import) Using Discussion Board Plus Migration Tool

The All function in the Migration Tool exports existing SharePoint Discussion Board data and then imports it into a Discussion Board Plus list. This option is appropriate for most migration scenarios.

Step Action
1. In the Discussion Board Plus Migration Tool, select the All function.
2. WARNING: Use this option with caution. Users who have alerts configured on the old discussion board will get new alerts when posts are copied to the new discussion board. SharePoint treats the new copy of the discussion board posts as “changed” or “new”. For large discussion boards, this could generate hundreds or thousands of alert e-mails!

  • Ignore Web Parts: Excludes the import of Web Parts associated with list forms. Importing these Web Parts can sometimes cause problems during import and is not required when the source and target discussion boards are on the same site. Use this option if previous import attempts have failed, and only if the source and target discussion boards are on the same site.
3. After completing all migration settings, click Run to begin the migration.

sa75migrationall.jpg

4.

The migration tool will export all data from the existing SharePoint Discussion Board list and import it into the target Discussion Board Plus list. SharePoint Alerts are also copied if the Copy Alerts option was checked. Migration results are displayed in the Migration Tool status window and are also logged to a file in the folder you specified in the File Location setting.

NOTE: The amount of time the migration takes will depend on the amount of data being exported and imported. If you have thousands of posts and want to perform the export and import separately, consider using the Export Only migration function followed by the Import Only function.

Alert Plus Utility

Alert Plus Utility

Summary

This article describes how to use the Alert PlusUtilities to automate configuration updates that must be performed when upgrading from Release 3.0 or earlier.

NOTE: The Alert Plus Utilities (no version number) for Alert Plus 3.1 will only work correctly with Alert Plus 3.1.
The Alert Plus Utilities (no version number) for Alert Plus version 3.2.38 will only work correctly with Alert Plus 3.2.38.
The Alert Plus Utilities v3.2.2.0 for Alert Plus version 3.2.52 only work correctly with Alert Plus version 3.2.52 and above.

Use the Alert Plus Utilities that come with the installer for your version of Alert Plus, or contact the Bamboo Support Team. We now have tools and instructions to run either a console application (for SP2007) or a PowerShell script (for SP2010 and SP2013) in order to upgrade or maintain single sites, all sites in a site collection, or all sites in a web application.

Before using the Alert Plus Utilities application, upgrade Alert Plus using the instructions that apply to your situation.

The Alert Plus Utilities application includes the following tools, each on a separate tab. Click the name of the utility in the list below for instructions about when and how to use it:

  • Upgrade Alert Plus: For use when upgrading any version of Alert Plus. See Upgrading Alert Plus from Release 3.0 to 3.1 for more information.
  • Register Site: For use when upgrading from Alert Plus 2.8 or earlier.
  • Event Registration Info: For use when prompted by Bamboo Support.
  • Update Event Receivers: For use only when prompted by Bamboo Support.

Running the Alert Plus Utlities

The Alert PlusUtilities application is included with the Setup program for Alert Plus Release 3.1 and higher.

Starting Alert Plus Utilities from Setup

Click the Alert Plus Utilities link in the Components list on the left, read the information provided, and then click the Install button to launch the Alert Plus Utilities application.

Starting Alert Plus Utilities from the executable

The Alert Plus Utilities application is also attached as a zip file to this Knowledge Base article. Download the correct file for your SharePoint version and extract the file to a directory on one of the SharePoint front-end Web servers in the farm and run the Bamboo.AlertPlusUtilities.exe application.

Requirements for running the Alert Plus Utilities application

Where to run it:

  • SharePoint 2007: Run the Alert Plus Utilities on one of the servers in the SharePoint farm running the Windows SharePoint Services Web Application service. Refer to Topology and Services in SharePoint Central Administration for a list of servers running this service.
  • SharePoint 2010 and 2013: Run the Alert Plus Utilities on one of the servers in the SharePoint farm running the Microsoft SharePoint Foundation Web Application service. Refer to System Settings in SharePoint Central Administration for a list of servers running this service.

Required permissions. The account running the Alert Plus Utilities application must have the same permissions as the application pool identity account for the Web application where Alert Plus is installed. Refer to the Internet Information Services (IIS) Manager to identify the application pool identity account for each Web application.

Release Notes for Alert Plus

Release Notes for Alert Plus

NOTE: Release Notes will open in a new browser tab

WSSv3/MOSS SharePoint 2010 SharePoint 2013 SharePoint 2016
Release Notes Release Notes Release Notes Release Notes
Microsoft ended mainstream support for SharePoint 2007 in October 2012. See Microsoft’s Lifecycle Support Policy.
At that time, Bamboo stopped enhancements to our SharePoint 2007 product line, but continues to provide support and bug fixes to customers with active support contracts until October 2017. Previously purchased licenses will continue to function after October 2017, but support for these products will end, and no additional bug fixes will be provided beyond that time. Bamboo plans to cease selling new licenses and annual support contacts for its SharePoint 2007 products in October 2016 to ensure customers will be eligible to receive support for at least one year after purchase.
Microsoft plans to end mainstream support for SharePoint 2010 in October 2015. See Microsoft’s Lifecycle Support Policy. At that time, we will stop any enhancements for our SharePoint 2010 product line but will continue to provide support and bug fixes for our SharePoint 2010 products to customers with active support contracts until October 2020. Previously purchased licenses will continue to function after October 2020, but support for these products will end, and no additional bug fixes will be provided beyond that time. Bamboo plans to cease selling new licenses and annual support contacts for its SharePoint 2010 products in October 2019 to ensure customers will be eligible to receive support for at least one year after purchase.

Visit our website where you can get the latest info about each of our products for SharePoint 2013.

A separate installation package and license key is required for SharePoint 2013 deployment. For additional details, review the following knowledge base articles:

Bamboo Solutions has also begun releasing products for SharePoint 2016. For additional details, check the product release notes in the link above, or contact us.

For details on migration, see the Knowledge Base Article “Migrate Bamboo Products from SharePoint 2013 to SharePoint 2016”

Understanding Bamboo Releases:

  • Bamboo offers Trial, Basic and Premium support.
    • Free Trial support expires after 30 days.
    • For more information about Basic and Premium support, please see the Support Plans page.
    • There may be a fee to upgrade from a major version to another.

See Also:

Alert Plus Highlights

Alert Plus Highlights

HW05animated.gif 
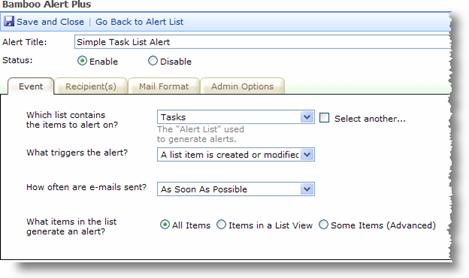
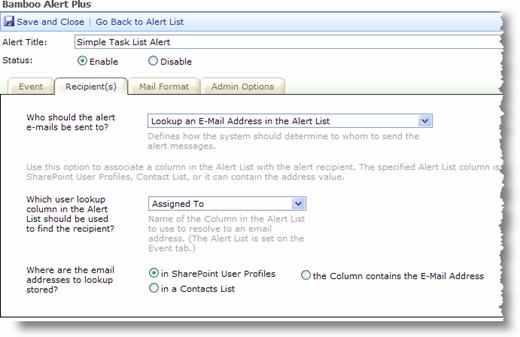
Alerts in SharePoint are frequently underused. One of the main reasons is that users are often inundated with an unnecessary amount of alerts whenever a list is touched – diminishing their significance. Alert Plus provides the ability to specifically configure alerts so unnecessary alerts are minimized. With Alert Plus, it is also possible to configure the specific subject line and message body for each alert, so end users quickly understand why they are receiving the alert.

Alert Plus includes a special trigger that allows you to send reminder messages. Unlike SharePoint alerts, which are triggered when data is created or changed, this alert is triggered because time has passed and an item now meets the alert criteria.

Alert Plus Limitations

Alert Plus Limitations

AlertPlus The following are limitations of Alert Plus:

  • Alert Plus 3.0 and higher provides support for alerting on recurring items in a Calendar list. However, if the series is modified, the users will get e-mails for each recurrence item in the series if the alert is set to send an e-mail on the following triggers: An item in the list is modified, An item in the list is created or modified, A specific column in the list changes (if the column is related to recurrence).
  • Outlook clients cannot view images included in an Alert Plus e-mail body using Image Manager or the tag if viewing the image link requires authentication.
  • After upgrading to Alert Plus 3.0 or higher, you must view the page where the Alert Plus Web Part resides in order to register it properly with the master timer job. Alternatively, use the Alert Plus Utilities to register multiple sites from one location.
  • Some custom schedules from previous Alert Plus versions are not fully supported in Alert Plus 3.1. See Upgrading Alert Plus in the Online Documentation for more information.

Alert Plus Features

Alert Plus Features

Alert Plus Highlights

AlertPlus This product provides the following features:

Within all SharePoint Lists and Libraries, users have the ability to subscribe to Alerts based on simple trigger options including when items are Created, Modified or Deleted. Based on this subscription to a list or library, an e-mail notification is sent when the trigger occurs on any item in the selected SharePoint List or Library.

Bamboo Alert Plus takes e-mail alerts to a new level by providing a supplemental alert mechanism providing users ultimate flexibility in how alerts are generated, the look and feel and who they are sent. Below is a comparison chart between Bamboo Alert Plus and SharePoint Alerts:

Key Feature Bamboo Alert Plus SharePoint Alerts
Ability to select specific list to be alerted on
Icon-Checkmark
Define look and feel of alerts without requiring developer coding
Icon-Checkmark
Alert on item creation, modification and deletion
Icon-Checkmark
Icon-Checkmark
Alert if item exists
Icon-Checkmark
Alert if a column value of an item changes
Icon-Checkmark
Filter alert list to alert on relevant items
Icon-Checkmark
Send Alerts to individual SharePoint users
Icon-Checkmark
Icon-Checkmark
Send alerts to a distribution list, such as Contacts list
Icon-Checkmark
Send alerts to an e-mail defined in an associated lookup list
Icon-Checkmark
Send alerts to individual e-mail addresses
Icon-Checkmark
Merge multiple alerts into a single e-mail
Icon-Checkmark
Icon-Checkmark
View alerts the logged in user is subscribed to
Icon-Checkmark
Icon-Checkmark
Manage alerts in a central location
Icon-Checkmark
Edit existing alerts
Icon-Checkmark
Icon-Checkmark
Create a single alert for multiple SharePoint lists using List Rollup Web Part
Icon-Checkmark

Alert Plus Email Configured Correctly?

Alert Plus Email Configured Correctly?

HW05_TestSendEmail.jpg 
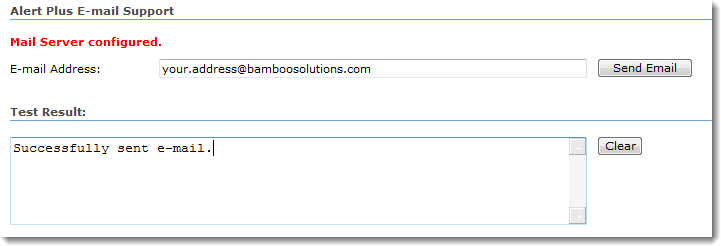
Alert Plus uses the e-mail configuration for the SharePoint server. If Emails are not sent when Alert Plus events are fired, and Bamboo logs (c:windowstempbamboosolutions) show this error:

“5.7.1 Client does not have permissions to send as this sender”

This issue is most likely due to the account running the SharePoint Timer service in Admin Tools > Services (OWSTIMER.svc) does not have permission to send email.

To resolve this, check the following:

  • The farm account running the SharePoint Timer service in Admin Tools > Services (OWSTIMER.svc) must have a mail box in the Exchange server.
  • The From email address configured in Central Administration needs to use this mailbox address.
  • If you do not wish to monitor this farm account mailbox address, then you can forward replies to a mailing list that includes all SharePoint administrators.

To test that e-mails can be sent by Alert Plus, enter a destination e-mail address and click the Send E-mail button. The results of the test will be shown in the Test Result window.

Alerts

Alerts

Take email alerts and alert management to a new level by providing a supplemental alert mechanism which provides both users and administrators with the ultimate in flexibility in terms of how alerts are generated, who to whom they’re sent, and how they’re managed across Sites and Site Collections. With our alerts management tools, you’ll save time, minimize unnecessary traffic, and keep projects on track.

Product Details Documentation Description
Alerts Administrator Allow Site Administrators to manage SharePoint alerts across sites and Site Collections from a single location. Administrators can create user alerts and view, edit, remove, group, filter and enable/disable existing SharePoint alerts.
Alert Plus Easily setup alerts with custom notifications based on conditional triggers, such as sending an alert before and after a task is due, if the status of an item is “Delayed”, or the priority of an item is equal to “High” and the status is equal to “Not Started”.
Group Email Our Group Email Web Part allows you to quickly send emails to a group of users using the e-mail addresses in a list, the SharePoint site, or Active Directory group.
My Alerts Organizer Allow users to manage their own SharePoint alerts from an easy to use Web Part like user interface. Users can create new alerts and view, edit, remove or enable/disable existing SharePoint alerts.

Click here for a list view of the help topics.

Alert on a Tasks List and send alerts for every task to the assigned person

Alert on a Tasks List and send alerts for every task to the assigned person

As a project manager, you have set up a Tasks List for the team to work on their assignments. Every time a Tasks List item is created or updated, you want to send an alert message to the person to whom the task is assigned. This use case uses the standard SharePoint Tasks List with the Assigned To field defined as a lookup field to the SharePoint User Profile where the e-mail address is stored.

Alert List – What list contains the items to alert on? Tasks List
Event Type – What triggers the alert? An item is created or modified
E-mail Frequency – How often are e-mails sent? As Soon As Possible
Item Criteria – What items in the list generate an alert? All Items
Who should the alert e-mails be sent to? Lookup an E-mail Address in the Alert List
Where is the e-mail address to lookup stored? In SharePoint User Profiles
Which user lookup column in the Alert List should be used to find the recipient? Assigned To

hw05076.jpg

hw05078.jpg

Step 1 – Create Alert Event

  • Select the Tasks List from the drop-down list.
  • Select the trigger action for when the item is either created or modified.
  • Select mail frequency for when you want the alert e-mails to go out.
  • For filter criteria, select All Items in the list.

Step 2 – Create Recipients

The Assigned To column in the Tasks list is a lookup field into SharePoint’s User Profile Information. We will set Alert Plus to use this field to resolve the recipient e-mail address. That way each e-mail alert will go to the individual that is assigned the task.

hw05080.jpg

  • Select “Lookup an E-Mail Address in the Alert List” from the first drop-down list.
  • Select the “Assigned to” column which is the index field to the user profile information.
  • Select “in SharePoint User Profiles” as the source of e-mail addresses.

Step 3 – Create E-Mail Message

Create your notification e-mail message.

Alert Plus (Current)

Alert Plus (Current)

With Bamboo’s Alert Plus you can easily set up alerts with custom notifications based on conditional triggers, such as sending an alert before and after a task is due, if the status of an item is “Delayed”, or the priority of an item is equal to “High” and the status is equal to “Not Started”.

If you’re using a legacy version of Alert Plus (older than (2.34.5), click here for legacy documentation.

Click here for a full list of current documentation.

Alert Plus Overview

Alert Plus Overview

Alert Plus Highlights

AlertPlus

Alert Plus Components

The Bamboo Alert Plus system contains four major components. They are:

HW05_SystemArch.jpg
This diagram shows how each of these components fit together as part of the solution.

Top

Alert Plus Web Part

The purpose of the Alert Plus Web Part is to provide a way to set up alerts with specific messages to notify users when things happen (or don’t happen) in SharePoint. You don’t need to rely on your end users subscribing to alerts themselves. You also can get creative with the email subject and body; all alerts don’t have to look the same!

The Alert Plus Web Part is targeted for use by a power user or sophisticated SharePoint. Once the Web Part is installed, deployed to a web application, and activated on a site collection, it can be added to pages as needed at the site level. Typically, there is one Alert Plus Web Part per site or even per site collection, since you can manage alerts for multiple sites from one web part. Using the web part, create alerts that send specific email messages, to specific people, under specific conditions.

Top

Alert Plus Lists

When you add an Alert Plus Web Part to a page on a SharePoint site, two lists are automatically created on that site. They are:

  • Alert+ Configuration List
    The Alert+ Configuration List stores configuration information for each alert instance configured in the web part. As you create or modify an alert through the Alert Plus Web Part interface, the changes are stored in this SharePoint list.

  • Alert+ AlertChangeList
    This list is used only for alerts that trigger when: an item is deleted or a specific column in the list changes. These type of alerts add event handlers to the alert list (the list where the items that trigger the alert reside) so information can be added to the Alert+ AlertChangeList when items are deleted or changed. When the alerts process, the entries in this list are removed.

Top

Alert Plus Master Timer Jobs

Bamboo Alerts are processed using SharePoint timer jobs. Timer jobs can run on any SharePoint WFE server. There are four default timer jobs that are installed when you install Alert Plus. They are:

  • As Soon As Possible Timer Job
  • Every Day Timer Job
  • Every Hours Timer Job
  • Every Week Timer Job

how often are email sent.jpg
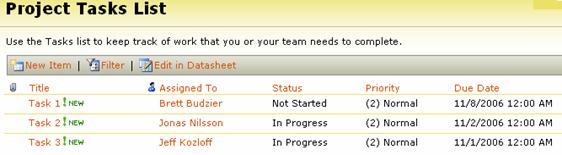
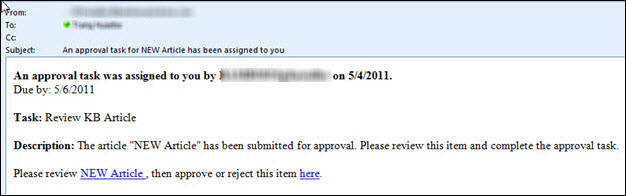
They correspond with the first four selections available in the How often are e-mails sent? selection on the Event tab of the alert configuration.

If you create an alert with a Custom Schedule, an additional timer job will be created to process that specific alert. The screen shot below from SharePoint Central Administration > Job Definitions shows the four default timer jobs and one custom timer job.

alert plus timer jobs.jpg
The Alert Plus timer jobs read information from the Site Collection Properties to know what sites have alerts to process.
Top

Alert Plus Subscriber Web Part

This Web Part displays all the Bamboo alerts the logged in user is subscribed to. It references the Alert+ Configuration List to determine which alerts to display.

NOTE: This web part does NOT display SharePoint alerts the logged in user may be subscribed to, just Bamboo alerts.

The Alert Plus Subscriber Web Part is an optional web part. It is not required for Bamboo alerts to process; install it only if you want end users to know what Bamboo Alerts they are subscribed to.

Alert Plus

Alert Plus

AlertPlus.pngWith Bamboo’s Alert Plus you can easily set up alerts with custom notifications based on conditional triggers, such as sending an alert before and after a task is due, if the status of an item is “Delayed”, or the priority of an item is equal to “High” and the status is equal to “Not Started”.

Highlights Release Notes Complementary Products

Install

Permissions

License

Permissions

ServerAdmin ServerAdmin

Configure

Permissions

Work With

Permissions

SiteAdmin User-1
Click here if you would rather see a complete list
of all topics for this product.
Bamboo Shopping BagClick on the shopping bag or here to download a trial of the product or to purchase it.

Alert Plus


AlertPlus.png

With Bamboo’s Alert Plus you can easily set up alerts with custom notifications based on conditional triggers, such as sending an alert before and after a task is due, if the status of an item is “Delayed”, or the priority of an item is equal to “High” and the status is equal to “Not Started”.


Highlights Release Notes Complementary Products


Install

Permissions

License

Permissions

ServerAdmin ServerAdmin

Configure

Permissions

Work With

Permissions

SiteAdmin User-1
Click here if you would rather see a complete list
of all topics for this product.
Bamboo Shopping BagClick on the shopping bag or here to download a trial of the product or to purchase it.


Alerts Administrator


AlertAdmin
With Bamboo’s Alerts Administrator web part, Site Administrators can manage SharePoint alerts for sites across Site Collections within a Web Application. Administrators may create new user alerts, as well as view, edit, remove, group, filter and enable/disable existing SharePoint alerts.


Highlights Release Notes Complementary Products


Install

Permissions

License

Permissions

ServerAdmin ServerAdmin

Configure

Permissions

Work With

Permissions

  • There is no administrator
    configuration required.
SiteAdmin SiteAdmin
Click here if you would rather see a complete list
of all topics for this product.
Bamboo Shopping BagClick on the shopping bag or here to download a trial of the product or to purchase it.

Advanced Search Columns for User Directory

Advanced Search Columns for User Directory

Return to User Directory Configuration

AdvancedSearch.jpg
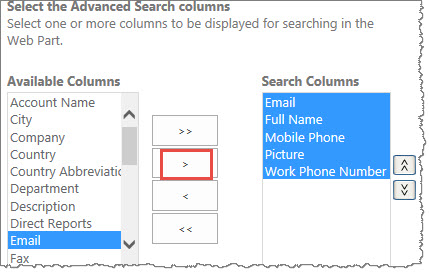
The Search selections display the user profile attributes that can be used in the Advanced Search window. You can select which fields can be used as the search criteria, by adding the fields from the left pane to the right pane. Highlight more than one column on the left Available Columns box and click the > symbol to move them into the Search Columns box on the right. (If you click the double symbol >>, then all the Available Columns move into the Search Columns box.)

AdvSearchBox.jpg
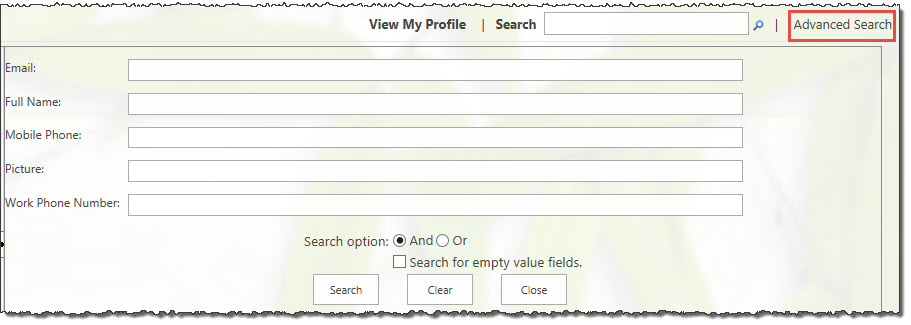
In the example above, we selected five columns which show in the sample image here. Depending on the columns you configure to show, end users will be able to search on those columns in the Advanced Search tool in the web part as displayed here.

Administrative Connection Settings

Administrative Connection Settings

Return to Overview of Configuration
The information you enter here enables User Registration Accelerator to create accounts in the domain of your choosing.
AdminConnection.jpg
Step Action Result
1. Administrator’s User Name The name of the account used to handle new account creation requests; note that the account you must provide must have the rights required to create and modify Active Directory users for the Web Part to work properly.
2. Administrator’s Password The password for the provided Administrator account.
3. Administrator’s Domain The domain of the provided Administrator account.
4. Fully qualified domain name The fully qualified (i.e., “qa.bamboo.local”) domain name indicating where any new accounts are to be created.
5. Domain name The domain name only where accounts are to be created (following the above example, this would just be “qa”).
6. Require user to change password Select this option to force new users to change their password the first time they log in after their account is successfully created.

Additional Tips for using the CAML Criteria Builder

Additional Tips for using the CAML Criteria Builder

Return to CAML Criteria Builder or
Select the Filter for your Schema-based Rollup

Some other ways you can use the Criteria Builder to build a CAML Query are outlined below:

You want to… Try this
Use a value that is not listed in the Value column.

If you choose a Person or Group column type and want to use a value that is not listed in the Value list for the column, first select any user and copy the criteria to the CAML Query field. Once the query is in the CAML Query box, manually edit it to replace the selected user between the tags with the unlisted name as it is displayed in SharePoint:

Old CAML: 
  <Value Type="User">Listed User</Value>

New CAML: 
  <Value Type="User">Unlisted User</Value>
Use the SharePoint variable [Me] as the value for a Person or Group column.

This variable is not listed in the Value List by default, but you can still use it. To use the SharePoint variable [Me] as the value for a Person or Group column, first select any user and copy the criteria to the CAML Query field. Once the query is in the CAML Query box, manually edit it to replace the CAML text as shown here:

Old CAML: 
  <Value Type="User">Some User</Value>

New CAML: 
  <Value Type="Integer"><UserID /></Value>

Icon-WarningIMPORTANT 1: The tag <UserID /> is case-sensitive! If you enter <UserId />, you will not get any data.

Icon-WarningIMPORTANT 2: Be careful specifying a filter using [Me] in an alert. That variable designates the logged in user. When the alert is processed, the logged in user is a system account, so an Alert that uses [Me] may not generate any alert messages.

Use the SharePoint variable [Today] as the value for a Date column.

A Date and Time column type automatically displays a Calendar control to select a specific date. To use the [Today] SharePoint variable instead, first select any date and copy the criteria to the CAML Query field. Once the query is in the CAML Query box, manually edit it to change the date value to <Today /> as shown below.

Old CAML: 
  <Value Type="DateTime">2011-05-01T00:00:00Z</Value>

New CAML: 
  <Value Type="DateTime"><Today /></Value>
Add or subtract a number of days from [Today]

To add or subtract a number of days from [Today] to create a filter like “a task overdue by 3 days”, first select any date and copy the criteria to the CAML Query field. Once the query is in the CAML Query box, manually edit it to replace the placeholder date with the following CAML, adjusted for the desired number of days:

Old CAML: 
  <Value Type="DateTime">2011-05-01T00:00:00Z</Value>

New CAML ("3 days after today"): 
  <Value Type="DateTime"><Today /><addValue value="3" /></Value>

New CAML ("3 days before today"): 
  <Value Type="DateTime"><Today /><addValue value="-3" /></Value>

Adding tasks using a PM Central project tasks list

Adding tasks using a PM Central project tasks list

sa12a-assignpmctask.jpg
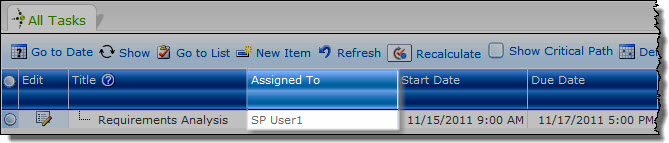
To add a task from a PM Central project, simply assign the resource to the task in the PM Central project Tasks list.

Important Notes

  • If someone assigns you to a PM Central task after you have already saved the timesheet for the period that includes the task, click the Refresh button at the top of the timesheet to refresh the task list. Click the Save button to save the task to the timesheet. The task will not be included on the timesheet until you click both Refresh and Save. If you were removed from a task, your task list will only be updated on unsubmitted timesheets.
  • If you create a new task in PM Central and assign a resource to it, the full task information—including the Project Name—may not be available in the timesheet for up to 59 minutes. This is the interval at which task information is updated in the PM Central portfolio site. sa12a-refreshsave.jpg
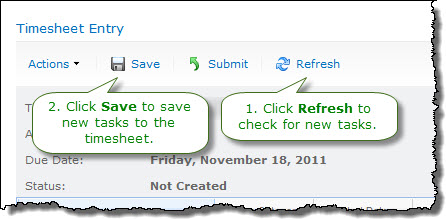
If you create a new task and don’t see the Project Name in the timesheet, wait 59 minutes and then click Refresh and Save to update the task information.
  • You cannot assign tasks using the Timesheet Tasks list if you configured PM Central as the data source for tasks. However, you can still add administrative tasks using the Administrative Time list.