Localize Bamboo Applications or Custom Columns
Bamboo applications and custom columns are slightly different than web parts when it comes to localizing/translating. The user interface isn’t confined to a web part, but can exist as site definitions or other custom pages. For example, the configuration of a Bamboo custom column is within the SharePoint list settings area.
The text strings that require translation are located in different files than the strings that appear in a web part.
Changing the language or text for an application or custom column is a multi-step process:
Top
About the Language Files
Text displayed in a Bamboo application may be included in one or both of the following locations:
- Provisioning Resources. These resources are located in the 12, 14, or 15 “Hive”, in the Resources folder. The number of the Hive depends on the version of SharePoint you are using (e.g., SP2007 has a 12 Hive, SP2010 has a 14 Hive, and SP2013 has a 15 Hive).
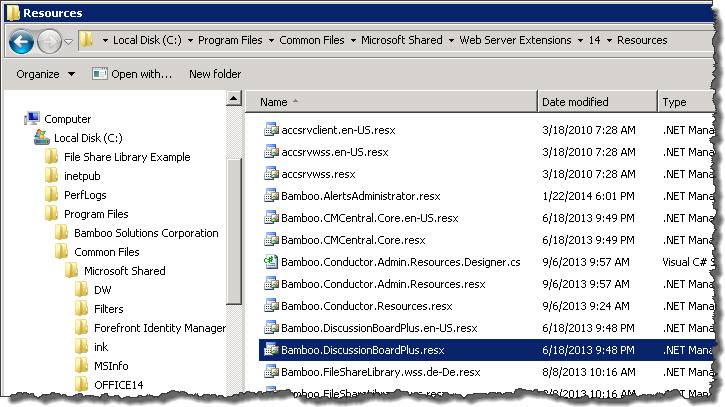
The Bamboo.*.resx files include text used in site features, site definitions, list definitions, and other provisioning resource elements. Any changes you make in these files will apply to new product instances only.
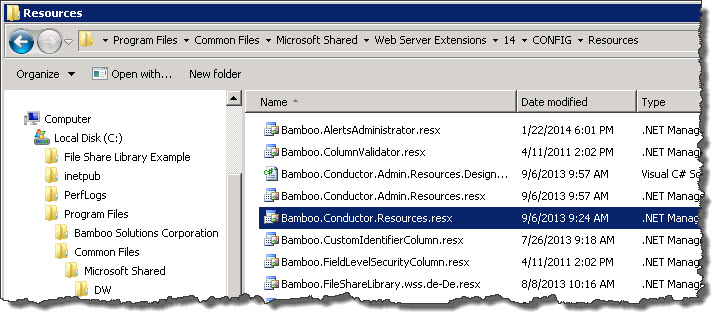
- Application/Runtime Resources. These are also located in the 12, 14, or 15 Hive, but in the CONFIGResources folder.The Bamboo.*.resx file in the CONFIG folder is different than the one included in the Resource folder.
 This one includes text used in application pages, custom site menu actions, navigation elements, and other runtime resources. Any changes you make will apply to new and existing product instances only.
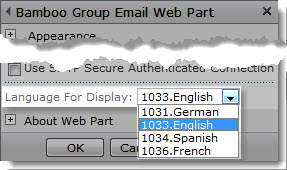
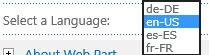
In each location, there may be multiple versions of Bamboo.*.resx files with identical content. The different files are provided for English (en-US), German (de-DE), French (fr-FR), and Spanish (es-ES). The content of all files is in English until you translate it to your language. If your site is configured to use a language that does not have a corresponding Bamboo product .resx file, copy an existing file and rename it to include the culture name for that language pack. For example, create a file for Italian by saving the default file as Bamboo.[Product].it-IT.resx. Make your changes to this new file. If your site is configured to use a specific language but you do not have a culture-specific file, the product will use the default Bamboo.[Product].resx file instead.
 IMPORTANT: If you customize one of the default resource files provided with the product, your changes will be overwritten when you upgrade.
To avoid losing customizations, copy the customized file to a different location (not the same folder) before upgrading. After the upgrade is finished, compare the new file with your customized file to incorporate any new entries. Then copy the merged file to the Resources folder. Culture-specific files created for languages that are not provided with the product will not be overwritten during an upgrade, but you still need to incorporate new resource entries.
Top
Editing text in resource files
IMPORTANT: Before making any changes, back up your original file to a different folder.
To change text in a resource file, open it in a text editor and locate the text you want to change. Editable text is usually found between the <value></value> tags, as shown in the screen shot below. Do not modify the data tag. If you want to remove text completely, delete only the text; do not delete the <data> or <value> entries from the file, or the server will display an error message. In the example below, the editable text is highlighted in gray.

When you are finished with your changes, save the file and copy it to the appropriate Resources *folder on *all Web front-end servers in your SharePoint farm. Follow the instructions below to make your changes take effect.
Top
Applying Language File Updates
To apply changes to Provisioning Resource Files:
If you modified the provisioning resources file, apply your changes by restarting Web services with the following command on all Web front-end servers.
iisreset
NOTE: changes to provisioning resources affect new instances of the Bamboo product only; existing instances of the product are not updated.
To apply changes to Application/Runtime Resource Files:
If you modified the application/runtime resources file, apply your changes by executing the following stsadm command on all Web front-end servers. This command copies the updated resource file to the App_GlobalResources folder of each Web application. Changes apply to existing product instances and any new instances you create.
stsadm -o CopyAppBinContent
NOTE: Changes apply to EXISTING product instances AND any new instances you create.
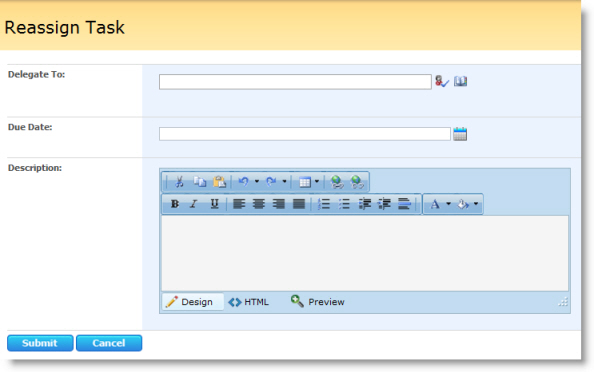
 Reassign Task is an option reviewers and approvers have when completing Request Feedback and Request Approval tasks, and is not a separate widget. This option allows a reviewer or approver to delegate the original review, approval, or data collection task to another user. The Reassign Task option is available if the Allow Reassignment property for the


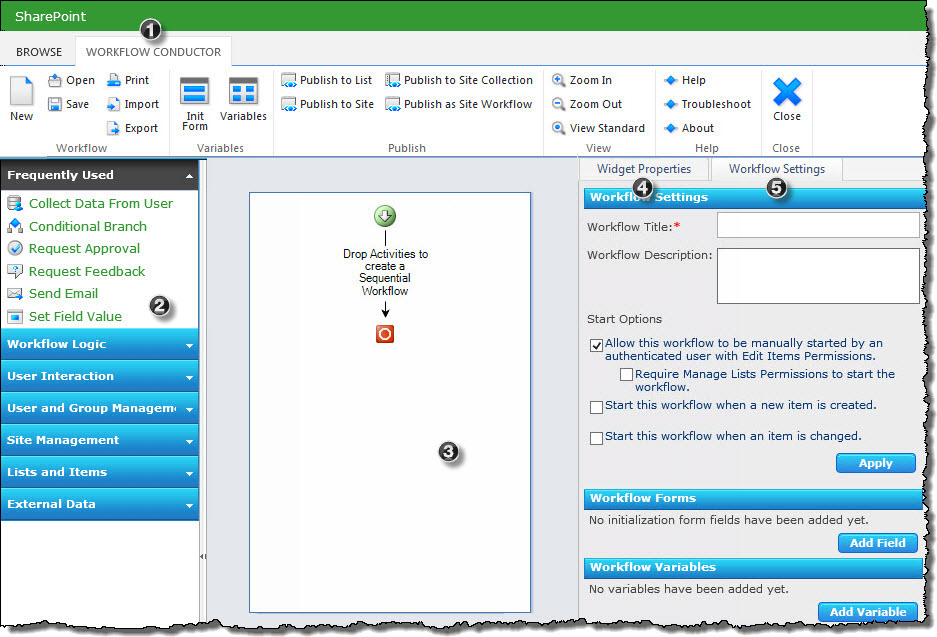 Workflow Conductor provides a simple, yet powerful way to automate and manage your business processes. A simple drag-and-drop interface lets designers easily create and deploy complex workflows without the need for custom coding. Conductor Studio is the Workflow Conductor interface that allows you to create, edit, and deploy new workflows or workflow templates.
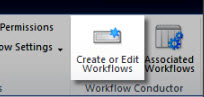
 Workflow Conductor’s installation interface (shown at right) lists the Components available for install with the Workflow Conductor Installation/Setup application. For a description of each component, see the table below.
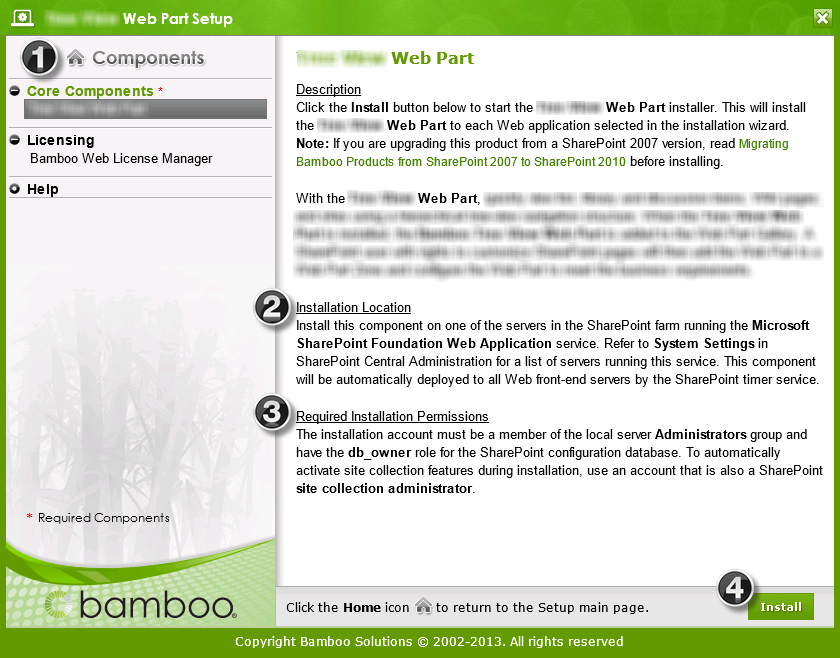
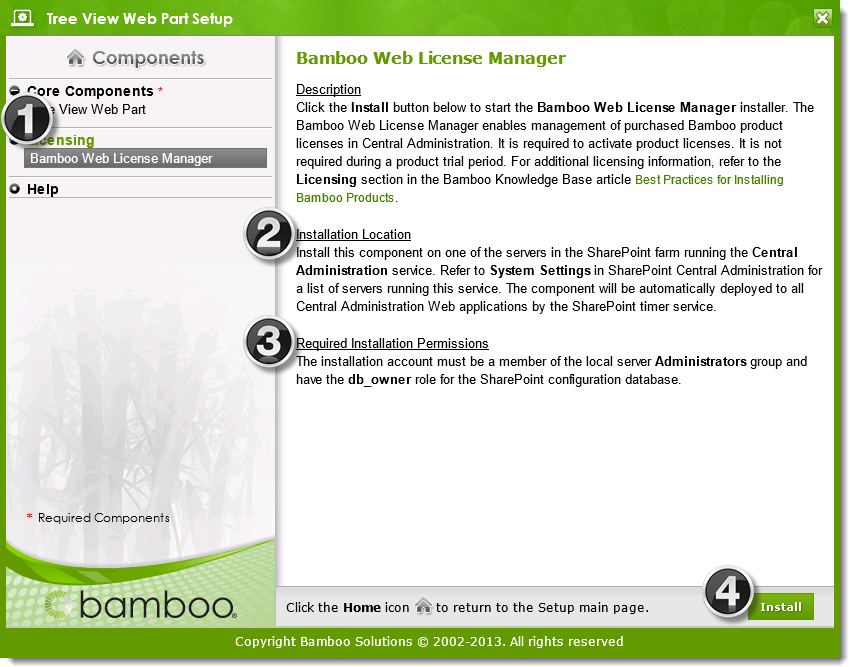
 ) at the top of the components list to return to the Setup main page.
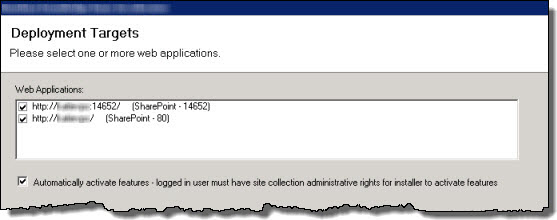
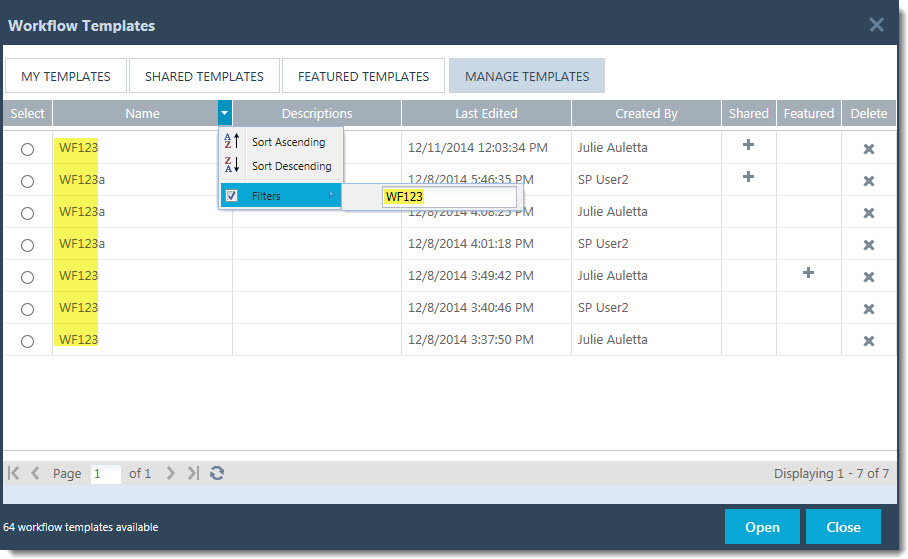
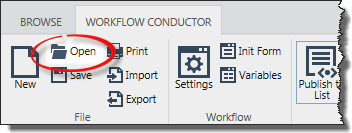 To open a workflow template from the template gallery, click the Open icon in the Conductor Studio ribbon.
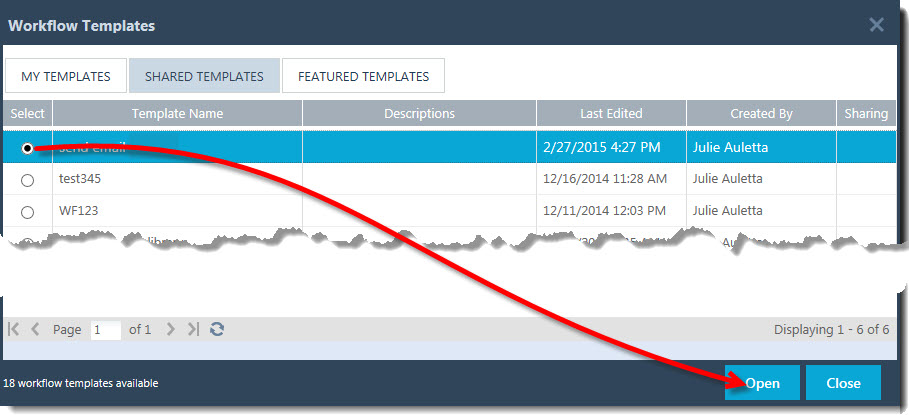


 ) icon. If more than one item is matched, the first item returned is selected as the source item to move.
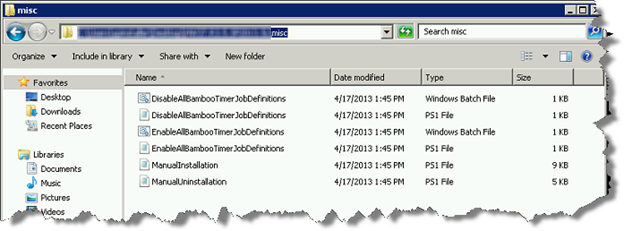
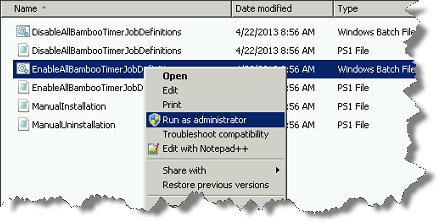
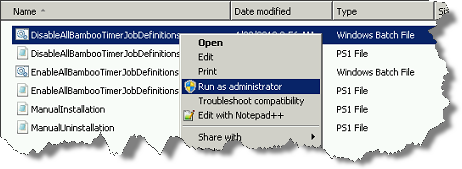 Right-click on the file DisableAllBambooTimerJobDefinitions.bat and choose Run as administrator. This script stops the timer job services for all Bamboo products installed on the farm, helping to put the farm in a quiescent state for the install.
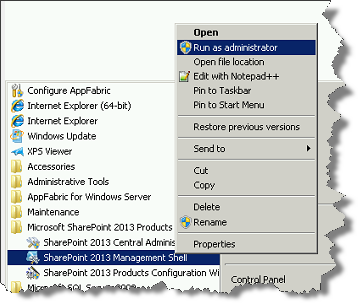 On the WFE where you extracted the product folders, right-click on the PowerShell application in the Start menu and choose Run as administrator. You can use Windows PowerShell or SharePoint 2013 Management Shell.
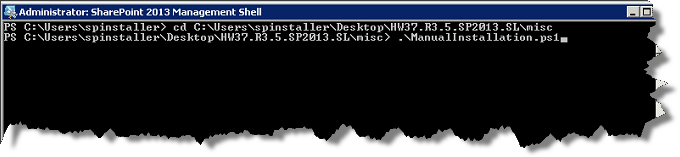

 Return to the misc folder. Right-click on EnableAllBambooTimerJobDefinitions.bat and choose Run as administrator. This enables all Bamboo timer job services.
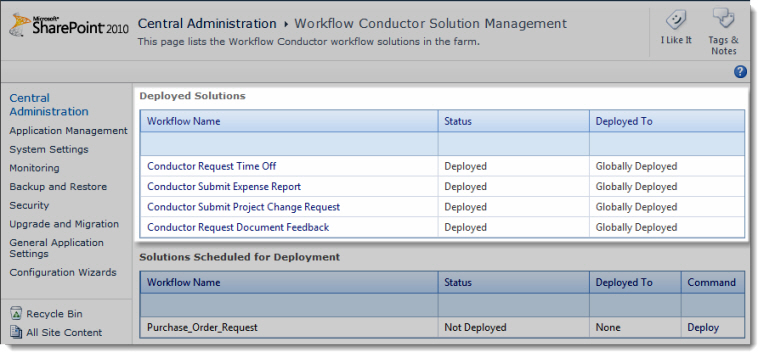
 Clicking a Workflow Name displays details about the solution.
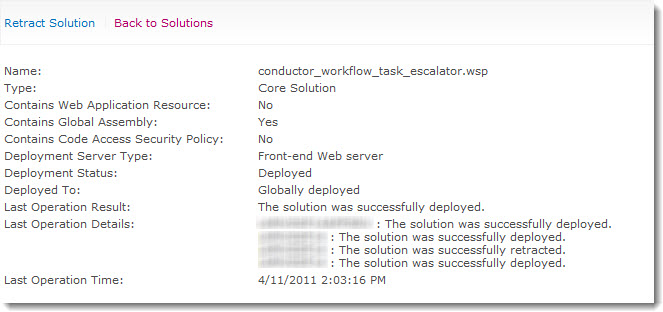
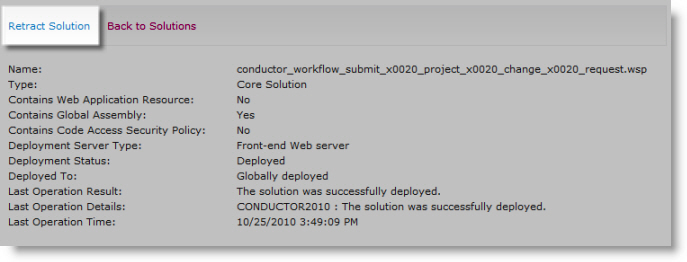 In the Solution Properties page, click Retract Solution.
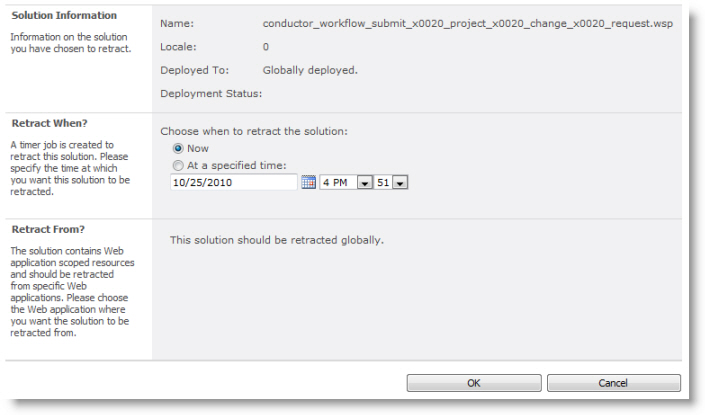 Enter a date and time to schedule the retraction and click OK.
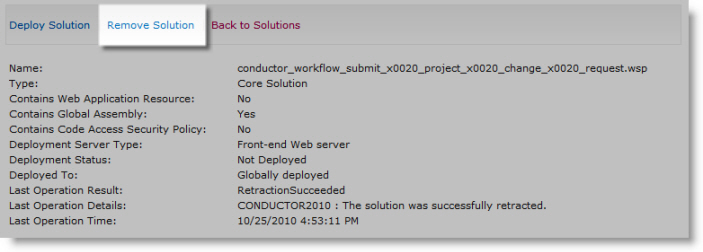 To completely remove the workflow solution from the farm, click its name again and click Remove Solution.
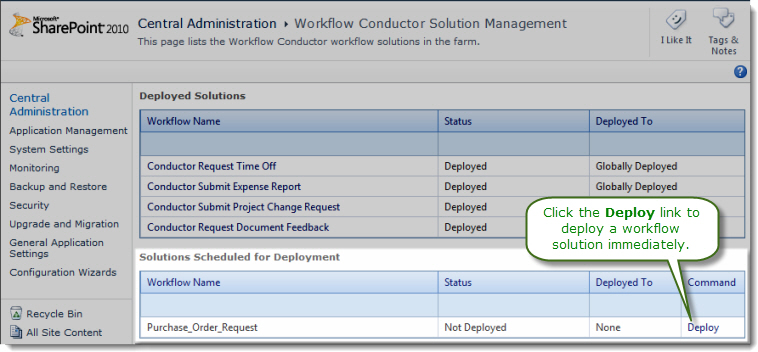
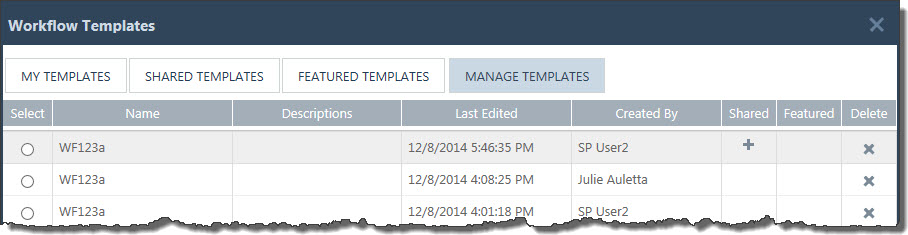

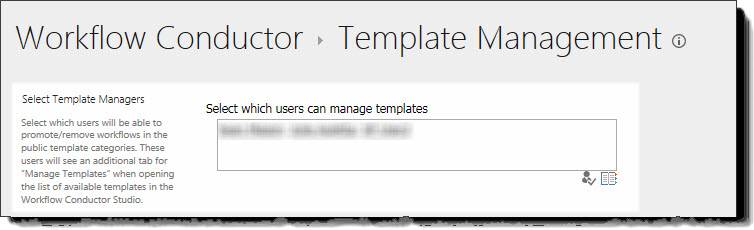 Template managers have special rights in the Conductor Studio Template Gallery:
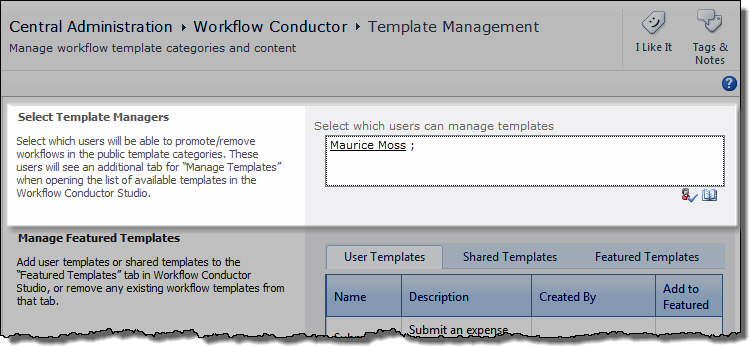 In the Select Template Managers section of the Template Management page, enter one or more SharePoint users separated by semi-colons. Use the Lookup (
 ) to search for names. When ready, click
  to resolve the names and ensure they are entered correctly.


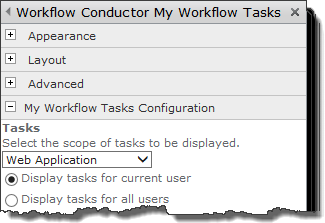
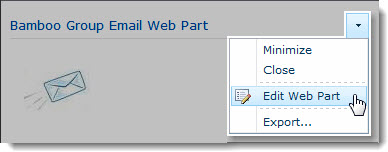 Click the edit drop-down menu on the Web Part title bar and select Edit Web Part (or Modify Shared Web Part if you are using SharePoint 2007). See the example from the Group Email Web Part.
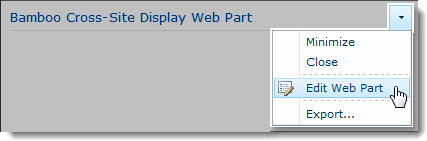 Click the edit drop-down menu on the Web Part title bar and select Edit Web Part (or Modify Shared Web Part if you are using SharePoint 2007).
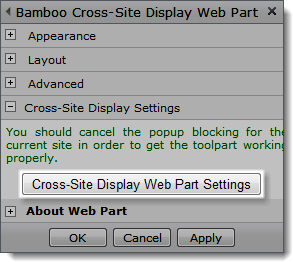 Click the [Product] Settings button in the Web Part tool pane.
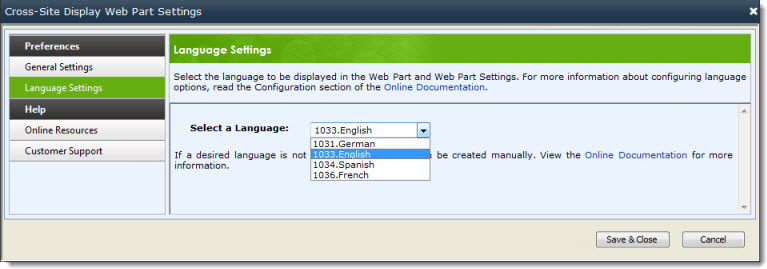
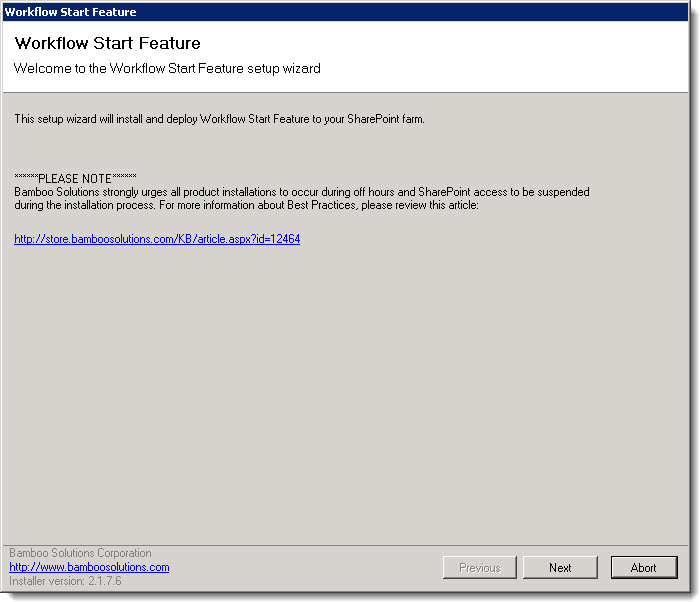 Highlight the Workflow Start Feature item in the Optional Items section of the Workflow Conductor Setup program. When a component is selected, information specific to it is displayed on the right side of the interface.
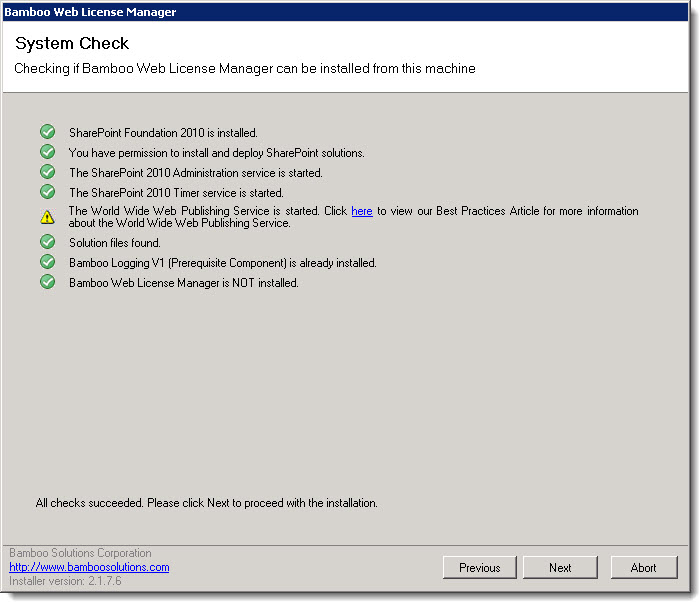
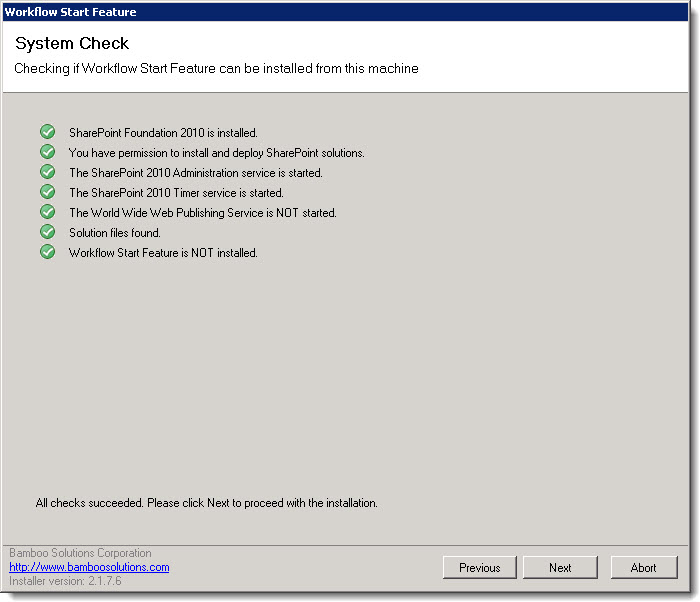 Verify that the system checks pass successfully and click Next. If the system checks do not pass, you will not be able to proceed.
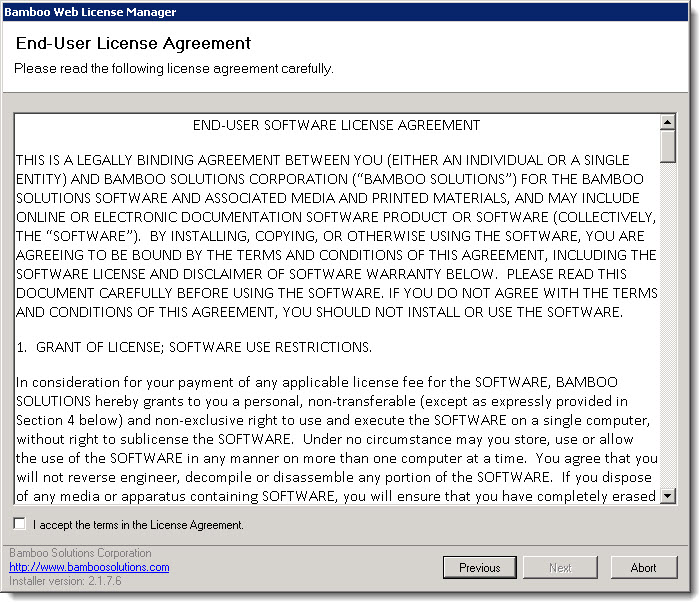
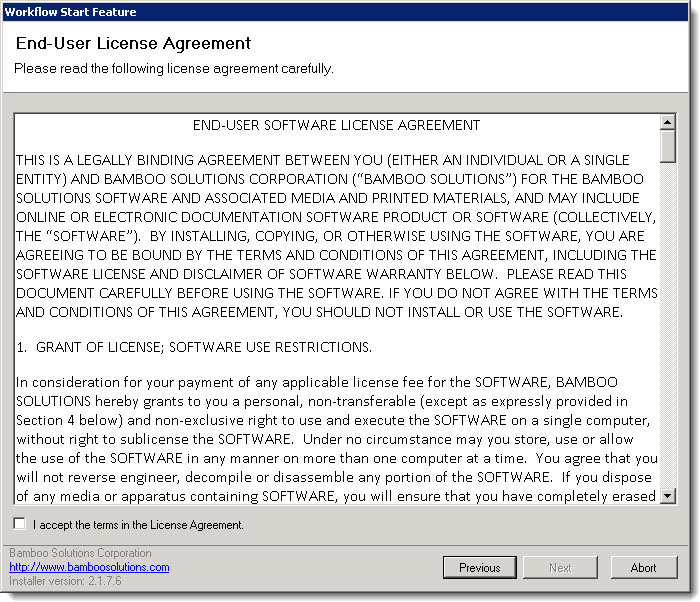 Read and accept the Bamboo Solutions End-User License Agreement (EULA).
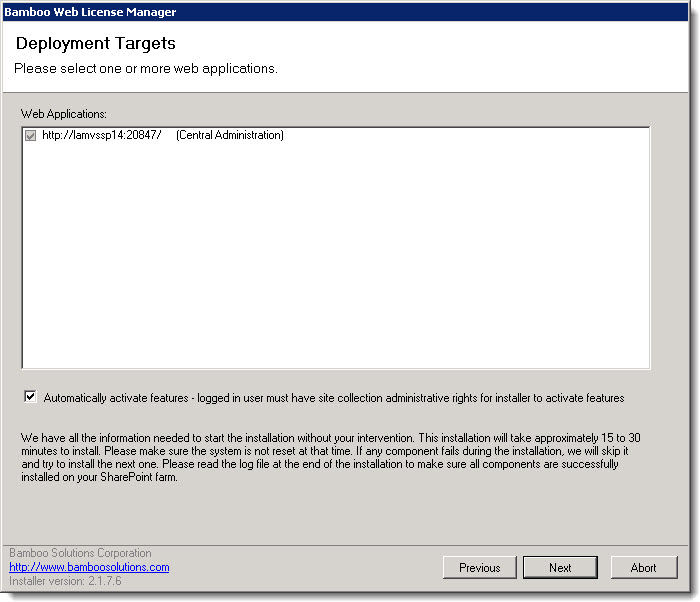
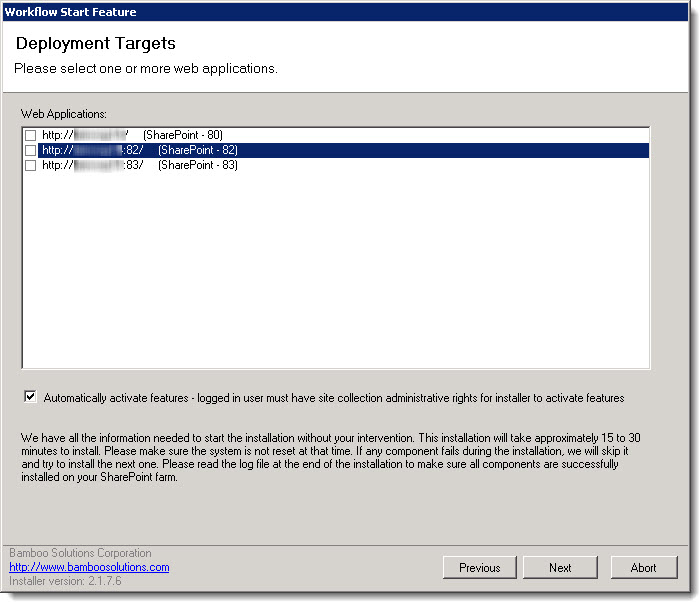 In the Deployment Targets page, select the Web Application(s) on the farm where you want to deploy the feature.
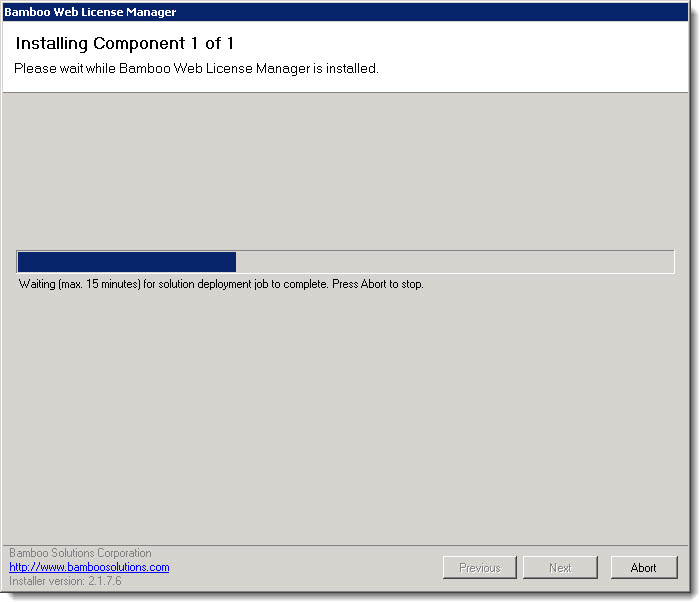
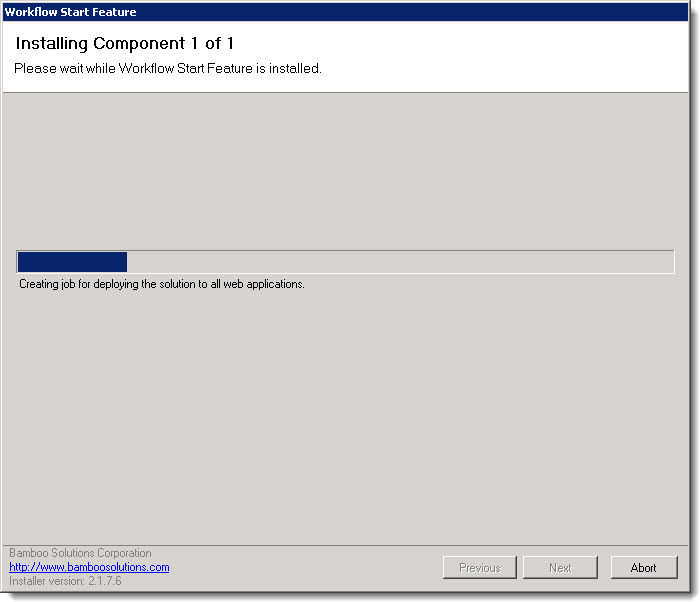 Wait while the installation progresses.
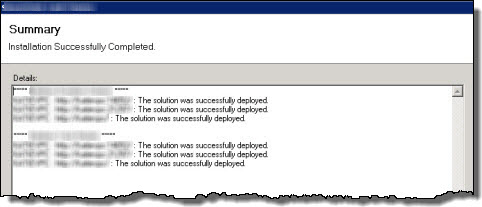
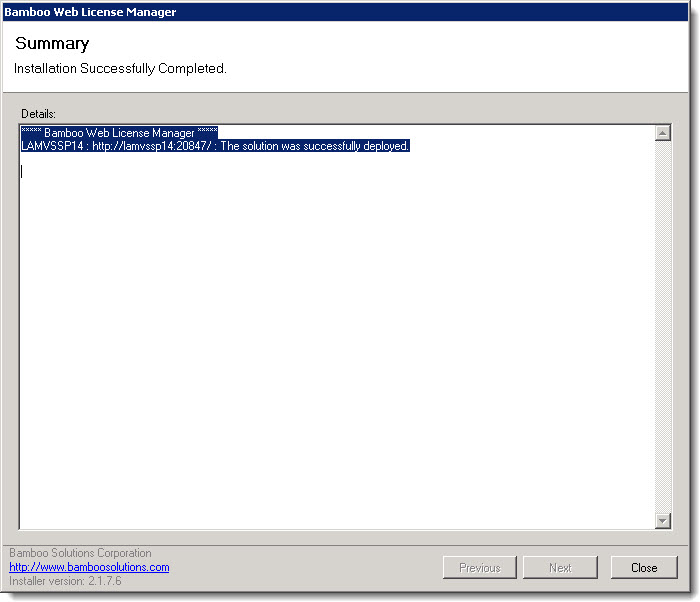
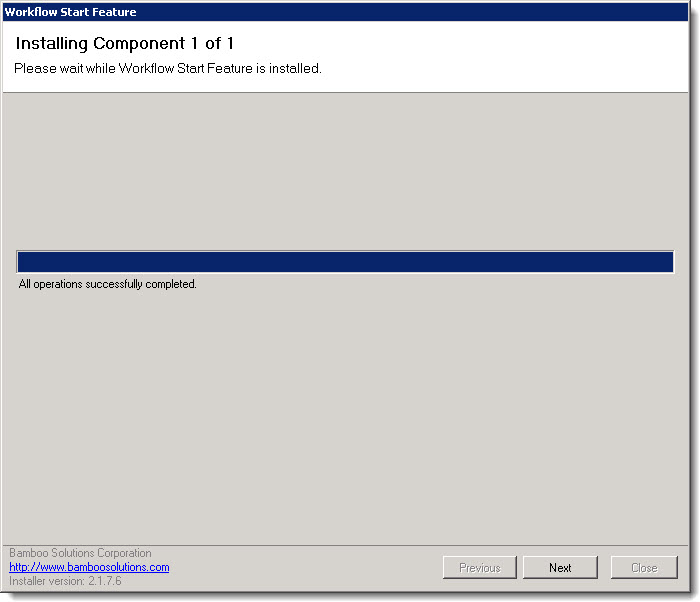 When the process completes, the All operations successfully completed message will be displayed and the Next button will be enabled.
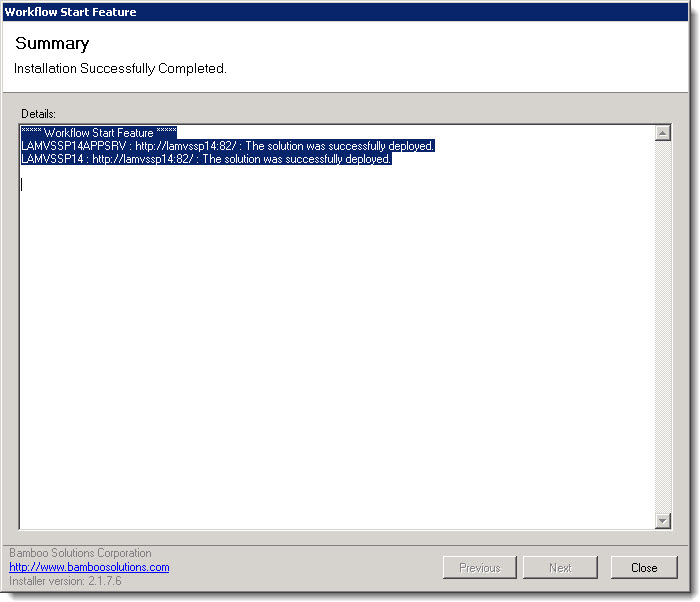 Details about the process are shown. Review the details carefully to make sure everything was successful.
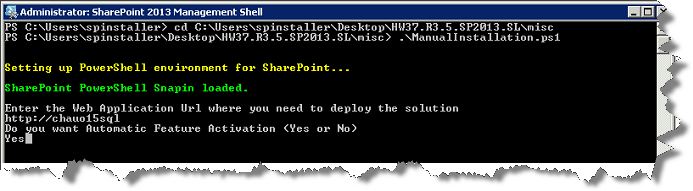
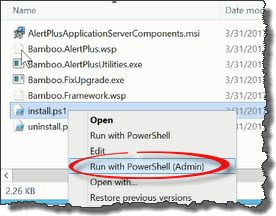 Run the Install.ps1 from a WFE server in PowerShell as an admin.
 The script will look for WSPs in the install folder and list those found. It will install them in alpha order.
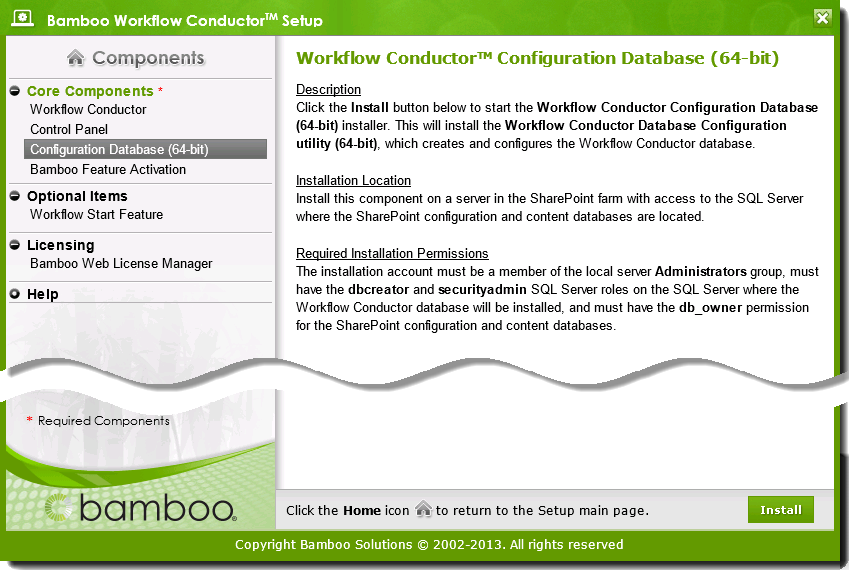 On a server in the SharePoint farm with access to the SQL Server where the SharePoint configuration and content databases are located, start the Workflow Conductor install and highlight the Configuration Database component.
 In the first installation screen, click Next.
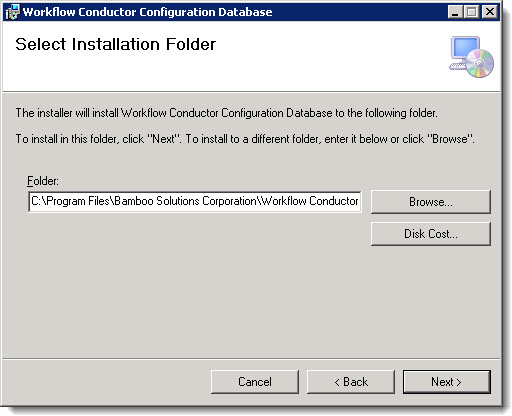 Select an installation folder location and click Next, and then click Next in the Confirm Installation screen to begin configuring the Workflow Conductor database.
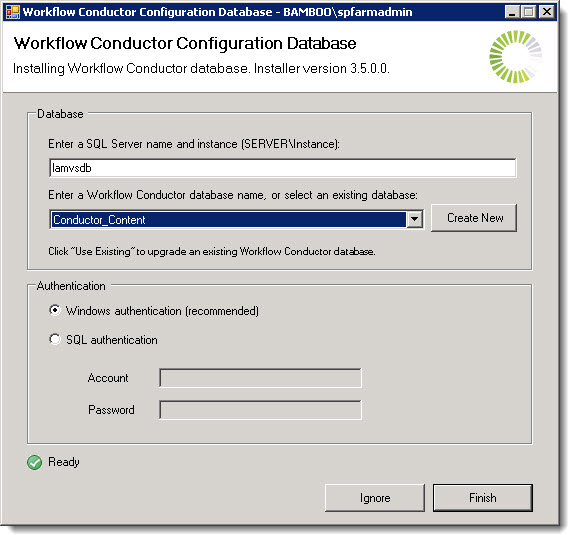 In the Workflow Conductor Configuration Database screen enter the name of your database server and SQL Server instance.
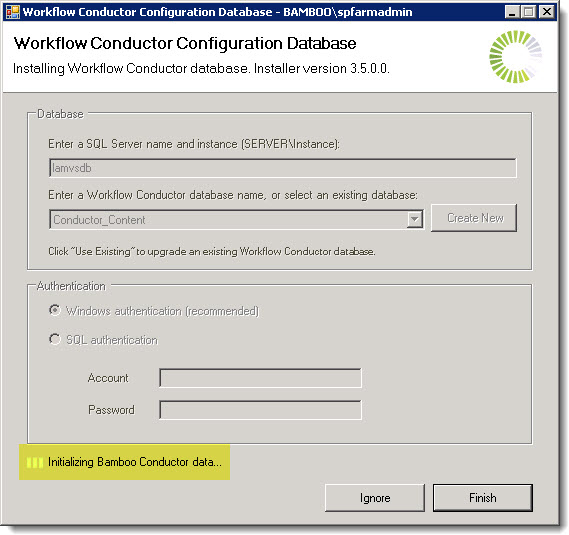 Click Finish. The Workflow Conductor database will be created and populated. You will see some progress notes displayed at the bottom of the page.
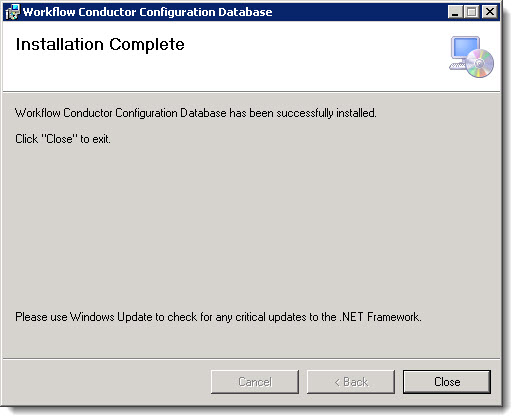 When the database is created, the Installation Complete page is displayed.

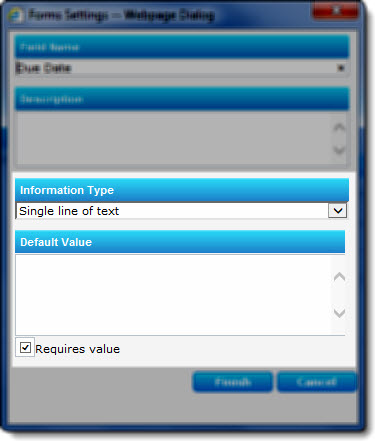
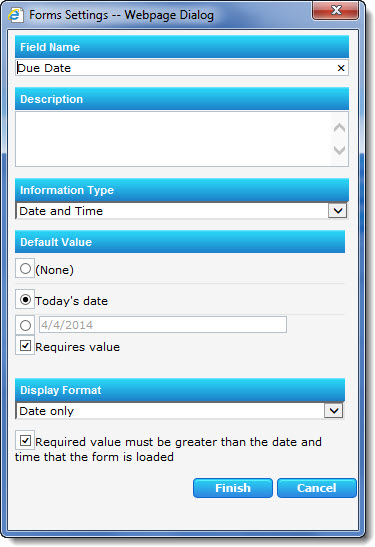
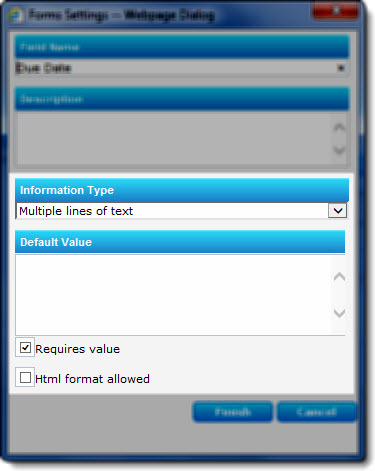 Enter a default value, if desired, and check Requires value if you need this field to have a value before the workflow continues.
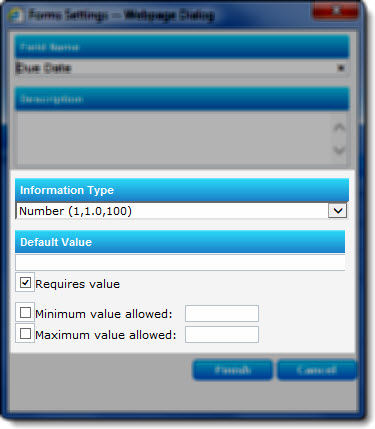 Specify the following for the Number field:
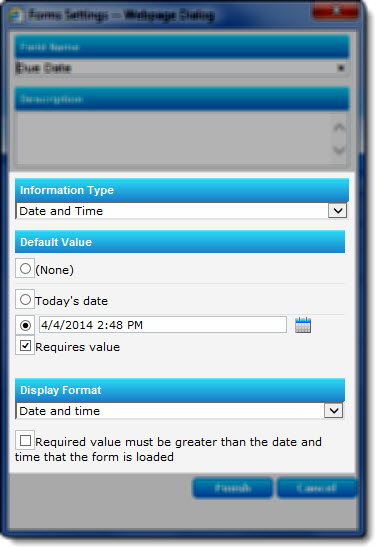 Specify the following for the Date field:
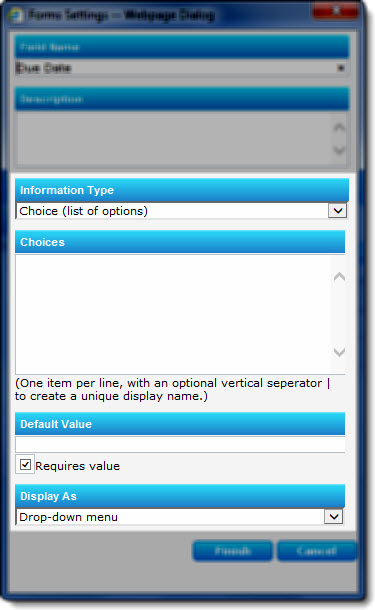 Specify the following for the Choice field:
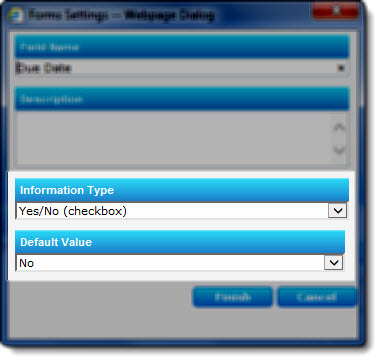 Enter a default value, if desired.
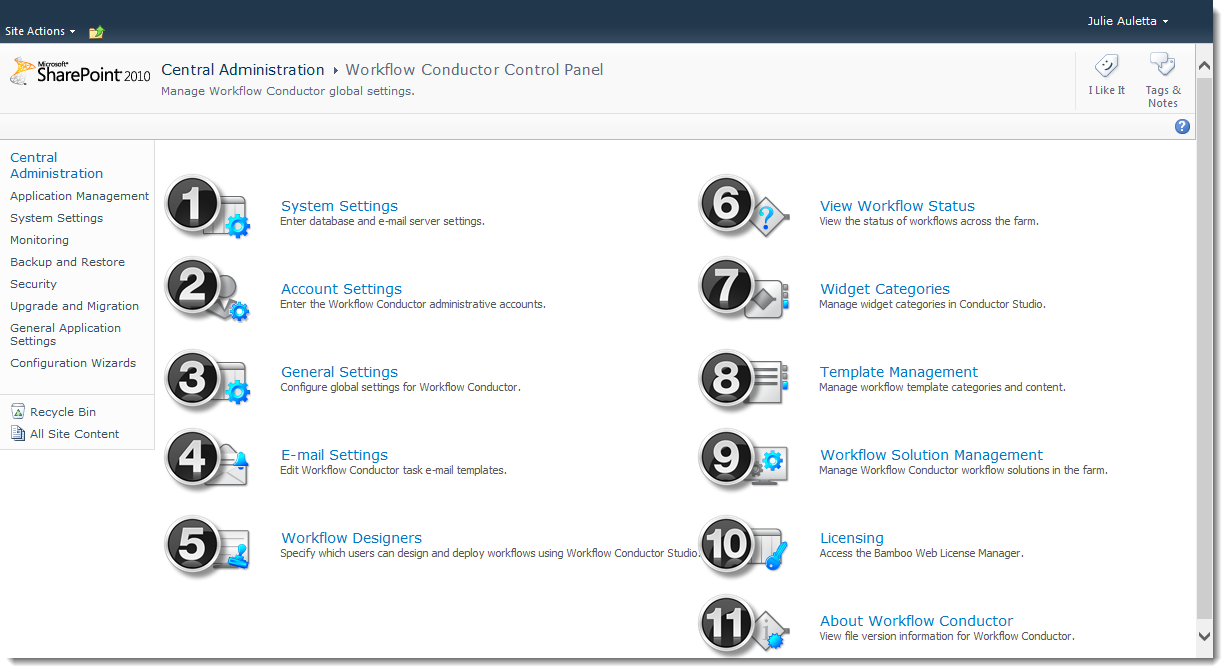
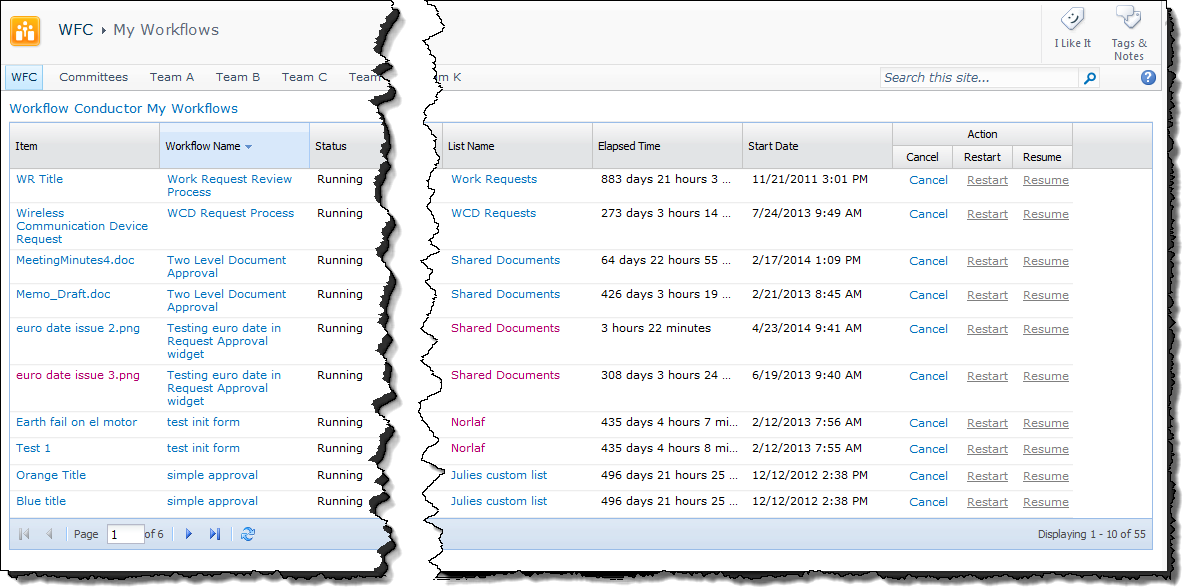
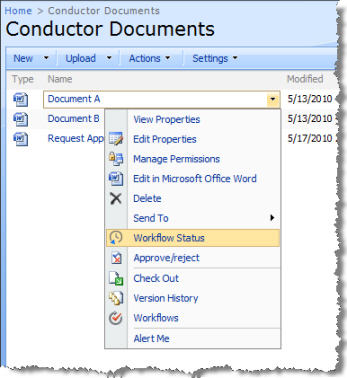 There are several ways to view the status of a workflow in Workflow Conductor. Go to each of the sections listed below for more details about each method.
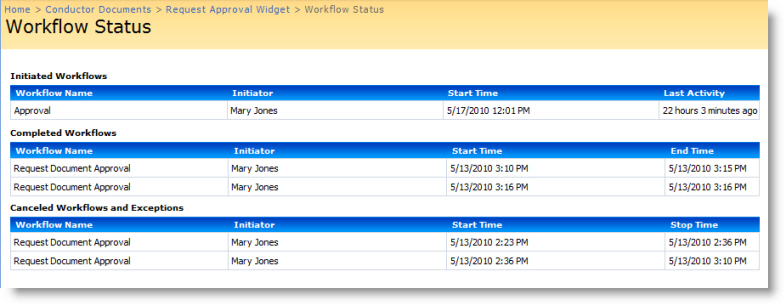
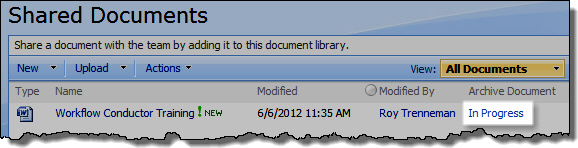
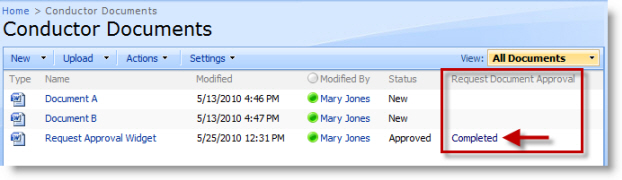 When you start a workflow on a list or library item, SharePoint adds a column to the Default view of the list that matches the workflow name. This column contains the status of the most recent workflow instance started on that item with a link to the SharePoint Workflow Status page for that workflow instance.