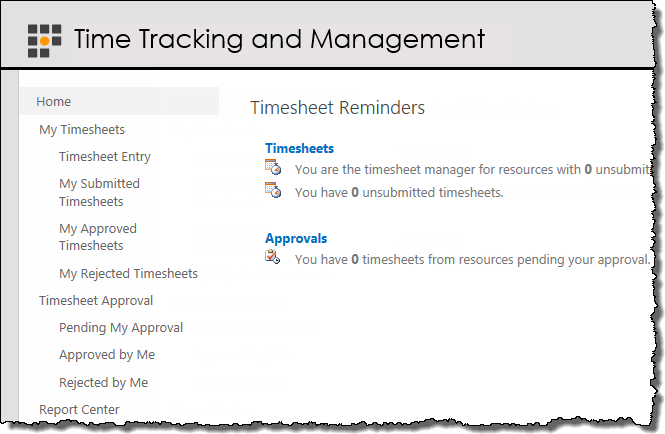
View reports in TTM Report Center

View reports in TTM Report Center

Return to Overview of TTM Report Center

Time Tracking and Management Report Center includes several preconfigured reports for resource use and timesheet status. If you have the proper permission to view reports, follow the steps listed below; scroll down to see the list all the available reports.

Step Action Result
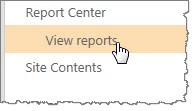
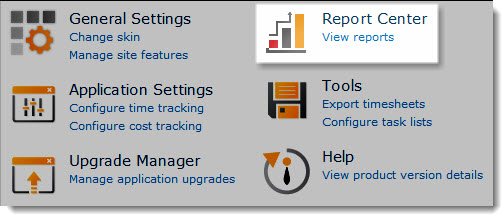
1. Either from the navigation or from the Report Center, click View Reports. ViewRpts.jpg
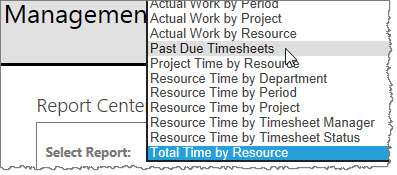
2. Select Report TTM provides a variety of report options; select the report you want.
SelectRpts.jpg
3. Based upon the report you selected above, you have various views to pick. View1.jpgView2.jpg
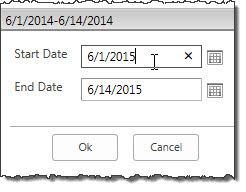
4. Select the Date Range for the report you want to see. DatePicker.jpg
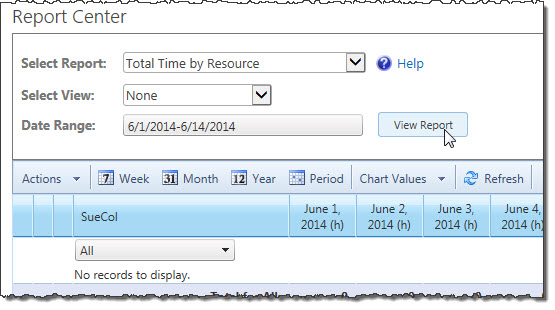
5. Click View Report. ViewReport.jpg

The reports available to you are as follows:

Report Name Description
Actual Work by Period Shows the actual number of hours worked vs. the number of hours available for tasks, grouped by timesheet period. Expand a period to see the work performed by each resource and an indicator that shows the status of the work budget for each task.
Actual Work by Project Shows the actual number of hours worked vs. the number of hours available for tasks, grouped by project. Expand a project to see the work performed by each resources and an indicator that shows the status of the work budget for each task.
Actual Work by Resource Shows the actual number of hours worked vs. the number of hours available for tasks, grouped by resource. Expand a resource to see the work performed by each resource and an indicator that shows the status of the work budget for each task.
Past Due Provides a summary of timesheets for periods ending before the current date that are not yet approved, grouped by resource.
Project Time by Resource Shows total time a resource entered for each project in a single reporting period. Expand a project to see the total time for each project task.
Resource Time by Department Shows total time for each resource in a single reporting period, grouped by department. Expand a resource to see the total time for each task.
Resource Time by Period Shows total time a resource entered for each resource in a single reporting period.
Resource Time by Project Shows a resource time entered for each project in a single reporting period. Project hours can be summarized in a chart. Expand a resource to see the time for each project task.
Resource Time by Timesheet Manager Shows total time for each resource in a single reporting period, grouped by timesheet manager and timesheet status.
Resource Time by Timesheet Status Shows total time for each resource in a single reporting period, grouped by timesheet status. Select the All items view to see a chart of total time by timesheet status.
Total Time by Resource Shows the total time entered for all project tasks, group by resource. Use the date range icons to see time for different time periods, or use the arrow buttons at the top of the report to change reporting periods.

View actual cost in PM Central

View actual cost in PM Central

If you elected to copy actual cost from TTM to PM Central when you configured cost tracking options, you can view the cumulative actual cost per task and for the entire project in PM Central. You can also view reports that compare actual cost from timesheets with planned and actual cost from the project.

Viewing Actual Cost Per Task

To view the total actual cost entered in timesheets for a task, add the Actual Cost (Time Entry) field to the project Tasks list. This field contains the cumulative cost of all work approved for a task to date, and is updated each time a timesheet that has the task is approved. You must follow the steps below for EACH project in your PM Central portfolio where you want to view the Actual Cost (Time Entry) field.

Step Action Result
1. In the PM Central project site, click the Tasks tab and go to the All Tasks view. _taskmastereditwp.jpg
2. Edit the Task Master Web Part
3. In the Column Settings section of the Web Part configuration tool pane, click Add Row and add the Actual Cost (Time Entry) field to the list of fields displayed in the Web Part. _taskmasteractualcost.jpg
4. Click Apply and then OK to save your changes. You can add the Actual Cost (Time Entry) field to any instance of Task Master, including the Overdue Tasks and My Tasks views.

Viewing Actual Cost Per Project

To view the sum of the Actual Cost (Time Entry) field for all project tasks, look at the Project Actual Cost (Time Entry) field in the Project Health list. To access this list, go to the Project Home page and click the project name in the Project Info section.

You can also add the Project Actual Cost (Time Entry) field to the Update Project Cost & Schedule web part so you can compare Actual Cost calculated in TTM with other budgeted and actual values. To add additional fields to the Web Part, follow these steps:

Step Action Result
1. In the project site, go to Tasks > Progress Management.
2. In the Progress Management page, edit the Project Cost & Schedule web part.
3. In the Web Part settings tool pane, scroll to the bottom of the View Fields list and select Project Actual Cost (Time Entry). Click the right arrow (>) to add it to the Display Fields list, and use the up and down arrows to order the field where you want it. -pmc-projectcostschedulewp-actualwork.jpg
4. Click Apply and then OK to save your changes. -pmc-projectcostschedulewp.jpg

Actual Cost Reports

When you connect PM Central to a TTM site, several additional reports are enabled in PM Central to allow you to view actual cost data from timesheets and compare it to cost data from projects. To view these reports, click the Reporting tab in the portfolio site. The following cost-related reports are available:

  • Actual Cost (Project Tracking vs. Time Entry): Compares Actual Cost calculated based on % Complete in the project to the calculated cost for Actual Work entered in resource timesheets.
  • Cost (Planned) vs. Actual Cost (Time Entry): Compares the total planned Cost value in the project to the calculated cost for Actual Work entered in resource timesheets.
  • Actual Cost (Time Entry): Displays the calculated cost for Actual Work entered in resource timesheets.

-pmcreports-cost.jpg

Upgrade to TTM 2.5

Upgrade to TTM 2.5

An upgrade occurs when you want to install a new version of Time Tracking and Management (TTM) version on your existing farm.

If you are interested in migrating from one version of SharePoint to another version (i.e., SharePoint 2010 to SharePoint 2013), see the topics under Migrating to a new SharePoint version….

To upgrade to Time Tracking and Management follow these steps:

Step Action
Part A: Upgrade Time Tracking and Management Core Components
1. Before starting the Time Tracking and Management upgrade, review the best practices for a successful install
2. Restart the SharePoint Timer Service and SharePoint Administrative Services on any server in the farm running the Microsoft Foundation Web Application service. This will ensure files that need to be updated are not locked by these services
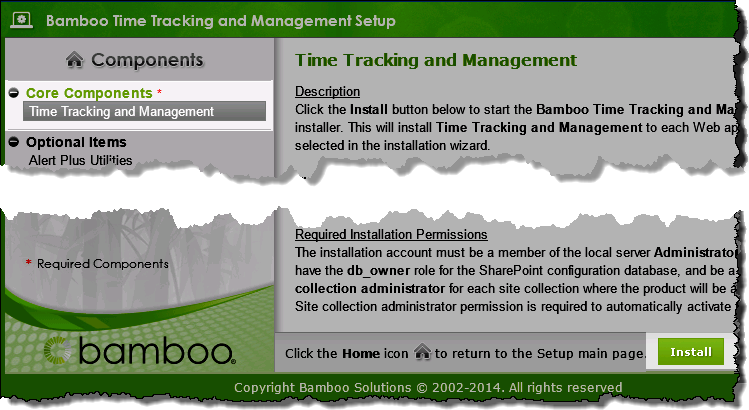
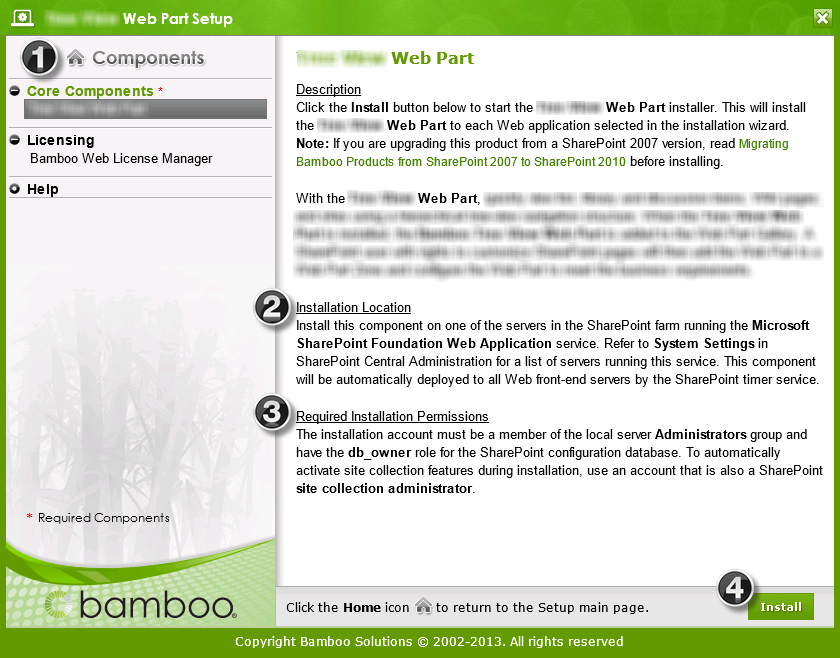
3. From the TTM Installer on the SharePoint Server, select the Time Tracking and Management under the Core Components header, then click the Install button. TTM installer core components
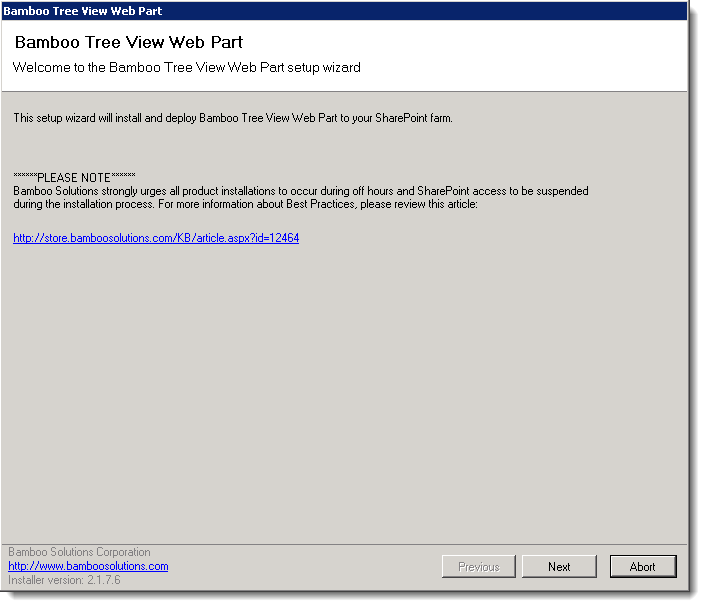
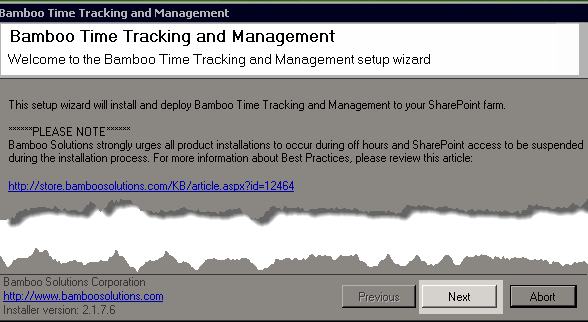
4. Click the Next button on the setup wizard welcome screen Welcome screen
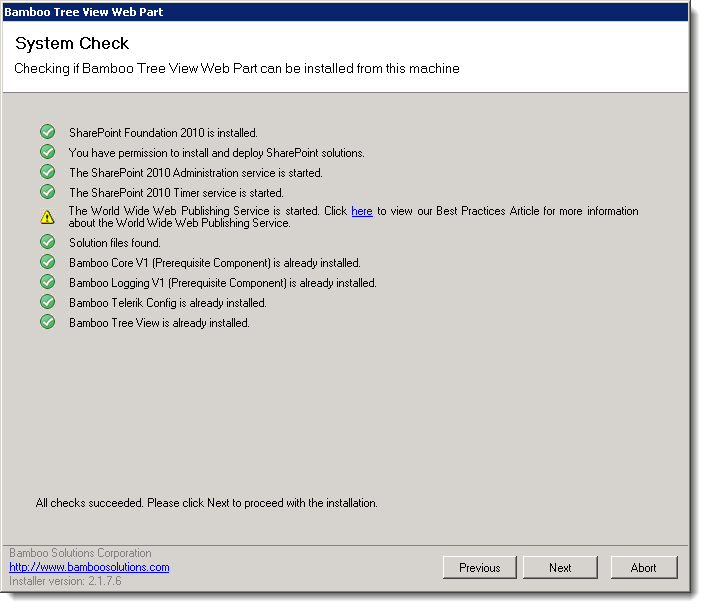
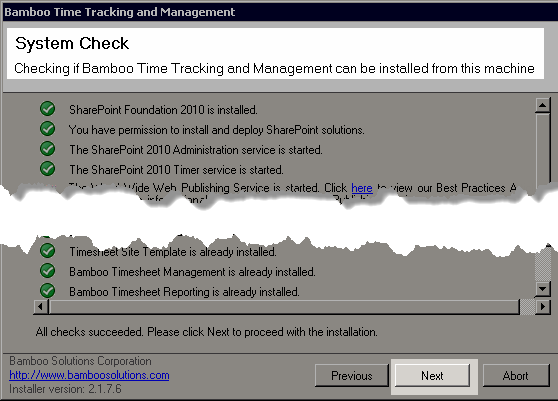
5. When the System Check has completed without error, click Next Remove, Repair Screen in the Installer wizard
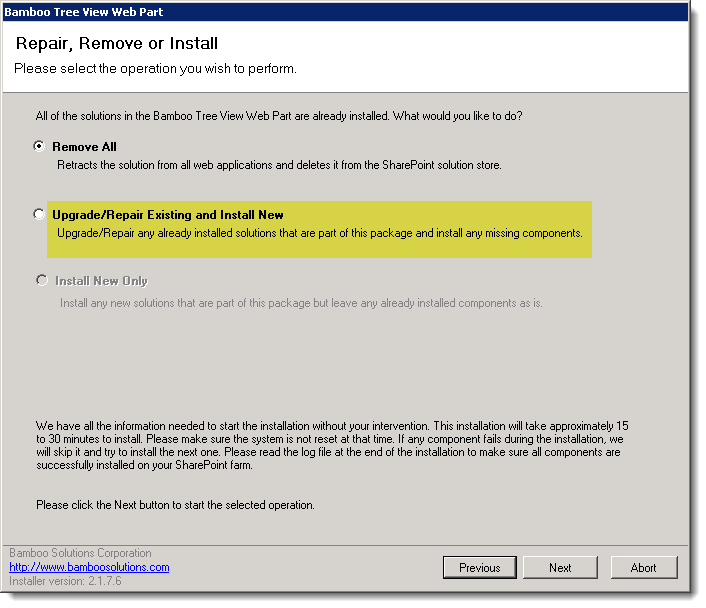
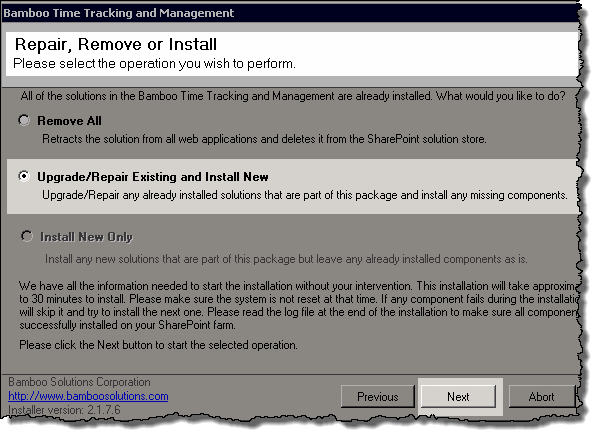
6. From Repair, Remove or Install screen select Upgrade/Repair Existing and Install New, then click Next Remove, Repair Screen in the Installer wizard
7.

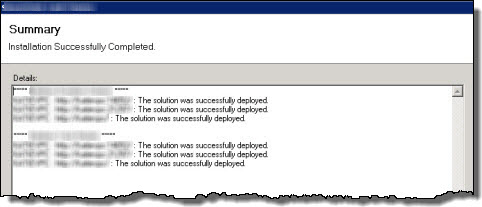
Review the final screen to confirm that all TTM components were upgraded successfully.
Summary screen

NOTE: If any of the components failed to install, capture a copy of the error message on the screen to the Bamboo Support team.

Part B: Upgrade your existing TTM Central sites
1. Following the installation of the Time Tracking and Management core component, the TTM home page will display the following message indicating the existing sites need to be upgraded.
Upgrade warning message on PM Central siteIcon-WarningImportant:
You should be logged in as a Site Collection Administrator before you perform the site upgrade.
2.

Click the provided link to access the Upgrade Manager

NOTE: The Upgrade Manager can also be accessed from the TTM Control Panel

3. Click the Upgrade button
TTM UpgradeManager
4. An Upgrade Summary will be displayed when the upgrade process has been completed.TTM Upgrade Summary screen

What alerts come with TTM?

What alerts come with TTM?

TTM Control Panel Time Tracking Checklist

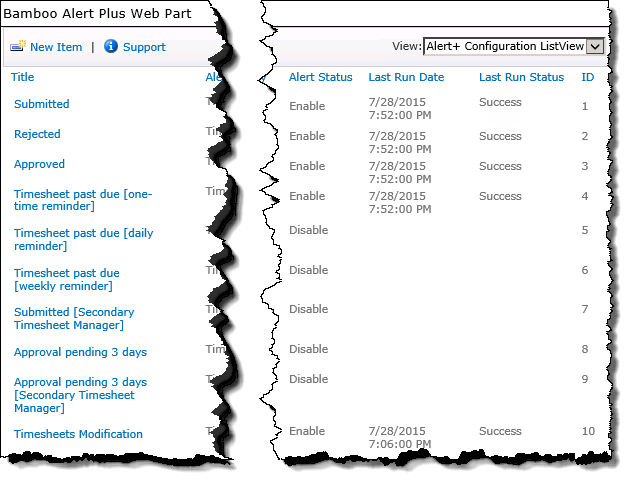
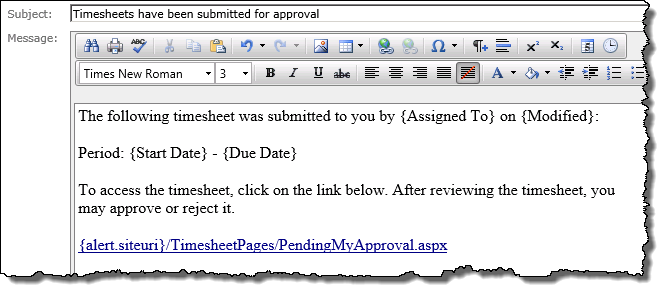
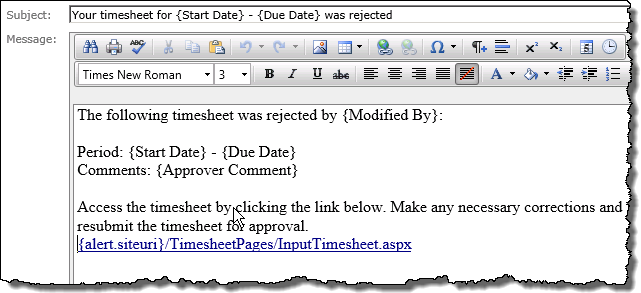
Time Tracking and Management (TTM) comes with pre-defined alerts that let you quickly communicate timesheet status to Timesheet Managers and Resources.

TTMAlerts.pngWhen working with TTM Alerts, keep in mind:
  • All TTM alerts are disabled by default

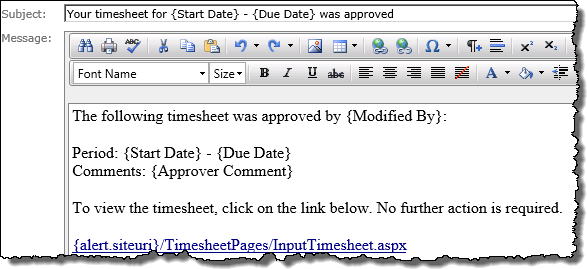
  • The tokens ({Column Names}) shown in the mail format will be replaced with content in the email

  • You can modify existing alerts or create new alerts as needed. Click here for more information.

TTM’s default alerts:

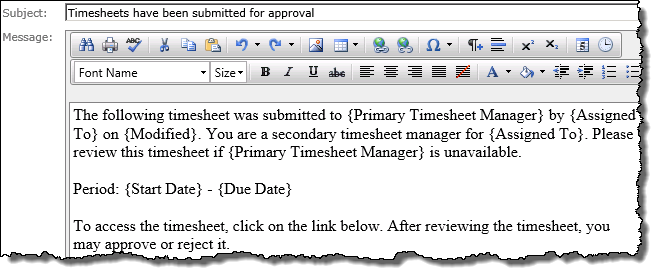
ID # Alert Title & Criteria Alert Message Format
1. Submitted:

Sends a notification to the Primary Timesheet Manager when a timesheet is submitted.
New emails are sent every hour and multiple alerts will be sent in a single summary notification
Alert format
2. Rejected:

Sends a notification to the Timesheet Resource when their timesheet is rejected
New emails are sent “as soon as possible.”
Alert format
3. Approved:

Sends a notification to the Timesheet Resource when their timesheet is approved
New emails are sent “as soon as possible.”
Alert format
4. Timesheet past due (one-time reminder):

Sends a notification to the Timesheet Resource when their timesheet is still in Saved status after the due date.

New emails are sent as soon as possible

TTMAlertID3.png

5. Timesheet past due (daily reminder):

Sends a notification to the Timesheet Resource when their timesheet is still in Saved status after the due date.

New emails are sent every hour and a follow up email will be sent after 1 day
6. Timesheet past due (weekly reminder):

Sends a notification to the Timesheet Resource when their timesheet is still in Saved status after the due date.
New emails are sent as soon as possible
and a follow up email will be sent after 7 days
7. Submitted (Secondary Timesheet Manager):

Sends a notification to the Secondary Timesheet Manager when a timesheet is submitted.
New emails are sent every hour and multiple alerts will be sent in a single summary notification
Alert format
8. Approved pending 3 days:

Sends a notification to the Primary Timesheet Manager when a submitted timesheet has been pending review for 3 days.
New emails are sent every hour and multiple alerts will be sent in a single summary notification.
Alert format
9. Approved pending 3 days (Secondary Timesheet Manager):

Sends a notification to the Primary Timesheet Manager when a submitted timesheet has been pending review for 3 days.
New emails are sent every hour and multiple alerts will be sent in a single summary notification.
Alert format
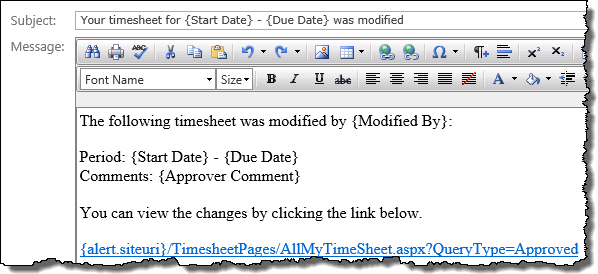
10. Timesheet Modification:

Sends a notification to the Timesheet Resource when a submitted timesheet has been modified by the Timesheet Manager prior to approval.
Emails are sent as soon as possible
.
Alert format

TTM Control Panel Time Tracking Checklist

How to know what TTM version you are using

How to know what TTM version you are using

TTM Configuration Overview

As Time Tracking and Management (TTM) has gone from one release to the next, the appearance of TTM and the functionality availability within the application continues to change.

What version of TTM are you using?

There are a couple of ways you can determine the version of TTM that you are using.

File Version
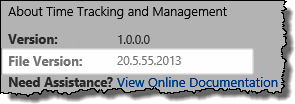
If you have access to the TTM Control Panel look at the File Version, found in the About Time Tracking and Management section, to find out exactly which TTM release is installed.

About TTM

Site Appearance

If you do not have access to the TTM Control Panel the images below will you help you determine which version of TTM you are using.

NOTES:
1. After installing the most recent version of Time Tracking and Management to SharePoint you may need to upgrade the TTM Site to see the modifications shown below applied to site pages
2. Links to the Configuration Checklists were added in TTM 2.0 but are only visible to users will access to the Time Tracking and Management Control Panel.

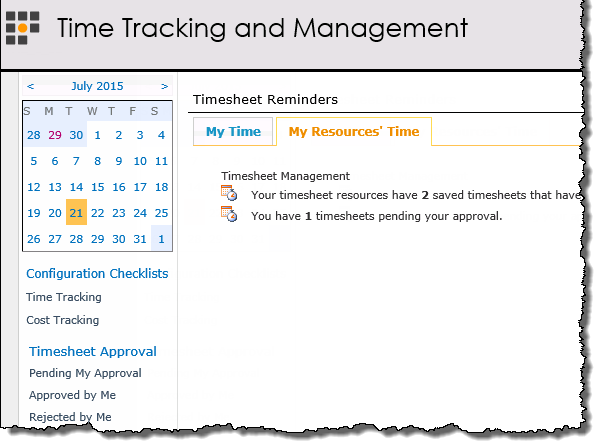
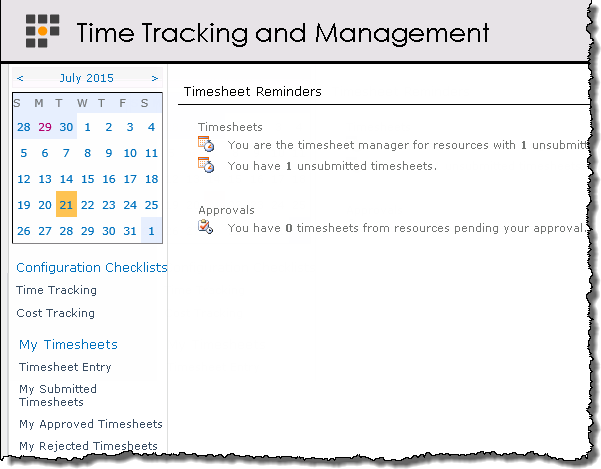
TTM Version 2.5 TTM 2.5 Home page
TTM Version 2.0 TTM 2.0 Home page
TTM Version 1.7
TTM 1.7 and earlier versions are very similar in appearence. Use the file version to identfity the specific version installed.
TTM 1.7 Home page

TTM Configuration Overview

Using the TTM Configuration Lists

Using the TTM Configuration Lists

TTM Configuration Overview

The Time Tracking and Management (TTM) Configuration Checklists provide administrators with instructions on how to prepare the site for use.

When working with the Timesheet Configuration Checklists keep in mind:

  • There are two checklists associated with TTM:

  • You will need Full Control permission on the TTM site to complete some of the items in the Time Tracking checklist.

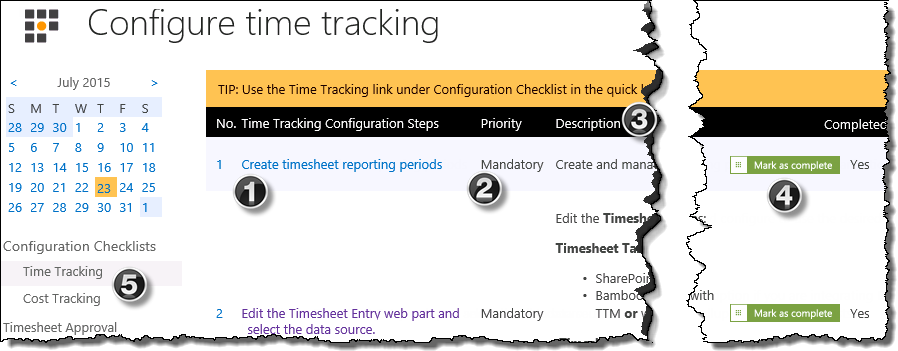
    Open item in the Configuration checklist

    NOTE: Additional steps and the “Mark as Complete” button were added in TTM 2.0

# Function
1. Configuration Steps:
Use the link to access the page where the configuration needs to be implemented
2.

Priority:

  • Items with a Mandatory priority must be completed for all configurations of Time Tracking and Management.
  • The Warning message on the TTM Home page will be displayed until all Mandatory items associated with the Time Tracking Configuration Checklist have a been closed.
    Warning message with links to the TTM Configuration Checklists

    Icon-WarningIMPORTANT:
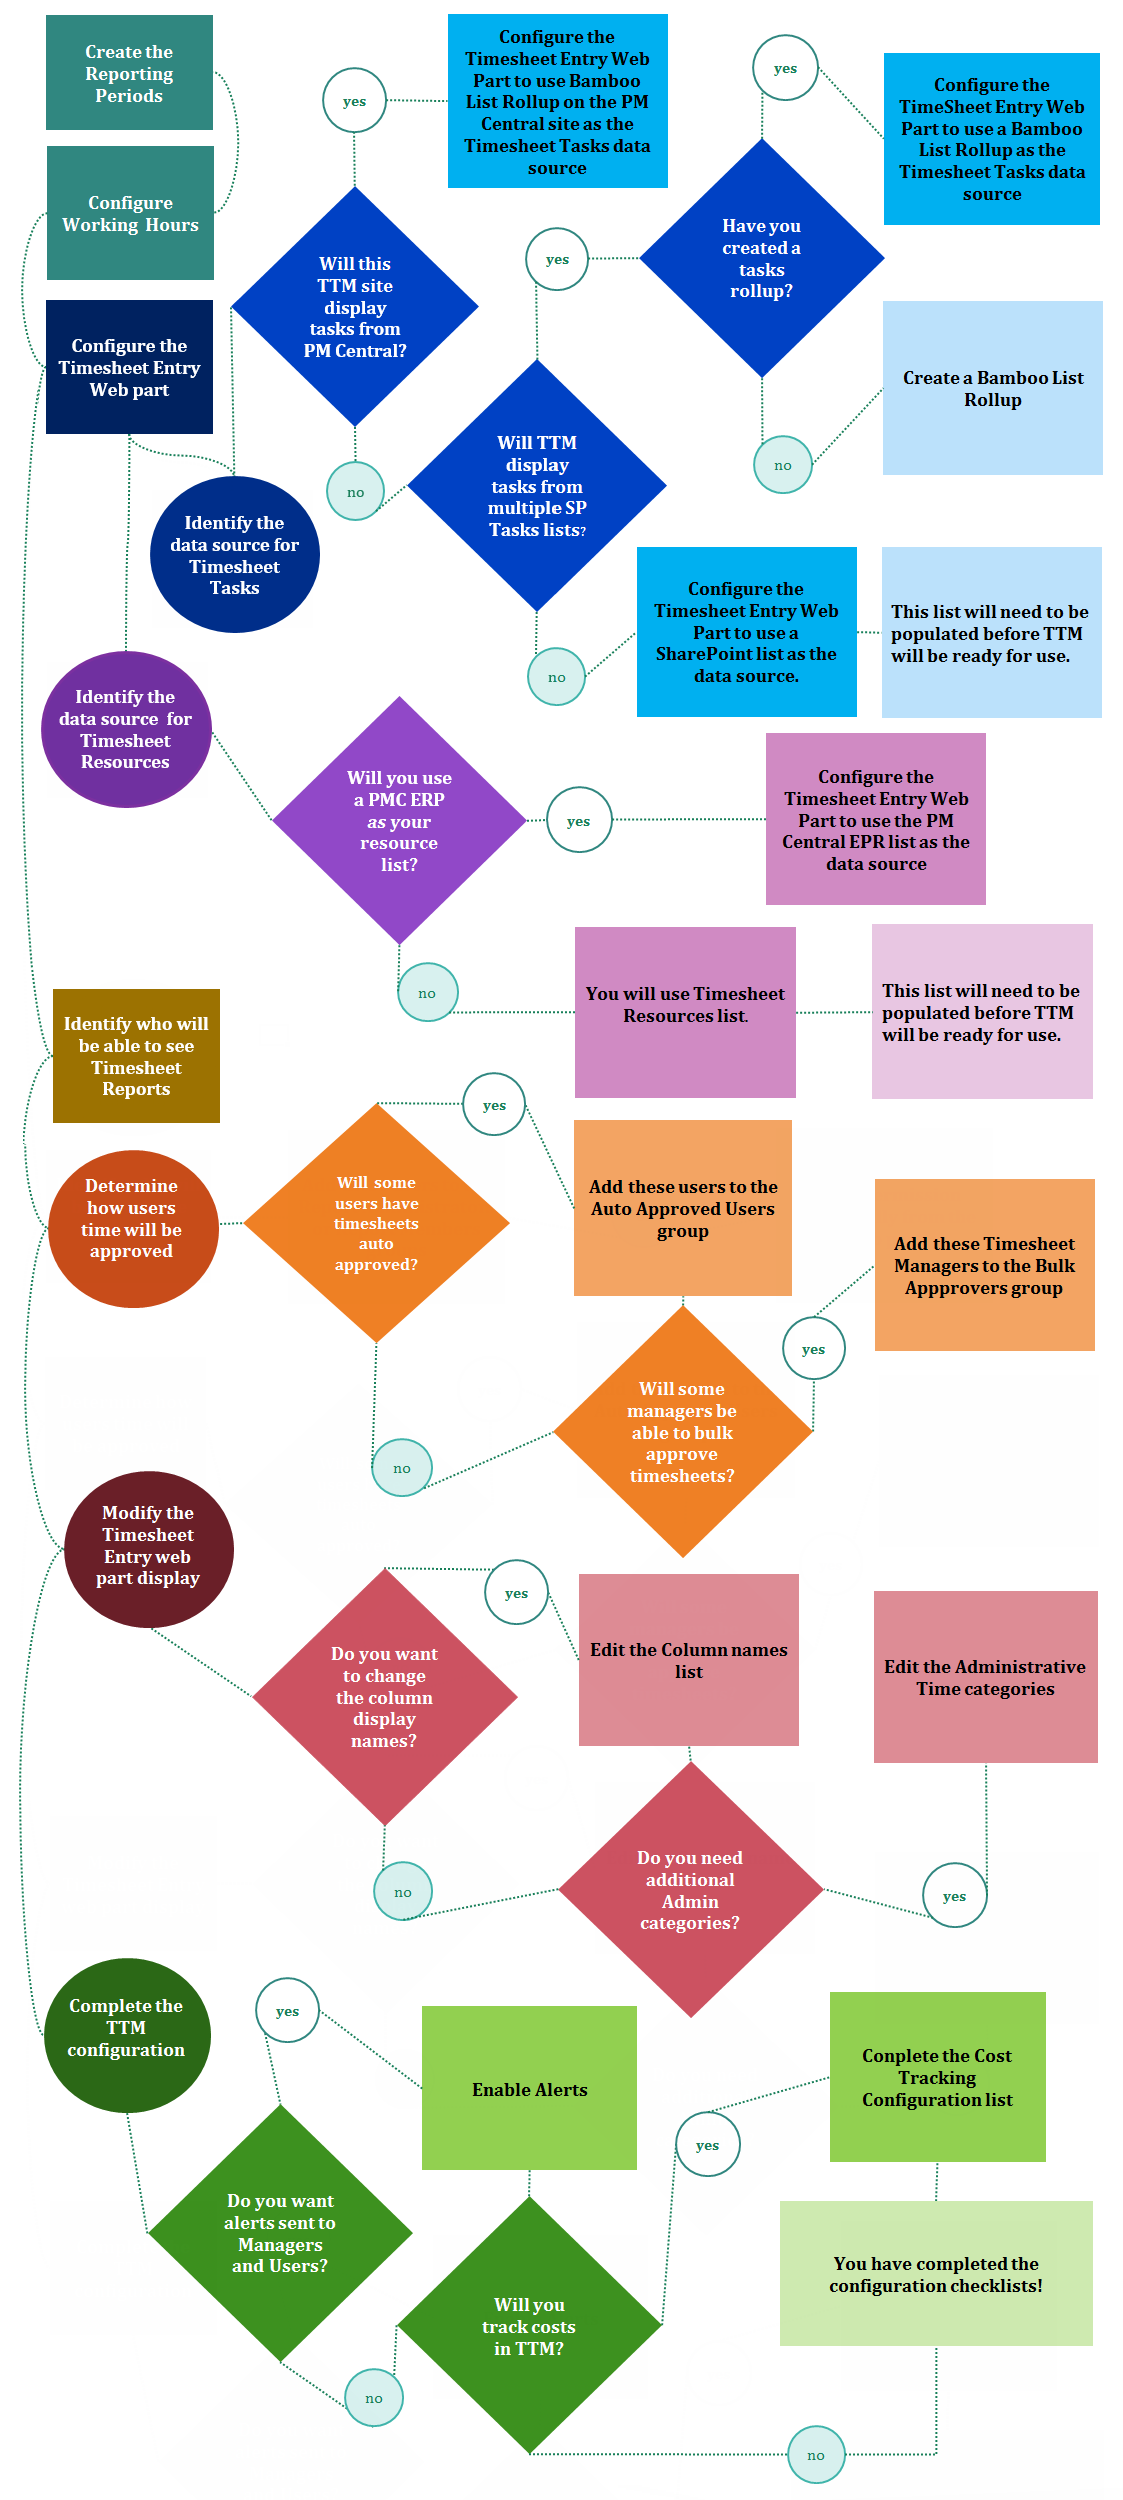
    Not all recommended items in the check list will need to be completed. See the TTM Configuration Decision Map page to identify which configuration items need to be completed for your set up.

3. Description:
The description provides basic information about the individual configuration step that is required. Click the “more information” link associated with the item to access the topic in the documentation.
4. Complete buttonCompleted:
Click the button to change the Completed status from No to Yes.
5.

Complete buttonChecklist links:

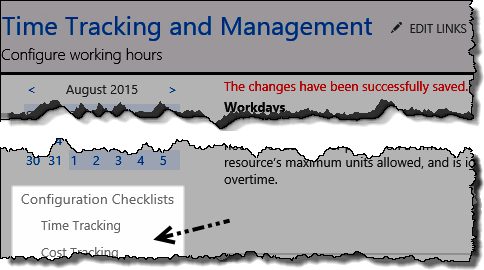
  • Each of the Configuration links will take you to a new page in TTM. To return to the checklist use the link in the left hand navigation.
  • Only users who have Full Control or Design permissions on the TTM site will see these links .

    NOTE: You will need Full Control permission on the TTM site to complete some of the items in the Time Tracking checklist.

TTM Configuration Overview

Using the Time Tracking and Management Upgrade Manager

Using the Time Tracking and Management Upgrade Manager

TTM Configuration Overview TTM Control Panel

Before you can take advantage of new features associated with the latest version of Time Tracking and Management (TTM) you may need to upgrade your current TTM site.

Keep in mind:

  • You should read the TTM upgrade documentation before you install the latest TTM version on the SharePoint server
  • After the newer version of TTM is installed you will see a warning message if a site upgrade is required
  • You must be a Site Owner to perform the TTM site upgrade

TTM upgrade warning message

To upgrade your TTM Site:

Step Description
1.

UpgradeManager_ControlPanelLink.pngAccess the Upgrade Manager using links found in:
NOTE: You must have Full Control of the site to see the Upgrade Manager link in the TTM Control panel

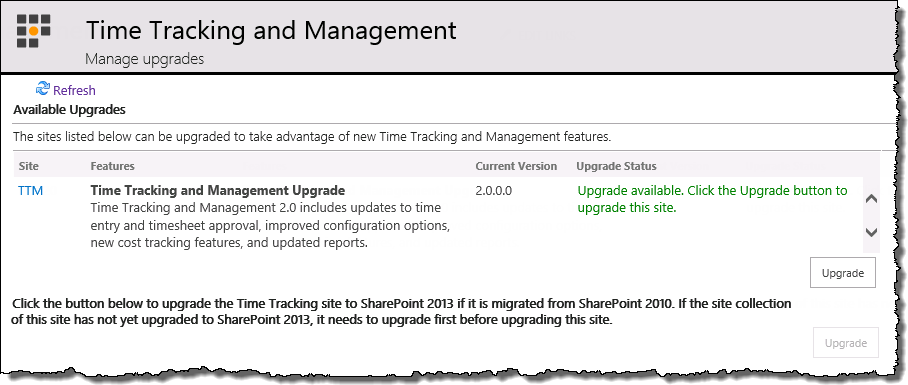
2. Click the Upgrade button. TTM Upgrade Manager prior to site upgrade
3.

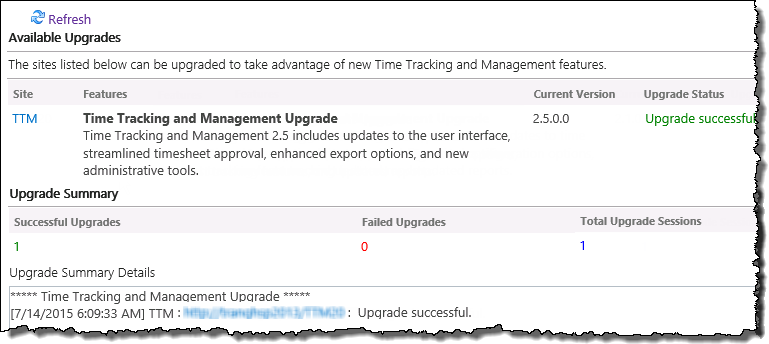
Verify that the upgrade completed successfully TTM Upgrade manager post site upgrade

NOTE: If you migrated from SharePoint 2010 to SharePoint 2013 to you must upgrade the site to SharePoint 2013 look and feel before you can upgrade the TTM site.

TTM Configuration Overview TTM Control Panel

Configuring TTM’s User Profile Import Web Part

Configuring TTM’s User Profile Import Web Part

TTM Configuration Overview TTM Control Panel

Time Tracking and Management’s (TTM) User Profile Import allows user information from a SharePoint User Profile to be imported into TTM, minimizing the data entry required to populate the Timesheet Resources list.

Keep in mind:

Configure the TTM User Profile Import Web Part:

Step Action
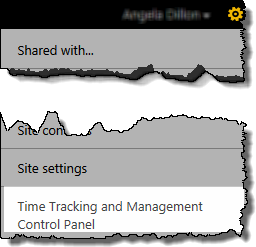
1. TTM Control Panel linkFrom the TTM site’s Site Actions menu, select Time Tracking and Management Control Panel.
2.

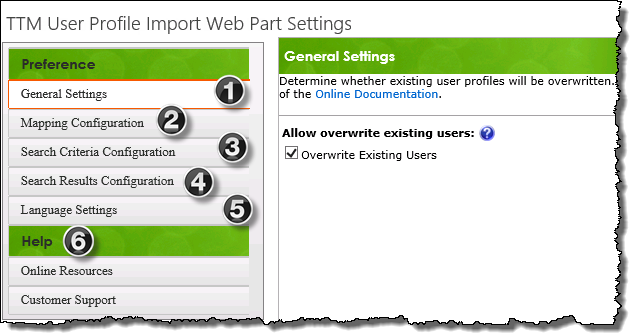
Edit the Web Part on page and click the Import User Profile Web Part Settings button to access the pop-up configuration window

Icon-Warning IMPORTANT: If you don’t see the dialog screen (shown below), make sure that you have disabled popup blockers for this site.Image of the Configuration window

3.

Use the left hand navigation to access the appropriate configuration screens:

# Function
1 By default, if items are reimported the new user profile information will overwrite the current information in the Timesheet Resources list.
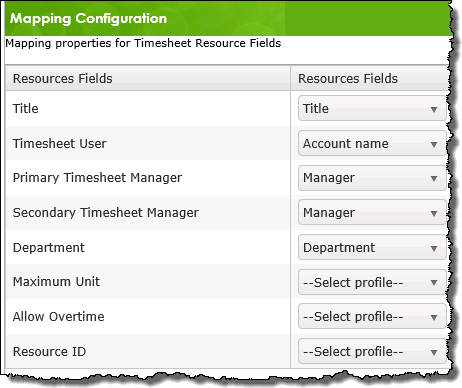
2. Mapping Configuration
Map the fields in the Timesheet Resources list to SharePoint User Profile fields
Mapping screen

Icon-Warning Important:By default, a user’s Manager will be identified as their Primary and Secondary Timesheet Manager.

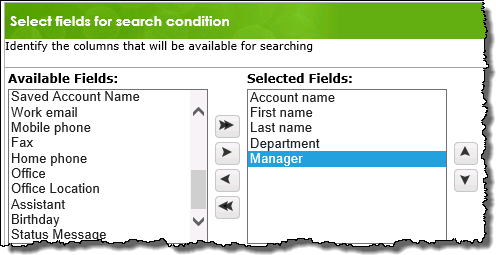
3. Search screenSearch Criteria Configuration

Select the fields that you want to be able to search from Available fields
4.

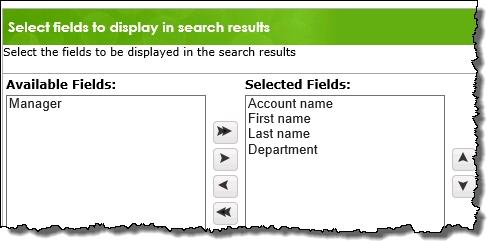
Results screenSearch Results Configuration
Select the columns that will be displayed in the search results

NOTE: Columns must be added to the Search Criteria “Selected Columns” before they will be available to display in the search results

5. Language Settings
Modify the Language Settings
6.

Help

  • Click Customer Support to access available online resources for the web part.
  • If you are unable to find the answer to your question with these resources, our Customer Support engineers are standing by to help.
4. Click Save & Close to commit the changes and exit pop-up configuration screen.

TTM Configuration Overview TTM Control Panel

Overview of the TTM Control Panel

Overview of the TTM Control Panel

TTM Configuration Overview

The TTM Control Panel link in Site Actions.
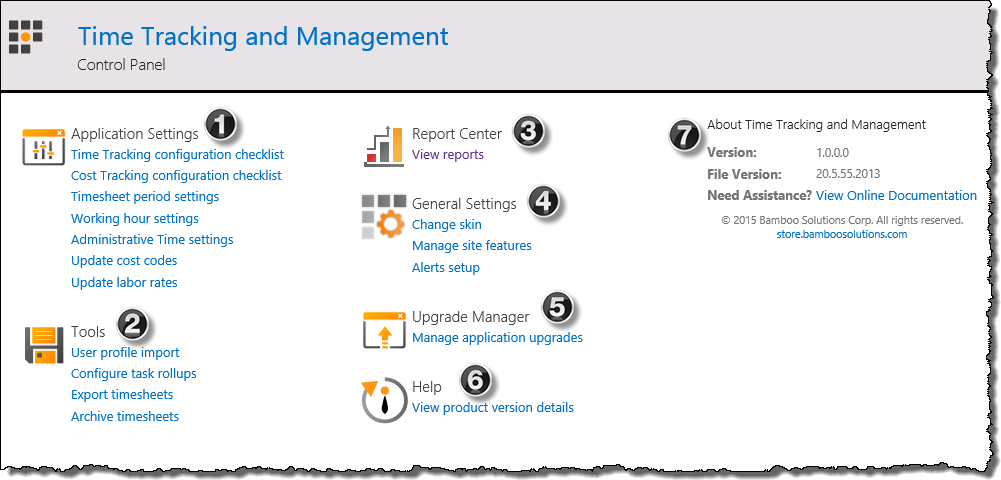
The Time Tracking and Management Control Panel provides a central location for the configuration and administration of the TTM site.

When working in the TTM Control Panel keep in mind:

  • Users with Full Control or Design permissions can access the Time Tracking and Management Control Panel from the Site Actions drop down menu.

  • The contents of the control panel are security trimmed so not all options will be visible to users with Design permissions. The table below identifies the permission level required to see specific links.

NOTE: The image below shows a TTM Control Panel for users with Full Control permissions

TTM Control Panel
TTM Control panel as seen by a user with Full Control

Section
1.

Application_Settings_48.pngApplication Settings

Link: Permission required Notes
Time Tracking Configuration Checklist Full Control or Design

You must complete the Time Tracking Configuration checklist before using TTM

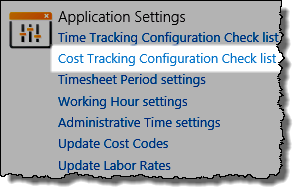
Cost Tracking Configuration Checklist Full Control or Design You only need to review this checklist if you will track project costs in TTM
Timesheet Period Settings Full Control or Design Creating Timesheet periods is a mandatory step in the Time Tracking Configuration list and you will need to create new timesheets periods from time to time.

Icon-Warning IMPORTANT: Review the reporting period parameters. By default 26 14-day timesheets starting on 12/29/2014 will be created.

NOTE: The default date may differ based on the version of TTM installed .

Working Hour settings Full Control or Design Defining working hours is a mandatory step in the Time Tracking Configuration list

Icon-Warning IMPORTANT: By default time can only be entered Monday – Friday, and users will be prevented from entering more than 8 hours of time per day, unless their profile is marked to allow overtime

Administrative Time settings Full Control or Design Edit or create new Administrative Time categories.
Update Cost Costs Full Control or Design Required if you are tracking costs in TTM
Update Labor Rates Full Control or Design Required if you are tracking costs in TTM

2. Export.pngTools

Link: Permission required Notes
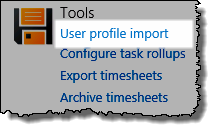
User Profile Import Full Control or Design Use to copy profile information from the SharePoint User Profile database into the Timesheet Resources list.
User Profile Import added in TTM 2.5
Configure Task Rollups Full Control or Design Use Bamboo List Rollup to create a rollup of multiple tasks lists for use as the Timesheet Entry Web Parts tasks data source

NOTE: This is an optional configuration step. See the TTM configuration decision map
for more information

Export Timesheets Full Control Export Timesheet list information to another list SharePoint list
Archive timesheets Full Control Use schedule the archival of timesheets from the Timesheets list by creating a archive schedule or a one-time action
Archive timesheets feature added in TTM 2.5

3.

TimesheetManagementReporting.pngReport Center
The View Reports link takes users to the Reports Center where a number of predefined reports are available.

NOTE: Users must have Full Control to see the Report Center link from the Control Panel.

4.

TimesheetManagementSettings.pngGeneral Settings

NOTE: General Settings is located on the left of the screen when you are logged in with Design permissions

Link: Permission required Notes
Change Skin Full Control Choose from three available skins to modify the appearance of the TTM site.
Manage site features Full Control or Design Gives you the option to deactivate the Site Actions access to the Control Panel
Activate buttonNOTE: Only users with Full Control or Design permissisons on the site see this menu item
Alerts setup Full Control or Design Enable and manage TTM’s available alerts

5.

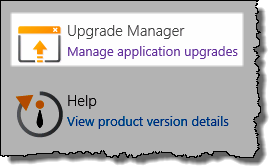
Upgrade_Manager_48.png

Link: Permission required Notes
Upgrade Manger Full Control Use the Upgrade Manager to upgrade an existing TTM site following the installation on a new TTM version. to verify that your TTM site was upgraded following the installation of the latest TTM version.
6. TimesheetManagementHelp.pngHelp
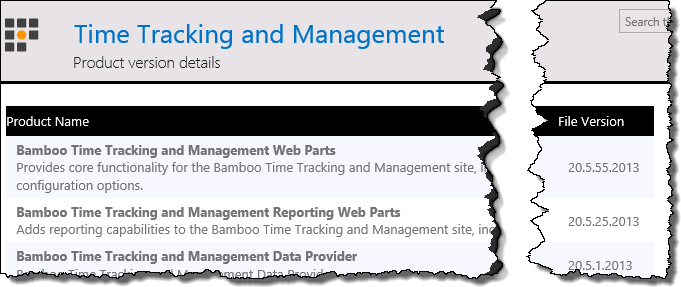
Displays the version details of the products installed as part of the TTM application.
Product Details page
7. File VersionAbout Time Tracking and Management
Look at the File Version to determine what version of TTM is installed in your farm.

Icon-Tip Provide the File Version number any time you open a ticket with Bamboo Support

TTM Configuration Overview

TTM Cost Tracking Checklist

TTM Cost Tracking Checklist

Overview TTM Configuration TTM Control Panel

Icon
If your organization wants to use Time Tracking and Management (TTM) to track the cost of work entered in timesheets, there are several configuration tasks that must be completed. To help you complete all tasks in the correct order, the TTM site has organized these tasks in the Cost Tracking Configuration Checklist.

When configuring Cost Tracking for TTM keep in mind:

  • The steps below are only required if you will use TTM to track task costs.

  • If you want to use cost tracking with an existing Bamboo Project Management Central installation, read Configuring Cost Tracking for PM Central. This topic provides a summary of cost tracking configuration requirements in TTM and includes configuration requirements for PM Central.

Completing the Cost Tracking Configuration checklist :

TTM Configuration message

Step Description
1.

Links from the TTM Control PanelAccess the Cost Tracking configuration checklist using links found in:
2.

Click the Action link. You will be taken to appropriate page to complete the configuration.
More information on using the checklist is available here

Configuration Step Priority Description
  1. Configure Cost Tracking options
Mandatory Enable cost tracking for all timesheets and configure cost tracking options.
  1. Create cost codes
Mandatory Create cost codes that resources can charge time to.
  1. Enter labor rates
Mandatory Associate labor rates with cost codes in the Cost Tracking list
  1. Assign cost codes to resources
Mandatory Select the cost codes that each resource can charge tasks to. You can customize the cost codes available to each resource to minimize data entry errors.
3.

Click Save to save your changes or Cancel to exit without saving.

Icon-Tip To mark this item as complete in the Cost Tracking configuration checklist, click
Mark as Complete

NOTE:
If you upgraded Time Tracking and Management from version 1.0 and are enabling cost tracking for the first time, click the Update Timesheets button to add cost tracking features to timesheets. You only have to do this once, and the button will be disabled after the upgrade is complete.

Overview TTM Configuration TTM Control Panel

TTM Cost Tracking Columns

TTM Cost Tracking Columns

TTM Control Panel Cost Tracking Checklist

clip-6db7c8c0f2e03c55e3241c462f323e72b45a360bWhen you enable cost tracking, several cost calculations will be performed for each timesheet task.

When using Cost Tracking keep in mind:

  • The source of the Labor rate is determined by the selection made when configuring cost tracking options

    • If configured to use the Timesheet Resources list list the Labor rate will the defined Internal Rate from the Cost Tracking list for the cost code associated with the task.
    • If you are using PM Central to obtain billing rates, the Standard Rate for the resources from the Enterprise Resource Pool (ERP) is used
  • When you add cost tracking columns to the timesheet, timesheet managers can review the results of the selection calculation(s) (shown below) when approving time.

  • Calculations are also used to create cost-related reports in the TTM Report Center.

Column Name Description
Internal Cost Internal Cost multiples the number of hours entered for the task in the time period by the Internal Rate for the task’s associated cost code

Labor Rate source Calculation
(Source identified in green)
Time Tracking and Management Actual Work (Timesheet entry) * Internal Rate (Cost Tracking list)
Project Management Central Actual Work (Timesheet entry) * Standard Rate (PM Central’s ERP list)
Billable Administrative tasks – both data sources
(TTM & PMC)
Actual Work (Timesheet entry) * Internal Rate (Cost Tracking list)

Billable Cost

Billable Cost multiples the number of hours entered for the task in the time period by the Billable Rate for the task’s associated cost code.

Labor Rate source Calculation
(Source identified in green)
Time Tracking and Management Actual Work (Timesheet entry) * Billable Rate (Cost Tracking list)
Project Management Central Actual Work (Timesheet entry) * Standard Rate (PM Central’s ERP list)
Billable Administrative tasks
(Both data sources)
Actual Work (Timesheet entry) * Billable Rate (Cost Tracking list)

In the calculations below, Planned Work (Project Tracking) is equal to Planned Work (from the Timesheet Tasks list) or Work (from the PM Central Tasks list) less cumulative Actual Work (Time Entry) for all time periods before the current one.

  • It can be considered the remaining budget of hours available for the task at the start of the time period.

    For example: If the Planned Work value for a task from the Timesheet Tasks list is 40 hours and time entered for the task in all time periods before this one totals 10 hours, Planned Work (Project Tracking) is equal to 30 hours at the start of the current time period.

Planned Internal Cost

Planned Internal Cost calculates the internal budget remaining for the task at the start of the period.

  • It is based on the total planned work for the task less the time entered through the start of the time period multiplied by the internal labor rate

  • If this number is negative, the task was over budget at the start of the period.

Labor Rate source Calculation
(Source identified in green)
Time Tracking and Management Planned Work (Project Tracking) * Internal Rate (Cost Tracking list)
Project Management Central Planned Work (Project Tracking) * Standard Rate (PM Central’s ERP list)

Planned Billable Cost

Planned Billable Cost calculates the billable budget remaining for the task at the start of the period.

  • It is based on the total planned work for the task less the time entered for the task through the start of the time period multiplied by the billable labor rate.
  • If this number is negative, the task was over budget at the start of the period.

Labor Rate source Calculation
(Source identified in green)
Time Tracking and Management Planned Work (Project Tracking) * Billable Rate (Cost Tracking list)
Project Management Central Planned Work (Project Tracking) * Standard Rate (PM Central’s ERP list)

Work Variance

Work Variance is the number of hours left in the planned work budget at the end of the time period after subtracting all time entered for the task to date.

  • If this number is negative, it means that the amount of work entered for the task has exceeded the total number of hours that was budgeted for it.

Labor Rate source Calculation
(Source identified in green)
Both data sources
(TTM & PMC)
Planned Work (Project Tracking) * Actual Work (Timesheet entry)

Internal Cost Variance

Internal Cost Variance calculates the internal budget remaining for the task at the end of the period by subtracting the Internal Cost for this period from the Planned Internal Cost at the start of the period.

  • If this number is negative, the task is over budget.

Labor Rate source Calculation
(Source identified in green)
Both data sources
(TTM & PMC)
Planned Internal Cost – Internal Cost

Billable Cost Variance

Billable Cost Variance calculates the billable budget remaining for the task at the end of the period by subtracting the Billable Cost for this period from the Planned Billable Cost at the start of the period.

  • If this number is negative, the task is over budget.

Labor Rate source Calculation
(Source identified in green)
Both data sources
(TTM & PMC)
Planned Billable Cost – Billable Cost

TTM Control Panel Cost Tracking Checklist

Use the TTM Export Timesheets options

Use the TTM Export Timesheets options

TTM Configuration Overview TTM Control Panel

In Time Tracking and Management (TTM) timesheet information is maintained in the Timesheets list. Since modifications should not be made to this critical list, TTM provides a tool to allow you to export data from the Timesheets list to another list in the site collection.

When generating timesheet exports keep in mind:

  • The export tool was enhanced in TTM 2.5.

    • The enhanced tool replaces the functionality previously provided with the TTM Console Application.
    • For information on the columns included in the export, click here

    • There are two export options available:

      • Export Now – creates an immediate one-time export of identified timesheet data
      • Schedule Export – uses a timer job to export data on a specified schedule

To export timesheet data:

Link from the TTM Control Panel Click the Export Timesheets link in the TTM Control Panel to access the export tool.

NOTE: To see the link you will need to have Full Control permissions on the TTM site.

# Function
Export Parameters
Export Parameters
1.

TTM Source Site URL
Enter the URL of the TTM site within the same site collection that contains the timesheet data you want to export.

  • Keep the default ./ to export timesheet data from the current site.
2.

Destination list

Enter the name of the list that will be created and populated with timesheet data.

Icon-Warning Important: If you create an export schedule the same list will be continually overwritten with the timesheet data that meets the defined parameters of the export.

3.

Destination Site URL
Enter the URL of the destination site within the same site collection.

  • Keep the default ./ to export timesheet data to a list in the current site.
Export Parameters cont.
Export Parameters
4. Admin tasks in Timesheet Entry displayAdministrative Tasks
Check to include time entered against Administrative tasks in the export.
5. Exported Content

When checked, the export will only include task items that contain a time entry
.
6. Export Approved Timesheets
Check to only include timesheet with an Approved Status in the export.
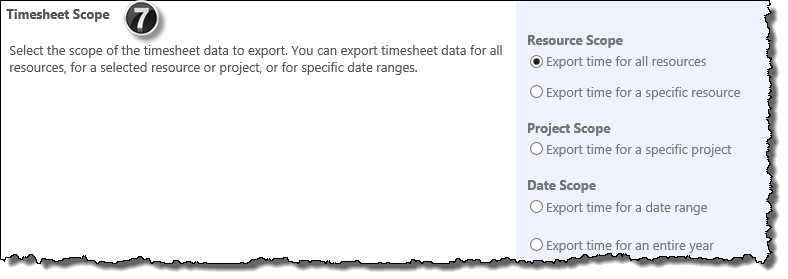
Timesheet Scope
Scope Parameters
7.

Select one of the options below to identify which timesheets will have data included in the export

  • Resource Scope
    • Export timesheets for all resources
    • Export timesheets for a specific resource
  • Project Scope
    • Export timesheets for a specific project
  • Date Scope
    • Export timesheets for an identified date range
    • Export timesheet for an entire year

Schedule Export
Use these settings only if you want to save an export schedule. Schedule Parameters

NOTE: If you want to create a one-time export, click the Export Now button below.

8
  • A. Define a schedule
    • Use the radio buttons to determine how frequently the defined export will be executed.
    • The export process will be managed by the Bamboo TTM Timer Job Manager (timer job)
  • B. Save Schedule
    • You must select the Save Schedule button if you want to use the schedule defined above
    • You can save one scheduled export.
    • One-time exports that are generated when you click the Export Now button do not impact the settings of a previously saved export.
9 Export Now
Use this button to create an immediate, one-time export of the identified timesheet data.

TTM Configuration Overview TTM Control Panel

TTM Report Center

TTM Report Center

sa12a-reportcenter.jpgThe Time Tracking and Management Report Center includes several preconfigured reports for resource use and timesheet status.

The list of available reports in the Report Center cannot be changed, but you can modify, create, or remove views for a report. Views filter report data so you can see the most relevant data for your business.

The Report Center can be accessed from the left navigation or through the Project Management Central Control Panel. TTM site users with the Design permission level and above can access the Control Panel in the Site Actions menu; however, only users with the Full Control permission level will see the Report Center feature.

See the Configuring TTM Report Center Permissions section for the step-by-step instructions to set TTM permissions as well how to provide access to users who can access and generate the reports.

You can also browse to the Report Center page directly. The Full Control permission level is still required to access the Report Center page directly.

Follow the steps in the Configuring TTM Report Center Permissions section to provide access. Users with less than Full Control will get an “Access Denied” message.

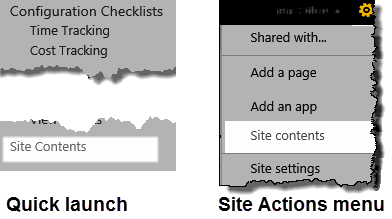
  1. Click the All Site Content link in the Quick Launch menu, or go to Site Actions > View All Site Content.
  2. In the Libraries section, click the TimesheetPages library.
  3. Click the Reporting page to access the Report Center.

Configure the TTM Send Message Web Part

Configure the TTM Send Message Web Part

TTM Configuration Overview Time Tracking Checklist

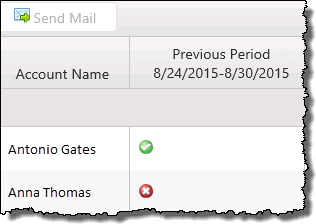
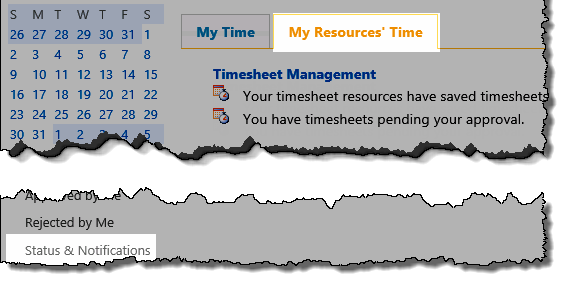
The TTM Send Message Web Part on the Status and Notifications page lets Timesheet Managers see their resources’ timesheet submission status for the previous and current time periods.

TTM Send MessageWhen configuring the TTM Send Message Web Part keep in mind:

  • Configuration of the web part is a recommended step in the Time Tracking configuration checklist however, if TTM is not configured to use the Timesheet Resources list, you will need to change Web Part’s default resource configuration

  • For information on using the Web Part, click here

  • The Status and Notifications page was added in TTM 2.5

To configure the TTM Send Message Web Part:

Step Action
1. TTM quick launch
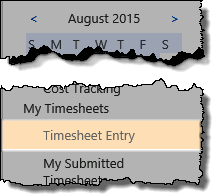
From the TTM site, click the Status Timesheet Entry link in the My Resources’ Time quick launch

OR

Use the link in the Time Tracking configuration checklist.

2.

Edit the Web Part on page and click the Send Message Web Part Settings button to access the pop-up configuration window

Icon-Warning IMPORTANT: If you don’t see the dialog screen (shown below), make sure that you have disabled popup blockers for this site.Image of the Configuration window

3.

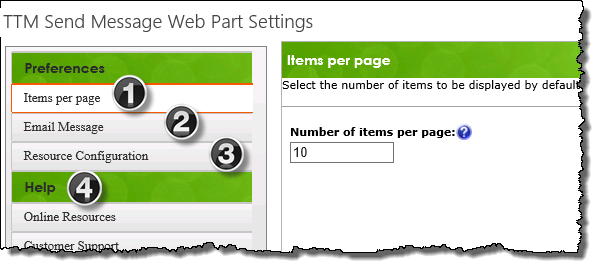
Use the left hand navigation to access the appropriate configuration screens:

# Function
1 Items per page:

Select the number of resources, between 10 -50, that you want to show per page.

2. Email Message
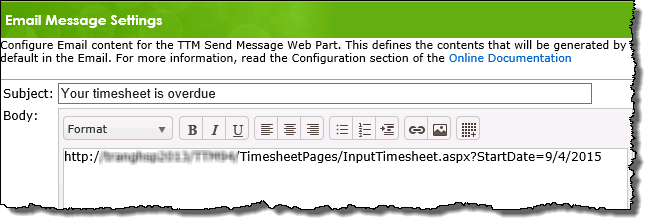
By default, the email template has the subject line Your timesheet is overdue and has link to the current timesheet in the body.
Default email template

Icon-Warning Important:The message template configured here will only be used when the Send Message button is selected

3.

Resource Configuration

Select a Resource Data Source from ONE of the following
options:

  • Timesheet Resources – this is the default setting and uses the local Timesheet Resources list to get information about users

    • If you will use this list no configuration is required in this section.
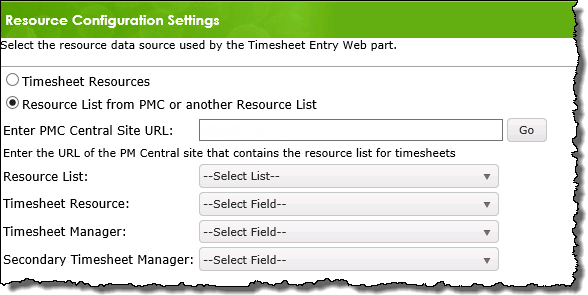
  • Resource list from PMC or another Resource list

    • Map columns in the selected list to the columns shown on the left.

      Column mapping
4.

Help

  • Click Customer Support to access available online resources for the web part.
  • If you are unable to find the answer to your question with these resources, our Customer Support engineers are standing by to help.
4. Click Save & Close to commit the changes and exit pop-up configuration screen.

To return to the Time Tracking configuration checklist, use the Time Tracking link in the TTM quick launch menu

Icon-Tip To mark this item as complete in the checklist, click the
Mark as Complete button for the item.
More information on using the checklist is available here

TTM Configuration Overview Time Tracking Checklist

TTM Time Tracking Checklist

TTM Time Tracking Checklist

Overview TTM Configuration TTM Control Panel

IconThe Time Tracking Checklist provides administrators with a list of steps to walk you through the configuration of a Time Tracking and Management (TTM) site.

When configuring TTM keep in mind:

  • You must complete all the mandatory items and you may need to complete some of the recommend items, based on configuration settings selected.

  • A configuration decision map is available to help you identify what steps you need to complete

TTM Configuration warning message

Completing the Time Tracking configuration checklist:

Step Description
1.

Access the Time Tracking Configuration checklist using links found in:

  • the TTM Welcome Message (shown above)
  • the TTM Control Panel
  • the left hand quick launch
2.

Click the Action link. You will be taken to appropriate page to complete the configuration.
More information on using the checklist is available here

NOTES:
1. You will need Full Control or Design permissions on the TTM site to view the links
2. The contents of the Time Tracking Checklist was updated in TTM 2.5.

Configuration Step Priority Description
1.
Create timesheet reporting periods
Mandatory Create and manage timesheet reporting periods

Icon-Warning IMPORTANT: Review the reporting period parameters.
By default 26 14-day timesheets starting on 12/29/2014 will be created.

2
Configure working hours
Mandatory

Configure working hours to:

  • Identify the days that users will be able to enter time against tasks
  • Determine whether TTM should validate a maximum or minimum number of working hours per timesheet period.

Icon-Warning IMPORTANT: By default time can only be entered Monday – Friday, and users will be prevented from entering more than 8 hours of time per day, unless their profile is marked to allow overtime

3
Configure the Timesheet Entry Web Part
Mandatory

Edit the Timesheet Entry Web Part and configure it to use the desired data source for Tasks and Resources:

Timesheet Tasks – choose one:

  • SharePoint list (default)
  • Bamboo List Rollup (select this option if you are integrating TTM with PMC or if you will create your own rollups of multiple tasks lists)

Timesheet Resources – choose one:

  • Local SharePoint List (Timesheet Resources list)
  • PM Central Enterprise resource pool (select if you are integrating TTM with PMC)
4
Add users into the Report Groups
Mandatory

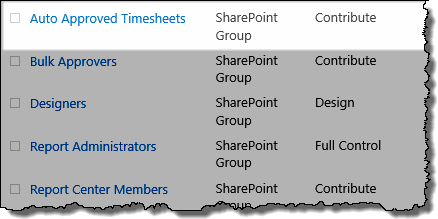
Add users who need the ability to generate and view TTM reports, but who will not have access to the TTM Control Panel to the Report Center Members group.

Add users who will need the ability to generate, view and export TTM reports, and who will have access to the TTM Control Panel to the Report Administrators group.

NOTE: Users with Design permissions will not be able to view the Report Center or export timesheet reports from the Control Panel.

5 Allow user timesheets to be Auto Approved Recommended

This optional step allows Administrators to identify users who do not need to have their timesheets formally approved and add them to the Auto Approved Timesheets group.

NOTE: This step requires the Full Control permission level on the TTM site.

6 Allow Timesheet Managers to bulk approve timesheets Recommended

This optional step allows administrators to identify timesheet managers who will be able to approve displayed timesheets in bulk, by adding them to the Bulk Approvers group.

NOTE: This step requires the Full Control permission level on the TTM site.

7 Modify column display names Recommended This optional step enables you to modify the column name headers that will be displayed in the Timesheet Entry web part.
8 Define Administrative Time Categories Recommended

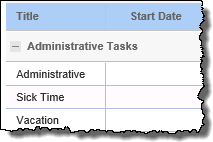
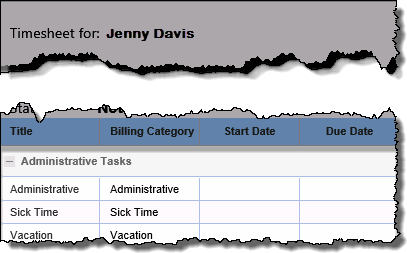
Administrative time categories are used to capture time spent on billable and non-billable administrative tasks. Identified categories will appear on all users’ timesheets, and the list includes these items by default:

  • Administrative
  • Sick Time
  • Vacation
9 Enable Alerts Recommended Configure automated alerts for timesheet submission and approval using Bamboo Alert Plus.
10 Configure Cost Tracking Recommended

Complete this optional step if users will be charging time to cost centers.

NOTE: All items in the Cost Configuration must be completed before TTM will be able to calculate the cost of work entered into timesheets

11 Configure the TTM Send Message Web Part Recommended

Verify the Status & Notifications Web Part is using the same resource data source as the Timesheet Entry Web Part.

NOTE: This Web Part references the Timesheet Resources list as the data source by default

12 Identify users who will submit time in TTM Recommended

Add users who will submit timesheets to the Timesheet Resources list, providing user information such as department, timesheet manager(s), permitted cost codes, and time entry validation.

NOTE: This step is required if the Timesheet Entry web part is configured to use the Timesheet Resources list.

13 Create tasks in the SharePoint tasks list Recommended

Create tasks and assign them to resources in the Timesheet Tasks list

NOTE: This step is required if the Timesheet Entry web part is configured to use a SharePoint List.

3. To mark items as complete in the checklist, click the Mark as Complete button associated with each item

Overview TTM Configuration TTM Control Panel

Configure Time Tracking and Management’s Approval Center

Configure Time Tracking and Management’s Approval Center

TTM Configuration Overview

The Pending My Approval display lets Timesheet Managers review, and then approve or reject, their resources’ timesheets.

When configuring the Approval Center Web Part keep in mind:

  • By default the web part will display 10 task items per page

    • Starting with TTM 2.5 only project tasks with time entered against them are displayed
  • For information on using the Pending My Approval Web Part, click here

To configure the Approval Center Web Part:

Step Action
1.

TTM quick launch
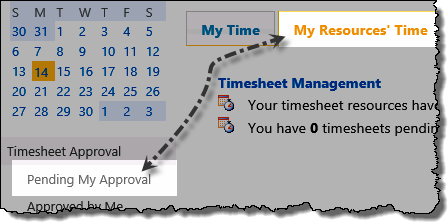
From the TTM site, click the Pending My Approval link in the My Resources’ Time quick launch

NOTE: Starting with TTM 2.5, you must click the My Resources’ Time tab before you will see the Pending My Approval link in the quick launch.

2.

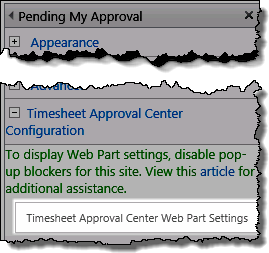
TTM Approval CenterEdit the Web Part on page and click the Approval Center Web Part Settings button to access the pop-up configuration window

Icon-Warning IMPORTANT: If you don’t see the dialog screen (shown below), make sure that you have disabled popup blockers for this site.

3.

Use the left hand navigation to access the appropriate configuration screens:
Image of the Configuration window

# Function
1

Items per page:

Select the number of resources, between 10 -50, that you want to show per page.

NOTE: Starting with TTM 2.5, only timesheet task items with time entered against them are displayed in the Pending My Approval display.

2. Language Settings
Modify the Language Settings for the web part
3.

Help

  • Click Customer Support to access available online resources for the web part.
  • If you are unable to find the answer to your question with these resources, our Customer Support engineers are standing by to help.
4. Click Save & Close to commit the changes and exit pop-up configuration screen.

TTM Archive

TTM Archive

TTM Configuration Overview TTM Control Panel

TTM Time Tracking and Management (TTM) provides a tool to clean up the Timesheets list by archiving stale items to another SharePoint list.

  • There are two archive options available:

    • Archive Now – creates an immediate one-time archive of identified timesheet data
    • Save Schedule – uses a timer job to archive timesheet data on a specified schedule
  • The archive process is managed by the Bamboo TTM Timer Job Manager which is responsible for:

    • creating the destination list
    • copying the timesheets that meet the archive criteria from the Timesheets list to the destination list
    • deleting the previously copied items from the TTM Timesheets list

Icon-Warning Important: Once data is deleted from the Timesheets list it will no longer be accessible from Time Tracking and Management (TTM):

  • Users will not be able to view archived records in the Timesheet Entry or Submitted Timesheet displays
  • TTM reports will not include information about archived timesheets
  • A project’s cost and work variance calculations may impacted

To archive timesheet data:

Link from the TTM Control Panel Click the Archive Timesheets link in the TTM Control Panel to access the export tool.
NOTE: To see the link you will need to have Full Control permissions on the TTM site.

# Function
Archive List Details
Archive Parameters
1.

Destination Site URL
Enter the URL of the destination site within the same site collection.

  • Keep the default ./ to export timesheet data to a list in the current site.
2.

Archive List Name

Enter the name of the list that will be created and populated with timesheet data.

Icon-Warning Important: If you create an archive schedule the same list will be continually updated with timesheet data that meets the defined parameters of the archive.

Archive Parameters
Export Parameters
4.

Select one of the options below to identify which timesheets will be included in the archive:

  • Archive timesheets that were created on or before the specified data
  • Archive timesheets when the Timesheet period contains a data within the specified range
  • Archive timesheet that were created “x” number of days before today
5 Click the checkbox if only timesheets with an Approved Status should be archived
Schedule Archive
Schedule Parameters
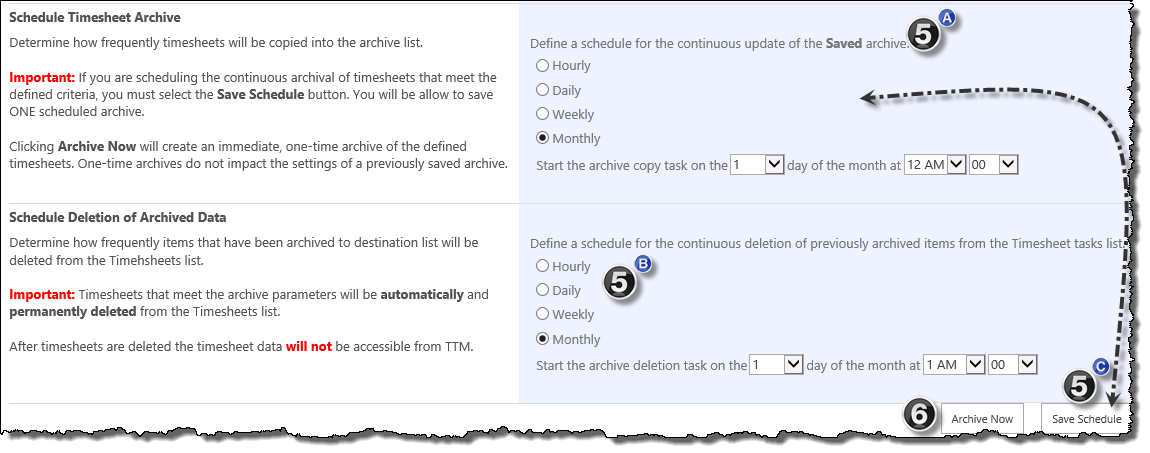
5
  • A. Schedule Timesheet Archive
    • Determine how frequently timesheet data will be copied into the destination archive list.
    • The archive process will be managed by the Bamboo TTM Timer Job Manager (timer job)
  • B. Schedule Deletion of Archived data
    • Determine when items that were previously copied into the destination archive list will be deleted from the TTM Timesheets list.
    • Icon-WarningImportant: Once data is deleted from the Timesheets list it will no longer be accessible from TTM.
  • C. Save Schedule
    • You must select the Save Schedule button if you want to use the schedule defined above
    • You are allowed to save ONE scheduled archive. One-time archives that are generated when you click the Archive Now button do not impact the settings of a previously saved archive.
6 Archive Now
Use this button to create an immediate, one-time archive of the identified timesheet data.

Icon-WarningImportant: Once data is copied into the destination archive list it will immediately be deleted from the Timesheets list and will no longer be avaiable in TTM displays, reports, etc.

TTM Configuration Overview TTM Control Panel

Using the Auto Approved Timesheet group in TTM

Using the Auto Approved Timesheet group in TTM

TTM Configuration Overview Time Tracking Checklist

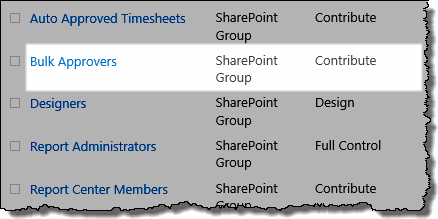
Users who are added to the Auto Approved Timesheets group bypass the manual timesheet approval process and have their timesheets automatically approved on submission.

When using the Auto Approved option, keep in mind:

  • A Primary Timesheet Manager will still need to be identified for each user
  • Timesheet Managers cannot modify an approved timesheet
  • You can configure working hour validation to require a minimum number of hours to be entered into timesheets.
  • The Auto Approved Users group is automatically created with the TTM site

Using the Auto Approved Timesheet group:

Add Users to the Auto Approved Timesheets group
1.

Click the link in the Time Tracking configuration checklist,
OR
Navigate to SharePoint’s Site Permissions page

NOTE: Accessing Site Permissions requires you to have Full Control permission the TTM site.

2.

Site Permissions pageAdd the appropriate users to the Auto Approved Timesheets group

NOTES:
1.The Auto Approved Timesheets group was added in TTM 2.0
2.This group has contribute permissions on the site by default

What happens when users in this group submit a timesheet?
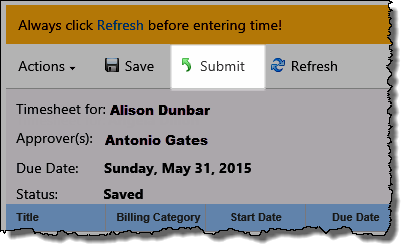
1. Submit buttonWhen members of this group submit a timesheet, the status of the timesheet will immediately be changed to Approved
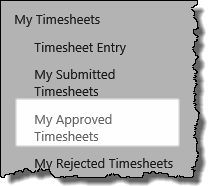
2. My Timesheets linksThe timesheet will be available in the resource’s My Approved Timesheets display, and in the Timesheet Manager’s Approved by Me display.

TTM Configuration Overview Time Tracking Checklist

Using the Bulk Approvers group in TTM

Using the Bulk Approvers group in TTM

TTM Configuration Overview Time Tracking Checklist

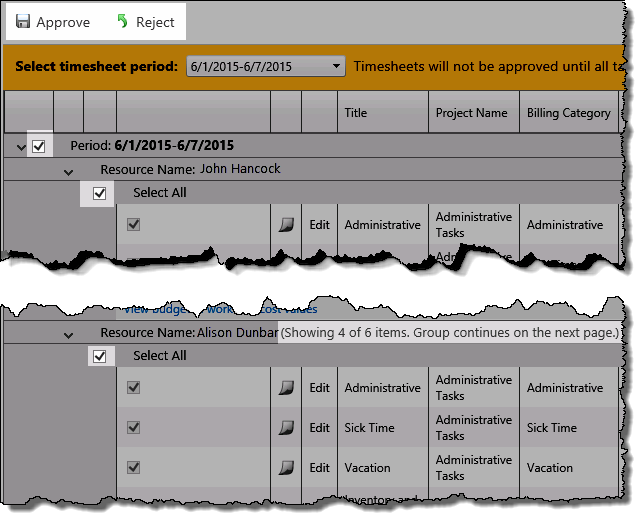
Timesheet Managers who are added to the Bulk Approvers group will be able quikcly approve all items displayed in the Pending My Approval display screen with just a couple of clicks.

Keep in mind:

  • You can only approve items that are visible in the display page.
    • If a timesheet spans another page in the Pending My Approval Web Part the timesheet will not be approved until all timesheet items have received an approval.
    • Click here for information on modifying the number of items displayed on the page
  • You can only bulk approve / reject timesheets from the same timesheet period

Using the Bulk Approvers group:

Add Users to the Bulk Approvers group
1.

Click the link in the Time Tracking configuration checklist,
OR
Navigate to SharePoint’s Site Permissions page

NOTE: Accessing Site Permissions requires you to have Full Control permission the TTM site.

2.

Site Permissions pageAdd the appropriate users to the Bulk Approvers group

NOTES:
1.The Bulk Approvers group was added in TTM 2.0
2.This group has contribute permissions on the site by default

How do Timesheet Managers bulk approve / reject timesheets?
1. Bulk SelectTimesheet Managers who are added to this group will see a check box associated with the Period in the Pending My Approval display
2.

Bulk Select checked When this box is checked, all items associated displayed on the time will be checked for bulk approval or rejection.

Icon-Warning IMPORTANT: If a timesheet continues on the next page then:

  • If you selected Reject – the entire timesheet will be immediately rejected
  • If you select Approve – the entire timesheet will not be approved until the remaining items in the timesheet have also been approved.
    • If you reject items on the subsquent page(s) the entire timesheet will be rejected.

TTM Configuration Overview Time Tracking Checklist

TTM Configuration Home Page

TTM Configuration Home Page

Once you have created your new TTM site you will have a number of configuration decisions to make that will determine how you, and your users, will interact with the Time Tracking and Management (TTM) application.

Use the links below to access configuration topics:

TimeTrackingMgtTime Tracking & Management Configuration Overviews
Time Tracking Configuration Checklist

You must complete the Time Tracking Checklist before you will be able to use TTM.

TTM Configuration Decision Map

Use the decision map to determine how your instance of TTM should be configured.

Cost Tracking Configuration Checklist

Complete if you will use TTM to track project costs.

Timesheet Entry Configuration Overview

Configuring this web part is a mandatory step in the Time Tracking configuration checklist.

TTM Control Panel Overview

A look at the tools available in the TTM Control Panel.

TTM Permissions

Overview of permissions required in TTM.

TimeTrackingMgtTime Tracking & Management Configuration Topics
TTM Site Management
What version of TTM are you using?
TTM Upgrade Manager
Using TTM Groups
Report Center Administrators and Members
Auto Approved Resources
Bulk Approvers
Alerts and Messaging
What alerts come with TTM?
Enable TTM alerts
TTM Status and Notification center
Manage Timesheet Data
Access TTM Reports
Export TTM Timesheets
Archive Timehsheets
Timesheet column display options
Modify column display names
Hide columns in the Timesheet Entry display
TTM Resources data source
Configure resources data-source
Configuring TTM’s User Profile Import
Using PM Central Resources in TTM
TTM Tasks data source
Configure tasks data-source
Create a rollup of SharePoint Tasks lists
Use PM Central Tasks
Administrative Time
Configure Administrative Tasks data-source
Add categories to the Administrative Time list
Cost Tracking Configuraton
Define Labor Rates
TTM Cost Tracking
Create Cost Codes
Change the TTM site appearance
Change the Pending My
Approval display to show more items by default
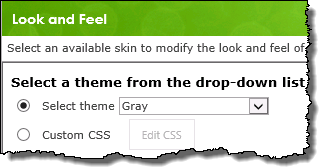
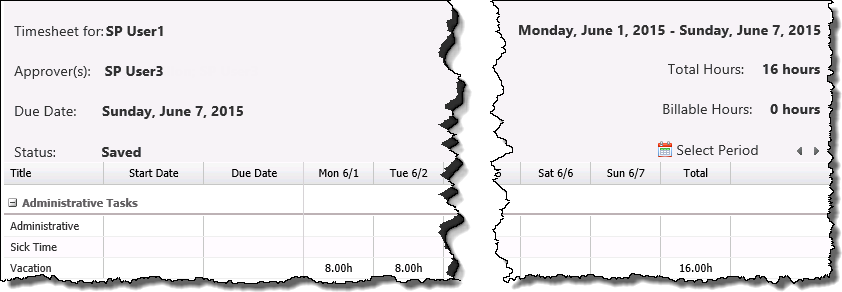
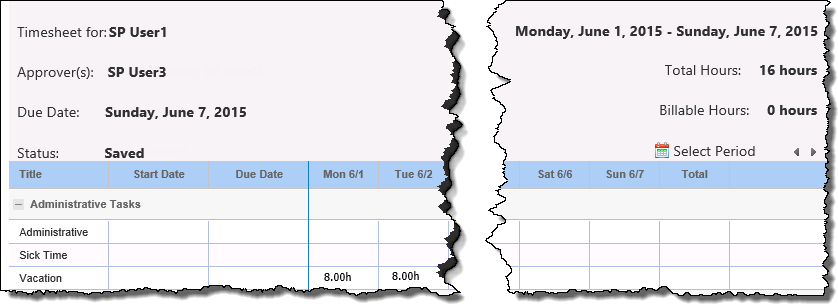
Change the Timesheet Entry skin
Change the site skin
Populating lists
Add tasks to the Timesheet Tasks list
Add users to the Timesheet Resources list

Add items to TTM’s Timesheet Resources list

Add items to TTM’s Timesheet Resources list

TTM Configuration Overview Time Tracking checklist

A Time Tracking and Management (TTM) site includes a Timesheet Resources list. This list is one of the resource data-source options available when configuring TTM, and is used to identify the users who will be able to submit time in TTM timesheets.

When using the Timesheet Resources list as the resource data-source keep in mind:

  • You must specify a Timesheet Manager for each resource. Users who do not have a Timesheet Manager will not be able to enter time.

  • You can quickly add users to the Timesheet Resources list using the User Profile Import tool.
    The User Profile Import tool was added in TTM 2.5

  • You can use the Timesheet Resources list as the resource data-source even if PM Central is the data-source for tasks.

    • The PM Central project tasks assigner to a user in the Timesheets Resources list will automatically be added to the user’s timesheet.
    • This configuration is useful is only specific users in your PM Central ERP need to enter time.

Entering Resources in the Timesheet Resources list:

Step Description
1. Site Contents links
From the TTM site, access Site Contents

OR

use the direct link in the Time Tracking configuration checklist

2. Click on the Timesheet Resources list.
3.

Click the Add new item link and complete fields as described in the table below.

Timesheet Resources list

NOTE: The column order displayed in the list view differs from the form

Column Name Description
Department

Use the drop down selector to associate the resource with a department for reporting purposes

NOTE: The options associated with this field can be be modified.

Timesheet User Identify the SharePoint user that will be able to submit time in TTM (required)
Primary Timesheet Manager

Enter an individual user who can approve timesheets submitted by the resource.
(required)

  • If you imported this resource into the Timesheet Resources list from SharePoint using the User Profiles Import tool, the Manager from the user’s SharePoint profile is automatically entered as the Primary Timesheet Manager.

  • You can use this account or you can change the value to a different account.

Secondary Timesheet Manager
  • If you want to name a backup person who can approve timesheets if the Primary Timesheet Manager is unavailable, enter a name in the Secondary Timesheet Manager field.
  • Either manager can approve timesheets.
Maximum Unit
  • Enter the percentage of the timesheet period that this resource is available to work on tasks.

For example: For example, if a part-time resource is only allowed to work 20 hours of a 40-hour week, enter 50%. If this field is blank, TTM will assume a Maximum Unit of 100%.

Allow Overtime
  • To allow this resource to work more than the standard number of hours in the timesheet period, select this option.
  • If overtime is allowed, validation for the maximum number of hours allowed per day or per pay period will be ignored..
Cost Codes

Select the costs codes that the resource can use, if you are tracking costs as well as time in TTM.

If an individual has their own entry in the Timesheet Resources list, and is a member of a group resource, cost codes for both entries will be available for the resource.

NOTE:The cost codes must have previously been created in the Cost Codes list

Resource ID
  • This optional field lets you associate an ID reference with the user.
  • The Timesheet Entry Web Part
    can be configured to display this entry.
4. Create an entry for each user or group who needs to enter time in the TTM site.

Icon-Tip To mark this item as complete in the Time Tracking configuration checklist, click the Mark as Complete button for this item
More information on using the checklist is available here

TTM Configuration Overview Time Tracking checklist

TTM Administrative Time data-source options

TTM Administrative Time data-source options

TTM Configuration Overview Timesheet Entry Configuration Overview

Administrative Time lets you track employee’s categorized non project hours, such as vacation or sick time, or time spent on administrative tasks such as support or maintenance activities in the Time Tracking and Management (TTM) timesheet.

Keep in mind:

  • Admin Tasks in web partThe Timesheet Entry Web Part is configured by default to reference the local Administrative Time list that is created with the TTM site. This list contains the following default items:
    • Administrative
    • Sick
    • Vacation
  • By default, tasks in the identified Administrative Tasks list will be included on the timesheets of all users.

  • Changing the Timesheet Entry Web Part’s default configuration to reference a custom list is optional

To configure Timesheet Entry to use a custom Administrative Time list:

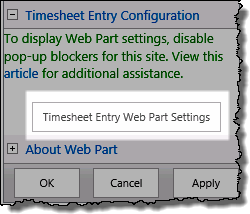
NOTE: The following steps require you to have accessed the Timesheet Entry Configuration Settings screens by clicking the Timesheet Entry Web Part Settings button in the Web Part’s configuration tool pane.

Action Result
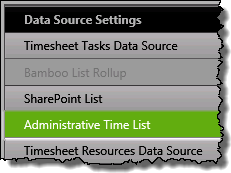
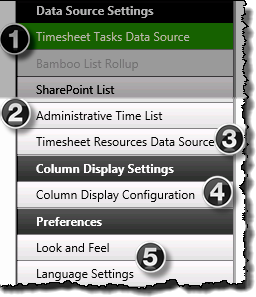
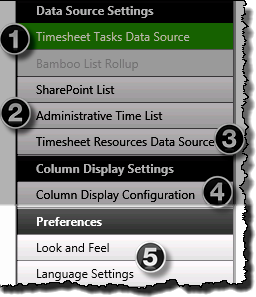
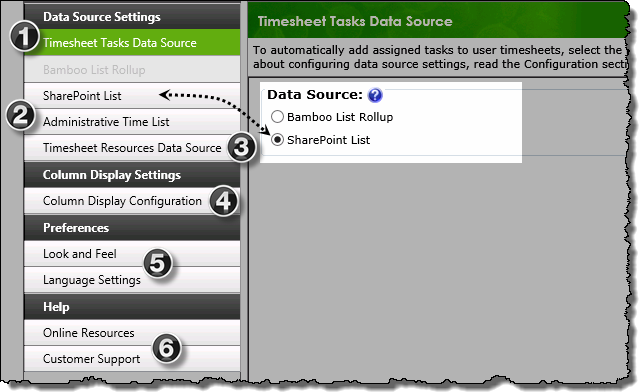
1. From the Timesheet Entry configuration screen, click the Administrative Time List button under Data Source Settings in the navigation tool pane. Image of the Navigation Pane The configuration screen will be displayed on the right side of the pop-up window

By default the Timesheet Entry Web Part uses the local Administrative Time list as the data source. If you will use this list, skip to step 5 for additional information on configuring the Web Part.

  • Information on editing the categories associated with the Administrative Time list is available here
2.

Enter the site where the custom list is located, then click the green arrow

Both absolute paths (http:// server name/site ) or relative paths(./Site/) can be used for the site URL.

Icon-WarningIMPORTANT: Although you can enter a URL for another Site Collection, be careful about going across Web Applications. You may have issues if the other web app has a significantly different security setup.

Administrative list configuration screen
3. Pick the custom list from the Select Administrative Time drop down selector.

4.

Map columns from the list to the columns shown on the left.

Administrative Time column name Description
Task Name The task name will be displayed in the timesheet.
Billing Category If your task list has a column that defines different billing categories, such as “Standard”, “Administrative”, etc., select it here.
Project Name The name all administrative time will be grouped under in the timesheet.
Assigned To Map this column to the task list column that includes the SharePoint user account assigned to the task. If a user is assigned the task will only be displayed on this user’s timesheet.
Billable Select the Yes/No column that indicates whether an administrative task is billable.
Planned Work If you want to track the amount of time planned for a task against the time actually entered for it, select the column in the list that contains the planned work.
5.

Configuration tool paneYou have now configured the Web Part to use a custom list as the Administrative Tasks data source.

Click these links for additional Web Part configuration topics:

TTM Configuration Overview Timesheet Entry Configuration Overview

Use a Bamboo List Rollup as the Tasks data source in TTM

Use a Bamboo List Rollup as the Tasks data source in TTM

TTM Configuration Overview Timesheet Entry Configuration Overview

Before you start to use Time Tracking and Management (TTM) you will need to identify the data-source for the tasks that will be displayed in the Timesheet Entry Web Part.
This is a mandatory configuration step in the Time Tracking configuration checklist, and the TTM configuration decision map is available to help identify which data-source option you should use.
There are two task data-source options available:

  • Bamboo List Rollup
    • You can use a custom created rollup
    • or, you can reference an existing PM Central tasks rollup
  • SharePoint list (default)

When configuring the Timesheet Entry Web Part to use a Bamboo List Rollup as the task data-source keep in mind:

  • Using a Bamboo List Rollup Schema lets you display tasks from multiple SharePoint tasks lists.
  • If you are using a custom rollup, you will need to create the schema before configuring the Timesheet Entry Web Part.

  • Additional information on using TTM with PM Central is available here

To configure Timesheet Entry to display data from a Bamboo List Rollup:

NOTE: The following steps require you to have accessed the Timesheet Entry Configuration Settings screens by clicking the Timesheet Entry Web Part Settings button in the Web Part’s configuration tool pane.

Action Result
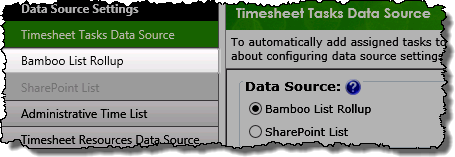
1. From the Timesheet Entry configuration screen, click the Bamboo List Rollup button under Data Source Settings in the navigation tool pane. Image of the Navigation Pane with the Bamboo button available.
NOTE:You will only be able to select this button if Bamboo List Rollup is selected as the Data Source Type
The Bamboo List Rollup screen will be displayed on the right side of the configuration pop-up and allow you to scroll through the configuration options associated with the data-source.
2.

Enter the site where the Bamboo List Rollup Schema is located.

  • If using a custom rollup enter the URL where the List Rollup Schema Designer is found
  • To use PM Central tasks, enter the PM Central portfolio site URL.

Both absolute paths (http:// server name/site ) or relative paths(./Site/) can be used for the site URL.

Icon-WarningIMPORTANT: If connecting to PM Central, the site must be in the same site collection as TTM for application integration to be supported.

Bamboo List Rollup Configuration screen
3. Click the green arrow to load available List Rollup Schemas in the site,
then pick the desired schema list from the Select Schema drop down.

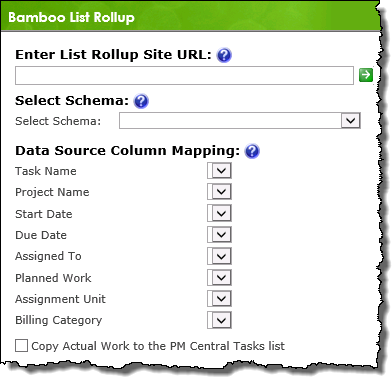
4.
  • If you entered a PM Central portfolio site, select the Tasks – All Tasks rollup to include all tasks in all project sites on resource timesheets.

    Otherwise..

  • Map columns from the schema to the timesheet columns shown on the left.
Timesheet Tasks Column Name Description
Task Name The task name will be displayed in the timesheet.
Project Name If you are assigned to multiple tasks in the same project, those tasks will be grouped in your timesheet under the same project name based on the value of this column
Start Date The start date for the task. The task will be included on timesheets starting on this date
End Date The end date, or due date, for the task. The task will be included on timesheets starting on the task Start Date and ending with the Due Date.
Assigned To Map this column to the task list column that includes the SharePoint user account assigned to the task. The task will be included only on this user’s timesheet.

NOTE: Time Tracking and Management supports multiple users assigned to a task.

Planned Work

If you want to track the amount of time planned for a task against the time actually entered for it, select the column in the list that contains the planned work.

  • In a PM Central tasks list, this is the Work column.
Billing Category

If your task list has a column that defines different billing categories, such as “Standard”, “Administrative”, etc., select it here.

  • PM Central task lists do not have this column, so leave it blank.
Copy Actual Work to the PM Central Tasks list

If you selected a PM Central task rollup, you can copy Actual Work for a task back to the PM Central Tasks list. This allows you to view cumulative work performed on a task through the current date in PM Central.

NOTES:
1.
Actual Work is copied to PM Central when a Timesheet Manager approves a timesheet.
2. To view this information, add the Actual Work (Time Entry) column to the Task Master Web Part in the Tasks tab for each project.

5.

Configuration tool paneYou have now configured the Web Part to use a Bamboo List Rollup as the tasks data-source.

Click these links for additional Web Part configuration topics:

TTM Configuration Overview Timesheet Entry Configuration Overview

Configure TTM’s Timesheet Entry Web Part’s resource data source

Configure TTM’s Timesheet Entry Web Part’s resource data source

TTM Configuration Overview Timesheet Entry Configuration Overview

Before you start to use Time Tracking and Management (TTM) you will need to identify the data-source for the resources that will be able to use TTM to submit timesheets. This is a mandatory configuration step in the Time Tracking configuration checklist, and the TTM configuration decision map is available to help identify which data-source option you should select.

There are two resource data-source options available:

  • The local Timesheet Resources list (default setting)
  • or, PM Central’s Enterprise Resource Pool (ERP).

When configuring the Timesheet Entry Web Part’s resource data-source keep in mind:

  • The selected data-source must contain an entry for each user who needs to enter time into TTM
  • Regardless of the data-source, each user must be configured with a Timesheet Manager.

  • You can use the local Timesheet Resources list even if you have configured the Timesheet Entry web part to use PM Central as the data source for tasks.

    • PM Central project tasks assigned to a user in the Timesheet Resources list will automatically be added to his or her timesheet. You may want to use this configuration if only specific users in your PM Central ERP need to enter timesheets.

Configure the Timesheet Entry Web Part’s resource data source:

NOTE: The following steps require you to have accessed the Timesheet Entry Configuration Settings screens by clicking the Timesheet Entry Web Part Settings button in the Web Part’s configuration tool pane.

Action Result
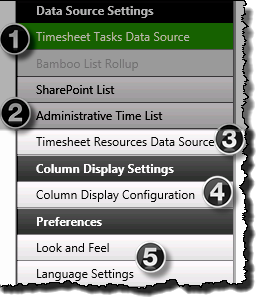
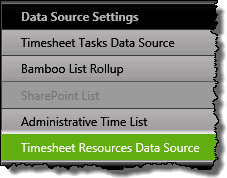
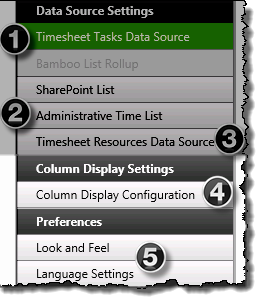
1. From the Timesheet Entry configuration screen, click the Timesheet Resources button under Data Source Settings in the navigation tool pane. Image of the Navigation Pane with the Bamboo button available. The Timesheet Resources screen will be displayed on the right side of the configuration pop-up

By default the Timesheet Entry Web Part uses the Timesheet Resources list as the resources data-source. If you will use this list, go to step 5 for additional information on configuring the Web Part.

  • Information on using the Timesheet Resources list is available here
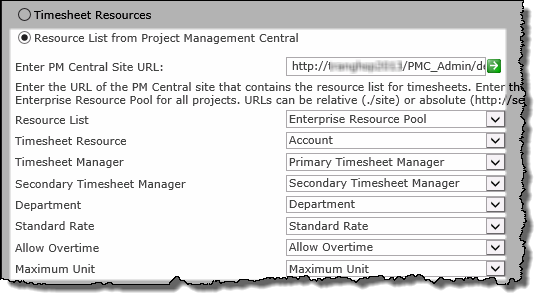
2. To use a PM Central ERP as the resource data-source, click the Resource List from Project Management Central radio button PMC data source configuration
3.

Enter the URL of the PM Central portfolio site, and click the green arrow

Both absolute paths (http:// server name/site ) or relative paths(./Site/) can be used for the site URL.

Icon-WarningIMPORTANT: The PM Central site needs to be located in the same site collection as the TTM site for application integration to be supported.

PMC data source configuration
4.

The following fields will be automatically mapped to the appropriate field in the PM Central Enterprise Resource Pool (ERP)

Timesheet Resources Column Name Description
Timesheet Resource The column that contains the SharePoint user or group who will be entering time in the timesheet.
Timesheet Manage The primary timesheet manager for the Timesheet Resource user. The timesheet manager can approve that user’s timesheet.
Secondary Timesheet Manager The secondary timesheet manager who can approve timesheets when the primary Timesheet Manager is unavailable.
Department The department the Timesheet Resource is a member of. This column is required if you want to view reports of time entered by department.
Standard Rate The labor rate for the resource. This column is required to use the cost tracking features of TTM if you want to use labor rates from PM Central instead of TTM.
Allow Overtime If you enforce Working Hours on timesheets in TTM, select the Yes/No column that indicates whether a resource is allowed to work overtime.
Maximum Unit The maximum percentage of available working hours the resource is allowed to work on tasks. For example, if a part-time resource is only allowed to work 20 hours of a 40-hour week, the resource’s maximum unit is 50%.
5.

Configuration tool paneYou have now configured resource data-source for the Timesheet Entry Web Part.

Click these links for additional Web Part configuration topics:

TTM Configuration Overview Timesheet Entry Configuration Overview

Use a SharePoint list as the Tasks data source in TTM

Use a SharePoint list as the Tasks data source in TTM

TTM Configuration Overview Timesheet Entry Configuration Overview

Before you start to use Time Tracking and Management (TTM) you will need to identify the data-source for the tasks that will be displayed in the Timesheet Entry Web Part. This is a mandatory configuration step in the Time Tracking configuration checklist, and the TTM configuration decision map is available to help identify which data-source option you should use. There are two task data-source options available:

  • Bamboo List Rollup
  • SharePoint Tasks list (default setting)
    • You can use the local Timesheet Tasks list (default)
    • or, a generic SharePoint Tasks list

When configuring the Timesheet Entry Web Part to use a SharePoint list as the task data source keep in mind:

  • The Timesheet Tasks list that comes with TTM includes fields not available in an out-of-the-box SharePoint Tasks list.

  • If you want to show tasks from multiple task lists you will need to use Bamboo List Rollup as the Web Part’s task data-source.

To configure Timesheet Entry to display items from a SharePoint Tasks list:

NOTE: The following steps require you to have accessed the Timesheet Entry Configuration Settings screens by clicking the Timesheet Entry Web Part Settings button in the Web Part’s configuration tool pane.

Action Result
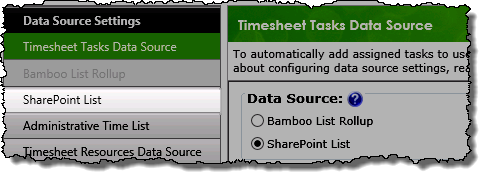
1. From the Timesheet Entry configuration screen, click the SharePoint List button under Data Source Settings in the navigation tool pane. Image of the Navigation Pane with the SharePoint list and library button available.
NOTE: You will only be able to select this button if SharePoint Lists and Libraries is selected as the Data Source Type
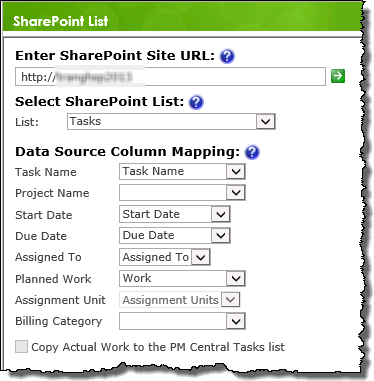
The SharePoint List Settings screen will be displayed on the right side of the configuration pop-up and allow you to scroll through the configuration options associated with the data source.
By default the Timesheet Entry Web Part uses the Timesheet Tasks list as the tasks data-source. If you will use this list, skip to step 5 for additional information on configuring the Web Part.
2.

To use a generic SharePoint tasks list as the tasks data-source, enter URL to the site that contains the list, then click the green arrow.

Both absolute paths (http:// server name/site ) or relative paths(./Site/) can be used for the site URL.

Icon-WarningIMPORTANT: Although you can enter a URL for another Site Collection, be careful about going across Web Applications. You may have issues if the other web app has a significantly different security setup.

SharePoint list configuration screen
3. Select the desired SharePoint tasks list from the SharePoint List drop down.

4.

Map columns from the schema to the timesheet columns shown on the left.

  • If you use the default Timesheet Tasks list, this mapping is completed automatically.
Timesheet Tasks Column Name Description
Task Name The task name will be displayed in the timesheet.
Project Name If you are assigned to multiple tasks in the same project, those tasks will be grouped in your timesheet under the same project name based on the value of this column
Start Date The start date for the task. The task will be included on timesheets starting on this date
End Date The end date, or due date, for the task. The task will be included on timesheets starting on the task Start Date and ending with the Due Date.
Assigned To Map this column to the task list column that includes the SharePoint user account assigned to the task. The task will be included only on this user’s timesheet.

NOTE: Time Tracking and Management supports multiple users assigned to a task.

Planned Work If you want to track the amount of time planned for a task against the time actually entered for it, select the column in the list that contains the planned work.
Billing Category If your task list has a column that defines different billing categories, such as “Standard”, “Administrative”, etc., select it here.
Copy Actual Work to the PM Central Tasks list This button is not available with this data-source
5.

Configuration tool paneYou have now configured the Web Part to use a generic SharePoint task list as the tasks data-source.

Click these links for additional Web Part configuration topics:

TTM Configuration Overview Timesheet Entry Configuration Overview

Change the appearance of the time entry grid display in TTM

Change the appearance of the time entry grid display in TTM

TTM Configuration Overview Timesheet Entry Configuration Overview

The Timesheet Entry Web Part is the display interface that users most commonly interact with. There are two skin options available to allow you to quickly modify the apppearance of this Web Part on the page.

Keep in mind:

  • The two skin options affect the grid display of the Web Part
  • Grey is the default skin
  • The Neptune skin became available in TTM 2.0

To change the grid display of the Timesheet Entry Web Part:

NOTE: The following steps require you to have accessed the Timesheet Entry Configuration Settings screens by clicking the Timesheet Entry Web Part Settings button in the Web Part’s configuration tool pane.

Step Description
1. Timesheet Entry Navigation paneFrom the Timesheet Entry configuration screen, click the Look and Feel button under Preferences in the navigation tool pane.
2.

Click Change skin under the General Settings header
Change Skin selector

Grey (default)
Grey grid display

Neptune
Blue grid display

5.

Configuration tool pane

Click here for information on modifying the Web Parts Language Settings (optional)

TTM Configuration Overview Timesheet Entry Configuration Overview

Timesheet data is missing after changing the Timesheet Tasks Data Source

Timesheet data is missing after changing the Timesheet Tasks Data Source

This topic applies to:

  • Time Tracking and Management R1.0
  • SharePoint Foundation 2010 and SharePoint Server 2010

What you see happening:

  • Timesheet data is missing from saved and submitted timesheets after the data source for timesheet tasks is changed from a Bamboo List Rollup to a SharePoint Tasks list, or vice versa. All timesheets created using the original data source are affected, and no longer display time that was entered for any administrative or project task. The status of timesheets that were already saved, submitted, approved or rejected now says “Not Created”. Reports in the Report Center do not display any data for the affected time periods.

For example:

  • Time has been entered for two different time periods as shown in the first examples below:
    SA12A_Example1.jpg
    SA12A_Example2.jpg

  • After these timesheets have been saved, the Timesheet Tasks Data Source list is changed. For example:

Original configuration was built from a List Rollup Schema:
FromSchema.jpg

And subsequently changed to a SharePoint List:
ToList.jpg

And now, the timesheets for the reporting periods no longer include the hours that were saved in them:

StatusNotCreated.jpg
StatusShowsNoHours.jpg

Cause:

If the Timesheet Tasks Data Source setting in the Time Entry Web Part is changed from its previous value (Bamboo List Rollup or SharePoint List), all timesheets created using the original task list are no longer visible in My Timesheets, Timesheet Approval, and Report Center views and reports. Users must re-enter time in affected timesheets.

Resolution:

If you need to recreate data for affected timesheets, take the following steps:

  • In the new task list, create the same tasks that were in the original task list.
  • In the Timesheet Entry page, re-enter time for the tasks in each affected reporting period.
  • Submit the timesheets for approval again and have the timesheet manager approve or reject them as normal.

NOTE: This process must be repeated for all timesheets that were saved or submitted using the original task list data source.

Remove a view from a report

Remove a view from a report

Return to Overview of TTM Report Center

The list of available views in the Select View drop-down list for a report is configurable. To remove a view from a report, do the following:

Step Action
1. Click the All Site Content link in the Quick Launch menu, or go to Site Actions > View All Site Content.
2. In the Lists section, click the Report Configuration list.
3. Select the name of the report you want to modify and click Edit Item.
4. In the Report Views field, delete the view you want to exclude.
5. Click Save.

Release Notes for Time Tracking & Management

Release Notes for Time Tracking & Management

NOTE: Release Notes will open in a new browser tab

WSSv3/MOSS SharePoint 2010 SharePoint 2013 SharePoint 2016
Product not available Release Notes Release Notes Release Notes
Microsoft ended mainstream support for SharePoint 2007 in October 2012. See Microsoft’s Lifecycle Support Policy.
At that time, Bamboo stopped enhancements to our SharePoint 2007 product line, but continues to provide support and bug fixes to customers with active support contracts until October 2017. Previously purchased licenses will continue to function after October 2017, but support for these products will end, and no additional bug fixes will be provided beyond that time. Bamboo plans to cease selling new licenses and annual support contacts for its SharePoint 2007 products in October 2016 to ensure customers will be eligible to receive support for at least one year after purchase.
Microsoft plans to end mainstream support for SharePoint 2010 in October 2015. See Microsoft’s Lifecycle Support Policy. At that time, we will stop any enhancements for our SharePoint 2010 product line but will continue to provide support and bug fixes for our SharePoint 2010 products to customers with active support contracts until October 2020. Previously purchased licenses will continue to function after October 2020, but support for these products will end, and no additional bug fixes will be provided beyond that time. Bamboo plans to cease selling new licenses and annual support contacts for its SharePoint 2010 products in October 2019 to ensure customers will be eligible to receive support for at least one year after purchase.

Visit our website where you can get the latest info about each of our products for SharePoint 2013.

A separate installation package and license key is required for SharePoint 2013 deployment. For additional details, review the following knowledge base articles:

Bamboo Solutions has also begun releasing products for SharePoint 2016. For additional details, check the product release notes in the link above, or contact us.

For details on migration, see the Knowledge Base Article “Migrate Bamboo Products from SharePoint 2013 to SharePoint 2016”

Understanding Bamboo Releases:

  • Bamboo offers Trial, Basic and Premium support.
    • Free Trial support expires after 30 days.
    • For more information about Basic and Premium support, please see the Support Plans page.
    • There may be a fee to upgrade from a major version to another.

See Also:

Overview of Time Tracking and Management

Overview of Time Tracking and Management

When Time Tracking and Management is installed, a new site template called Time Tracking and Management is added to the SharePoint Create screen. A SharePoint user with rights to create new sites can select the Time Tracking and Management Site template to create a new time tracking site.

SA12A_TimeTrackingOverview5.png

Time Tracking and Management allows you to enter hours spent on administrative and project tasks. You can save time entered in your timesheet each day, or enter time all at once. When you are ready, submit your timesheet to your timesheet manager for approval. To be able to enter time in a timesheet, the following requirements must be met:

  • Your account must be configured in the Timesheet Resources list or in the Project Management Central resources list.
  • A timesheet reporting period must exist for the dates you want to enter time for.
  • Once these requirements are met, simply browse to the timesheet you want to complete and enter time.

Once the site is created, users can then conduct the following tasks:

Overview of TTM’s Timesheet Entry Web Part

Overview of TTM’s Timesheet Entry Web Part

TTM Configuration Overview Time Tracking Checklist

Before you start to use Time Tracking and Management (TTM) you will need to configure the Timesheet Entry Web Part to reference the appropriate data-sources for your implemetation. This configuration is a mandatory step in the Time Tracking configuration checklist.
Timesheet Entry Configuration screen.

When configuring the Timesheet Entry Web Part keep in mind:

  • You will need to identify data-sources for the following:

    • Tasks
    • Administrative Time
    • Resources
  • The TTM configuration decision map is available to help determine how you should configure the Web Part.

  • Information on using the Timesheet Entry Web Part is available here

    To configure the Timesheet Entry Web Part:

Step Action
1. TTM quick launch
From the TTM site, click the Timesheet Entry link in the TTM quick launch

OR

Use the link in the Time Tracking configuration checklist.

2.

Edit the Timesheet Entry Web Part and click the Timesheet Entry Web Part Settings button to access the pop-up configuration window
Icon-Warning IMPORTANT: If you don’t see the dialog screen (shown below), make sure that you have disabled popup blockers for this site.Image of the Configuration window

3.

Use the left hand navigation to access the appropriate configuration screens:

# Function
1

Timesheet Tasks Data Source:

Use the radio buttons to Select a Task Data Source from ONE of the following
options:

  • Bamboo List Rollup:
    Select this option if your task list is one of the following, and then configure the Bamboo List Rollup settings described below:
    • A task list in a Bamboo Project Management Central site.
    • A Bamboo List Rollup configured for task lists in other sites.
  • SharePoint List:
    Select this option if your task list is one of the following, and then configure the SharePoint List settings described below.
    • The default Timesheet Tasks list included with Time Tracking and Management.
    • A SharePoint Tasks list in another site.

The corresponding button will be available in the navigation pane, allowing you to access the data-source’s configuration screen.

2.

Administrative Time
By default Timesheet Entry Web Part uses the local Administrative Time list to track time that is not related to a specific project.

  • If you will use this default list no further configuration is required in this section,
    Otherwise…
  • Configure the Web Part to use another SharePoint list to define Administrative Time
3.

Timesheet Resources data source

Select a Resource Data Source from ONE of the following
options:

  • Timesheet Resources – this is the default setting and uses the local Timesheet Resources list to get information about users.
    • If you will use this list then no configuration is required in this section.
  • PM Central Enterprise Resource Pool (ERP)
4.

Column Display Settings:

5

Preferences

6.

Help

  • Click Customer Support to access available online resources for the web part.
  • If you are unable to find the answer to your question with these resources, our Customer Support engineers are standing by to help.
4. Click Save & Close to commit the changes and exit pop-up configuration screen.

To return to the Time Tracking configuration checklist, use the Time Tracking link in the TTM quick launch menu

Icon-Tip To mark this item as complete in the checklist, click the
Mark as Complete button for the item.
More information on using the checklist is available here

TTM Configuration Overview Time Tracking Checklist

Overview of Suite or Pack Licensing

Overview of Suite or Pack Licensing

Overview of Licensing and and Product Activation

The bundled licensing in Suites and Packs allows multiple products to be licensed with a single key. This is a huge benefit over having to manage a license key for each product and each WFE server. Once the Suite or Pack is successfully licensed, each included product will show that it is running under the license for the Suite or Pack.

Take the Grants Management Solution Accelerator as an example. When installation is complete, the Grants Management Accelerator Pack appears in the Bamboo Web License Manager in the Suites and Packs area. If you click the plus sign next to the name, you will see all the products that are included in the pack.

WLM-GMSAcomponents.jpg

If you click on the Pack name or select Status from the associated menu, you will see the status of the Pack license. In the screen shot below, we can see it was activated on each WFE server with a valid license key. The current status of the license is Active.

WLM-GMSApack status.jpg

The Alert Plus Web Part is included in the Grants Management Accelerator Pack. If you click on the product name listed in the Individual Products section of the Web License Manager, you will see the status of the individual product license. In the screen shot below, we can see it is running under the Grants Management Accelerator Pack Licensing.

WLM-GMSAalertplusstatus.jpg

The Grants Management Accelerator Pack includes eight web parts. Rather than having to license 8 products on two WFE servers in my farm individually (16 different license keys), I use the pack license and am able to save a lot of time.

Sometimes a Suite includes another suite or a pack. The Project Management Suite includes several packs, including the SharePoint Project Management Central Pack. If the PM Suite is licensed, the license status of the SharePoint Project Management Central Pack will show that it is running under the Project Management Suite Licensing.

WLM-PMCPack status.jpg