The Custom User Task Form widget allows designers to define a set of possible responses and assign a task to users to complete a form to submit their selection. The overall result of the collected user responses is based on various business rules that can be set in the widget, with the result stored to a variable.
| Column |
Description |
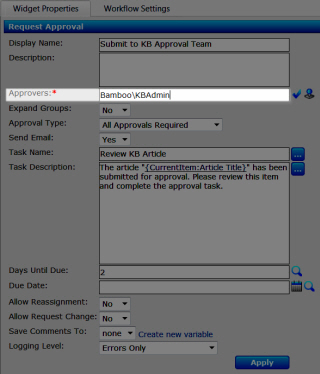
| Task Assigned To (Required): |
Enter one or more users or groups to complete the form. Each user is assigned a task when the widget runs. Assignees’ names can be entered using any of the following methods:
- Type a SharePoint or Active Directory display name or account name for a user or group and click the Check User icon (
 ). Separate multiple users with a semicolon (;). ). Separate multiple users with a semicolon (;).
- Click the Lookup User icon (
 ) to search for a SharePoint or Active Directory user or group in the User Lookup form. ) to search for a SharePoint or Active Directory user or group in the User Lookup form.
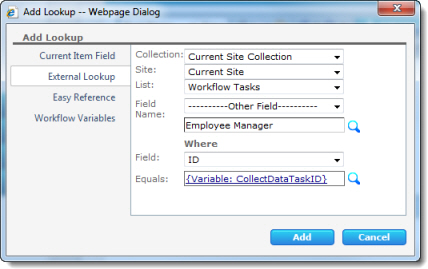
- Enter a lookup to user or group data using the Add Lookup button (
 ) in the User Lookup form. ) in the User Lookup form.
|
| Expand Groups: |
If a SharePoint group is entered in the Approvers property, the Expand Groups setting determines whether a single task is assigned to the entire group or if a separate task is assigned to each member of the group.
|
| Required Responses: |
Select the number of approvals required to save the response as a variable. The possible selections are:
- All Responses: All users assigned to the task must respond to fulfill the requirement.
- This number: Enter the number of users assigned to the task that must respond to fulfill the requirement.
- This percentage: Enter the percentage of users assigned to the task that must respond to fulfill the requirement.
Save first response: The response from the first will be stored in assigned variable and complete the requirement.
|
| Value: |
This field is only shown if This number or This percentage are selected from the Required Responses drop-down menu. Based on your selection, type the appropriate number in the box, or use a lookup. |
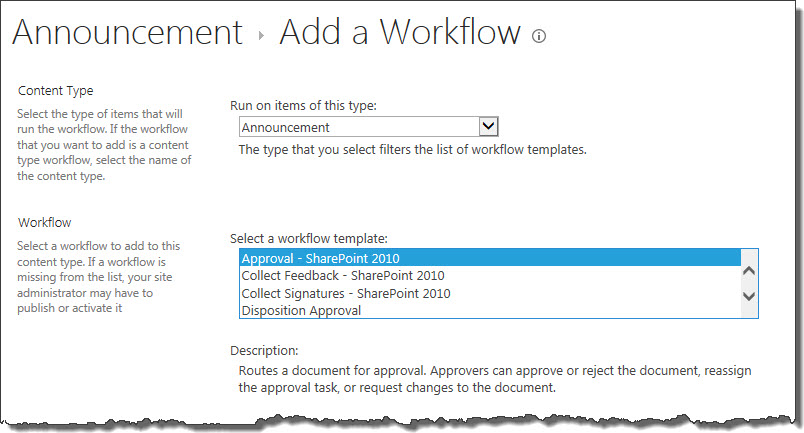
| Task Form (Required): |
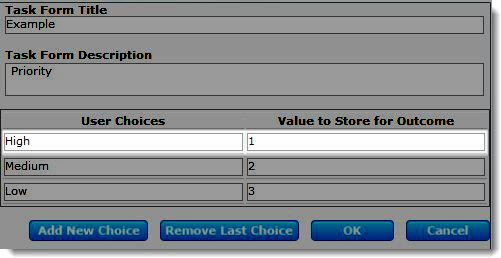
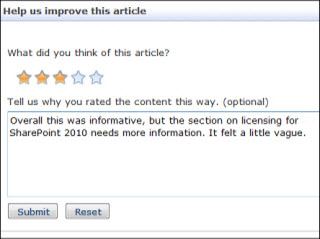
Build the task form with possible responses for the assignees to complete by clicking the ellipses to the right of the field. The Custom Task Form Settings window will open with the following fields:
- Task Form Title: Type a name for the form.
- Task Form Description: Type a description for the form.
- User Choices: Enter the responses for the user to choose from.
- Value to Store for Outcome: Enter the value to save for each response choice (see the screenshot below for an example).
|
| Outcome to Save: |
From the drop-down menu, select Most chosen response to save the response(s) chosen by the most task assignees or Least chosen response to save the response(s) chosen by the fewest task assignees. |
| Ties: |
Decide what outcome to save in the event that two or more responses tie. Choose one of the following options from the drop-down menu:
- Save all tied values – Saves all tied values, separated by comas. For example, “value1,value2,value3”.
- Use the first choice – Saves only the value of the tied item listed first in the User Choices column of the Task Form property.
- Write this value – Saves a designer-defined value in the case of a tie. For example, “tie”.
|
| Save Outcome To (Required): |
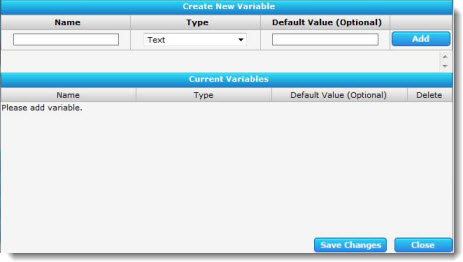
Pick a variable to save the outcome of the responses to. This can be an existing variable, or you can click the Create a variable link to define a new one:
- Name: Enter a name for the variable.
- Type: Choose the type of variable: Text, Boolean, DateTime, Number, or Record.
- Default Value (Optional): Choose a default value for the variable.
- Click Add to add the variable to the Current Variables list.
- Click Save Changes to save the variable.
|
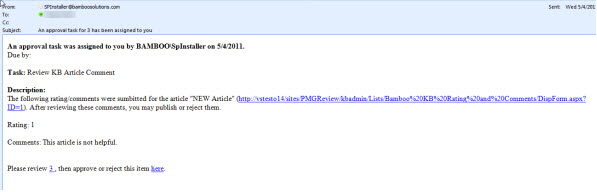
| Send Task Assignment Emails: |
Select an option to determine if the widget will send notification e-mails to users.
- Select Yes to send an e-mail to users when a task is assigned.
- Select No to assign the task without sending task assignment e-mail.
|
| Send Status Emails to Initiator: |
Select an option to determine if the widget will send notification e-mails to the initiator.
- Select Yes to send an e-mail the initiator when the status changes.
- Select No if you do not want e-mails sent to the initiator when the status changes.
|
| Notification Subject/Body: |
Customize the subject and body for the notification e-mail sent for the original Request Approval task. Default text can be specified in the Request Approval Task Notification sections of the Workflow Conductor Control Panel E-mail Settings. |
| Reassignment Subject/Body: |
Customize the subject and body for the notification e-mail sent if a task is reassigned. Default text can be specified in the Request Approval Task Reassignment sections of the Workflow Conductor Control Panel E-mail Settings. |
| Request Change Subject/Body: |
Customize the subject and body for the notification e-mail sent if a change is requested for the task. Default text can be specified in the Request Approval Task Change Request sections of the Workflow Conductor Control Panel E-mail Settings. |
| Send Reminder: |
Send a reminder email to task assignees some number of days before a task’s due date is reached. |
| Days Before Due Date (Required if Send Reminder=Yes): |
Enter the number of days prior to the Due Date that the reminder email should be sent. This can be set explicitly, or the value can be set dynamically at runtime using a lookup. |
| Reminder Subject/Body: |
Customize the subject and body for the reminder notification e-mail sent to task assignees prior to the task Due Date. Default text can be specified in the Custom User Task section of the Workflow Conductor Control Panel E-mail Settings. |
| Escalate Overdue: |
Reassign a task to a specified person if it passes the task Due Date without being completed. |
| Escalate To (Required if Escalate Overdue=Yes): |
Enter one or more users or groups to escalate the task to. |
| Escalation Subject/Body: |
Customize the subject and body for the reminder notification e-mail sent to task assignees prior to the task Due Date. Default text can be specified in the Custom User Task section of the Workflow Conductor Control Panel E-mail Settings. |
| Days Until Due: |
Enter the number of days until the task is due. You can enter a specific number or use a lookup. The number of days is added to the current date at the time the widget is run to determine the Due Date for each approver task. The calculated task Due Date is included in the task notification e-mail. If you do not enter a Days Until Due value, the Due Date property will be used, if there is one, or the task Due Date will be empty. |
| Due Date: |
Enter a Due Date for the task. You can enter a specific date using the calendar control or use a lookup. Unlike the Days Until Due property, this property sets a specific Due Date for the task. This is useful in situations where a particular deadline must be met. The task Due Date is included in the task notification e-mail. If you do not enter a Due Date, the value in the Days Until Due property will be used, if there is one, or the task Due Date will be empty.
NOTE: If both the Due Date and Days Until Due properties are defined, the task Due Date field will be set to the earlier of the two dates. If neither is defined, the task Due Date field will be blank.
|
| Allow Reassignment: |
- Select Yes to allow approvers to delegate their task to another user. If reassignment is allowed, a Reassign Task button is displayed at the bottom of the task form. See the Reassign Task section for more details about this option.
- Select No if you do not want approvers to be able to delegate tasks to other users.
|
| Allow Request Change: |
- Select Yes to allow approvers to create a new task for the item that must be completed before the approver task is completed. If change requests are allowed, a Request Change button is displayed at the bottom of the task form. See the Request Change section for more details about this option.
- Select No if you do not want approvers to be able to create new tasks using the task form.
|
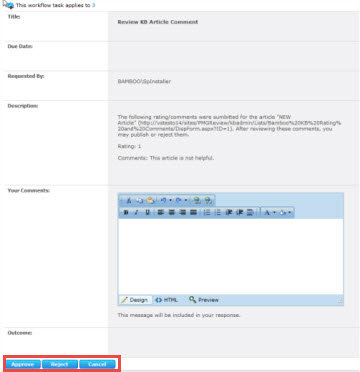
| Allow Comments: |
- Select Yes or No from the drop-down menu.
|
| Save Comments To: |
Each approver has the opportunity to enter comments when completing an approval task. You can view task comments in the completed task. If the Send Email property is set to Yes, a summary of all comments is e-mailed to the workflow initiator when the widget is finished running. You can also store the comments in a workflow variable for use later in the workflow. To assign a workflow variable, select a Text data type variable from the Save Comments To list. Create variables in the Workflow Settings tab in the settings pane, or click the Create new variable link next to the variable list. If multiple approvers enter comments, each comment is appended to the workflow variable. |
| Allow Attachment: |
Select Yes or No from the drop-down menu. |
| Item to Attach: |
Use a lookup to add an attachment. |
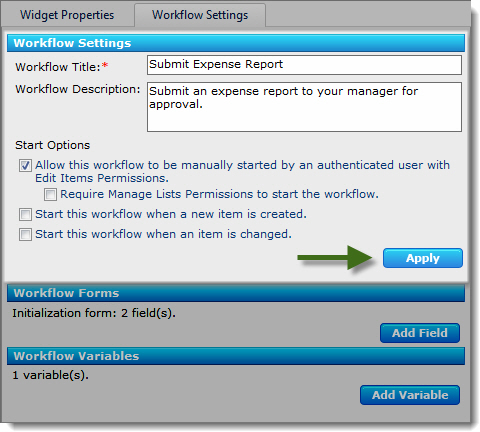
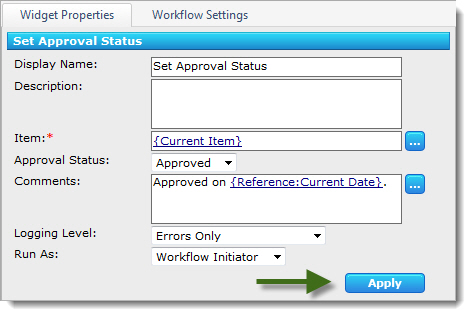
| Click Apply to save the widget settings. |
|
 You must be a Site Collection Administrator to perform these procedures.
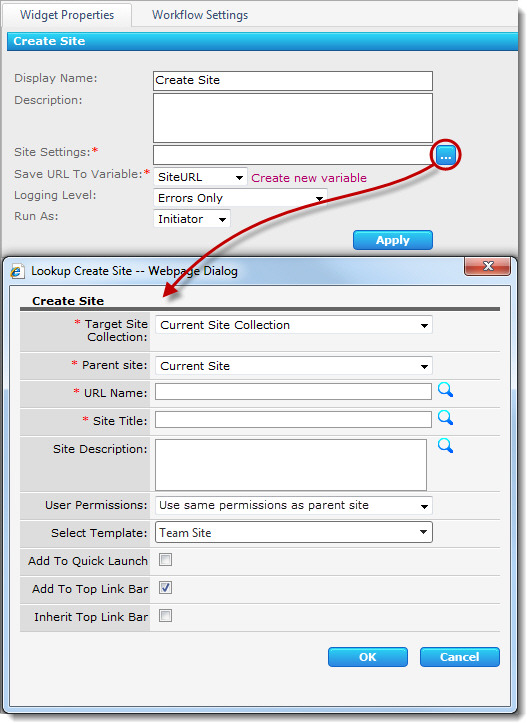 The Create Site widget creates a new SharePoint site. Sites can be created in any site collection in the Web application. The widget includes the following options and features:
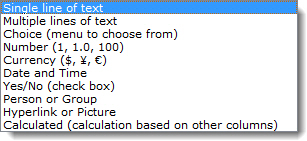

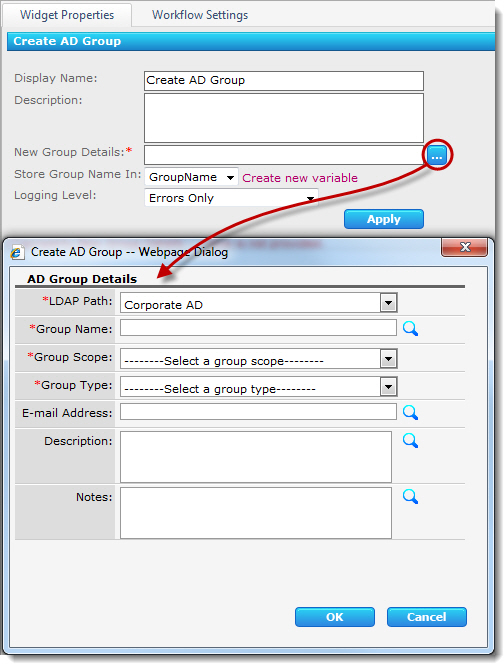 Create a group in a pre-configured LDAP path or enter a custom LDAP path (if allowed).


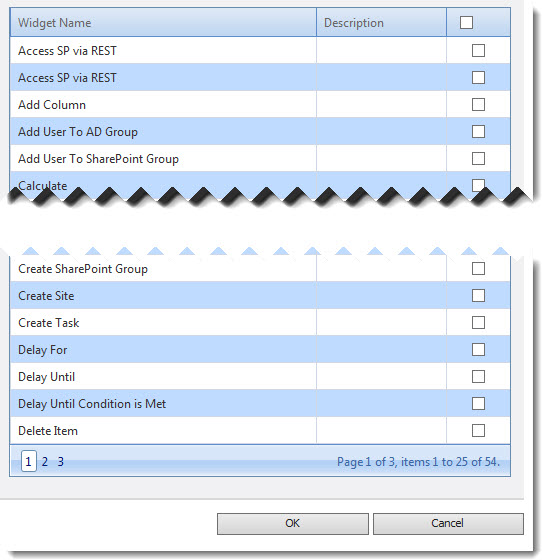 Check the widget(s) you want to include in the selected category.
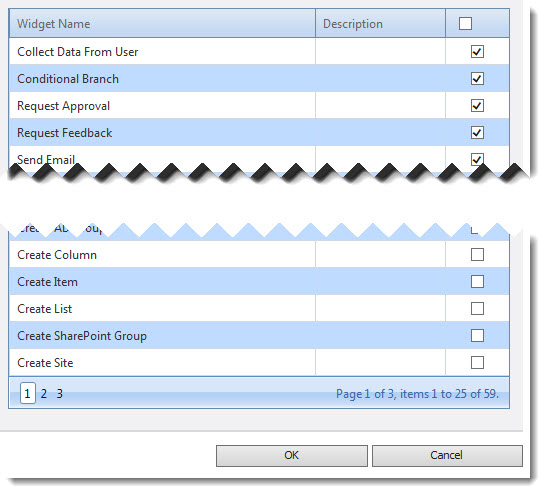 Uncheck the widget(s) you want to remove from the selected category.
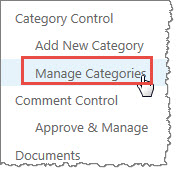
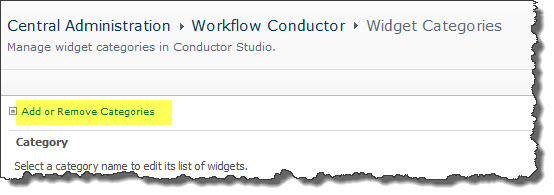 If the default categories for widgets are not satisfactory for your organization, you can change them. To add or delete categories, click the Add or Remove Categories link at the top of the Widget Categories page.
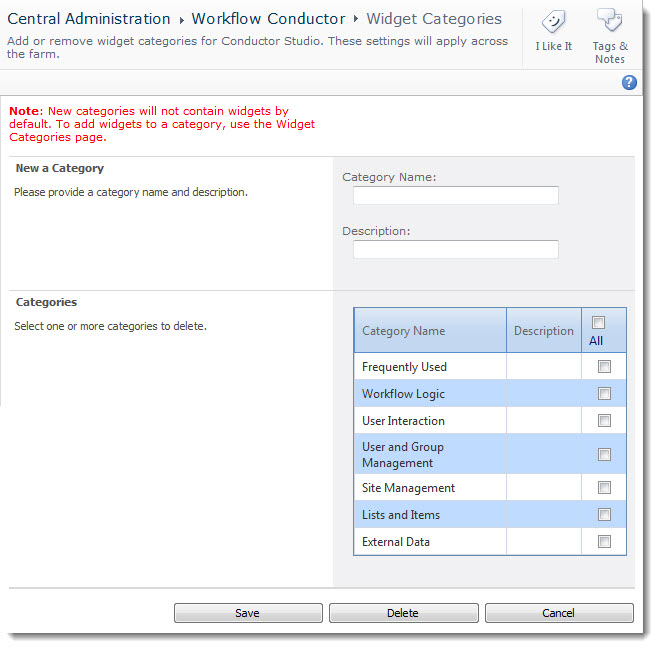 Enter the name of the new category and if desired, enter a description as well. As you can see from the list of existing categories, the Description value is optional.
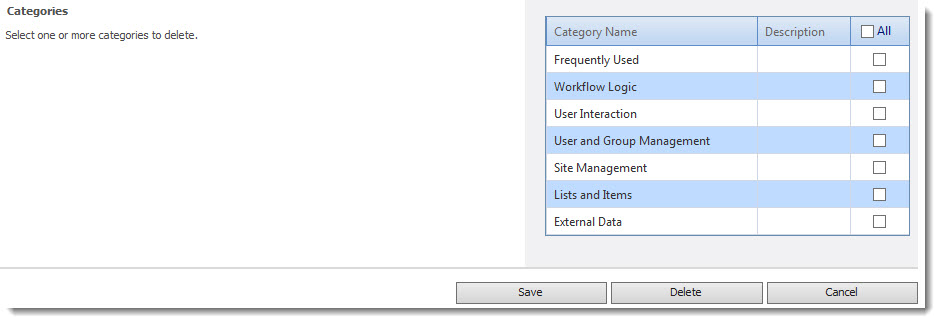
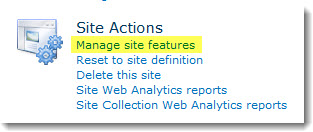 Activate the site feature Bamboo Workflow Incoming Email for each site where email-based approval will be allowed. This is a site where the workflow runs and the Workflow Tasks list resides.
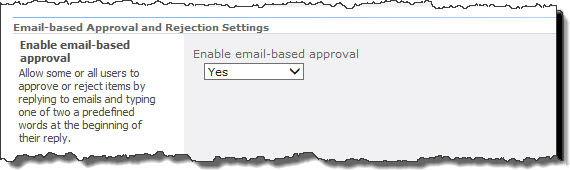 In the Enable email-based approval section, select Yes from the drop-down menu.
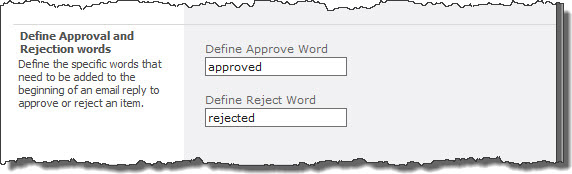 In the Define Approval Word box, enter the word users should respond with for an approval. In the Define Reject Word box, enter the word users should respond with for a rejection.
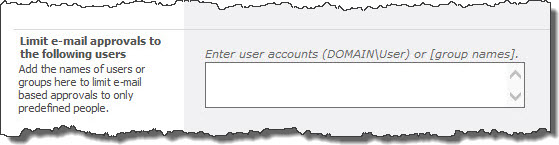 The Limit e-mail approvals to the following users section allows administrators to restrict approval emails to specific users or groups by typing their names in the box.

 To specify who can design Conductor Studio workflows in your SharePoint farm, go to Central Administration > Workflow Conductor, and then Workflow Designers.
 ) if you would rather search for names/groups than enter them directly. When you have the list, click
  to resolve the names and make sure they are entered correctly.
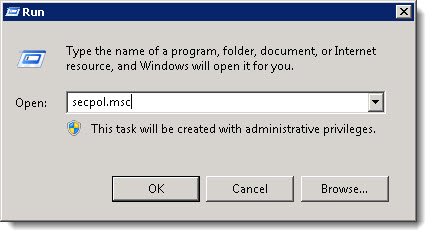 Type secpol.msc in the Open box, and then click OK.
 Widget Limitations:
  You will find many of our products complement each other quite nicely saving you the time and trouble to write custom code. With Bamboo at the heart of your SharePoint investment, you gain access to a huge catalog of enhancements, components, and accessories that add the critical functionality your business requires.


 button to define the comparison values and criteria:
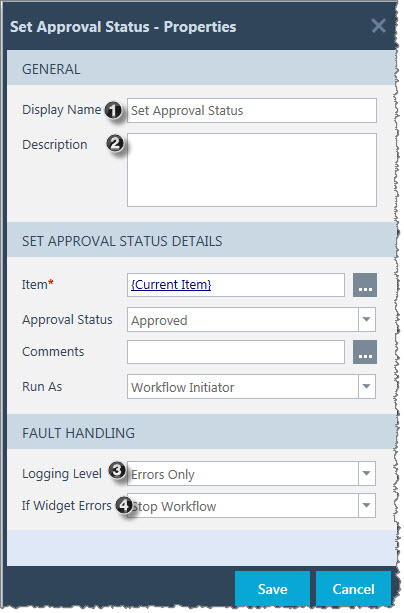 After a widget is dropped into the workflow, it must be configured before the workflow can use it. To set the properties of a widget, drag your widget to the studio and right-click on it to display the Widget Properties ** for that widget.
 and enter the Username and Password of another user account. Click Save.
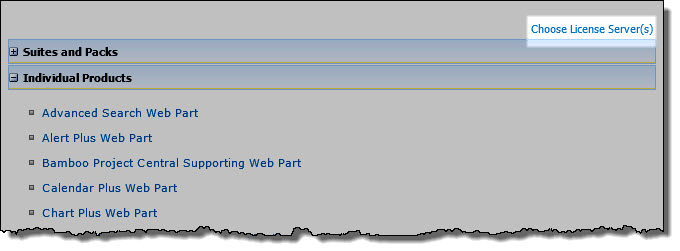
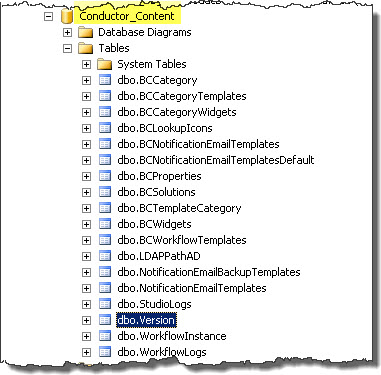 In SQL Server Management Studio, expand the Tables in your Workflow Conductor Configuration Database.
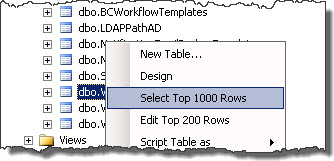 Right click the table called dbo.Version and choose *Select Top 1000 Rows* from the menu that appears.
 There is only one row in this table and it has two columns. Check the value of the Version column to learn the version of the Configuration Database. If you have just upgraded to Workflow Conductor R3.5, the value of this column should be 3.5.0.0
 button.
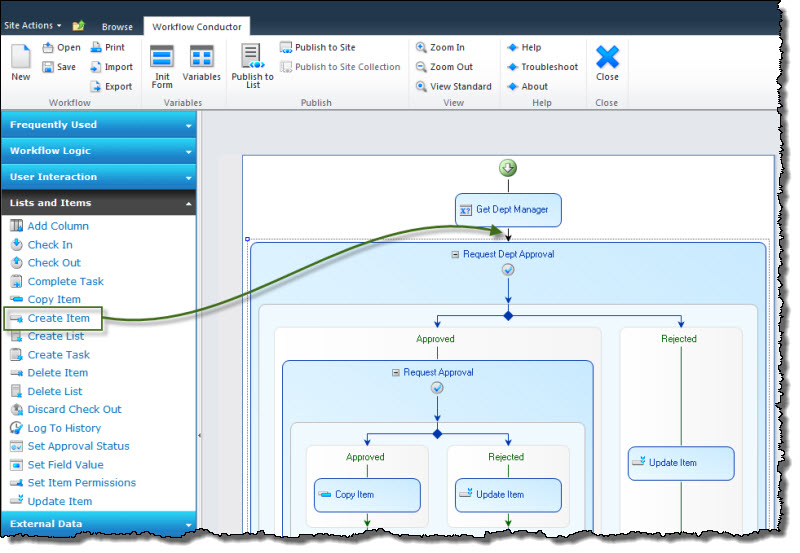

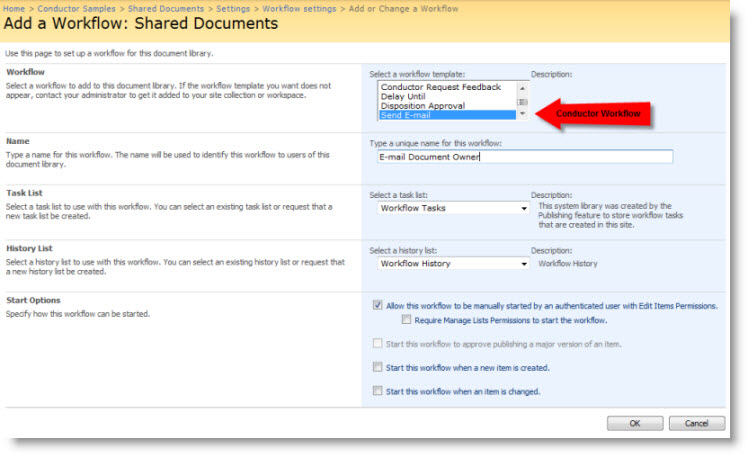
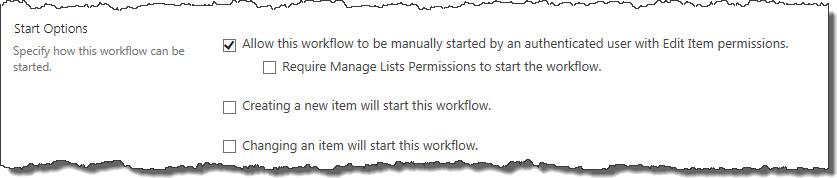
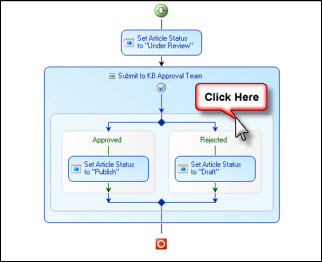
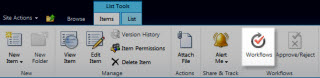
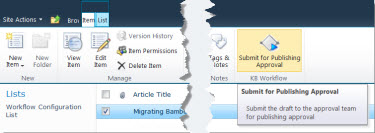
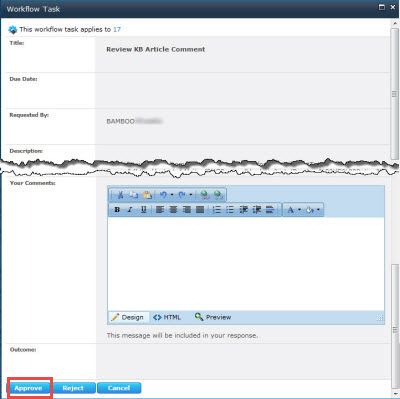
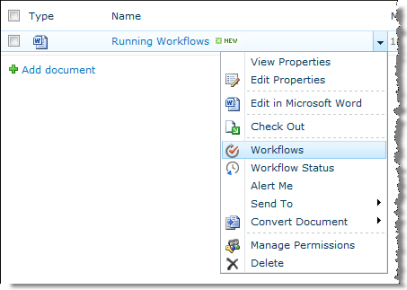 Depending on the Start Option you selected for the workflow, it can be started manually using the Workflows option for an item (as shown here), or will start automatically when an item is created, changed, or published.
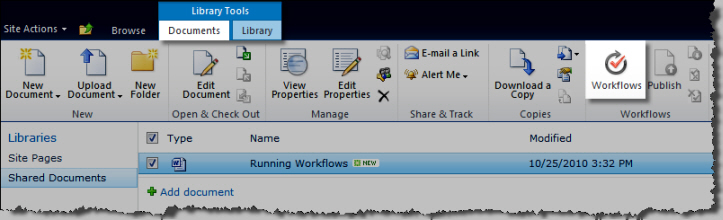
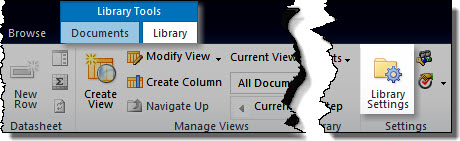
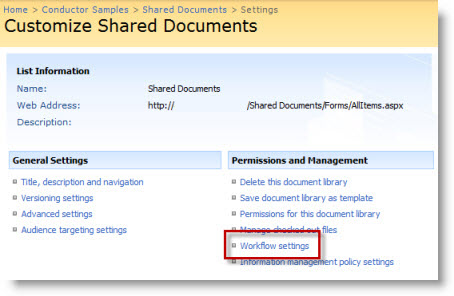
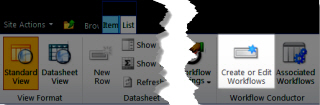
 On the list where you want to associate a workflow that has been published to the site or site collection, go to the list ribbon.
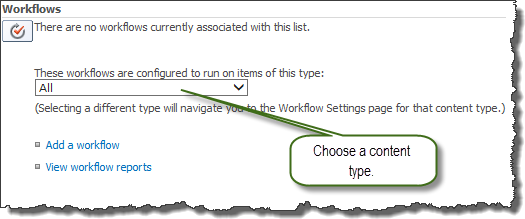 On the Workflows page, see the workflows that are already associated with the list, if any.
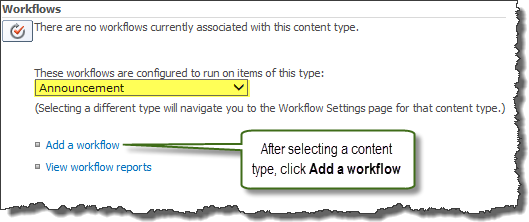


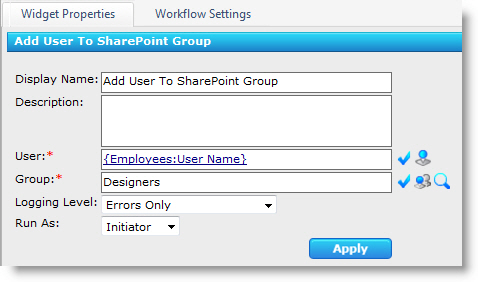 In this example, the Add User to SharePoint Group widget is configured to add a user to the SharePoint Designers group as part of a workflow that performs a number of activities when a user is assigned an administrative role in the company.
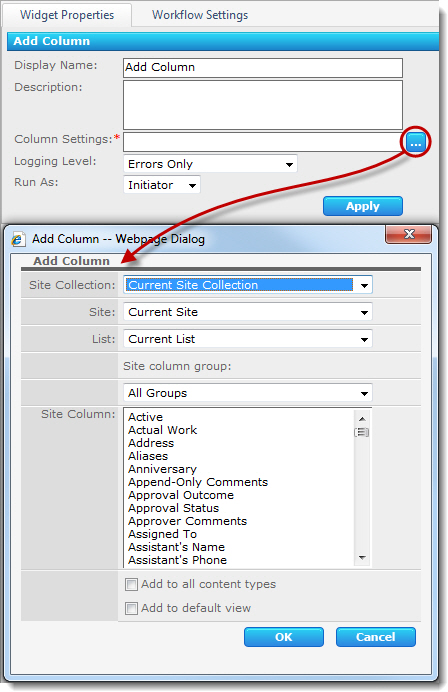 The Add Column widget adds an existing site column to a SharePoint list or library. Site columns can be added to any list in any site collection in the Web application. The widget includes the following features and options: