Permissions in Discussion Board Plus
Top
Discussion Board Plus uses the built-in SharePoint permissions to determine what actions a user can perform in a Discussion Board Plus list. We’ve divided up the sections of Discussion Board Plus to provide you a helpful way to understand the variations in permissions and settings for the tool.
General Permissions
The table below describes the permission or permission level required to perform each action.
| Discussion Board Plus Action |
Manage Lists |
Full Control |
Topic Creator1 |
Site Collection Administrator2 |
| Verify Answer |
No |
Yes |
Yes |
Yes |
| Move Topic |
Yes |
Yes |
Yes* |
Yes |
| Suggest as Answer |
Yes |
Yes |
Yes |
Yes |
| Mark as Not Answer |
Yes** |
Yes |
Yes |
Yes |
| Lock/Unlock Topic |
Yes |
Yes |
Yes* |
Yes |
| Mark/Unmark Topic as Sticky |
Yes |
Yes |
Yes* |
Yes |
| Access Forum Settings |
Yes |
Yes |
Yes |
Yes |
| Edit/Reply |
No |
Yes |
Yes*** |
Yes |
After topic is locked:
Edit/Reply/Suggest or Verify Answer/
Mark as Not Answer |
No |
No |
No |
Yes |
After topic is locked:
Mark or Unmark as Sticky/Unlock Topic |
Yes |
Yes |
Yes* |
Yes |
|
1The user who created the topic (does not apply to anonymous users).
2SharePoint site collection administrators.
*Yes, if the creator has the Manage Lists permission, Full Control permission level, or is a site collection administrator.
**Yes, if the user suggested or verified the answer originally.
***Yes, if the user has the Edit Items permission.
To set up your own SharePoint permission levels to use with Discussion Board Plus, refer to the following information from Microsoft: Edit, create, and delete permission levels.
Top
Private Topic Permissions
| Discussion Board Plus Action |
Recipient/ Topic Owner |
Contribute |
Design |
Full Control |
Site Collection Administrator |
System Account |
| Create Topic |
— |
No |
No |
Yes |
Yes |
Yes |
| Share With |
Yes* |
No |
No |
Yes |
Yes |
Yes |
| Access Topic |
Yes |
No |
No |
Yes |
Yes |
Yes |
| Get Alert Notification |
Yes |
No |
No |
No |
No |
No |
*Yes, if the user has Full Control permission level.
**Yes, alert sent to the Recipients only.
Top
Private Reply Permissions
| Discussion Board Plus Action |
Recipient |
Contribute |
Design |
Full Control |
Site Collection Administrator |
System Account |
| Create Reply |
— |
Yes |
Yes |
Yes |
Yes |
Yes |
| Access Reply |
Yes |
No |
No |
Yes |
Yes |
Yes |
| Get Alert Notification |
Yes |
No |
No |
No |
No |
No |
Top
Move Topic Permissions
| Discussion Board Plus Action |
Source List |
Target List |
Allow Move Topic? |
| If Topic in List: |
| Is a Locked Topic? |
No |
— |
Yes |
| Yes |
— |
No |
| Is a Sticky Topic? |
No |
— |
Yes |
| Yes |
— |
No |
| Is a Private Topic? |
No |
— |
Yes |
| Yes |
— |
No |
| Contains a Private Reply? |
No |
— |
Yes |
| Yes |
— |
No |
| Inherits List Permissions from Parent? |
Yes |
Yes |
Yes |
| Yes |
No |
No |
| No |
No |
No |
| No |
Yes |
No |
| Inherits Site Permissions from Parent? |
Yes |
Yes |
Yes |
| Yes |
No |
No |
| No |
No |
No |
| No |
Yes |
No |
|
Top
Forum Settings for Discussion Board Plus List
| Forum Settings |
Source List |
Target List |
Allow Move Topic? |
| Verify Answer |
Enabled |
Enabled |
Yes |
| Disabled |
Enabled |
Yes |
| Disabled |
Disabled |
Yes |
| Enabled |
Disabled |
No |
| Suggest as Answer |
Enabled |
Enabled |
Yes |
| Disabled |
Enabled |
Yes |
| Disabled |
Disabled |
Yes |
| Enabled |
Disabled |
No |
| Tagging |
Enabled |
Enabled |
Yes |
| Disabled |
Enabled |
Yes |
| Disabled |
Disabled |
Yes |
| Enabled |
Disabled |
No |
| Like |
Enabled |
Enabled |
Yes |
| Disabled |
Enabled |
Yes |
| Disabled |
Disabled |
Yes |
| Enabled |
Disabled |
No |
|
Top
Permissions for Forum Actions
Forums use the general permissions by default. And in addition to the permissions provided by Discussion Board Plus, please note the following for Community Central forums:
- Administrators and Moderators can add, update or delete any forum topic or post.
- Members can add topics and posts, but can only edit or delete their own topics/posts.
- If a read-only account is configured in the Forum Control Panel, anonymous users can read topics and posts but cannot add new topics or posts.
Permissions for Blog Actions
Community Central uses the default SharePoint settings to determine who can perform actions in a blog site. For a list of default permissions for basic blog actions, see the table below. For information about customizing blog site permissions, see the following article:
Configure permissions and settings for a blog (From office.microsoft.com)
| Blog Action |
Administrators |
Moderators |
Members |
Visitors |
Anonymous
Users |
| Read Blog Posts and Comments |
Yes |
Yes |
Yes |
Yes |
Yes |
| Create Blog Posts |
Yes |
Yes |
Yes |
No |
No |
| Edit Blog Posts |
Yes |
Yes |
Yes* |
No |
No |
| Add Comments |
Yes |
Yes |
Yes |
No1. |
No1. |
| Edit Comments |
Yes |
No |
Yes* |
No |
No |
| Approve Blog Posts and Comments |
Yes |
Yes |
No |
No |
No |
| View Draft Posts and Pending Comments |
Yes |
Yes |
** |
No |
No |
| Manage Blog Categories |
Yes |
Yes |
Yes |
No |
No |
* Members can edit any blog post or comment by default (not just their own post/comment).
1. Allow visitors and anonymous users to add comments by modifying list permissions.
** Members can view their own draft posts and comments pending approval, but not posts/comments created by other Members.
Top
Configuring Anonymous Access
By default, anonymous access is not enabled in SharePoint 2013. SharePoint administrators may want to enable anonymous users to have access to Community Central content without having to provide authentication credentials. Anonymous access is permitted or denied based on the permissions for the site. Additional configuration is needed for anonymous users to access Community Central content.
For example:
- Viewing locked topics – In order for anonymous users to view locked topics in forums, you must configure a read-only forum access account in each forum site’s Forum Control Panel. All other forum content is visible if the site is configured to allow anonymous access.
- Viewing avatars – In order for anonymous users to be able to see avatars (the SharePoint user profile picture), additional configuration steps are needed. For instructions, see this blog.
- Adding blog comments – In order for anonymous users to add blog comments, the administrator must modify the list permissions for the Comments list in each blog site. For instructions, see this blog.
For more information about configuring SharePoint for anonymous access, see:
- Using ideas from this article from Microsoft, decide whether to allow access for anonymous users.
- This article from Microsoft covers configuring anonymous access.
- For SharePoint 2010-specific configuration, see this blog.
Alternatively, you can configure SharePoint for anonymous access for forms-based authentication where the accounts can be created from the database. For more information on configuring anonymous users for forms-based authentication, see:
See also:
Top
 The
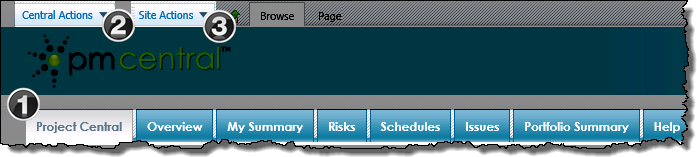
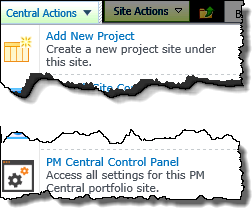
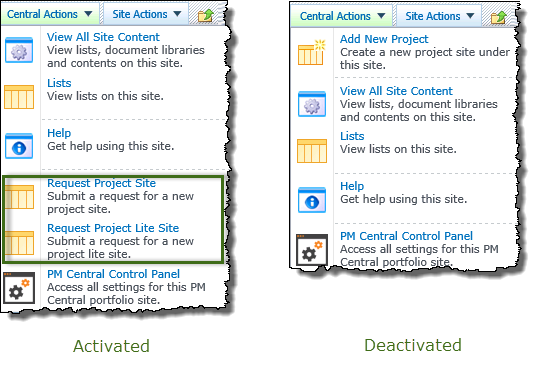
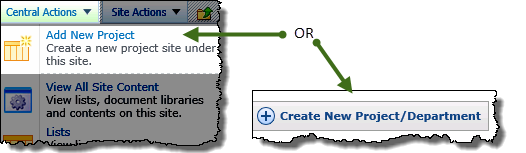
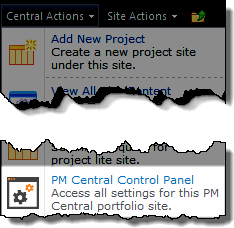
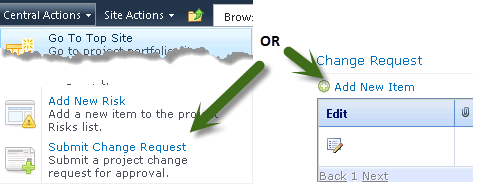
The  to access Central Actions in 2013
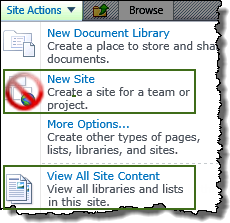 The SharePoint Site Actions menu provides shortcuts to commands commonly used when working with SharePoint sites. The command options you see depend on your permissions on the site.
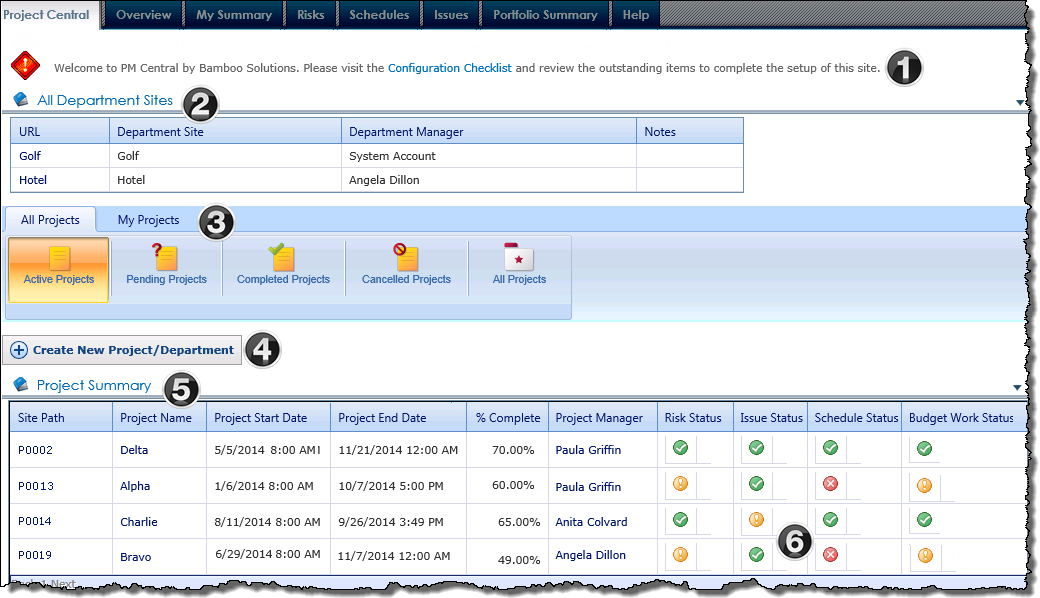
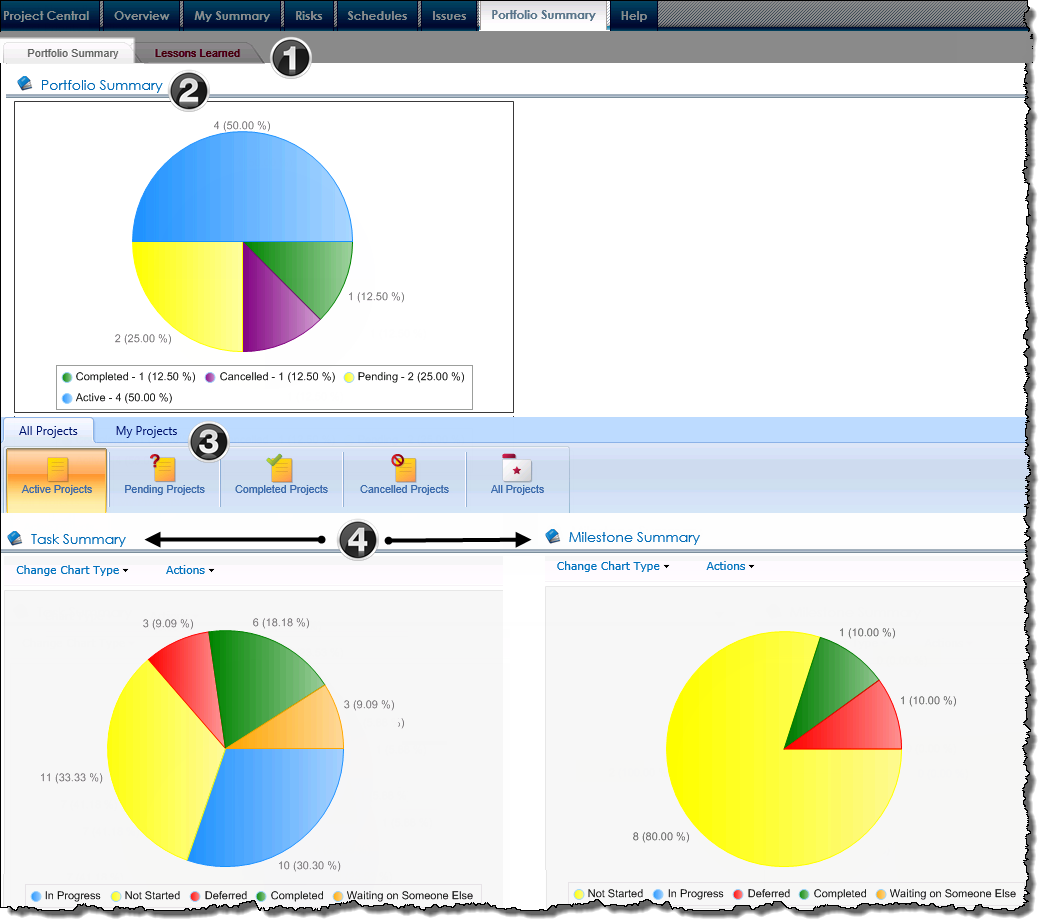
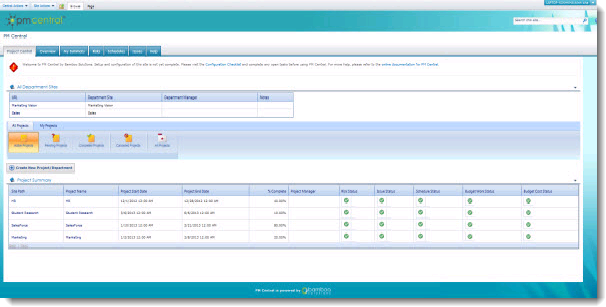
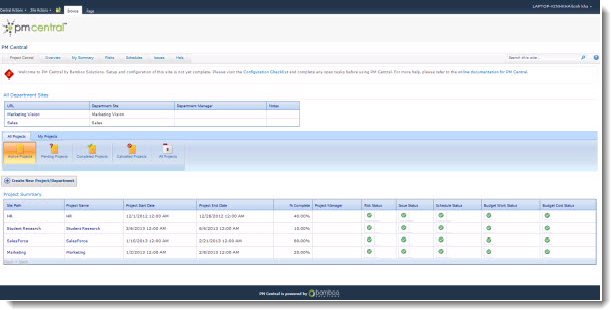
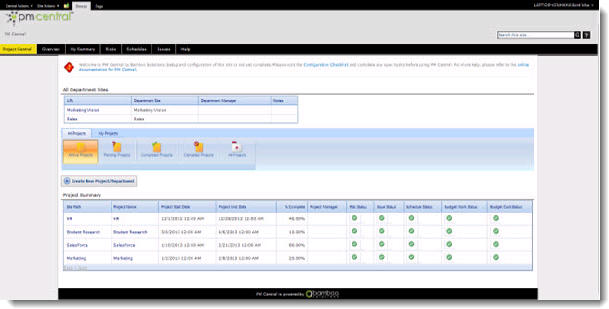
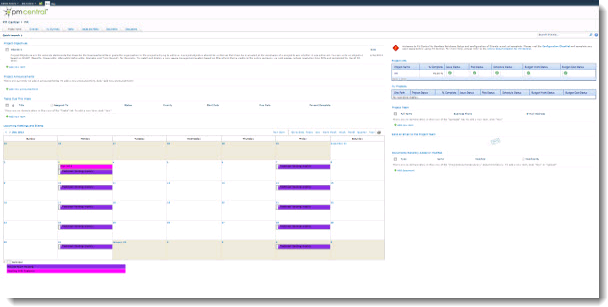
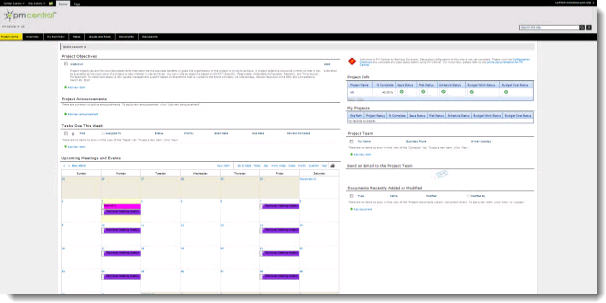
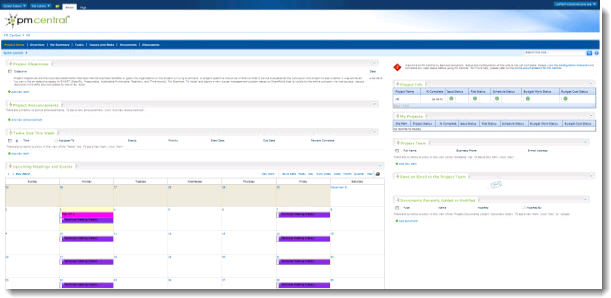
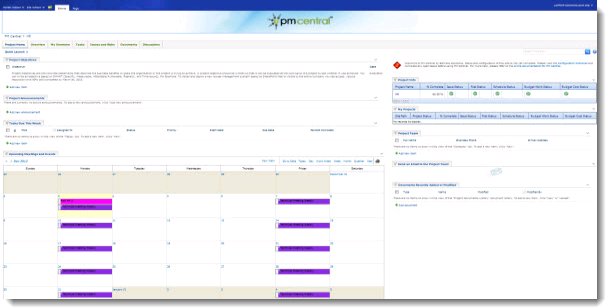
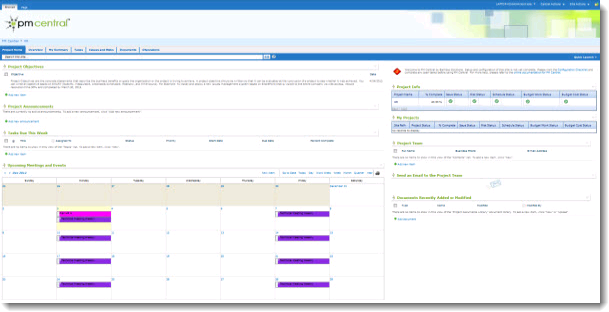
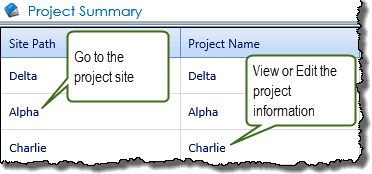 The Project Summary displays high-level status information for each project, including % Complete, Project Start Date and Project End Date. This information, including the displayed KPI’s is maintained in the project site’s Project Health list.
 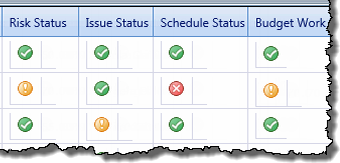 The Key Performance Indicators associated with the Project Health list provide insight into the health of projects.
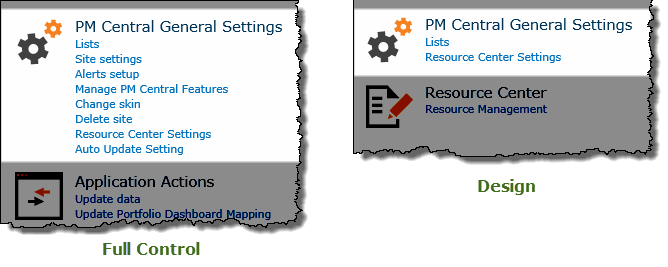


 Use the Poll web part to conduct custom user polls and gather valuable voting feedback from your sites. This product contains two components that allow for online question management, result exporting, and the display of poll results in a color chart or graph style.
 to configure this Bamboo product.")


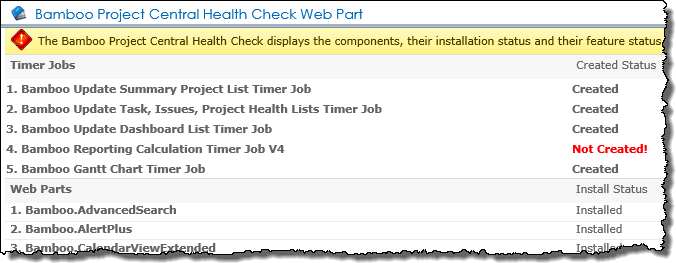
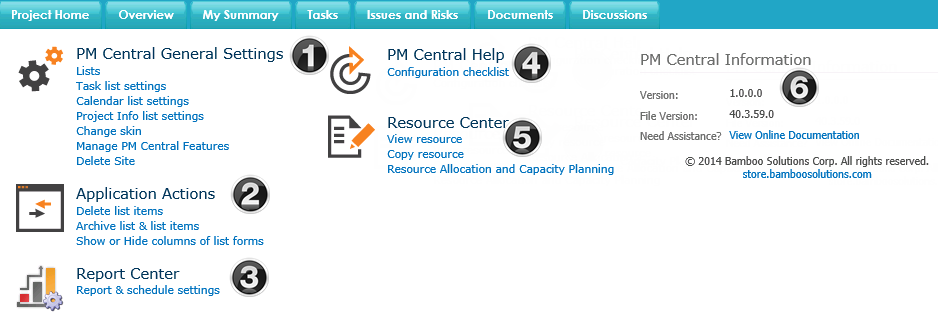
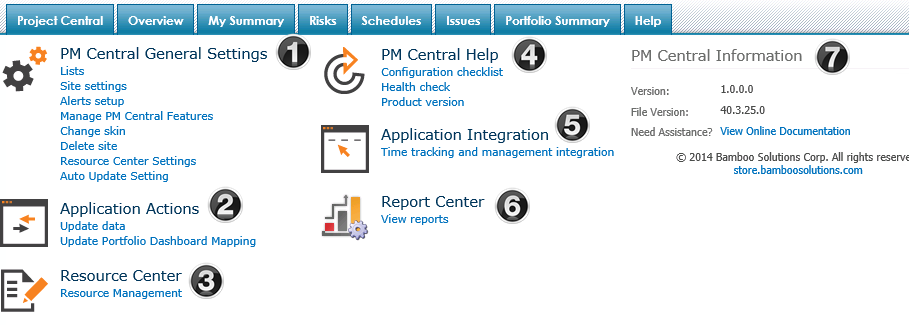
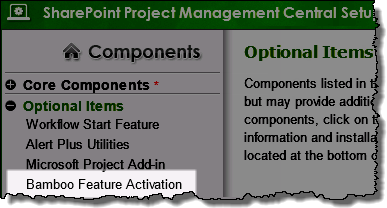 When PM Central is deployed there are a number of features that need to be activated at the Site Collection level before PM Central will be operable.
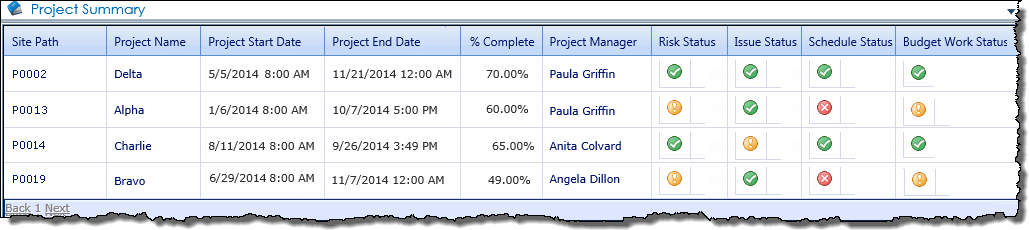
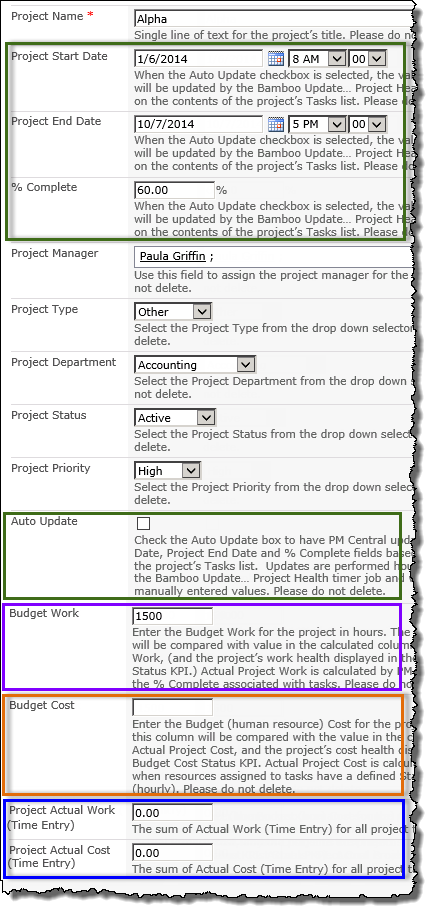

 The Budget Work field must be manually populated with a value if you want to track work with the Budget Work Status KPI
 The Budget Cost field must be manually populated with a value if you want to track project’s human cost with the associated Budget Cost Status KPI.
  These fields are populated with the system calculated total of (Time Entry) fields associated with project tasks when you Update All or Update Progress.
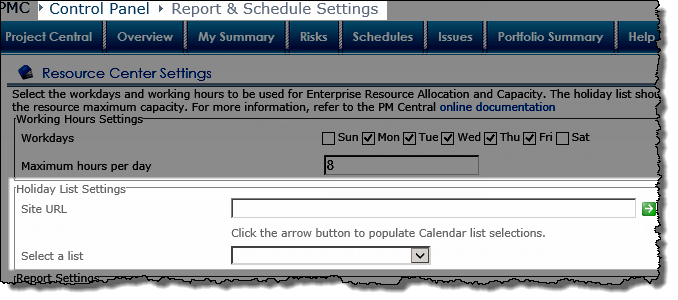
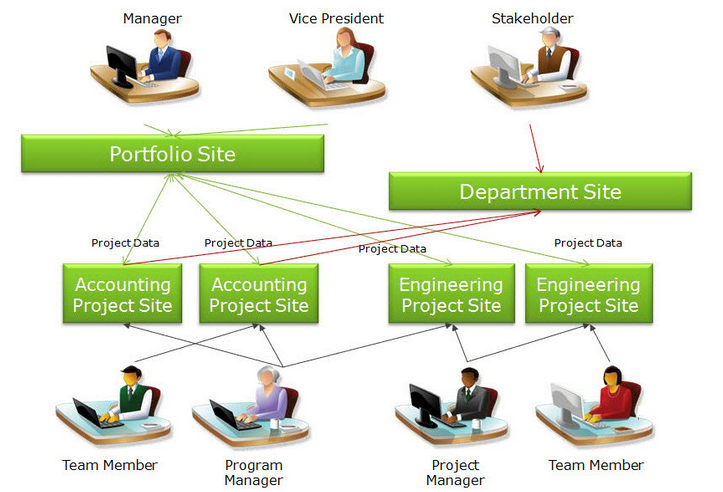
 With over twenty additional components and tools, PM Suite allows you to easily get the most out of your SharePoint-managed projects. With the PM Suite, you don’t just get Project Management Central, the world’s best SharePoint project management solution, you gain the ability to use many of the application’s powerful features — charting, task management, alerting, and much, much more — anywhere in SharePoint. With the additional tools and flexibility that comes with every PM Suite, you’re able to customize and extend Project Management Central as far as you’d like, enabling unlimited integration with your existing SharePoint environment, or simply adding needed functionality to the application itself. If you’re building a SharePoint project management solution, Project Management Central is the fastest, easiest way to get started… and with the PM Suite, there’s no limit to what you can accomplish!

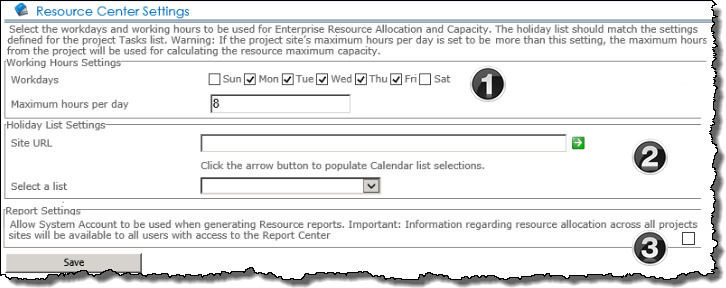
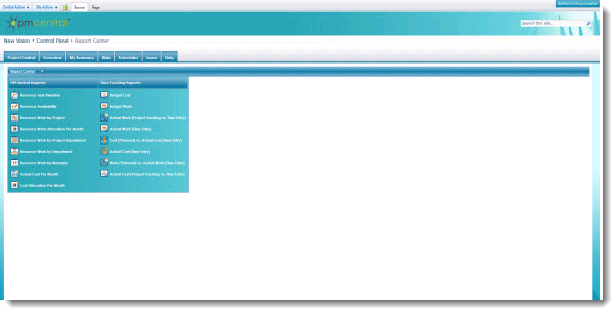
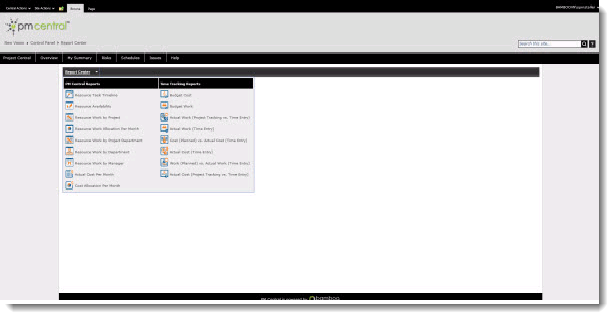
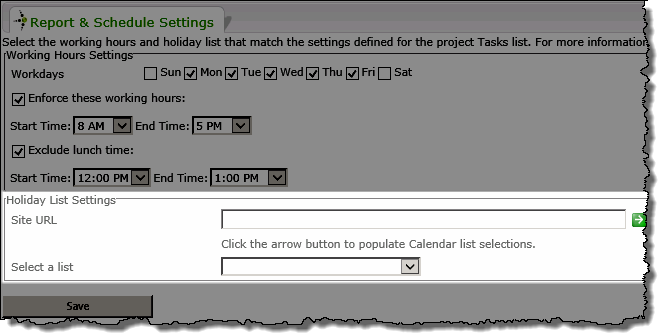
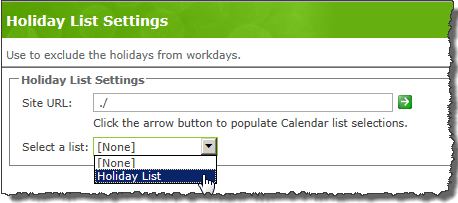
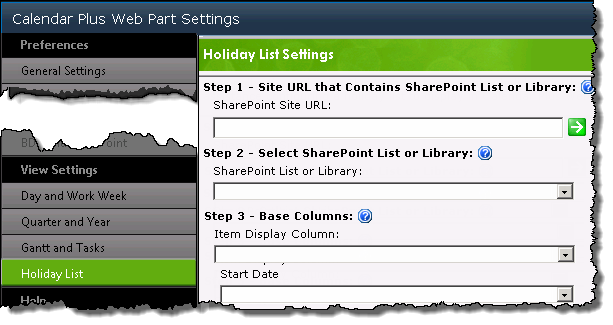
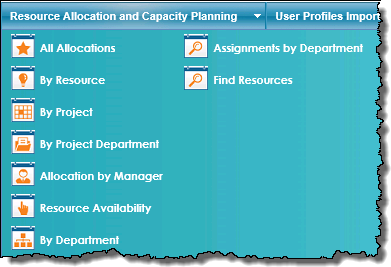 When working with the PM Central Resource Reports keep in mind:
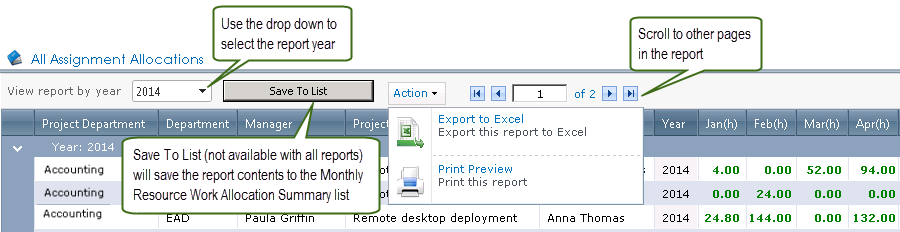


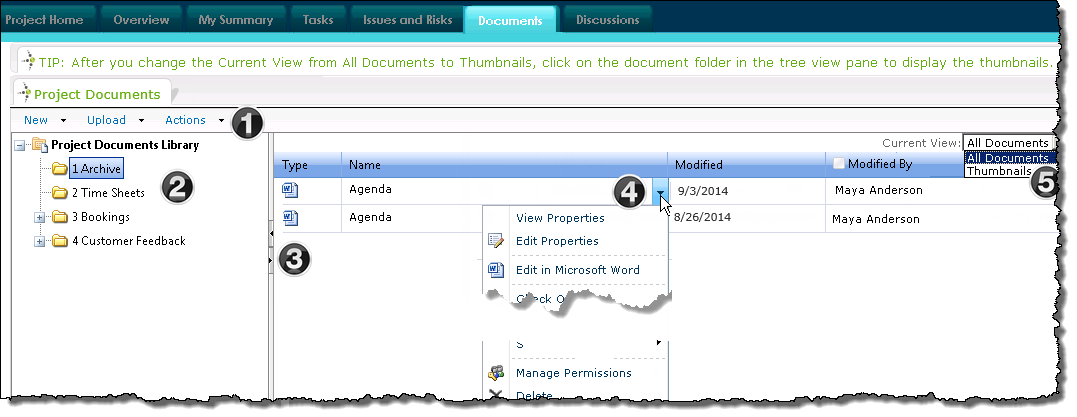
 Click the document drop down arrow to access the standard SharePoint document library menu items.
 Bamboo Suites are simple, cost-effective collections of SharePoint tools and components designed specifically to help you extend some of Bamboo’s most powerful business applications. With PM Suite you can proactively track, organize, maintain, and report statuses, tasks, risks, and issues for projects within an organization – allowing you to effectively communicate project expectations to team members and stakeholders in a clear, timely fashion from the task level to an executive summary.


 To resize the pie chart in relation to the chart area, select a scale percentage.
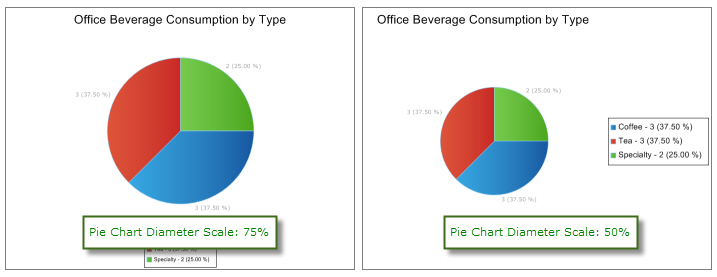
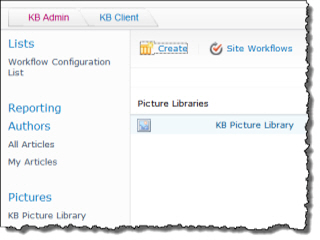
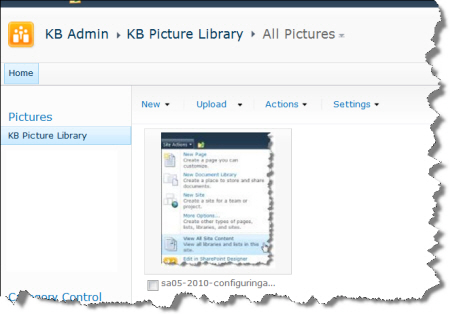


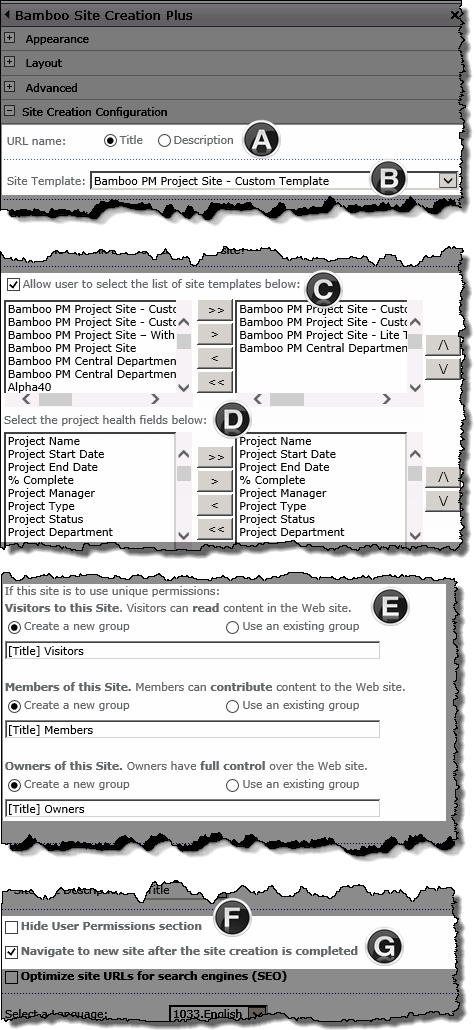
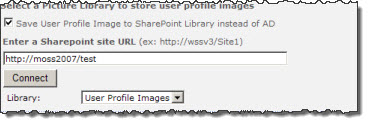 Select a Picture Library to store user profile images. Images of your users can be stored in Active Directory Services, but you and your users might find it simpler to use a SharePoint picture library so that images can be updated easier and more often.
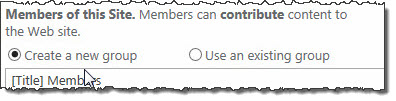
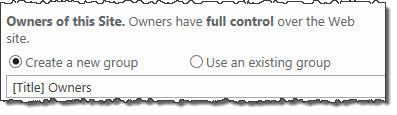
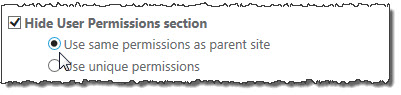
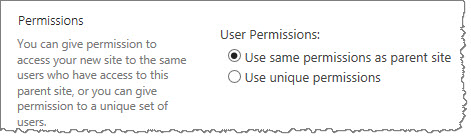
 This section of the configuration tool pane allows you to specify the naming convention for new user groups that are created during site creation. If you are using a links list to track site URLs, you have the option to include new sites in that links list. And you can also hide the user permissions section so that users do not see it.
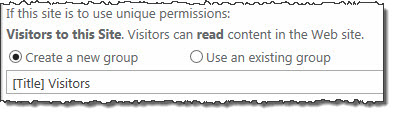
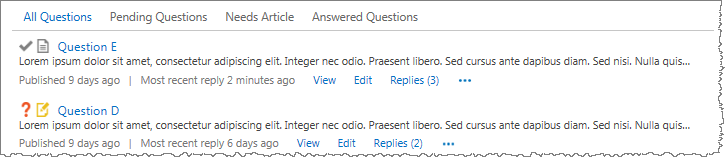
 Pending Question
 Answered Question
 Needs an Article
 An Article has been Published for this Question
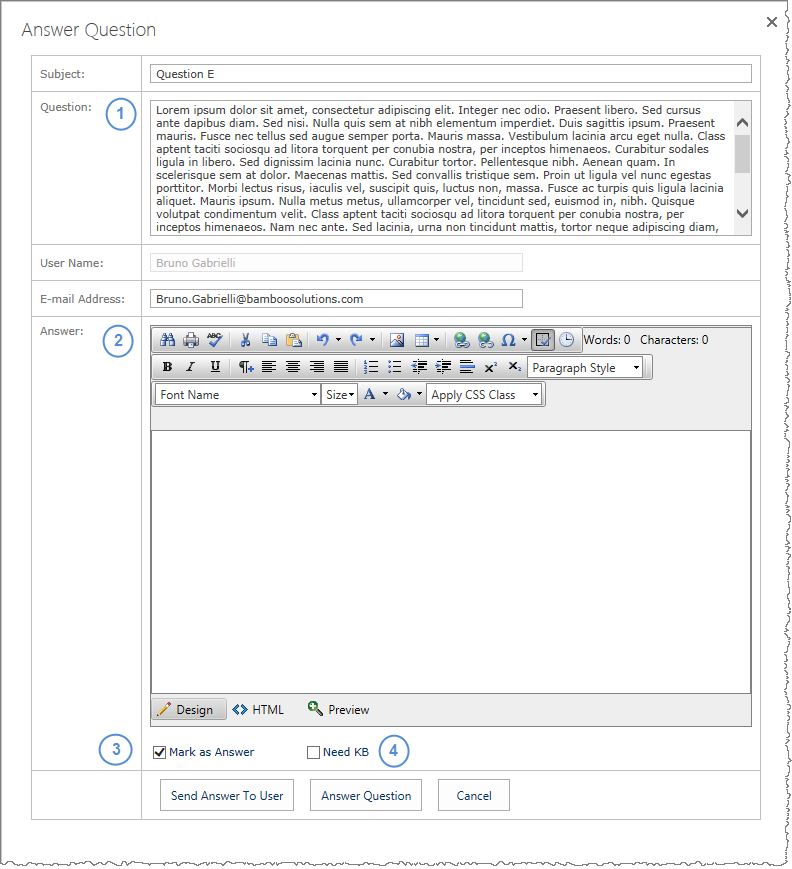

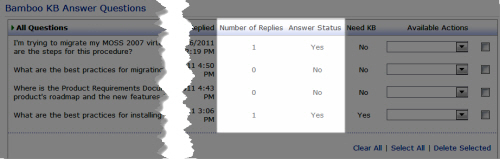
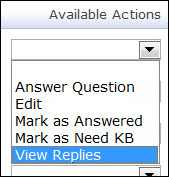
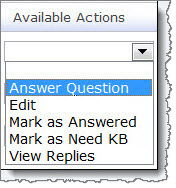 The available actions are as follows:


 Enter the Administrator Credentials for the Administrative Account used to reset passwords. This Administrator account must have the right to Manage Site Group and Create Cross Site Group within SharePoint. By default, this account has to be in the SharePoint’s Administrator group unless the account was granted the specific right to create and manage site and cross site groups.
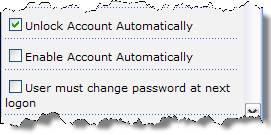

 Enter the user names or user groups separated by semi-colons for those users whom you do NOT want to be able to reset their passwords using this Web Part (for example, administrators, executives, or employees with access to sensitive data).