If you elected to copy actual cost from TTM to PM Central when you configured cost tracking options, you can view the cumulative actual cost per task and for the entire project in PM Central. You can also view reports that compare actual cost from timesheets with planned and actual cost from the project.
Viewing Actual Cost Per Task
To view the total actual cost entered in timesheets for a task, add the Actual Cost (Time Entry) field to the project Tasks list. This field contains the cumulative cost of all work approved for a task to date, and is updated each time a timesheet that has the task is approved. You must follow the steps below for EACH project in your PM Central portfolio where you want to view the Actual Cost (Time Entry) field.
| Step | Action | Result |
| 1. | In the PM Central project site, click the Tasks tab and go to the All Tasks view. |  |
| 2. | Edit the Task Master Web Part | |
| 3. | In the Column Settings section of the Web Part configuration tool pane, click Add Row and add the Actual Cost (Time Entry) field to the list of fields displayed in the Web Part. |  |
| 4. | Click Apply and then OK to save your changes. | You can add the Actual Cost (Time Entry) field to any instance of Task Master, including the Overdue Tasks and My Tasks views. |
Viewing Actual Cost Per Project
To view the sum of the Actual Cost (Time Entry) field for all project tasks, look at the Project Actual Cost (Time Entry) field in the Project Health list. To access this list, go to the Project Home page and click the project name in the Project Info section.
You can also add the Project Actual Cost (Time Entry) field to the Update Project Cost & Schedule web part so you can compare Actual Cost calculated in TTM with other budgeted and actual values. To add additional fields to the Web Part, follow these steps:
| Step | Action | Result |
| 1. | In the project site, go to Tasks > Progress Management. | |
| 2. | In the Progress Management page, edit the Project Cost & Schedule web part. | |
| 3. | In the Web Part settings tool pane, scroll to the bottom of the View Fields list and select Project Actual Cost (Time Entry). Click the right arrow (>) to add it to the Display Fields list, and use the up and down arrows to order the field where you want it. |  |
| 4. | Click Apply and then OK to save your changes. |  |
Actual Cost Reports
When you connect PM Central to a TTM site, several additional reports are enabled in PM Central to allow you to view actual cost data from timesheets and compare it to cost data from projects. To view these reports, click the Reporting tab in the portfolio site. The following cost-related reports are available:
- Actual Cost (Project Tracking vs. Time Entry): Compares Actual Cost calculated based on % Complete in the project to the calculated cost for Actual Work entered in resource timesheets.
- Cost (Planned) vs. Actual Cost (Time Entry): Compares the total planned Cost value in the project to the calculated cost for Actual Work entered in resource timesheets.
- Actual Cost (Time Entry): Displays the calculated cost for Actual Work entered in resource timesheets.

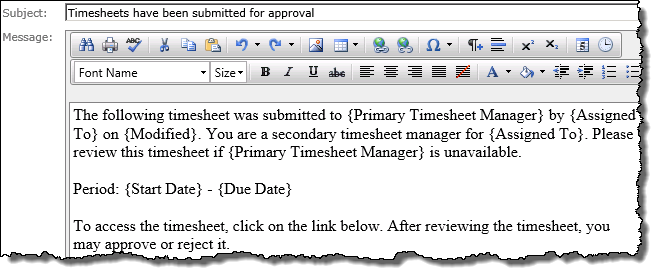
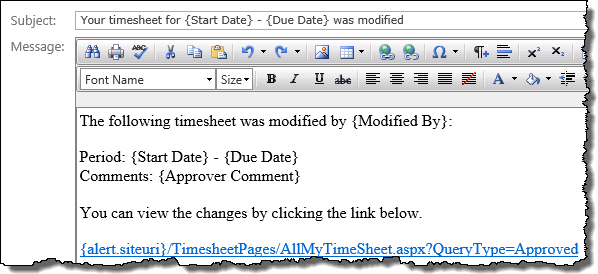
 When working with TTM Alerts, keep in mind:
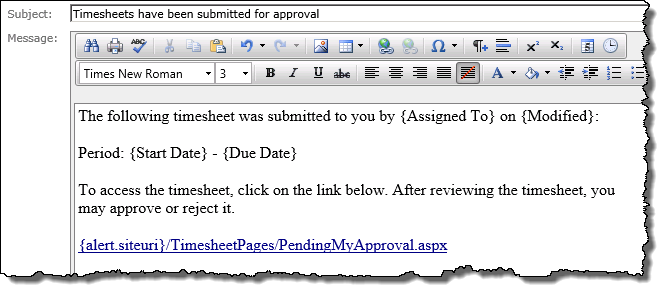
 From the TTM site’s Site Actions menu, select Time Tracking and Management Control Panel.
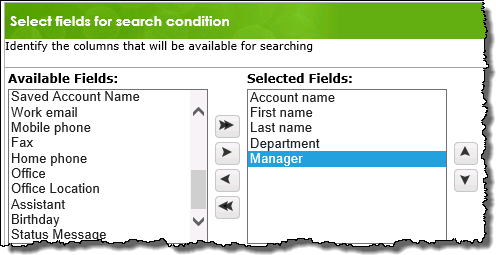 Search Criteria Configuration
 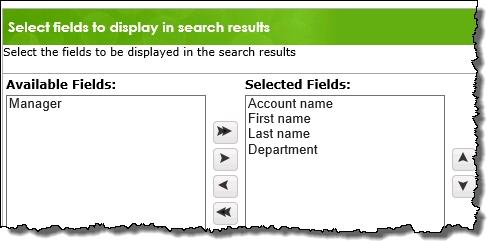 Search Results Configuration
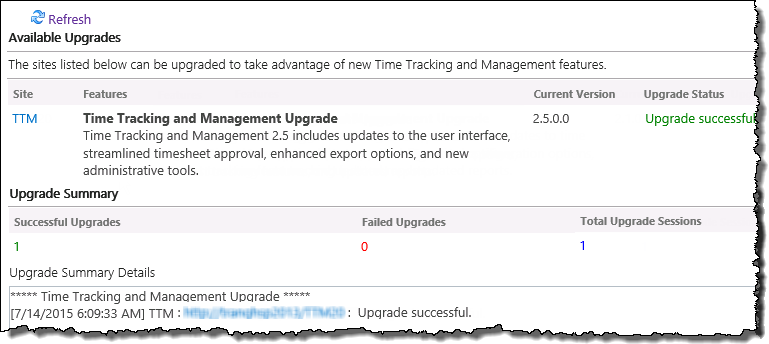
 Access the Upgrade Manager using links found in:
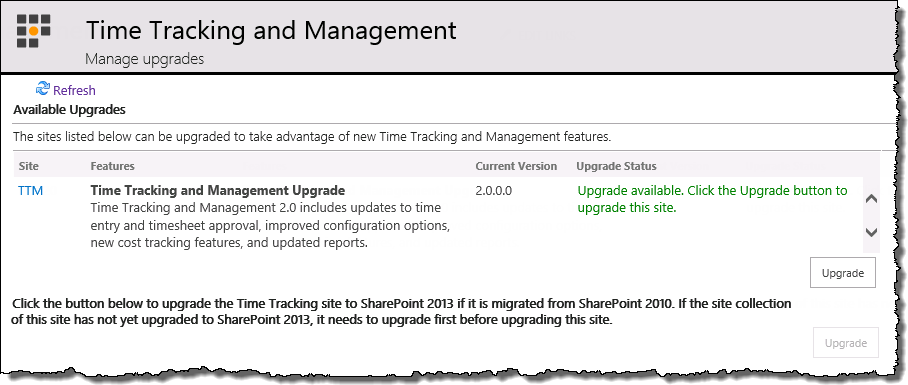


 Completed:
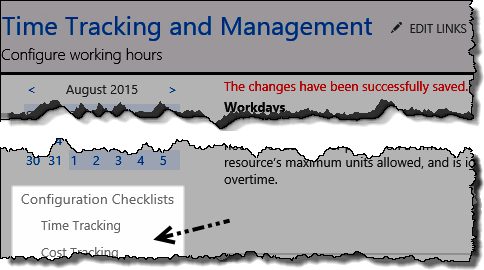 Checklist links:
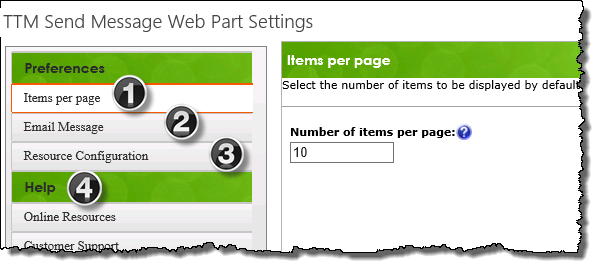
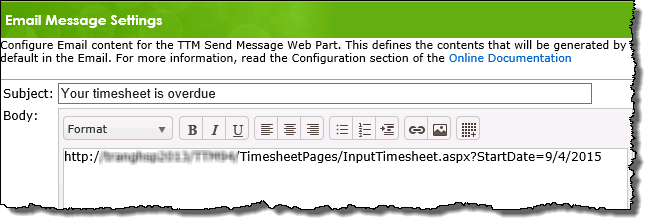
 When configuring the TTM Send Message Web Part keep in mind:
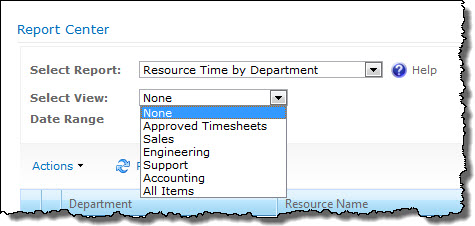
 The Time Tracking and Management Report Center includes several preconfigured reports for resource use and timesheet status.
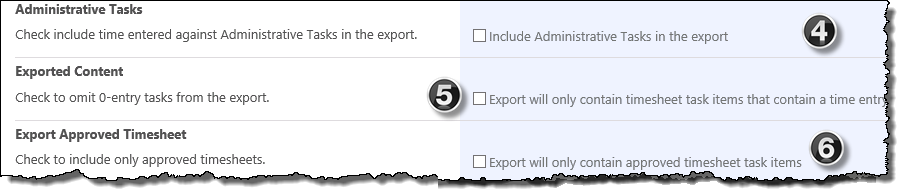
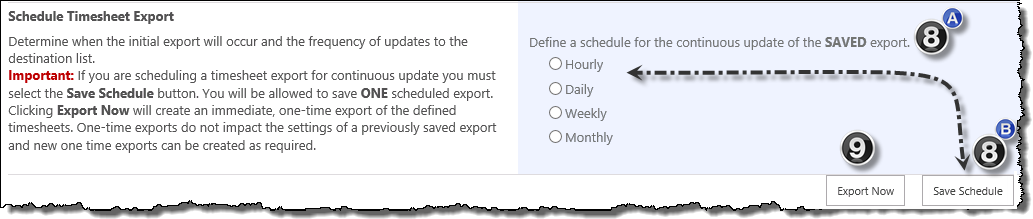
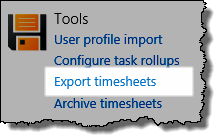 Click the Export Timesheets link in the TTM Control Panel to access the export tool.
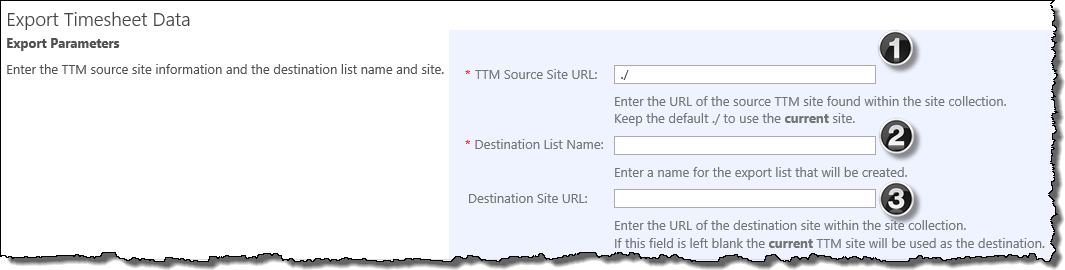
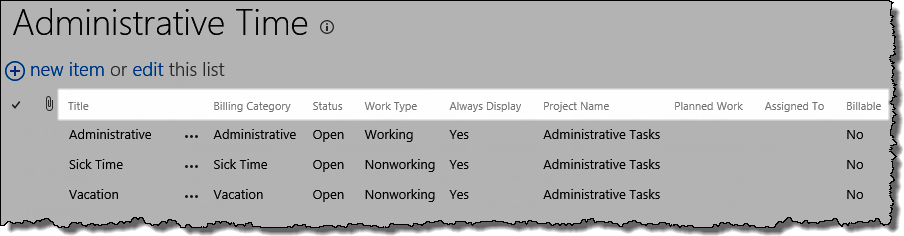
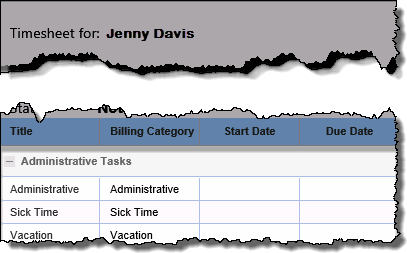 Administrative Tasks
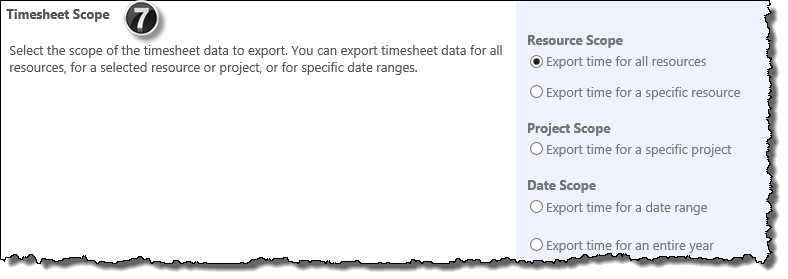
 When you enable cost tracking, several cost calculations will be performed for each timesheet task.
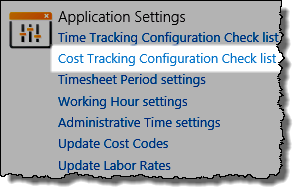 Access the Cost Tracking configuration checklist using links found in:
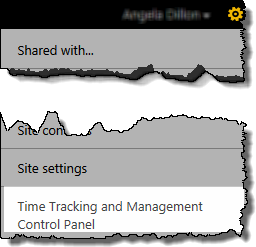
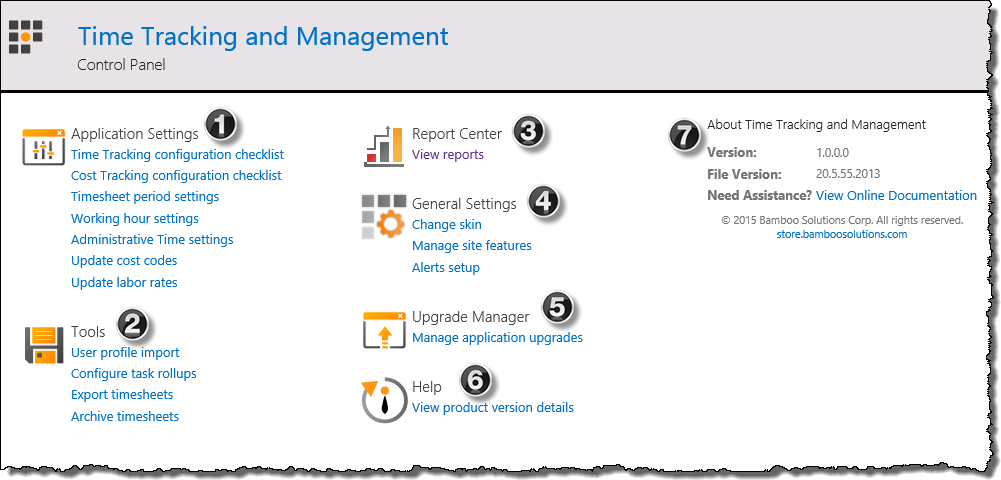
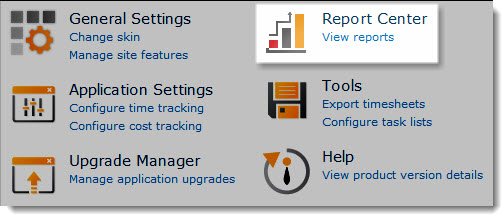
 Application Settings
 Tools
Tools  Report Center
 General Settings
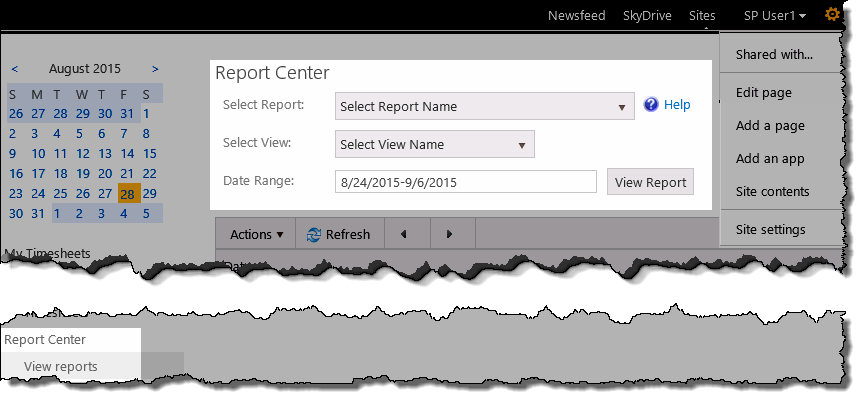
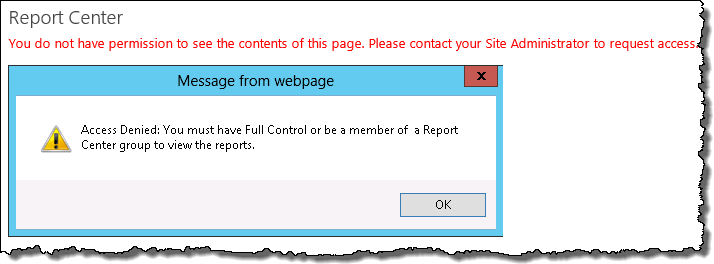
 NOTE: Only users with Full Control or Design permissisons on the site see this menu item
 Help
Help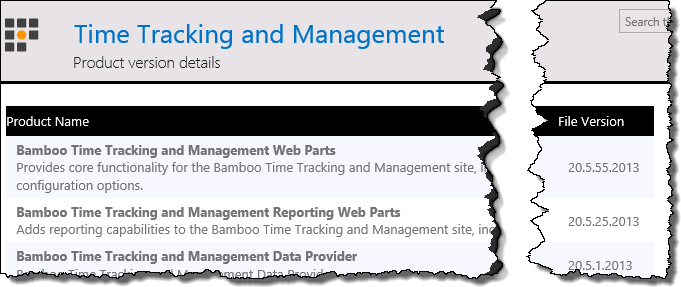
 About Time Tracking and Management
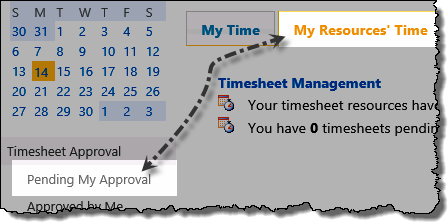
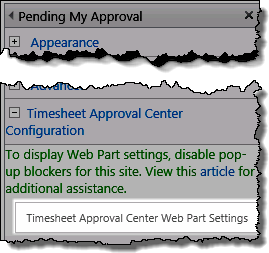 Edit the Web Part on page and click the Approval Center Web Part Settings button to access the pop-up configuration window
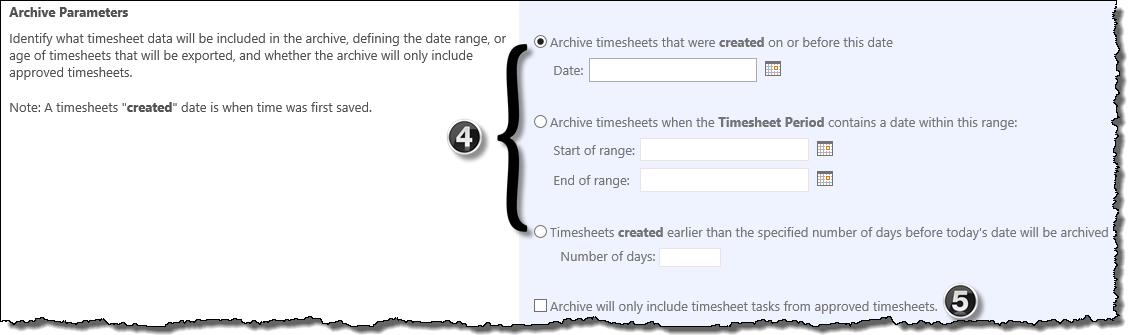
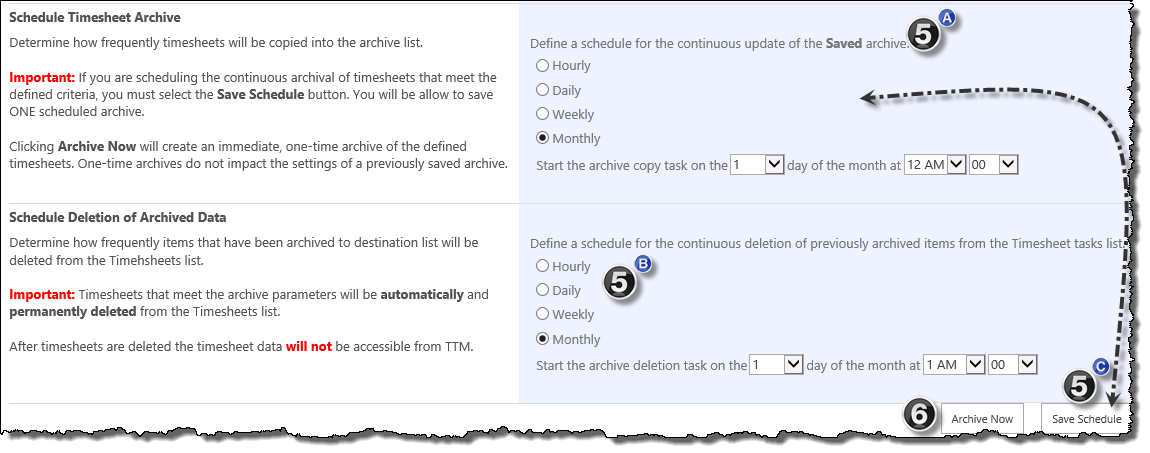
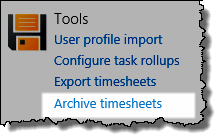 Click the Archive Timesheets link in the TTM Control Panel to access the export tool.
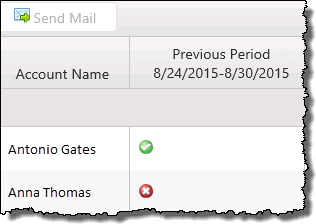
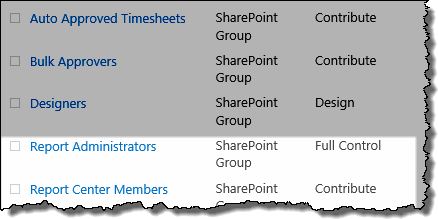
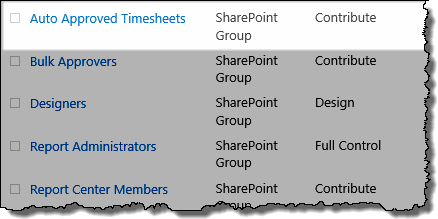 Add the appropriate users to the Auto Approved Timesheets group
 When members of this group submit a timesheet, the status of the timesheet will immediately be changed to Approved
 The timesheet will be available in the resource’s My Approved Timesheets display, and in the Timesheet Manager’s Approved by Me display.
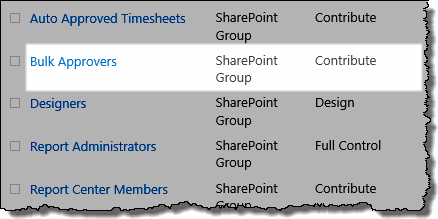 Add the appropriate users to the Bulk Approvers group
 Timesheet Managers who are added to this group will see a check box associated with the Period in the Pending My Approval display
 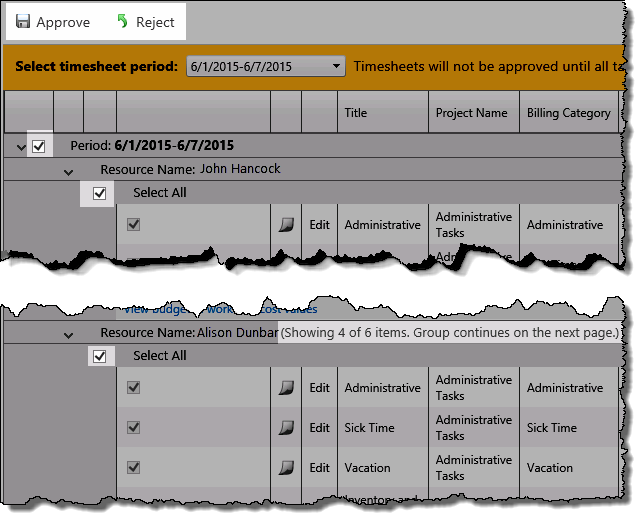 When this box is checked, all items associated displayed on the time will be checked for bulk approval or rejection.
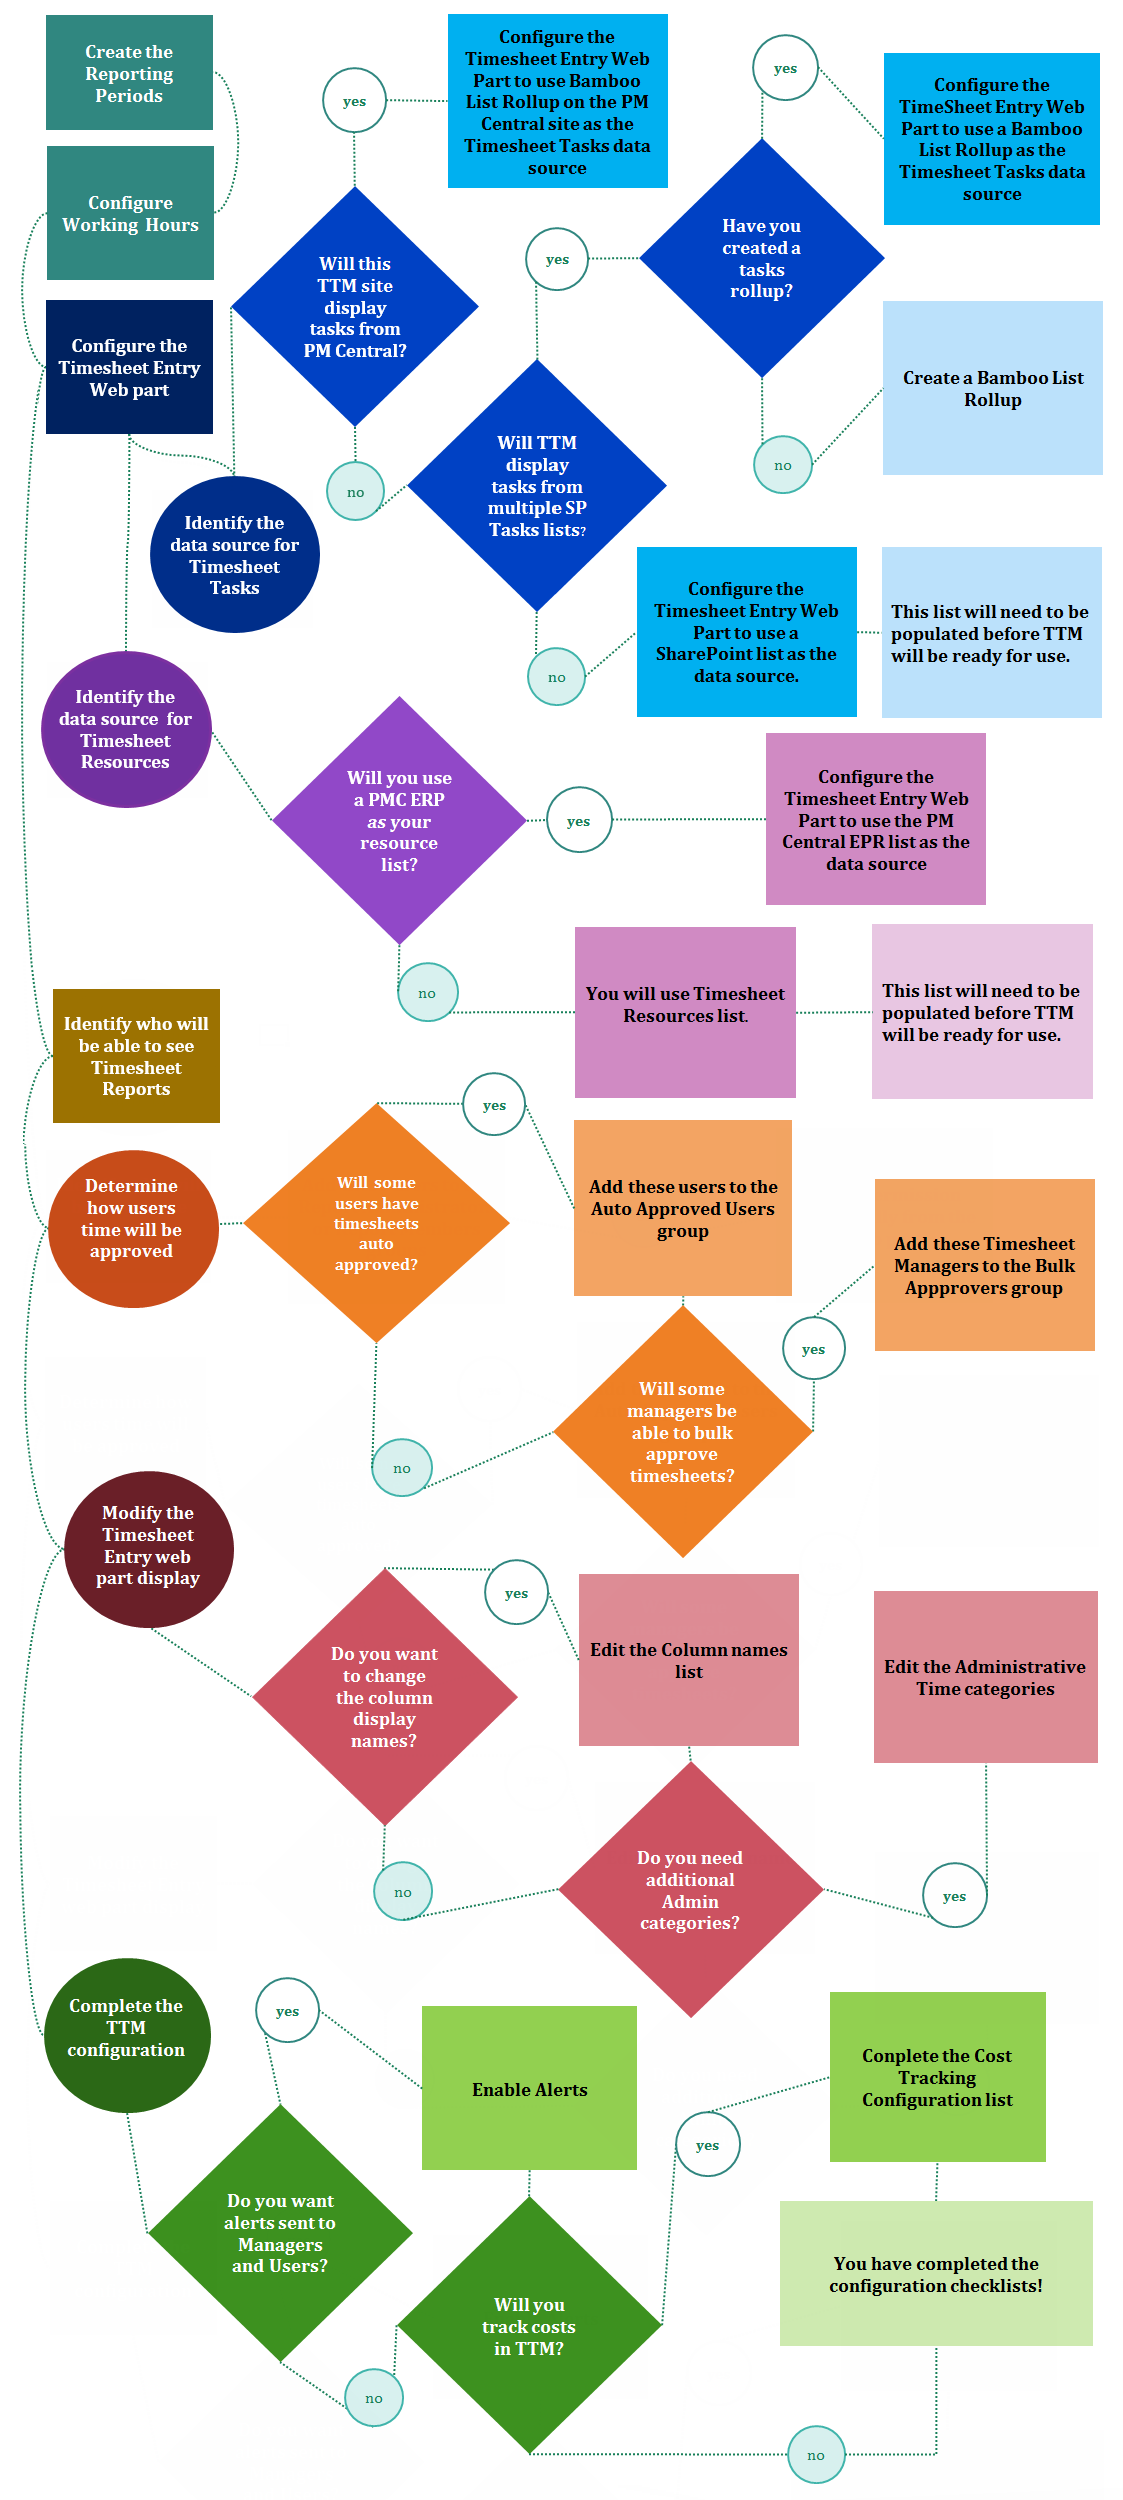

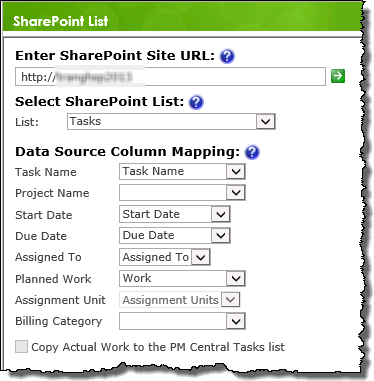
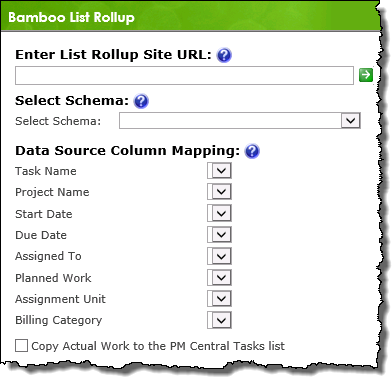
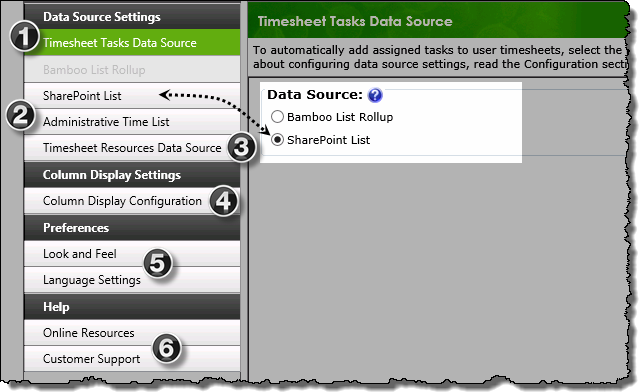
 You have now configured the Web Part to use a generic SharePoint task list as the tasks data-source.
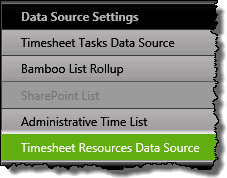
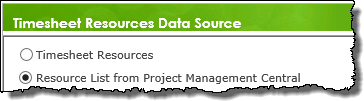
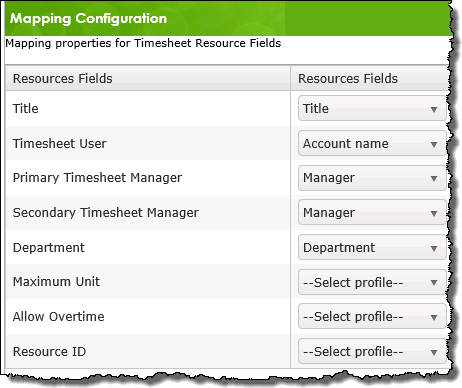
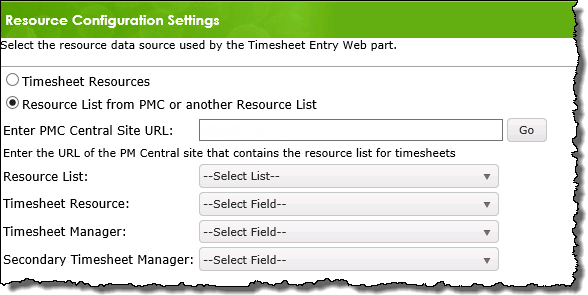
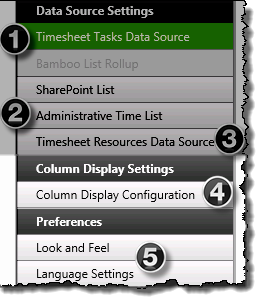 You have now configured resource data-source for the Timesheet Entry Web Part.
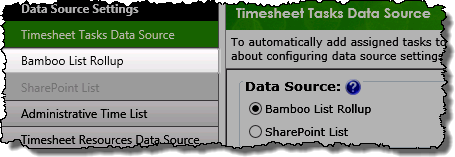
 The Timesheet Entry Web Part is configured by default to reference the local
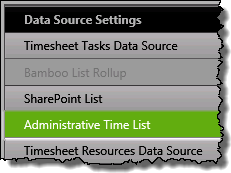

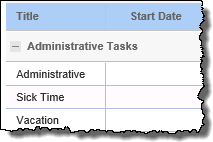
 You have now configured the Web Part to use a custom list as the Administrative Tasks data source.
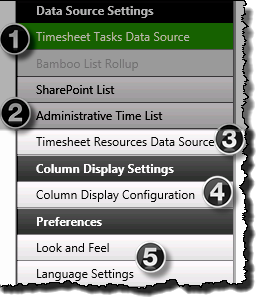
 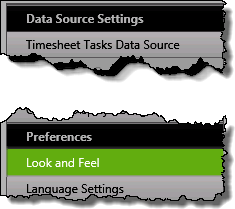 From the Timesheet Entry configuration screen, click the Look and Feel button under Preferences in the navigation tool pane.
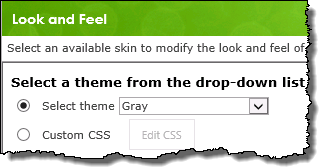
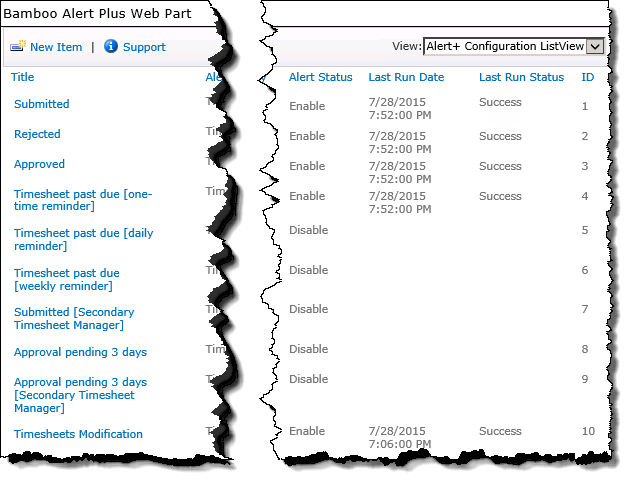
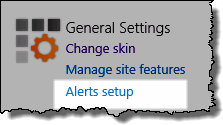 Access the alerts page from the Alerts Setup link in the
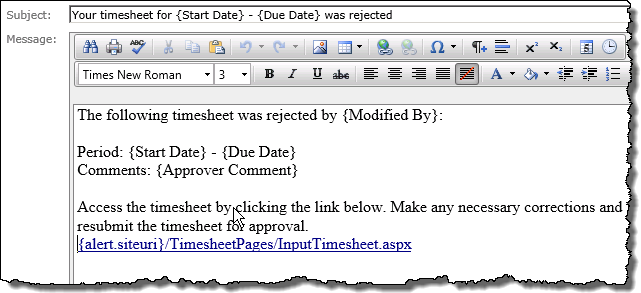
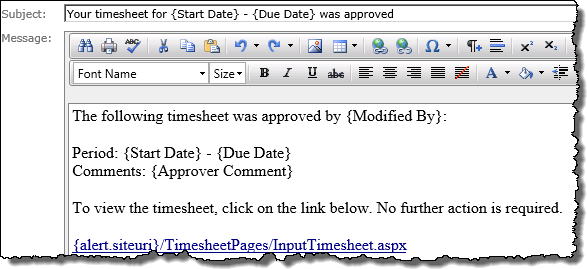
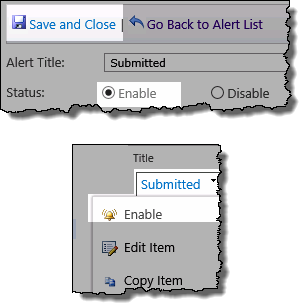 To enable an alert either:
 This one includes text used in application pages, custom site menu actions, navigation elements, and other runtime resources. Any changes you make will apply to new and existing product instances only.

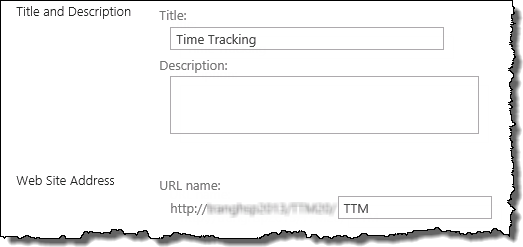
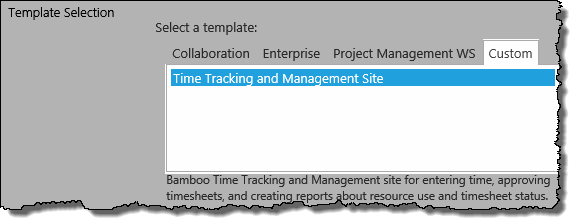
 The first step to using Time Tracking and Management (TTM) is to create a TTM site using the provided site template.

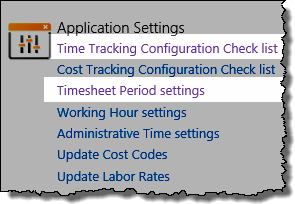 Access the Reporting Period Management page from the Timesheet Period settings link
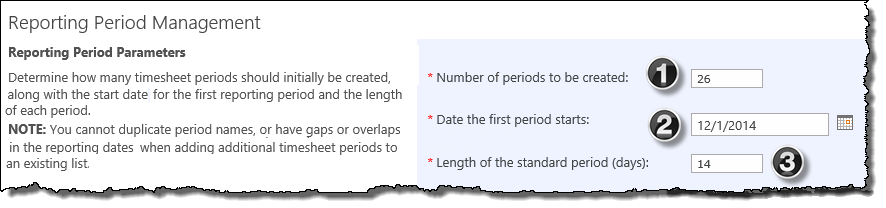
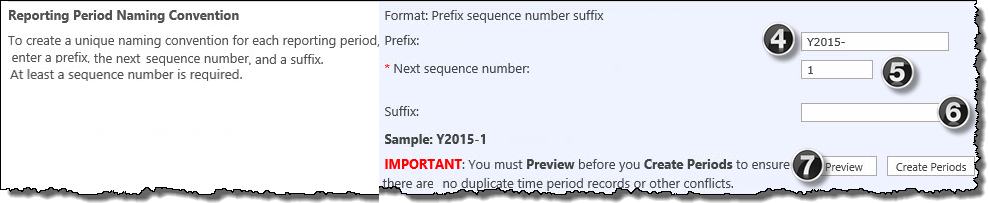
 button to preview the list of new reporting periods in the table on the Reporting Period Management page
 button to add the reporting periods to the Periods list. After they have been created, timesheets for those periods can be submitted.
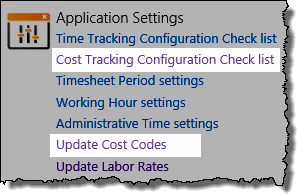 Access the Cost Codes list from the link in the Cost Tracking configuration checklist,
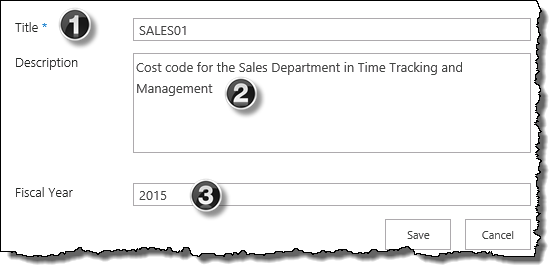


 Click the link in the
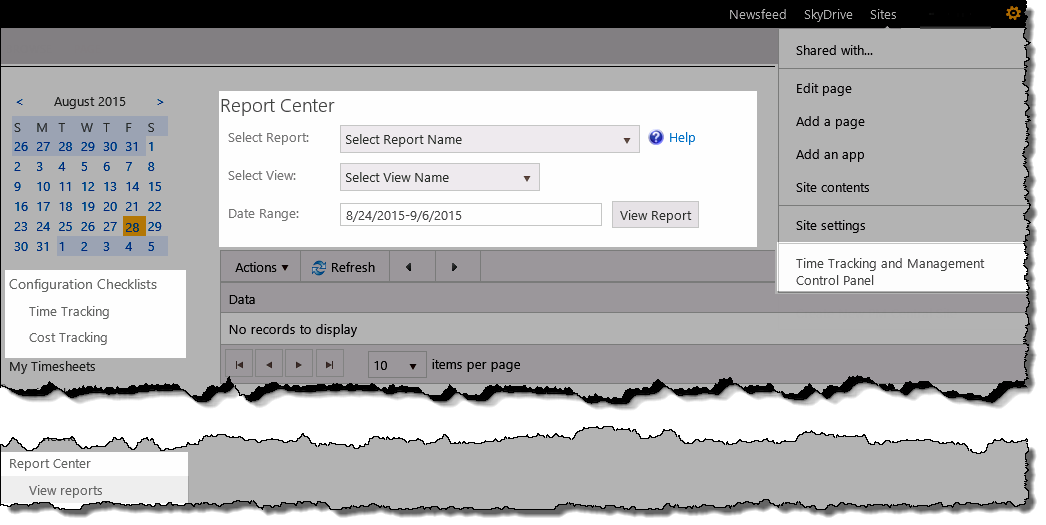
 Time Tracking and Management (TTM) can be configured to track the cost of work entered in timesheets based on labor rates that you provide. When costs are tracked, additional cost-related information is provided to timesheet managers when approving timesheets, and included in the reports accessed from the Report Center.

 Click Save.
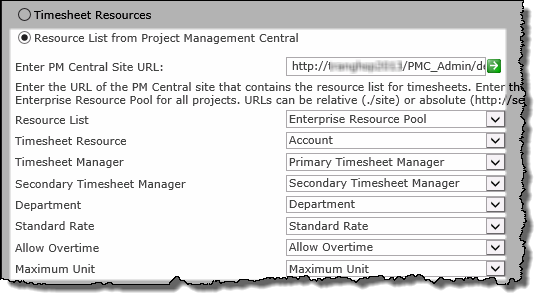
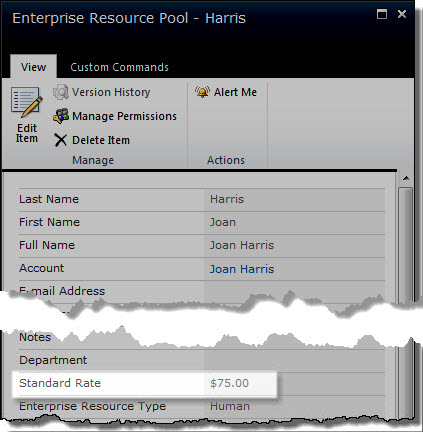 To use labor rates from PM Central, enter a Standard Rate for each resource in the PM Central Enterprise Resource Pool. This rate will be used for internal and billable cost calculations. The rate from the ERP will be used for all project tasks assigned to that resource in any project.
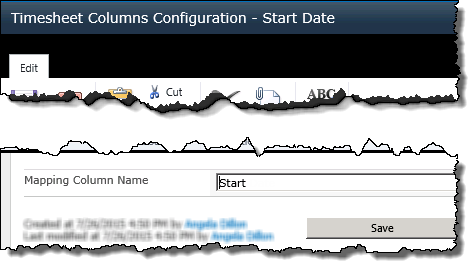
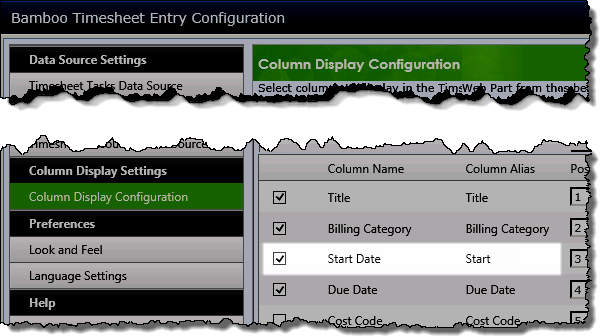
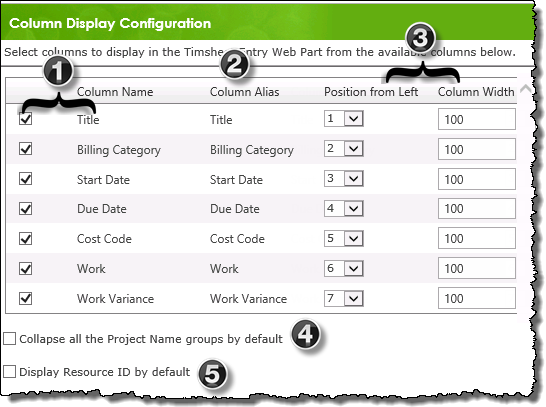
 When configuring the Timesheet Entry Web Part in Time Tracking and Management (TTM) you will be able to select the columns that will visible to users in their timesheets.
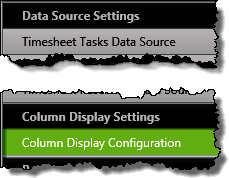
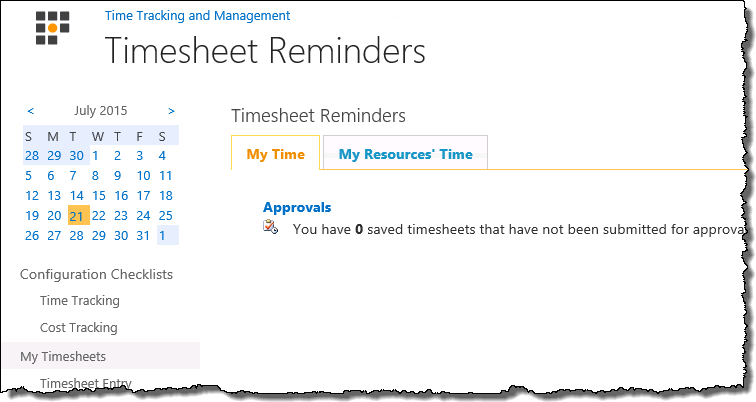
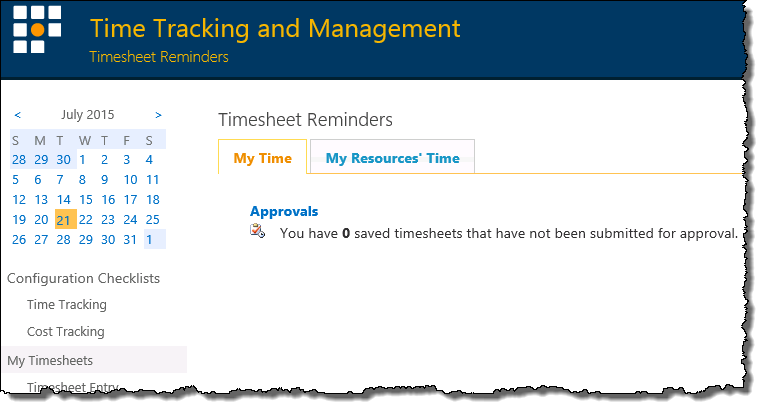
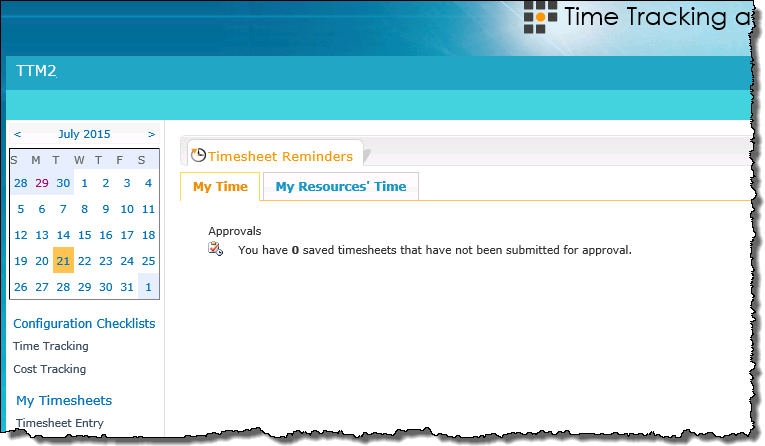
 Time Tracking and Management (TTM) includes a variety of skins that can be applied to change the color scheme and style of sites, providing an easy way to customize the appearance of TTM pages without manually modifying master pages and style sheets.
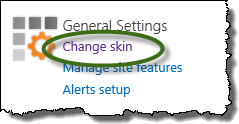 Click Change skin under the General Settings header
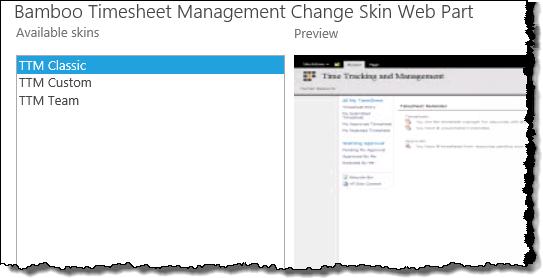 Preview the available skins , then click Apply.
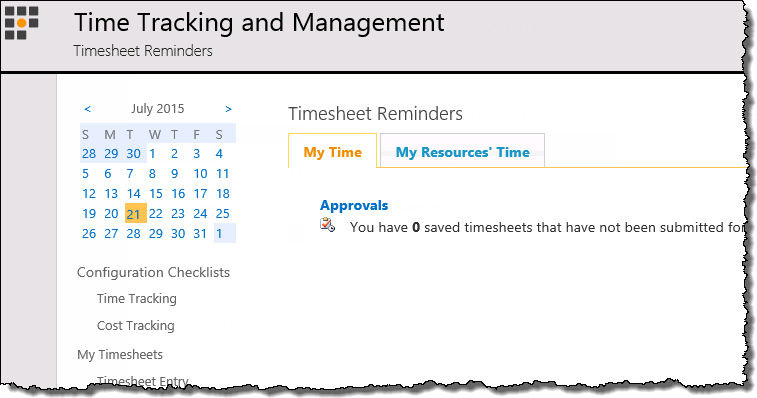
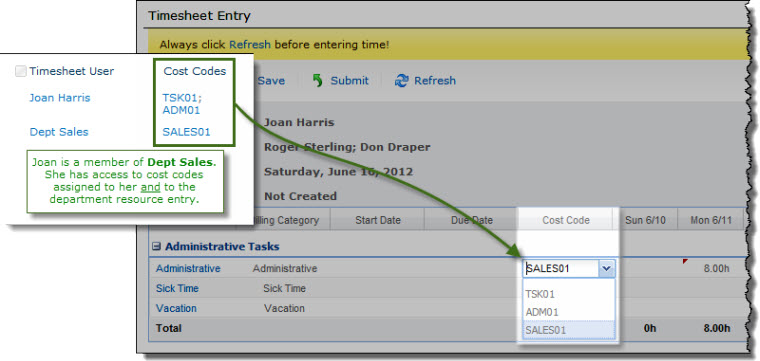
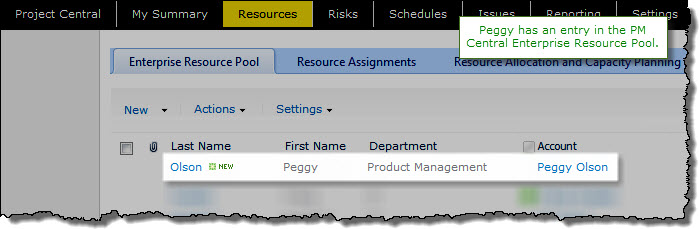 If you selected the PM Central Enterprise Resource Pool (ERP) as the data source for timesheet resources and you want to use cost codes, you must create entries in the Timesheet Resources list so you can assign cost codes to them.
 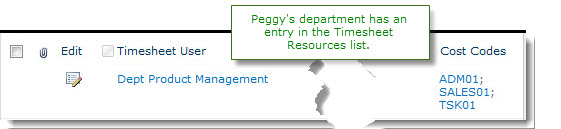 However, you do not need to create a duplicate entry for each ERP resource in the Timesheet Resources list. Instead, you can add one or more groups that contain the same resources accounts as members and assign cost codes to the group. Individual resources will inherit the cost code entries for each group of which they are a member.
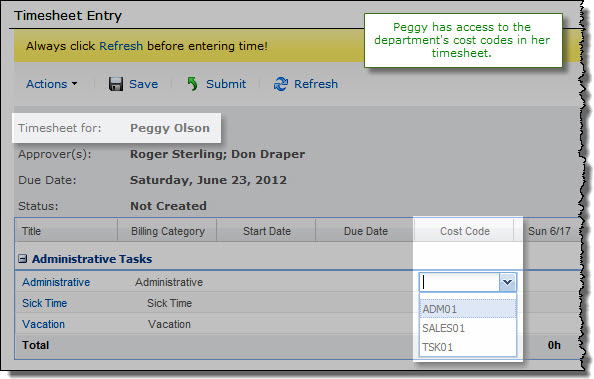 The screen shots here illustrate this example.
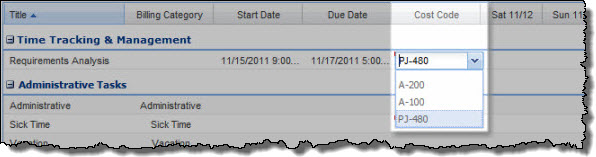
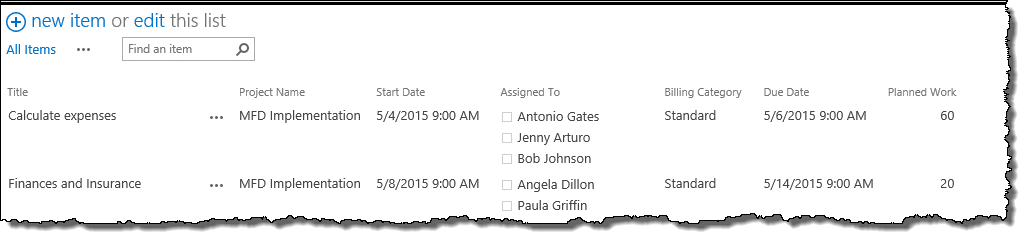
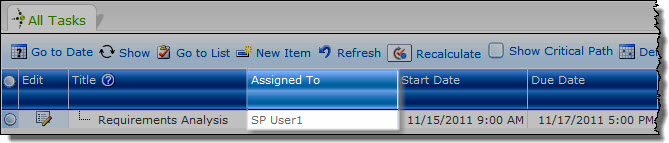 To add a task from a PM Central project, simply assign the resource to the task in the PM Central project Tasks list.
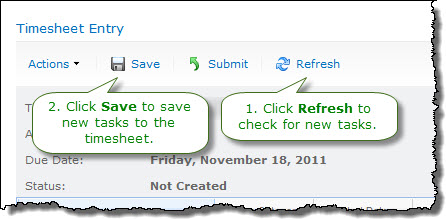 If you create a new task and don’t see the Project Name in the timesheet, wait 59 minutes and then click Refresh and Save to update the task information.