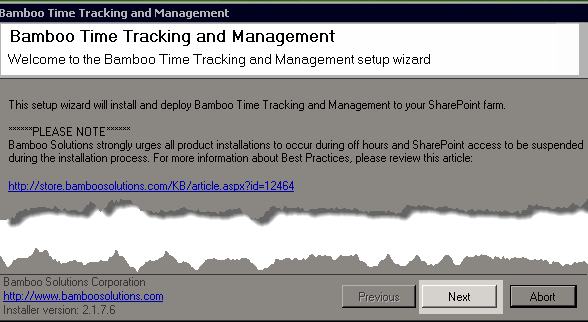
| Overview of Calendar Plus Configuration settings |
|---|
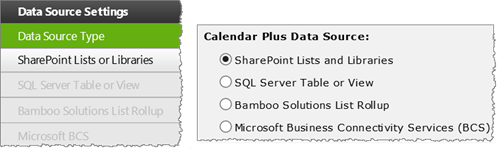
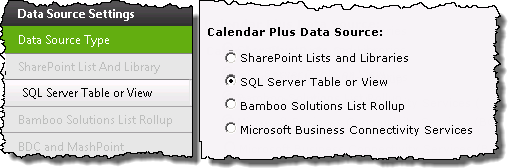
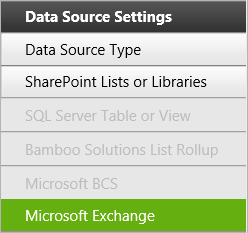
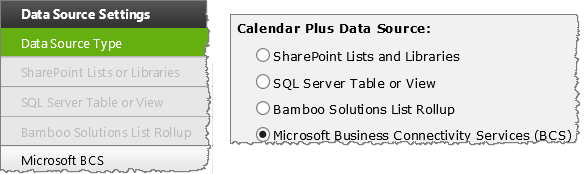
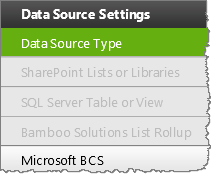
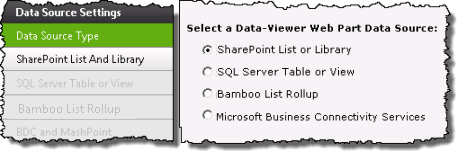
SharePoint Lists and Libraries are the default Data Source Type for Calendar Plus.
When working with SharePoint Lists and Libraries keep in mind:
-
Each SharePoint list or library referenced as a data source must contain at least one SharePoint Date and Time column.
-
Up to 10 SharePoint Lists and Libraries can be displayed in a single calendar instance.
NOTE: If you want to use more than 10 lists or libraries, Bamboo recommends using Bamboo List Rollup as the data source. This allows you to connect to rollups of multiple lists or libraries.
The following steps require you to have accessed the Calendar Plus Settings screens by clicking the Calendar Plus Web Part Settings button in the web parts configuration tool pane.
| Action | Result | |
|---|---|---|
| 1. |
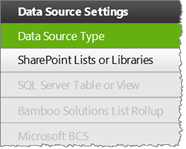
Click the SharePoint List and Library button under Data Source Settings in the navigation tool pane. You will only be able to select this button if SharePoint Lists and Libraries is selected as the Data Source Type |
|
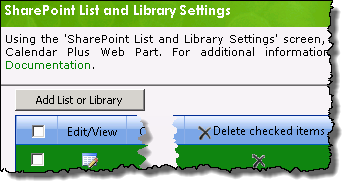
| 2. | Click the Add List or Library button |
The Add List or Library to Calendar pop up window will appear that contains the settings to configure the list or library. It divided into two sections:
|
| 3. |
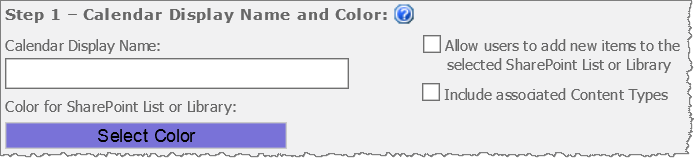
Complete the General Descriptions section to define how the list or library will be identified in Calendar Plus
|
The Calendar Name and color entered will be used in the calendar display to identify the source list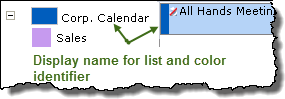 If Allow users to add new items… is checked, users can hover over the New Item button on the toolbar see the lists to which they can add a New Item 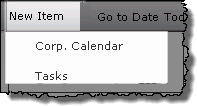 |
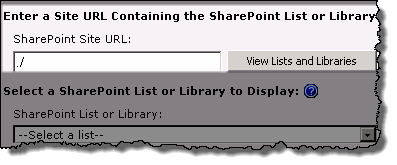
| 4. |
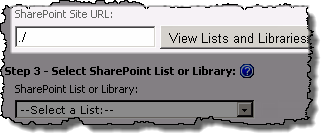
Enter the URL to the site that contains the list or library to be displayed in Calendar Plus, then click the View lists and Libraries button. Both absolute paths (http:// server name/site ) or relative paths(./Site/) can be used for the site URL. Bamboo recommends using relative paths if:
|
The available lists and libraries on that site will be listed in SharePoint List or Library drop-down menu. |
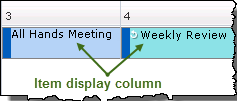
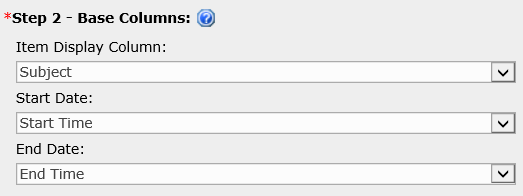
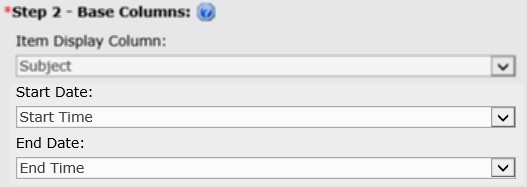
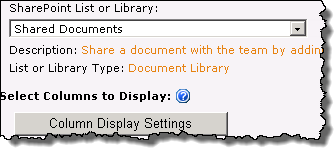
| 5. | Select the desired list or library, then select the column that contains the values you want to display in the item cell from the Item Display Column drop down.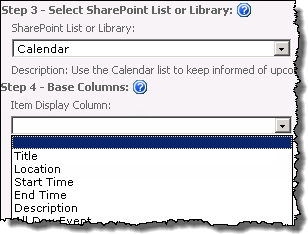 |
|
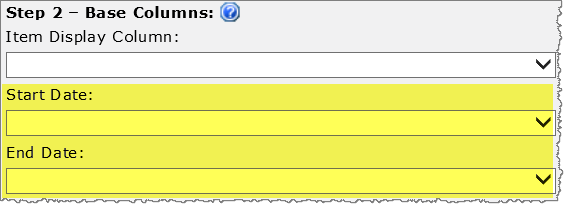
| 6. | Select the Date and Time column(s) in the list or library that will be displayed in the calendar. 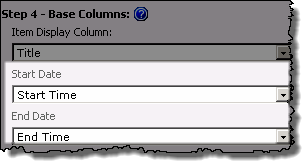 |
Whether you see Start Date and End Date fields or a Single Date field will depend on the selection made on the General Settings screen to Base the Calendar on a Single Date or Interval.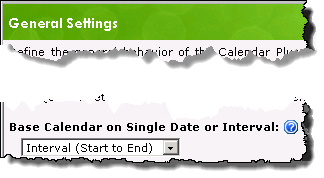 |
| 7. |
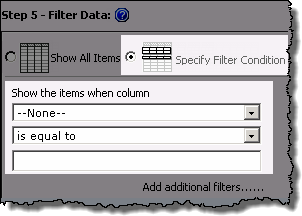
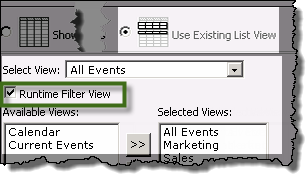
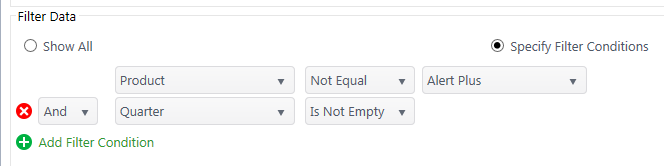
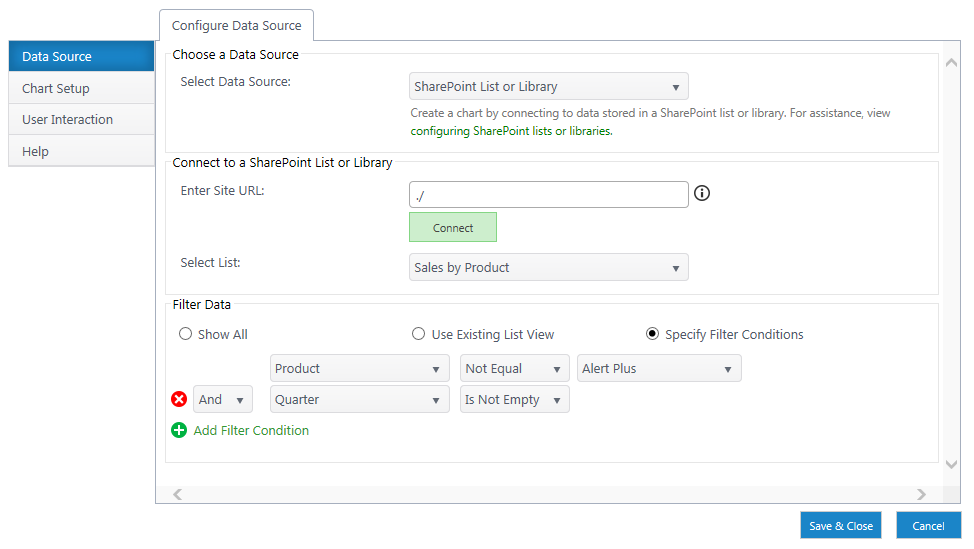
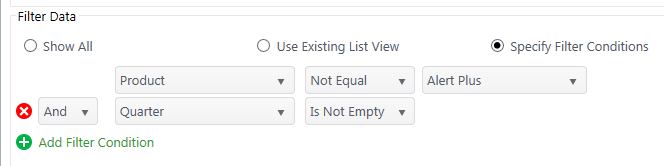
Apply a filter for the list or library by selecting from the following options:
|
Keep in mind: 2. Use the Add Filters link if you want to add another specified filter condition using AND/OR Boolean operators. 3. Data can be filtered dynamically at run time based on views using the Runtime Filter View. Users select the view they want to filter by from a drop down menu in the toolbar 4. Web part connections can be used to filter the contents of the calendar display but are not configured in the Calendar Plus web part settings. When using a SharePoint List or Library as the data source, the web part supports web part connections for the Display, Start Date and End Date columns. |
| 8. |
Stay in the configuration screen and complete the Optional Steps ORClick Save and Close |
Clicking Save and Close to return you to the SharePoint List and Libraries Settings screen, where you will see the newly added List or Library in the grid display. 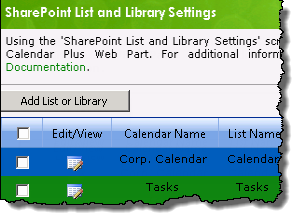 |
| 9. |
Use the left navigation pane and configure View Settings for the Calendar Plus web part ORClick Save and Close a second time |
Clicking Save and Close will exit the Calendar Plus Web Part settings screen |
| Overview of Calendar Plus Configuration settings |
|---|


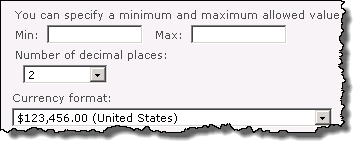
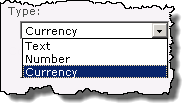 The screen will refresh to show additional fields if Number or Currency are selected.
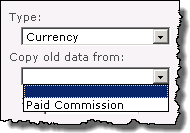


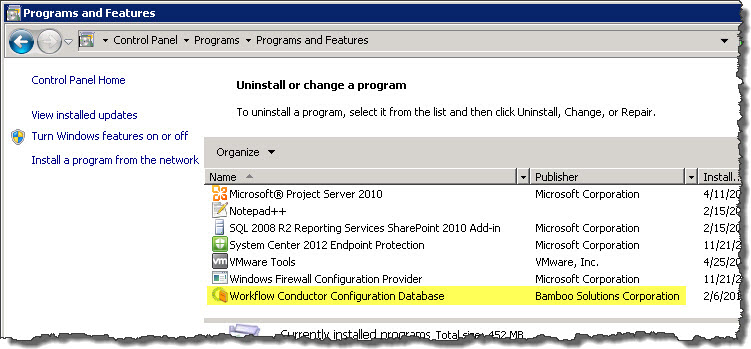 Right click the program called Workflow Conductor Configuration Database and select Uninstall from the menu that appears. Wait for the program to uninstall before proceeding.
 Now, you need to install the new version of the program you just uninstalled. Highlight the Configuration Database component in the Components section of the Workflow Conductor Setup program. When a component is selected, information specific to it is displayed on the right side of the interface. Verify the Location of Install Files and Required Installation Permissions displayed there. See
 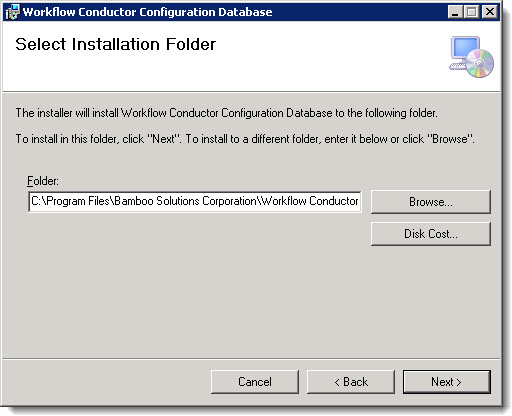 Select the installation folder. This is the location of the program that will be used to upgrade your existing Configuration Database.
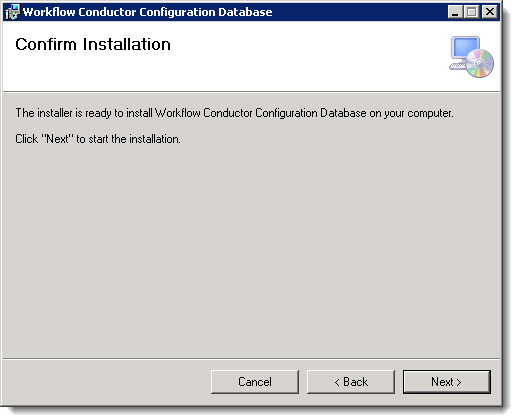 On the Confirm Installation page, click Next.
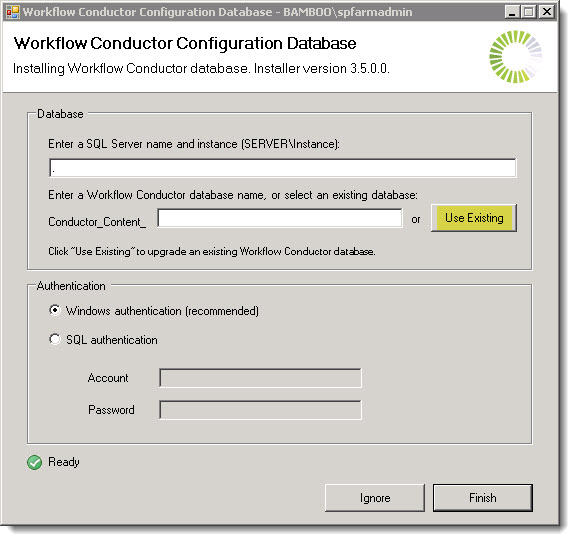 By default, this page will display a “.” in the SQL Server name and instance box. Unless your database is on the SharePoint WFE server where you are running the install, replace this with the name of the SQL server.
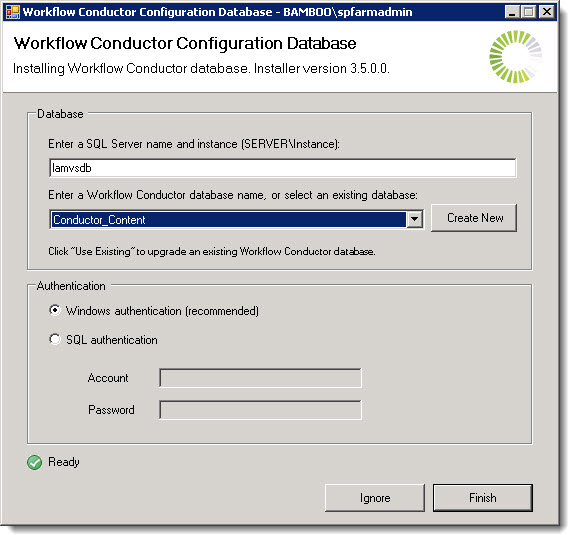 When you choose Use Existing, a drop down selection box displaying all the existing databases that exist in the SQL Server instance you entered will be displayed. Select your existing Workflow Conductor Configuration Database from the list.
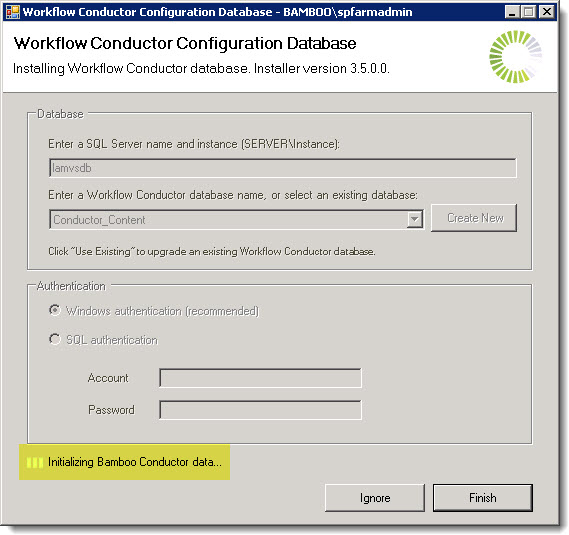 A message at the bottom of the dialog will indicate that the upgrade is in process.
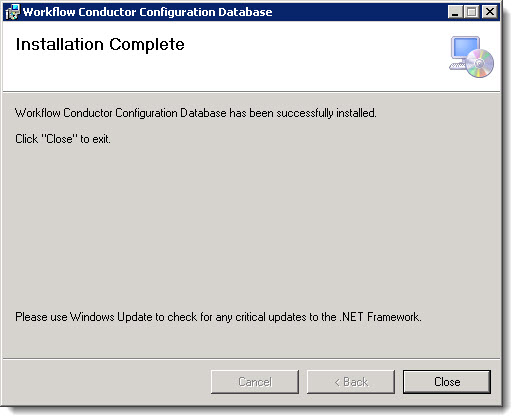 When the process is complete, the Installation Complete page will be displayed. Click Close to exit the program.
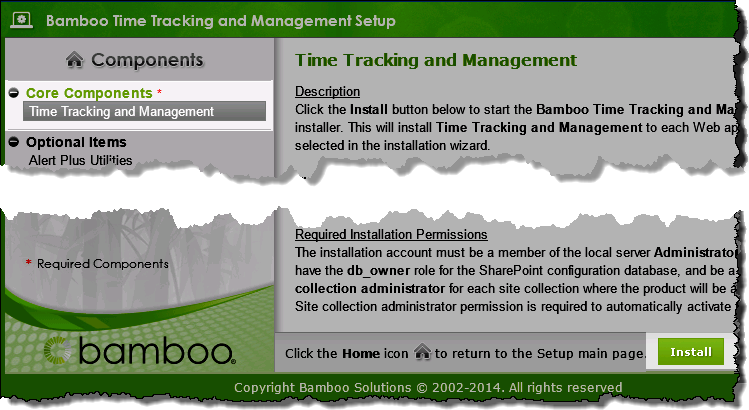
 Select the first product component in the Components section in the Setup program. When a component is selected, information specific to it is displayed on the right side of the interface. Verify the
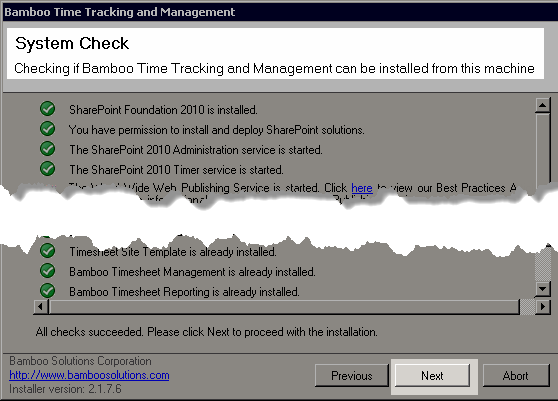
 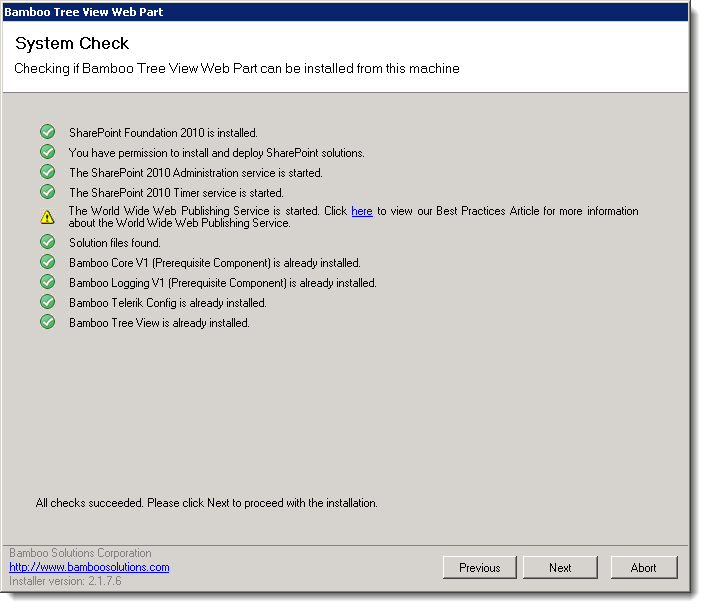 Click Next to begin the upgrade. Verify that the system checks pass successfully and click Next. If the system checks do not pass, you will not be able to proceed.
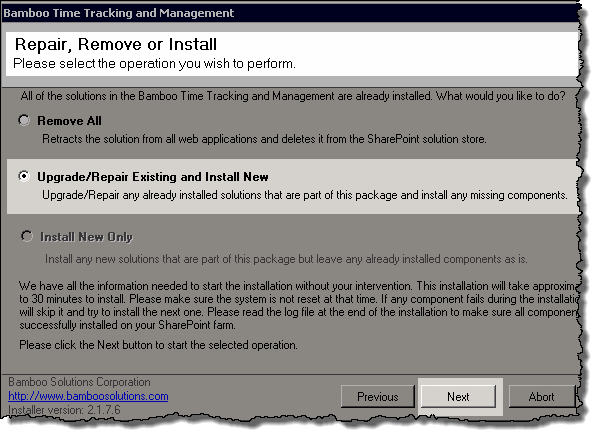
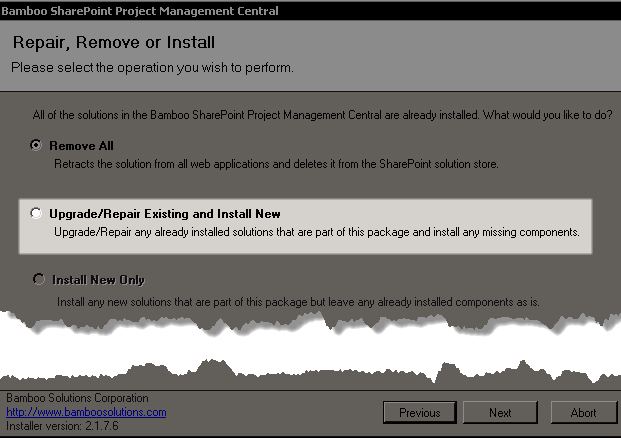
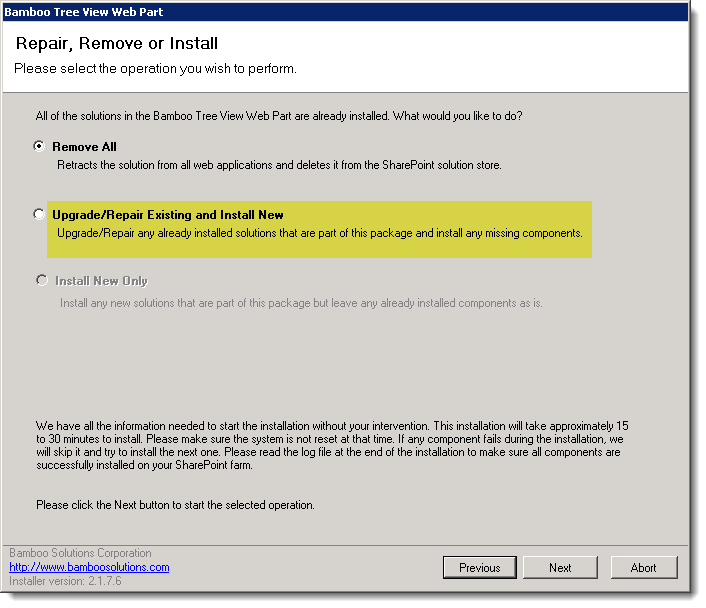 In the Repair, Remove or Install screen, select the Upgrade/Repair Existing and Install New option and click Next.
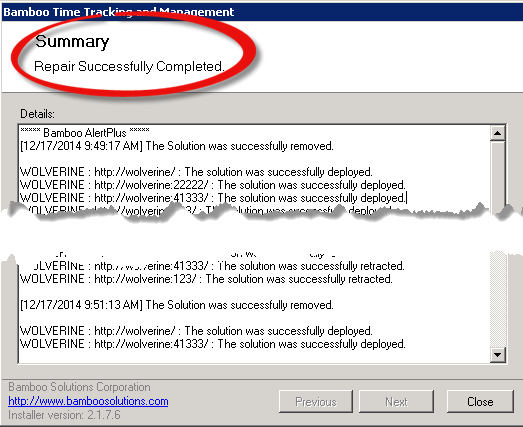
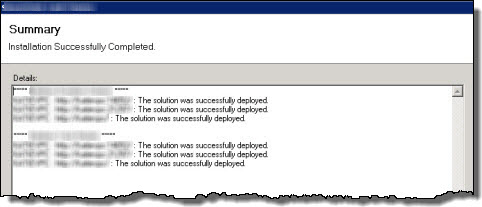 When the upgrade is complete, click Next to review the Summary screen and confirm that the product upgrade was successful. You may need to scroll up to review the entire summary. When satisfied, click Close.
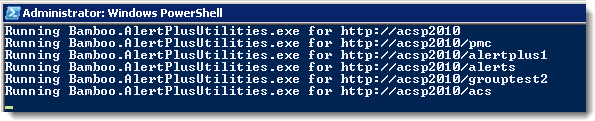
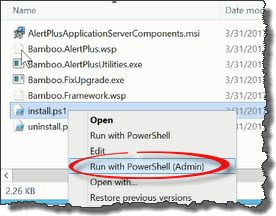 Run the Install.ps1 from a WFE server in PowerShell as an admin.
 The script will look for WSPs in the install folder and list those found.
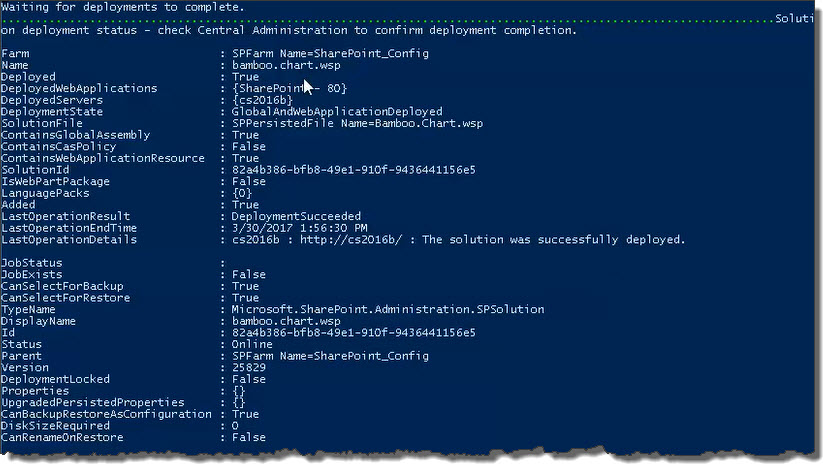 When the deployment completes, deployment status information will be displayed for each solution.
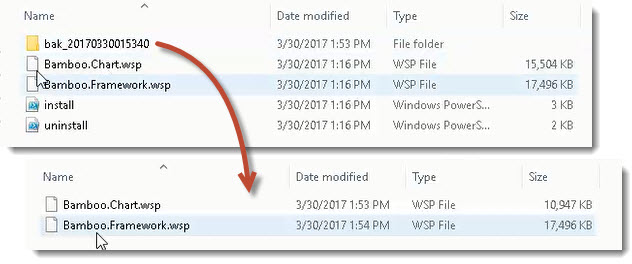
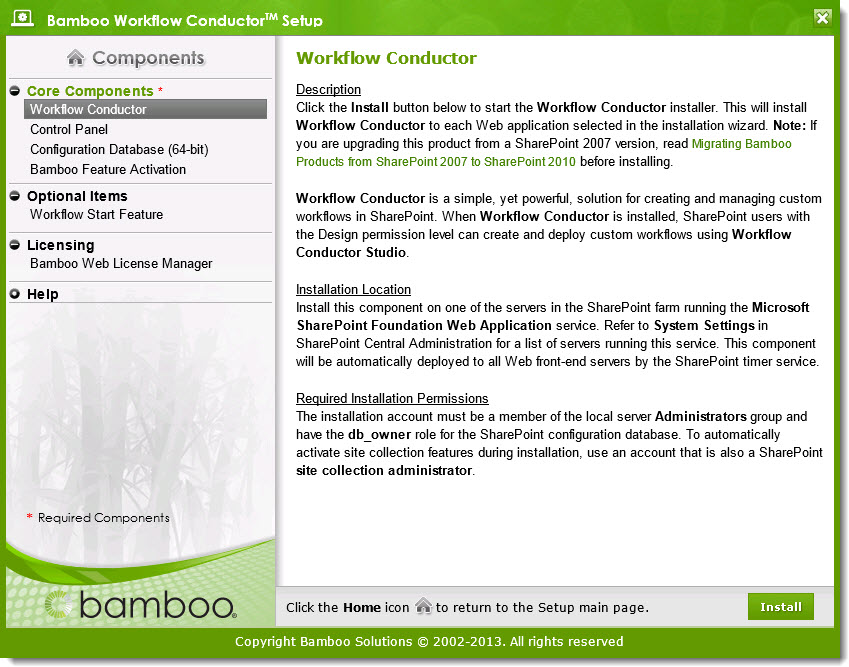 Upgrade the Workflow Conductor Core Component called Workflow Conductor. Please see
 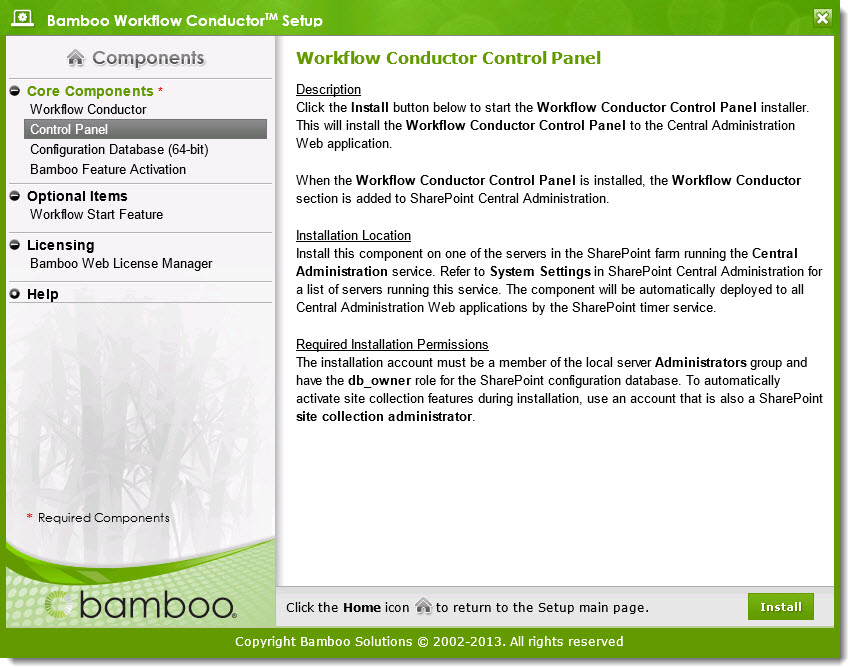 Upgrade the Workflow Conductor Core Component called Control Panel. Please see
 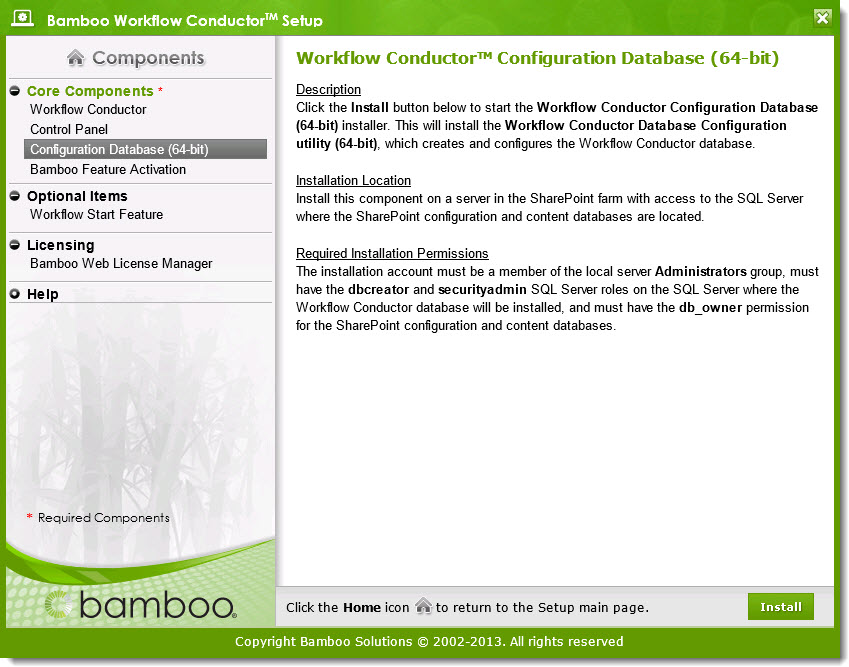 Upgrade the Workflow Conductor Core Component called Configuration Database. Please see
 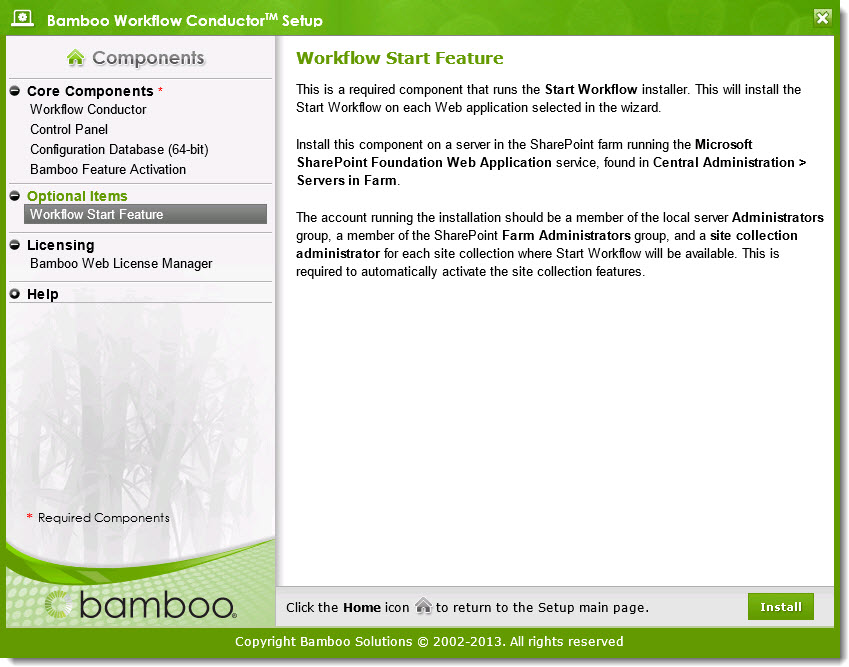 (OPTIONAL) Upgrade the Workflow Start Feature.
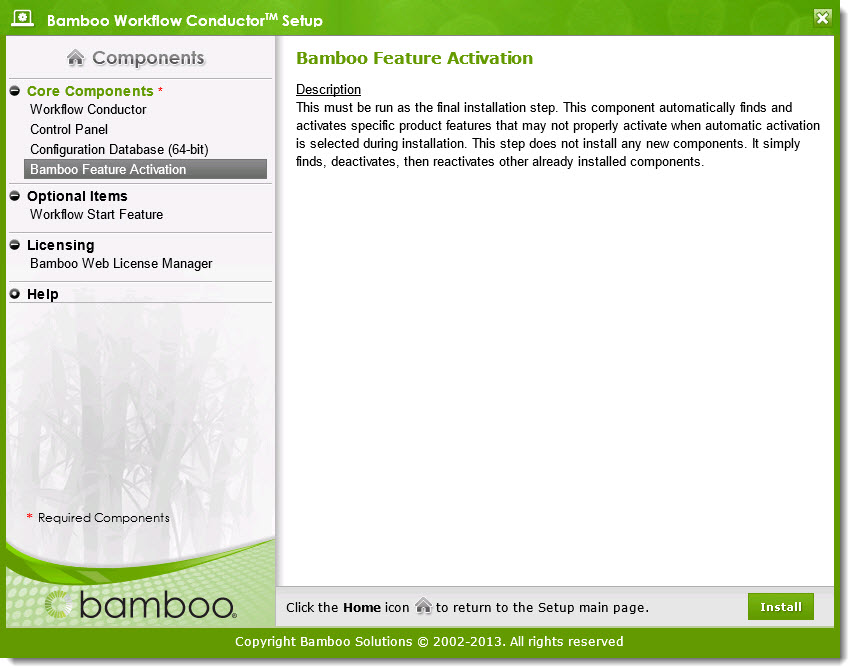 Run the Bamboo Feature Activation Component. Running this component doesn’t upgrade any software. Instead, it finds, deactivates, and then re-activates Workflow Conductor features previously installed/upgraded. See
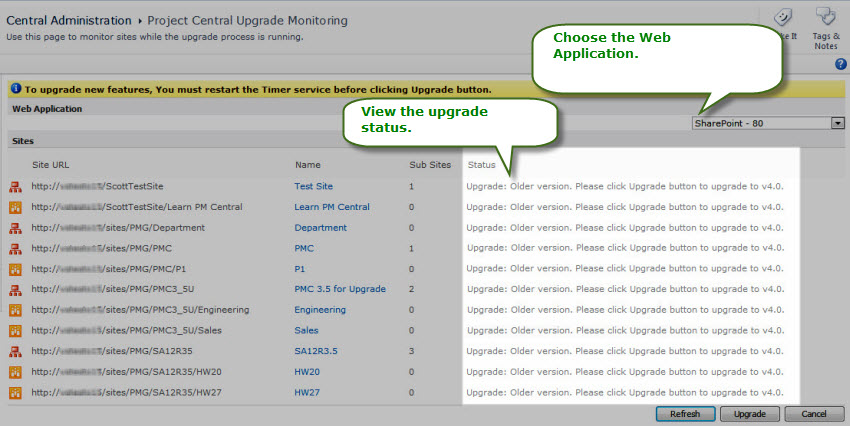
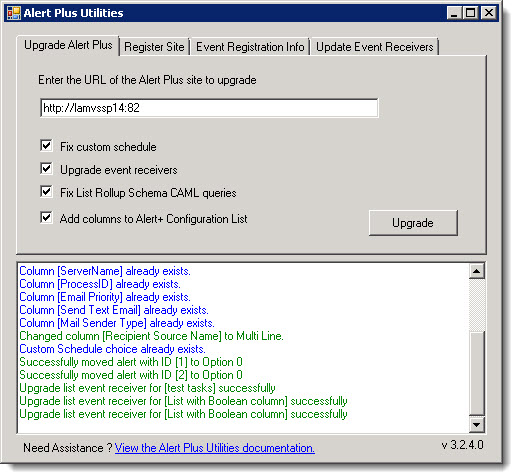
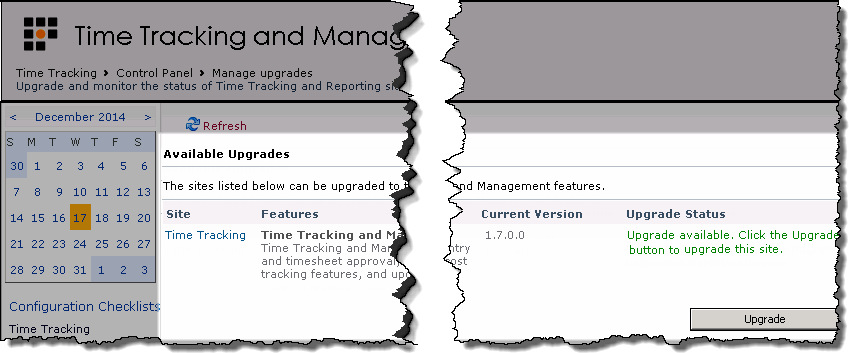
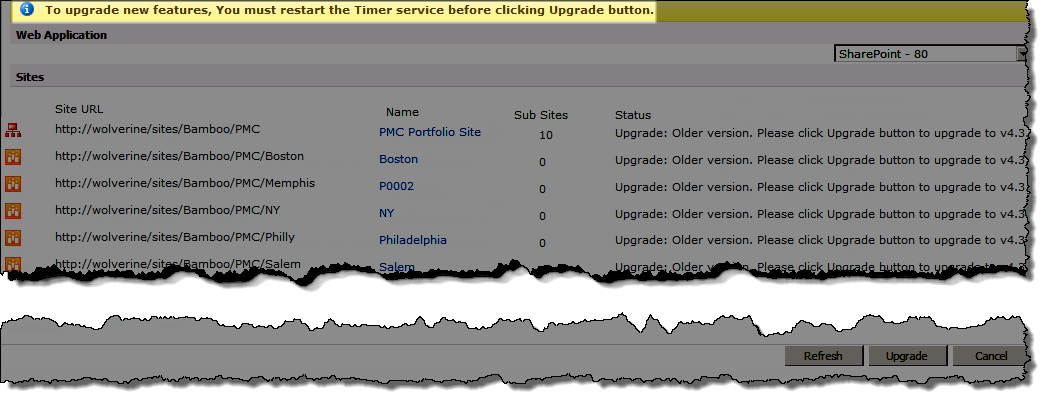
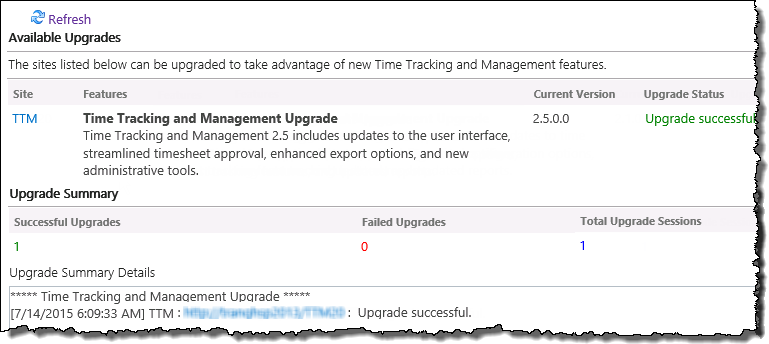
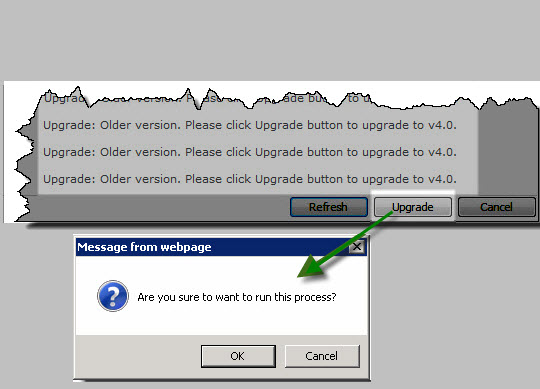 Click the Upgrade button to start the upgrade on all sites in the selected Web application.


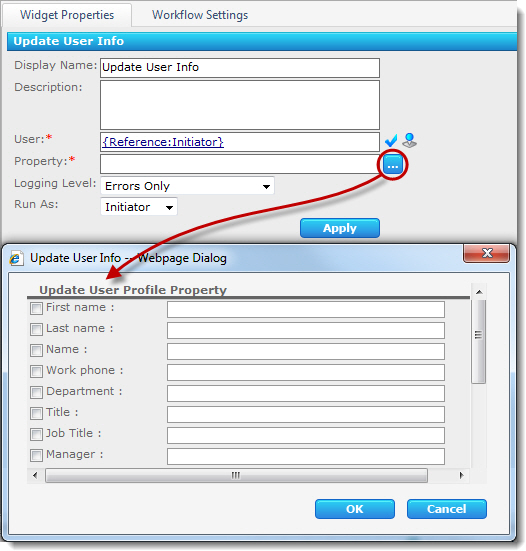 The Update User Info widget updates one or more user profile properties for a SharePoint user in the site collection. The widget has the following features and options:
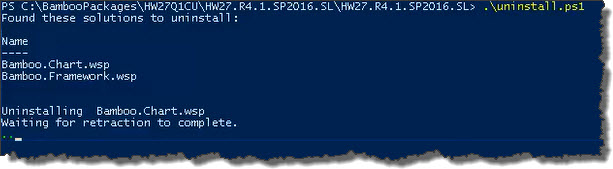 The script will look for WSPs in the install folder and list those found. It will uninstall them in alpha order.
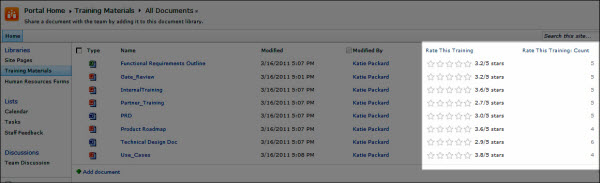
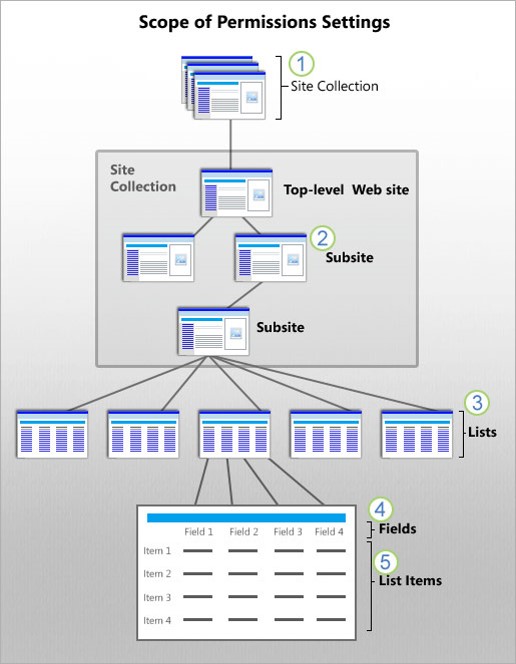 Understanding permission in SharePoint is typically the first thing users are confronted with when first attempting to add users or web parts to a site. Below we break down the permission structure to simplify it somewhat for you between “who,” “what” and “where;” by dividing the concepts between these areas, you can begin to piece together the components needed for a robust permission structure.

 From the TTM site’s Site Actions menu, select Time Tracking and Management Control Panel.
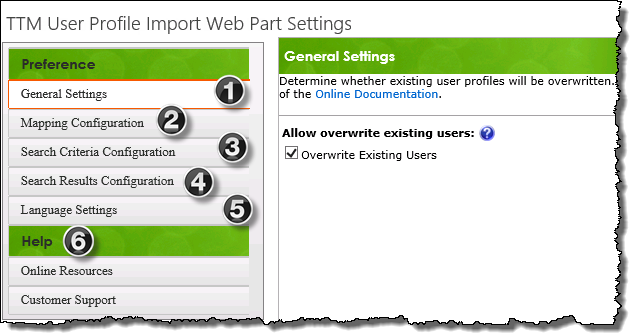
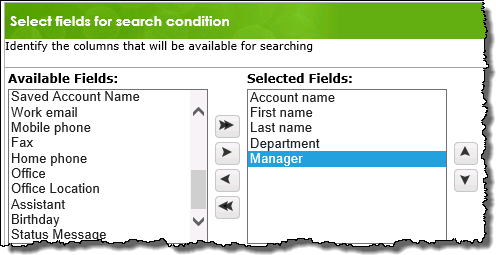 Search Criteria Configuration
 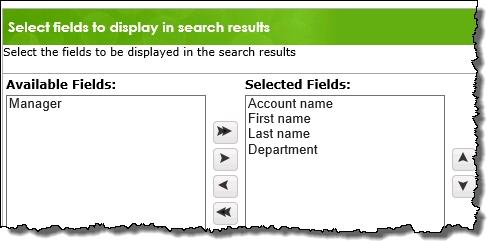 Search Results Configuration
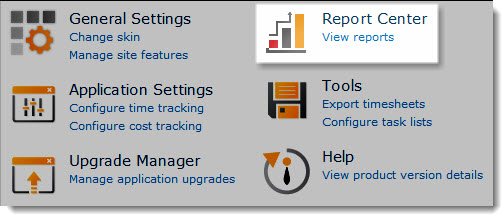
 Access the Upgrade Manager using links found in:
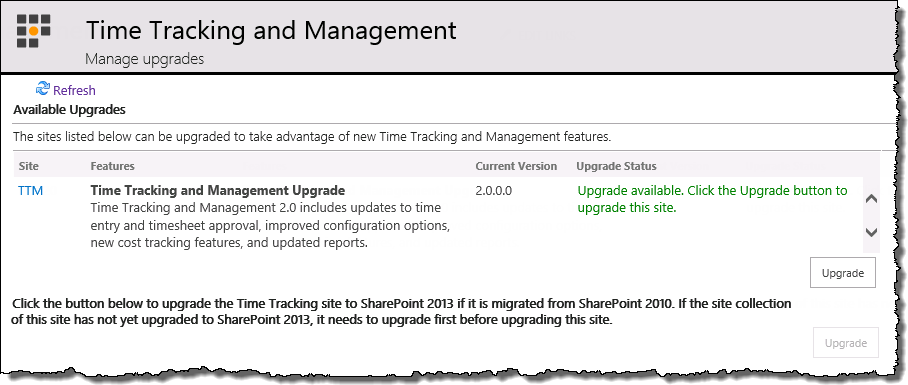


 Completed:
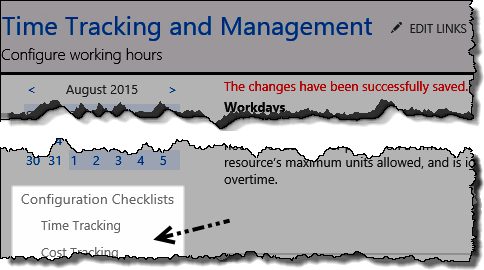 Checklist links:
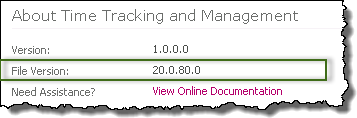

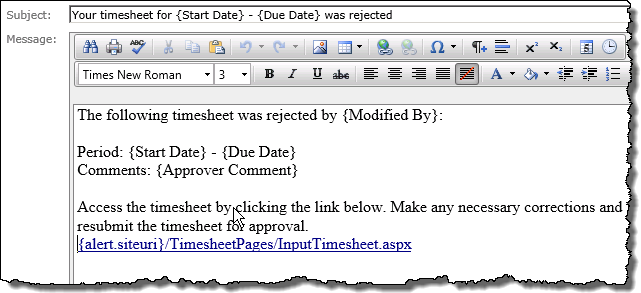
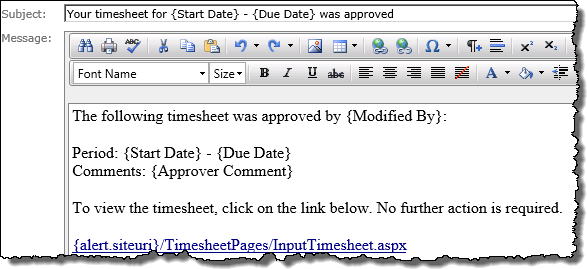
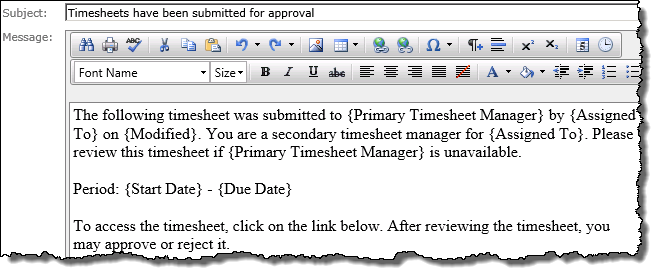
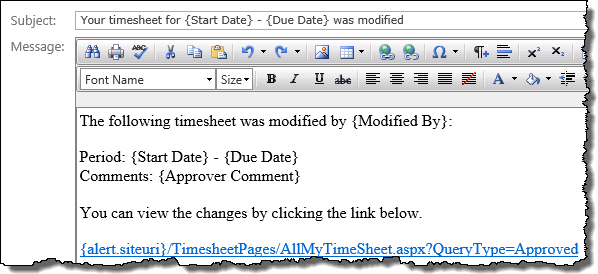
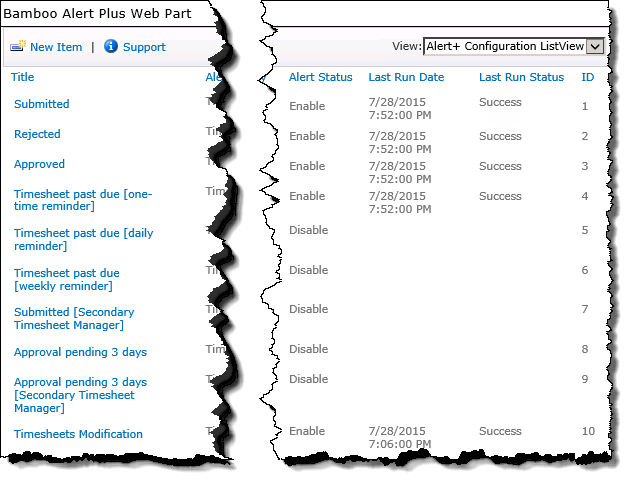 When working with TTM Alerts, keep in mind:
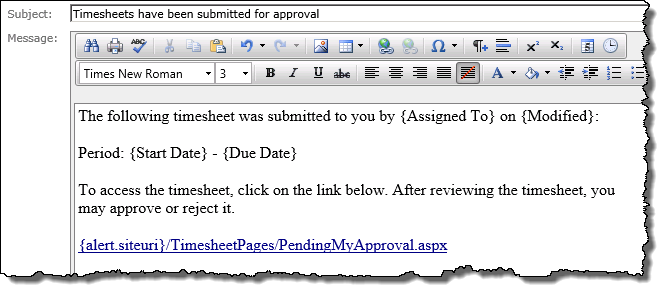

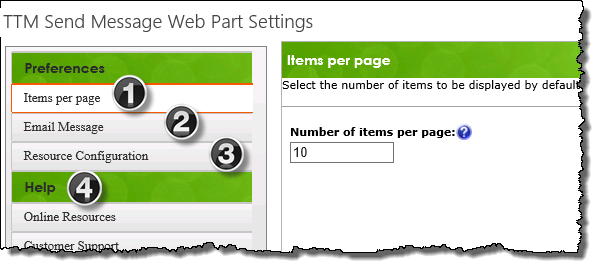
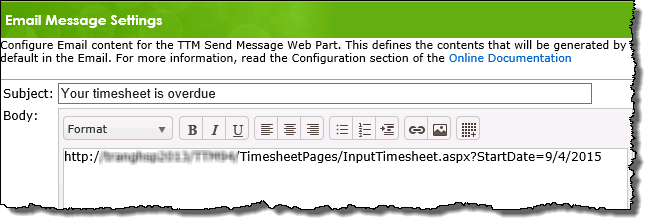
 When configuring the TTM Send Message Web Part keep in mind:
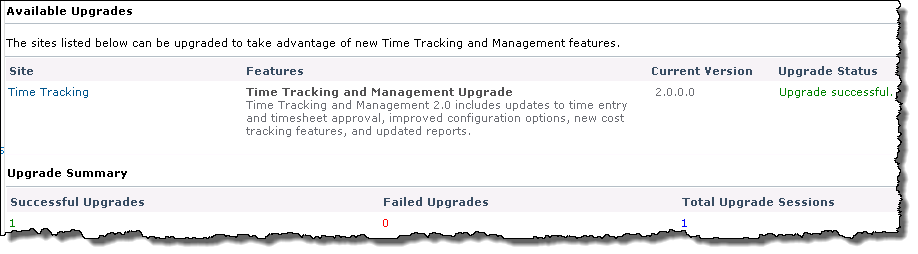
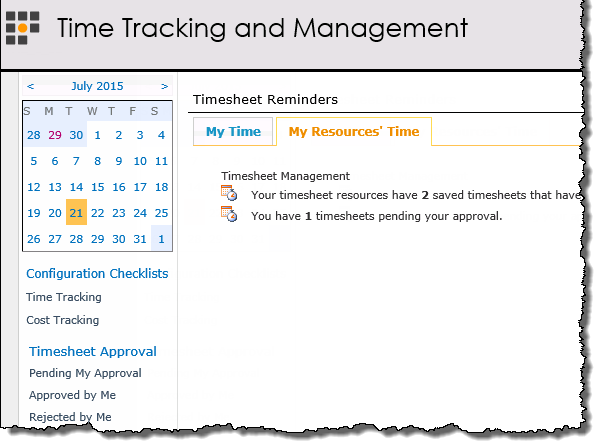
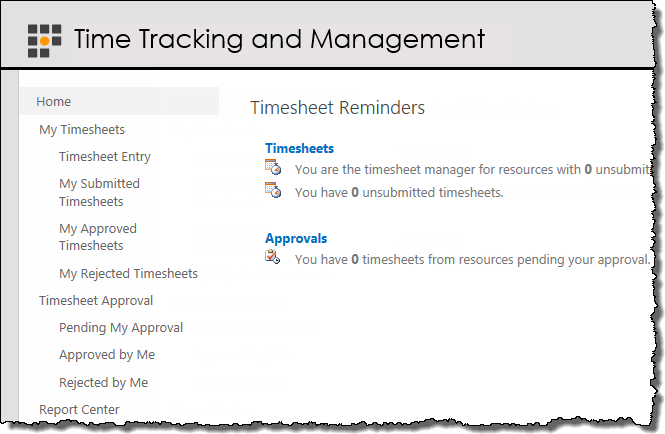
 The Time Tracking and Management Report Center includes several preconfigured reports for resource use and timesheet status.
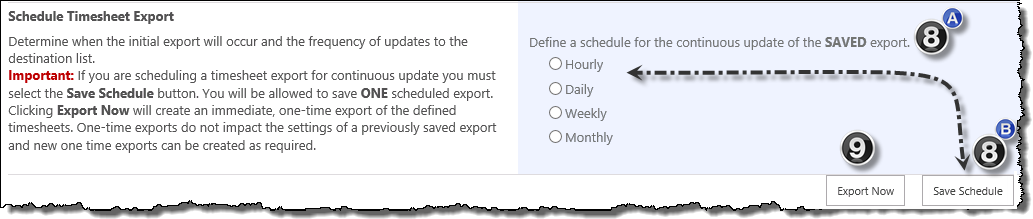
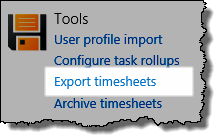 Click the Export Timesheets link in the TTM Control Panel to access the export tool.
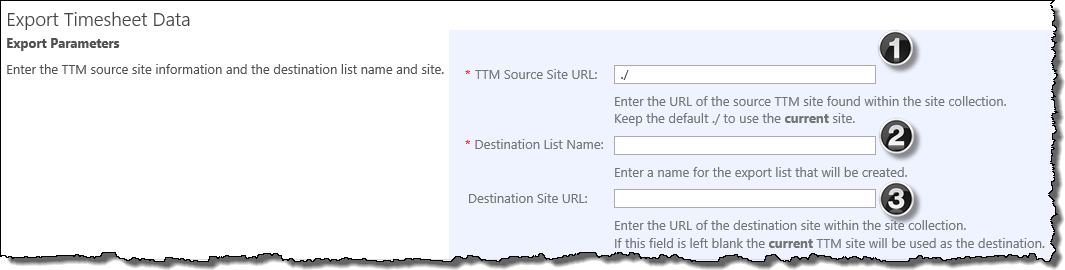
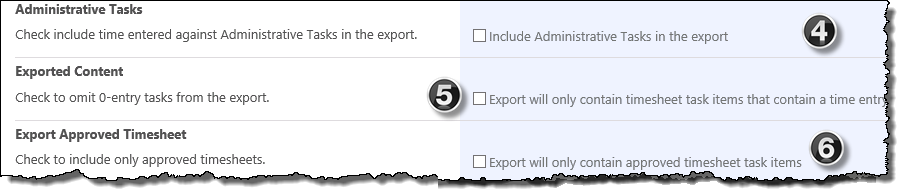
 Administrative Tasks
 When you enable cost tracking, several cost calculations will be performed for each timesheet task.
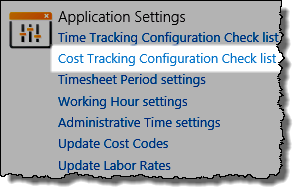 Access the Cost Tracking configuration checklist using links found in:
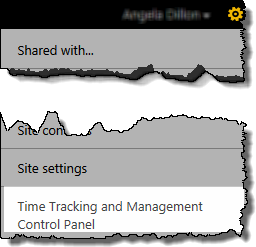
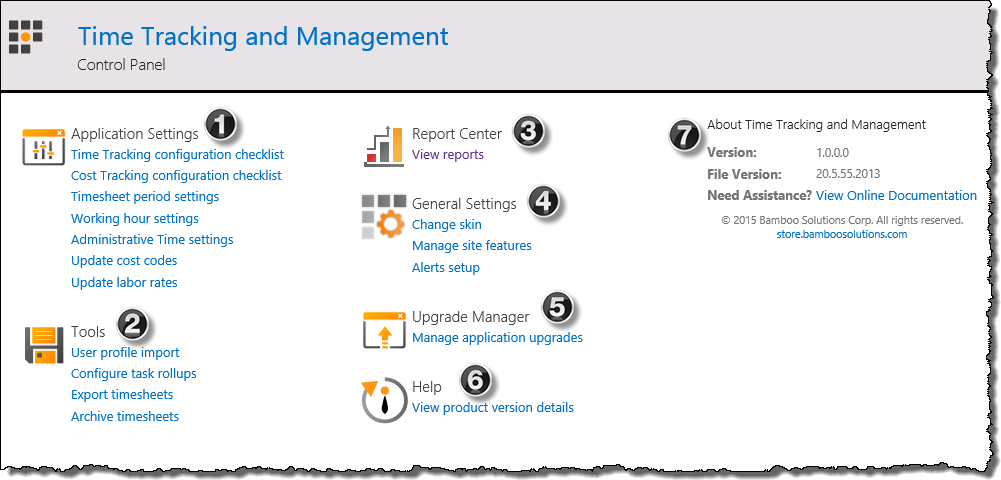
 Application Settings
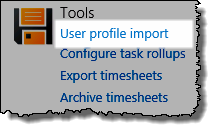
 Tools
Tools  Report Center
 General Settings
 NOTE: Only users with Full Control or Design permissisons on the site see this menu item
 Help
Help
 About Time Tracking and Management
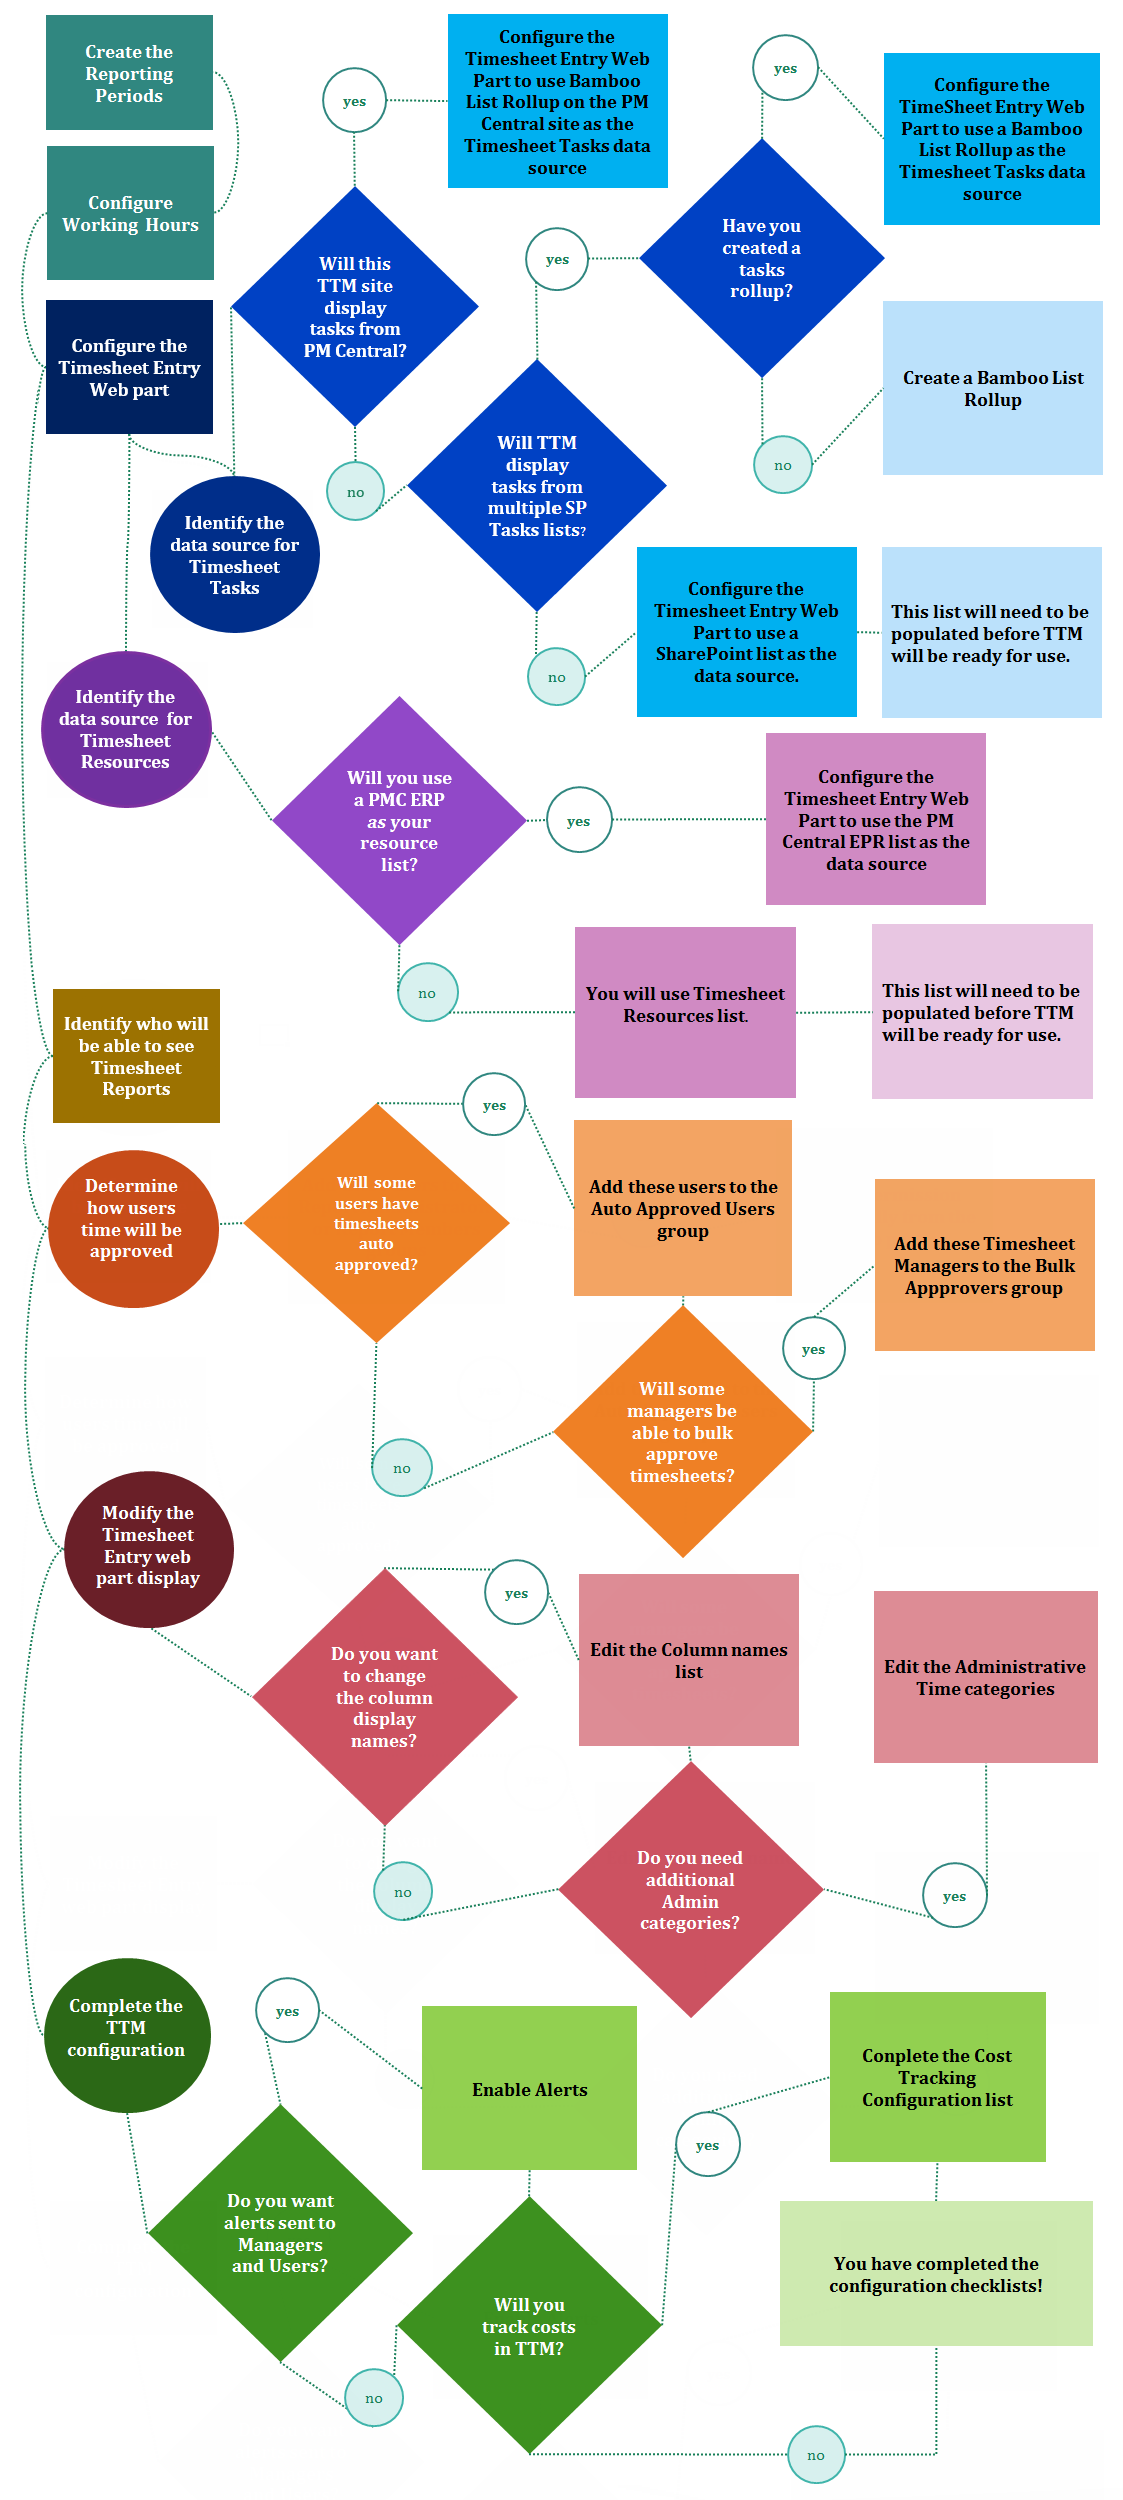
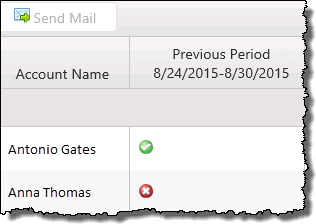
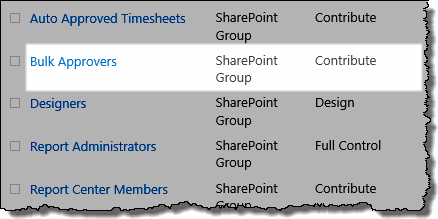 Add the appropriate users to the Bulk Approvers group
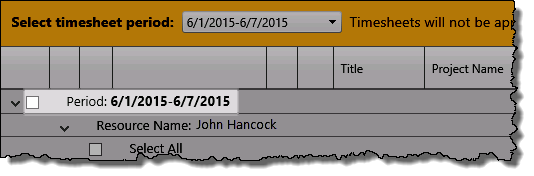 Timesheet Managers who are added to this group will see a check box associated with the Period in the Pending My Approval display
 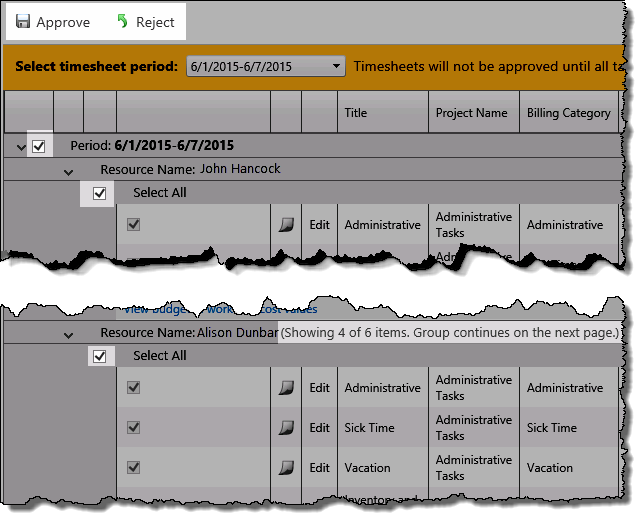 When this box is checked, all items associated displayed on the time will be checked for bulk approval or rejection.
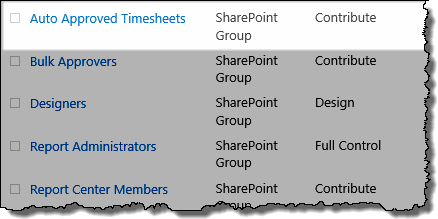 Add the appropriate users to the Auto Approved Timesheets group
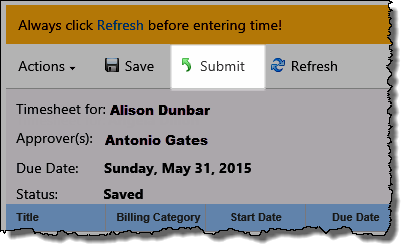 When members of this group submit a timesheet, the status of the timesheet will immediately be changed to Approved
 The timesheet will be available in the resource’s My Approved Timesheets display, and in the Timesheet Manager’s Approved by Me display.
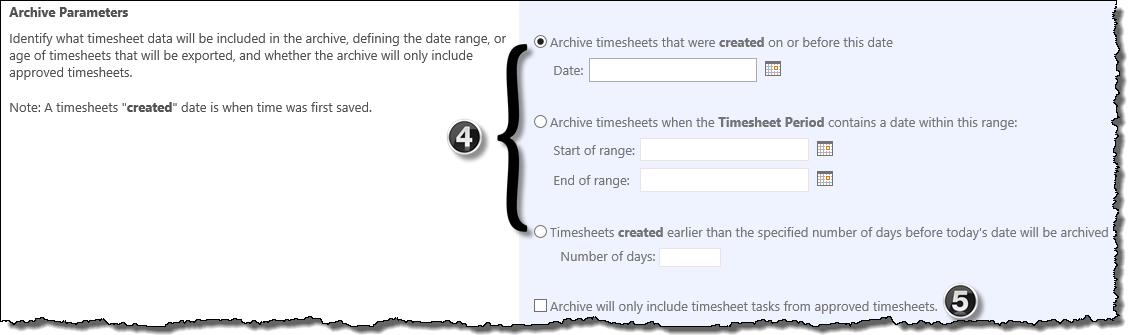
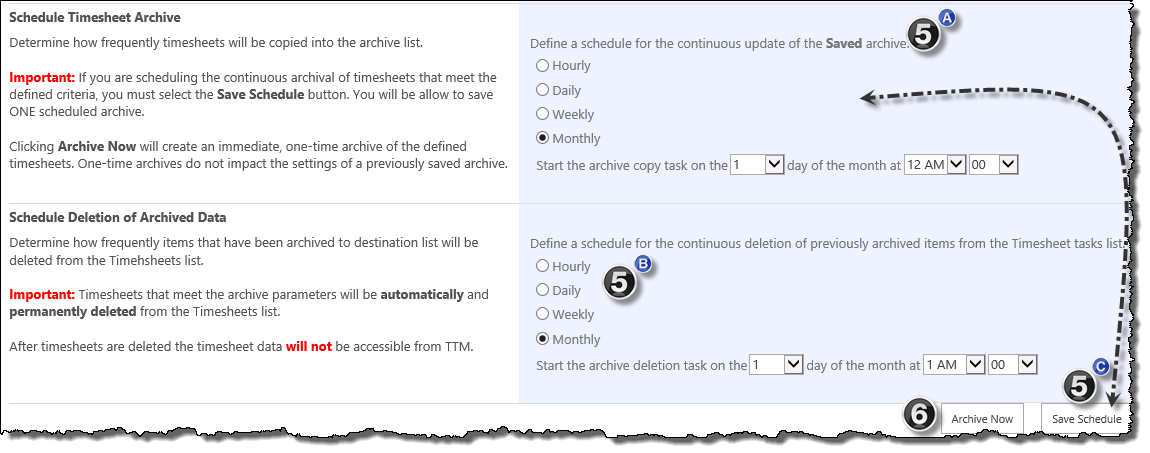
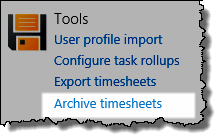 Click the Archive Timesheets link in the TTM Control Panel to access the export tool.